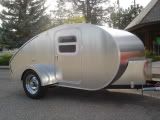
Polyurethane to glue aluminum skin???

Anything to do with mechanical, construction etc

Polyurethane to glue aluminum skin???

Postby hemi43 » Sat Jan 05, 2008 4:49 pm

Has anyone used polyurethane ( construction adhesive ) to glue aluminum skin on wood shell ? :thinking: I can't see why it wouldn't work !! I can't buy it in gallon cans, so I was going to get the large 850 ml cartriges the spread evenly. Once its all covered I think a 1/16" notched trowel should give me enough of a thickness for any uneveness in the wood. Any input would be appreciated. Thanks, Dan
www.flickr.com/dantechfab
www.geocities.com/dantechfab
The one who dies with the most tools, wins!!

www.dantechfabricating.com
www.flickr.com/dantechfab
User avatar
hemi43
Teardrop Advisor
 
Posts: 57
Images: 64
Joined: Mon Nov 26, 2007 5:19 pm

Postby madjack » Sat Jan 05, 2008 5:15 pm

Dan, we don't glue our AL skins down but rather, we float them and allow the trim, fenders, ect. to capture them and hold them in place...we use a poly based sealant(such as SikaFlex221) on the trim, ect....
madjack 8)
...I have come to believe that, conflict resolution, through violence, is never acceptable.....................mj
User avatar
madjack
Site Admin
 
Posts: 15128
Images: 177
Joined: Thu Dec 02, 2004 5:27 pm
Location: Central Louisiana

Postby hemi43 » Sat Jan 05, 2008 6:27 pm

I'm sort of going overboard with this project ( as I do with all of them ), and I want the skin to look tight as a drum. I'm also trying to keep the amount of visible fasteners inside and out to a minimum. I don't like seeing the pressure points that bolt cause on loose aluminum, and that's why I want to glue it. I have a couple of sample pieces drying right now and will post my results later. Thanks for the reply, Dan.
The one who dies with the most tools, wins!!

www.dantechfabricating.com
www.flickr.com/dantechfab
User avatar
hemi43
Teardrop Advisor
 
Posts: 57
Images: 64
Joined: Mon Nov 26, 2007 5:19 pm
Top

Postby vipercairo » Mon Jan 07, 2008 7:55 am

I'm using indoor/outdoor carpet adhesive (as suggested by Sonetpro) on my tear. I works well, but in temperatures below 65 degrees; you can just about triple the set-up time. Of course, the trim will provide additional "hold" and sealing. The most important thing to remember is the sealing... keep that water out... SS screws are best and should be installed wet. (with sealant)

It would be great to minimize on the screws... but when you're covering a 6' wide tear... it's next to impossible to find Al that width (save the semi-trailer 102" wide stuff). So one must "patch" with 4' width Al... personally, I hate that, but it's a decision each individual must make. ...and those seams will require a trim strip... with screws.

Good Luck...
Lead, Follow or Get Out of The Way!

Carl

Image Image
User avatar
vipercairo
Teardrop Builder
 
Posts: 41
Images: 33
Joined: Tue Oct 31, 2006 7:11 am
Location: Fort Worth, Texas
Top

Postby Duane King » Mon Jan 07, 2008 1:05 pm

The reason why many of us do not use glue on aluminum has to do with the expansion characteristics of the metal. Your aluminum skin will expand at a rate far greater than the wood it is glued to. In hot weather conditions this means that the skin will bow outward. I have heard this described as "oil canning". It it not a problem though, because when the temperature falls, the metal contracts and returns to its original flat appearance.

Now if you use glue, you probably will not be able to stop the oil can phenomenon. Instead, you run the risk of the metal expanding away from the trailer sides and then being unable to return to normal because the glue is holding the bulk of the sheet and not allowing it to float back into position. You might find that you end up with a permanent rather that a temporary bulge.

I know people that have had to add aluminum molding and screws to the sides of their trailer in an attempt to remove a bow that was caused by expanding metal and glue. You have probably noticed on semi truck trailers that they use a vertical row of rivets every 18" down the sides of a trailer. You may have also noticed that the skin bows between these rivets. It is impossible to avoid even with tons of fasteners. It just happens.

If you find a really good glue and you never have a problem with expanding metal, post the results on this forum. Others would like to benefit from your experience. But just keep in mind that there are inherent risks to what you are going to do.

Good luck,
Duane King

<img src="http://www.mikenchell.com/images/roadhouse.jpg" >
User avatar
Duane King
500 Club
 
Posts: 773
Images: 98
Joined: Sun Aug 06, 2006 2:54 pm
Location: California, Salinas
Top

Postby Airspeed » Tue Jan 08, 2008 3:19 pm

I used the indoor outdoor carpet stuff, it was a waste of time in the long run, it did help initially, holding the side panels in place while I applied them but after about a month I could tell it let go it grasp.
I struggled with the decision to use glue for a long time and should have taken the advise not to waste my time on it. all the trim holds mine in place and the .040 aluminum lays flat and smooth.
I can honestly say that glue is not necessary!
Aaron
User avatar
Airspeed
500 Club
 
Posts: 718
Images: 16
Joined: Sun Mar 04, 2007 7:26 pm
Location: North California
Top

Postby madjack » Tue Jan 08, 2008 7:57 pm

Airspeed wrote:I used the indoor outdoor carpet stuff, it was a waste of time in the long run, it did help initially, holding the side panels in place while I applied them but after about a month I could tell it let go it grasp.
I struggled with the decision to use glue for a long time and should have taken the advise not to waste my time on it. all the trim holds mine in place and the .040 aluminum lays flat and smooth.
I can honestly say that glue is not necessary!
Aaron


..you can lead a horse to water, BUT.................................. 8)
...I have come to believe that, conflict resolution, through violence, is never acceptable.....................mj
User avatar
madjack
Site Admin
 
Posts: 15128
Images: 177
Joined: Thu Dec 02, 2004 5:27 pm
Location: Central Louisiana
Top

Postby Airspeed » Tue Jan 08, 2008 9:33 pm

You were right Jack! A guy has to listen to his heart once in awhile!
anyway, for all you new guys! (now that I'm an expert) no glue!
Aaron
User avatar
Airspeed
500 Club
 
Posts: 718
Images: 16
Joined: Sun Mar 04, 2007 7:26 pm
Location: North California
Top

Postby Tripmaker » Sat Jan 12, 2008 1:16 pm

I struggled with decision too. But in the end I took the advice of the experienced builders on here and did not use glue. At first I was concerned about oil canning and how it looks, but it does return to normal after it cools down again. It's just something I had to get used to. Listen to Madjack others like him, they know what they are talking about. :thumbsup:
Jim


I started with nothing and still have most of it left.
User avatar
Tripmaker
500 Club
 
Posts: 893
Images: 59
Joined: Fri Aug 18, 2006 12:09 pm
Location: Fort Wayne, IN
Top

Postby Airspeed » Sat Jan 12, 2008 2:31 pm

I have never seen my "oil can" is that a common problem? I would think the air under the skin would easily find an exit, could your aluminum itself just be expanding? I applied mine on a hot day, maybe it was in full expansion when I applied it and therefor is somewhat stretched?
Might be something to consider! I think I actualy considered the temp when I applied it. Aaron
User avatar
Airspeed
500 Club
 
Posts: 718
Images: 16
Joined: Sun Mar 04, 2007 7:26 pm
Location: North California
Top

Postby SteveH » Sat Jan 12, 2008 8:35 pm

I used contact cement as recommended by an old pro, and it has been on now for four years without the first "oil can". It's not easy to do, but the procedure is to first seal the wood (I used polyurethane), clean the aluminum well, apply the glue to both the aluminum and the wood, and then install the aluminum. That's the way they were built in "the old days".

You do need to install the aluminum on a warm day with the aluminum having been in the sun for a while.

I've been in lots of hot weather, and some cool weather, with no problems.
SteveH
Calling an illegal alien an "undocumented immigrant"is like calling a drug dealer an "unlicensed pharmacist ".
User avatar
SteveH
2000 Club
2000 Club
 
Posts: 2101
Images: 42
Joined: Mon Nov 01, 2004 8:28 am
Location: Bexar Co, TX
Top

Postby Tripmaker » Mon Jan 14, 2008 8:40 am

Airspeed wrote:I have never seen my "oil can" is that a common problem? I would think the air under the skin would easily find an exit, could your aluminum itself just be expanding? I applied mine on a hot day, maybe it was in full expansion when I applied it and therefor is somewhat stretched?
Might be something to consider! I think I actualy considered the temp when I applied it. Aaron


I installed my AL in the winter not wanting to wait until summer to finish it. I'm sure that is part of the problem. Yes when the hot summer sun hits it, the AL it expands. When it cools it goes back to normal. The air under it is not a problem, it gets out the same way it gets in.
Jim


I started with nothing and still have most of it left.
User avatar
Tripmaker
500 Club
 
Posts: 893
Images: 59
Joined: Fri Aug 18, 2006 12:09 pm
Location: Fort Wayne, IN
Top

Postby halfdome, Danny » Mon Jan 14, 2008 12:19 pm

SteveH wrote:I used contact cement as recommended by an old pro, and it has been on now for four years without the first "oil can". It's not easy to do, but the procedure is to first seal the wood (I used polyurethane), clean the aluminum well, apply the glue to both the aluminum and the wood, and then install the aluminum. That's the way they were built in "the old days".

You do need to install the aluminum on a warm day with the aluminum having been in the sun for a while.

I've been in lots of hot weather, and some cool weather, with no problems.

In 2005 I installed my aluminum side skins and galley hatch in a heated shop with Wilsonart 951 spray weight contact cement and have had no Oil Canning problems. I applied it on both raw surfaces. I used the carpet adhesive on the roof and I'd never do that again as it dosen't hold. As I've said before contact cement is a weak glue and from my understanding it's main component is rubber. As you can see from this photo the .040 aluminum is flat. :) Danny
Image
ImageImage
"Conditions are never just right. People who delay action until all factors are favorable do nothing". William Feather
Don't accept "It's Good Enough" build to the best of your abilities.
Image
Teardroppers Of Oregon & WashingtonImage
User avatar
halfdome, Danny
*Happy Camper
 
Posts: 5883
Images: 252
Joined: Sun Aug 14, 2005 11:02 pm
Location: Washington , Pew-al-up
Top

Postby hemi43 » Wed Jan 16, 2008 11:03 am

Thanks for all the tips, but I decided on using the polyurethane anyways. I'm hoping to finally get this thing done in a week or two and will post final pics. I let you know how the aluminum looks after a hot day. I sanded the aluminum with 100 grit on a D/A, and used a 1/8 notch trowel for the adhesive. Before laying the aluminum down, I lightly misted the glue with water for a quicker cure. (polyurethane is moisture cured)The test samples I made turned out great, but only time will tell. Dan
www.flickr.com/dantechfab
www.geocities.com/dantechfab
The one who dies with the most tools, wins!!

www.dantechfabricating.com
www.flickr.com/dantechfab
User avatar
hemi43
Teardrop Advisor
 
Posts: 57
Images: 64
Joined: Mon Nov 26, 2007 5:19 pm
Top

Postby B52 » Wed Jan 16, 2008 5:33 pm

But ya can't make them drink!
Jim

Stumble through life; fat, dumb and happy!!
User avatar
B52
Teardrop Master
 
Posts: 242
Images: 19
Joined: Sat Jan 22, 2005 11:47 am
Location: Grant Parish, La.
Top

Next

Return to Teardrop Construction Tips & Techniques

Who is online

Users browsing this forum: No registered users and 6 guests