Singin the Gas Shocks Boogie - New Pics

Anything to do with mechanical, construction etc

Postby Nigel » Sat Jul 05, 2008 3:54 am

Finn

Move the top part away from the hinge. You have it too near.

Go in the house to the nearest door. Try pushing the door open with one finger: 1. at the edge of the door. 2. in the middle of the door. 3. by the hinge.

You will understand why.

Nigel
User avatar
Nigel
Teardrop Inspector
 
Posts: 20
Images: 30
Joined: Sat Feb 02, 2008 11:52 am
Location: Leeds England

Postby Nigel » Sat Jul 05, 2008 4:02 am

I tried with one strut and the hatch was too heavy it also twisted it a bit.

I installed mine so that when I shut the hatch the struts actually helped pull the hatch shut at the end.

Image

So the strut closes and then as you shut the hatch further the strut starts to open again thus closing the hatch.

Hope this make sense, too many beers last night

Nigel
User avatar
Nigel
Teardrop Inspector
 
Posts: 20
Images: 30
Joined: Sat Feb 02, 2008 11:52 am
Location: Leeds England

Postby Tripmaker » Sat Jul 05, 2008 9:42 am

See Bullshippers post at the bottom of the first page of this thead http://tnttt.com/viewto ... sc&start=0 That should tell you everything you need to know about positioning.
Jim


I started with nothing and still have most of it left.
User avatar
Tripmaker
500 Club
 
Posts: 893
Images: 59
Joined: Fri Aug 18, 2006 12:09 pm
Location: Fort Wayne, IN
Top

Postby Classic Finn » Sat Jul 05, 2008 2:27 pm

Hi there Nigel and Tripmaker

I didnt see your posts till now. As well as Paul.

I must admit I came in a bit frustrated for not succeeding with the struts. :cry: :cry: But ok I,ll give it another try tomorrow.
Because... there is nonone else trying this teardrop thing as of yet :lol: :lol:

So I will try almost a straight up and down position with it tomorrow. Almost all of the weight is on the bottom of the hatch. Or 3/4 of the way .

Lucky thing I had the hatch brased up cause even with 2 of the struts the hatch wouldnt stay up. I guess it was due to the top being too close to the hinge area?

Thanks Again for all of your help.

Regards
Classic Finn
Royal Teardrop Society Scandinavian Bureau Chief of Staff

Image
User avatar
Classic Finn
Midnight Sun Voyager
 
Posts: 17488
Images: 146
Joined: Fri Apr 29, 2005 4:29 am
Location: Country of Finland
Top

Postby Micro469 » Sat Jul 05, 2008 3:39 pm

Heiki.. I also had trouble with my struts. I ended up placing the top 5" away from the edge (hinge) and the bottom far enough inside to miss the cabinets and the hatch. I had supported the hatch in the position I wanted it to be open, and then screwed the bottom of the strut into place. I had 120# struts and one of them would not hold the hatch. with both of them screwed in it worked fine. And oh... I don't know what my hatch weighs.....

Hoope this helps.. ;) John,.
John
Image
User avatar
Micro469
Super Lifetime Member
 
Posts: 3185
Images: 382
Joined: Mon Nov 07, 2005 10:46 pm
Location: Brampton,Ontario,Canada
Top

Postby Classic Finn » Sun Jul 06, 2008 3:00 am

Good Morning Everyone.

Its time for coffee and then again tackle the struts once more. :? :?

Ohhh Boy.

Classic Finn
Royal Teardrop Society Scandinavian Bureau Chief of Staff

Image
User avatar
Classic Finn
Midnight Sun Voyager
 
Posts: 17488
Images: 146
Joined: Fri Apr 29, 2005 4:29 am
Location: Country of Finland
Top

Postby Betsey » Mon Jul 07, 2008 11:53 pm

Hi Heikki,

This is Craig, I’m hijacking Betsey’s account again.

Hopefully this will make sense.

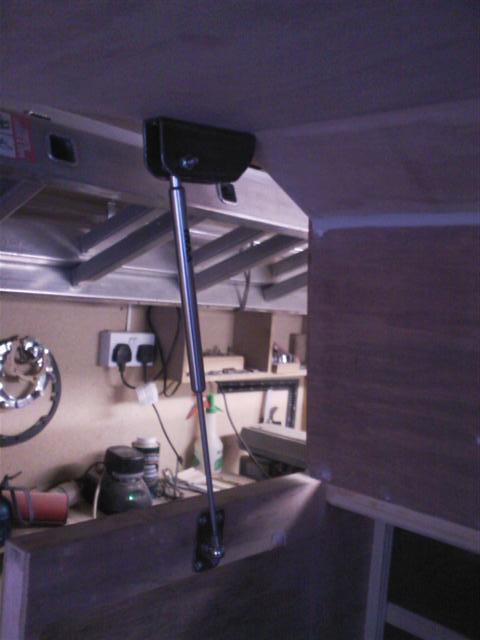
There are two ways to mount gas springs. Here is a picture showing the two ways.
Image

The picture shows the hatch in the open position with the gas spring extended and it shows the hatch in the closed position with the gas spring collapsed.

Style 1 is, in my opinion, a less desirable configuration. Since the gas spring mounts closer to the hinge, it must be stronger to hold the hatch open and therefore, it puts more stress on the hatch and the hinge.

Style 2 puts the force farther away from the hinge and therefore requires a lighter spring. Since the spring is lighter, it puts lower stresses on the frame and hinge.

The next picture group shows how to lay out the mounting locations, for the gas springs. It is easiest to start by sketching everything out full size on a piece of cardboard or plywood. Sketch your hatch in the open and closed positions. (big black arcs) Include the hatch hinge location. (white circle)

Image

Step A1 Determine where the gas spring will attach to the hatch. Start with a location slightly less than the length of the extended gas spring. Draw an arc from the open hatch to the closed hatch. (The arc center should be at the hinge center)

Step B1 Draw an arc, (the radius is the length of the extended gas spring) from the OPEN hatch location (from Step A1).

Draw an arc, (the radius is the length of the closed gas spring) from the CLOSED hatch location (from Step A1). (see pointer #4 below when figuring out the closed gas spring length)

Step C1 The intersection of the two arcs drawn in Step B1 will be the mounting location of the body end of the gas spring. Compare your drawing to your teardrop. See if the location you have found will work OK.

Step A2-C2 Try changing the location where the gas spring attaches to the hatch. (in this example, I have increased the distance) See how this affects the body mount location.

(It is possible to get a solution where the body mount is not physically on the body)

Here are a couple pointers to keep in mind:

1. The further you mount the spring from the hinge, the less stress the spring puts on the hatch and hinge.
2. The further you mount the spring from the hinge, the lighter the spring needed to hold the hatch open.
3. The spring should be mounted with the plunger down, when the hatch is closed. This will allow the lubricant in the gas spring to help keep the seal from drying out. If the seal dries out, the compressed gas leaks out and the spring loses some of it’s force.
4. When figuring out the closed length of the gas spring, add a little bit to the length. This will prevent the gas spring from bottoming out and binding.

For more info and pointers go to: http://www.mcmaster.com/
In the search on the left, type in “about gas springs”
You will see a page from their catalog that shows a lot of info about selecting and mounting gas springs.

Hope this helps,

Craig
Image
User avatar
Betsey
1000 Club
1000 Club
 
Posts: 1077
Images: 35
Joined: Fri Apr 16, 2004 6:44 pm
Location: West Central Wisconsin
Top

Postby Classic Finn » Tue Jul 08, 2008 11:41 am

Hi Craig and Everyone.

Im out in the tear and found the point on the hatch where the center of gravity is.
I can move the gas struts with my finger and believe me it aint a big finger. :lol: :lol:

Now the hatch stays up by itself.. :D However when closing it only closes half way of the shock and it doesnt swivel over to shut.

We tried about 6 positions and no luck. Are the shocks too short? If we have them positioned at a slant they just dont hold up no matter what position it is.

If we go any closer to the hinge the shocks wont hold no matter what we do.

If they are installed as they are now they wont close, at an upright position. :cry: :cry: And on the top if they are installed inwards towards the hinge it will not stay up. :thinking:

I,ll get a photo of it to show. I feel the frustration setting in.

Image

Anyone want to come over to give me a hand? :crazy:

Classic Finn :oops:
Last edited by Classic Finn on Tue Jul 08, 2008 3:59 pm, edited 3 times in total.
Royal Teardrop Society Scandinavian Bureau Chief of Staff

Image
User avatar
Classic Finn
Midnight Sun Voyager
 
Posts: 17488
Images: 146
Joined: Fri Apr 29, 2005 4:29 am
Location: Country of Finland
Top

Postby Classic Finn » Tue Jul 08, 2008 3:43 pm

Well after many hours of struggling to get the gas shocks mounted.. I gave up on that idea.. There is no way these shocks will fit in any position to hold the hatch open, then only closing halfway. It is either that they are too short or its the radius on the wall sides that provides no installation room :cry: :cry:

Image

Now Ive got about 20 holes on the interior walls on either side I have to redo :x :thumbdown:

The shocks are 10 inches when closed and 20 inches when open and I cannot find a number of kilos it is supposed to hold. :o

Except that they are English Camloc brand and they have numbers on them that are the following..SDB-8P8 200253 P8L then 170N177200 &
supposedly a date which says 27/07

How embarrassing of a day.

I think I,ll use a broom handle. :?

Classic Finn
Royal Teardrop Society Scandinavian Bureau Chief of Staff

Image
User avatar
Classic Finn
Midnight Sun Voyager
 
Posts: 17488
Images: 146
Joined: Fri Apr 29, 2005 4:29 am
Location: Country of Finland
Top

Postby Dean_A » Tue Jul 08, 2008 4:16 pm

Heikki,
Sorry to hear things aren't going well. For what it's worth, I had a devil of a time figuring out my hatch support locations as well. I ended up going with star wheel type supports. It took one variable out of the equation (lift capacity), and that was enough so that I could wrap my brain around it.
I'd take another look at Craig's post above. i don't pretend to understand it all, but the man seems to know what he's talking about. 8)

Here are my hatch supports:
Image
User avatar
Dean_A
Gold Donating Member
 
Posts: 597
Images: 55
Joined: Sat Oct 21, 2006 5:24 pm
Location: San Diego, CA
Top

Postby Classic Finn » Tue Jul 08, 2008 4:22 pm

Dean Im almost ready to get a couple of grandmas Broom Handles and say we,ll just keep it simple. I must be illiterate or somthing..

Ive looked at them photos and reread all of the above for hours this evening and I even printed things out.

Yours look plenty strong there Dean. The thing is we had our shocks also to the position you have.. and nuttn.

:( :(
Royal Teardrop Society Scandinavian Bureau Chief of Staff

Image
User avatar
Classic Finn
Midnight Sun Voyager
 
Posts: 17488
Images: 146
Joined: Fri Apr 29, 2005 4:29 am
Location: Country of Finland
Top

Postby Classic Finn » Tue Jul 08, 2008 4:38 pm

Heres a couple of more pics as to how we had them as well.

Image

Image
Royal Teardrop Society Scandinavian Bureau Chief of Staff

Image
User avatar
Classic Finn
Midnight Sun Voyager
 
Posts: 17488
Images: 146
Joined: Fri Apr 29, 2005 4:29 am
Location: Country of Finland
Top

Postby tonyj » Tue Jul 08, 2008 4:53 pm

First, the alignment issue. Using the brackets you have, the top bracket will have to be flipped 180 degrees with the narrow end with the ball facing down. With the ball facing down, you will also have to flip it so the ball is facing the closest wall of the tear, not the opposite wall.

Place that top bracket about 6 inches from the hinge (close to where you had it in the first picture. With bottom bracket unscrewed from the wall, (at this point, the top bracket is attacked to the hatch rib, the strut is attached to the top bracket and the bottom bracket is attached to the strut but not screwed to the wall), raise the hatch to about an inch higher than the maximum opening you want. (Make sure the bottom edge of the hatch is high enough so you don't hit your forehead on the corner of the opened hatch.) Prop the hatch open at this height with a board or stick or whatever makes the proper height. Now screw the lower hatch bracket to the wall down from the edge the distance of your hatch rib plus a quarter to a half inch for additional clearance.

If your fully opened strut is vertical like in one of your last pictures, the hatch won't close. It has to be at an angle.
Still graced with two eyes and ten fingers (due in no small part to luck!).

Just when you think a problem is solved, an uglier result replaces it.

tony
User avatar
tonyj
Super Lifetime Member
 
Posts: 2468
Images: 160
Joined: Mon Sep 26, 2005 10:18 pm
Location: Texas, Corpus Christi
Top

Postby Classic Finn » Tue Jul 08, 2008 5:00 pm

So Tony these shocks arent too short ?

at 10 inches closed and 20 open?

Im going out to give it another try.. what the heck its 0100.. but Id sure be happy to get this overcome.

Classic Finn
Royal Teardrop Society Scandinavian Bureau Chief of Staff

Image
User avatar
Classic Finn
Midnight Sun Voyager
 
Posts: 17488
Images: 146
Joined: Fri Apr 29, 2005 4:29 am
Location: Country of Finland
Top

Postby QuietOutdoorsman » Tue Jul 08, 2008 5:05 pm

Finn,

I hate to break this to you, but I think you need new struts. :(

Just looking at the pictures of your design, the 10 inch stroke of the current struts will force you to mount them pretty close to the hinge. But that would drive you to a higher load capability than those struts have.

So....longer struts with the same load rating, or stronger struts of the same length.

If I knew the exact dimensions, weight and position of center of gravity of your hatch I could help work out what you would need.

Cheers! :tipsy:

Dirk
QuietOutdoorsman
Teardrop Advisor
 
Posts: 73
Joined: Mon Jun 09, 2008 2:46 pm
Location: Everett, Wa
Top

PreviousNext

Return to Teardrop Construction Tips & Techniques

Who is online

Users browsing this forum: No registered users and 15 guests