Spring hanger torn off...probably my fault!

Anything to do with mechanical, construction etc

Re: Spring hanger torn off...probably my fault!

Postby working on it » Wed Feb 26, 2014 1:09 pm

Kc-actually, I am measuring it with my caliper here at work (l have the broken off piece with me). It is .104-.105 in three places. 12 gauge? If you remember my build, it started out as a 50x60 trailer with 8" wheels.
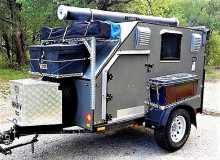
2013 HHRv "squareback/squaredrop", rugged, 4x8 TTT, 2225 lbs
  • *3500 lb Dexter EZ-Lube braked axle, 3000 lb.springs, active-progressive bumpstop suspension
  • *27 x 8.5-14LT AT tires (x 3) *Weight Distribution system for single-beam tongue
  • *100% LED's & GFCI outlets, 3x fans, AM/FM/CD/Aux. *A/C & heat, Optima AGM, inverter & charger(s)
  • *extended-run, on-board, 2500w generator *Coleman dual-fuel stove & lantern, Ikea grill, vintage skillet
  • *zinc/stainless front & side racks *98"L x 6" diameter rod & reel carrier tube on roof
173193172890148599
User avatar
working on it
2000 Club
2000 Club
 
Posts: 2177
Images: 457
Joined: Tue Oct 04, 2011 9:05 pm
Location: DFW Texas

Re: Spring hanger torn off...probably my fault!

Postby Redneck Teepee » Wed Feb 26, 2014 7:59 pm

The readings you show are awfully thin for the type of structural support needed, not to mention the shock that has already proven itself destructive. Rob's suggestion to scab the 1/4" angle is probably your best fix to rectifie the situation with out basically starting over. The 2" angle will take the bulk of the shock produced by the spring hangers, and the existing frame will have a new resting place with proper support. I would not weld the ends of the angle as this will keep the frame from flexing freely and possibly produce another crack in the thinner material. Being the old worn out weldor that I am, I would enlist the help of a good heli-arc weldor to stitch weld some angle iron as discussed at least 6" past the hanger brackets each side... with say 2" of weld, skip 4", weld 2" etc. By doing this you spread the load out, and stitching it allows the metal to move or flex with less tendency to crack at the welds. A good heli-arc weldor can keep from burning thru your frame because of the metal thickness differential by diverting the bulk of the heat to the angle iron........ Just my 2 cents worth :)....Hope I make sense
I fear the day that technology will surpass our human interaction, the world will have a generation of idiot's.
User avatar
Redneck Teepee
Silver Donating Member
 
Posts: 853
Images: 21
Joined: Fri Dec 27, 2013 5:00 pm
Location: Central Ca.

Re: Spring hanger torn off...probably my fault!

Postby working on it » Sat Mar 01, 2014 11:11 am

Redneck Teepee wrote:The readings you show are awfully thin for the type of structural support needed, not to mention the shock that has already proven itself destructive. Rob's suggestion to scab the 1/4" angle is probably your best fix to rectifie the situation with out basically starting over. The 2" angle will take the bulk of the shock produced by the spring hangers, and the existing frame will have a new resting place with proper support. I would not weld the ends of the angle as this will keep the frame from flexing freely and possibly produce another crack in the thinner material. Being the old worn out weldor that I am, I would enlist the help of a good heli-arc weldor to stitch weld some angle iron as discussed at least 6" past the hanger brackets each side... with say 2" of weld, skip 4", weld 2" etc. By doing this you spread the load out, and stitching it allows the metal to move or flex with less tendency to crack at the welds. A good heli-arc weldor can keep from burning thru your frame because of the metal thickness differential by diverting the bulk of the heat to the angle iron........ Just my 2 cents worth :)....Hope I make sense
Yes, the metal is thin (but I measured the torn/stretched piece at work; I'll measure the intact thickness today at home, for a true gauge reading). I went to a metal supplier (Metal Supermarket) in Plano later that day, on lunchbreak, and picked up 1/4" thick "2x2 angle" (36" long) for both side pieces, and one more piece as a test mule, and 108 inches of 3/16" thick "2x2 angle" that I'll assemble as a sub-frame to tie into the crossmembers/frame/side repair pieces (to stabilize and beef up the structure). I also have some flat to use as gussets. My main joining scheme is to use Grade 8 bolts and washers/nuts, with some welds where accessible. The side pieces and hangers will be welded/bolted together on a jig before attachment to the trailer. At some point, when I get an axle and wheels back under the trailer, I'll look into having a pro stitch-weld the entire sub-frame (in situ, on the trailer). http://www.youtube.com/watch?v=_VrFV5r8cs0
2013 HHRv "squareback/squaredrop", rugged, 4x8 TTT, 2225 lbs
  • *3500 lb Dexter EZ-Lube braked axle, 3000 lb.springs, active-progressive bumpstop suspension
  • *27 x 8.5-14LT AT tires (x 3) *Weight Distribution system for single-beam tongue
  • *100% LED's & GFCI outlets, 3x fans, AM/FM/CD/Aux. *A/C & heat, Optima AGM, inverter & charger(s)
  • *extended-run, on-board, 2500w generator *Coleman dual-fuel stove & lantern, Ikea grill, vintage skillet
  • *zinc/stainless front & side racks *98"L x 6" diameter rod & reel carrier tube on roof
173193172890148599
User avatar
working on it
2000 Club
2000 Club
 
Posts: 2177
Images: 457
Joined: Tue Oct 04, 2011 9:05 pm
Location: DFW Texas
Top

Re: Spring hanger torn off...probably my fault!

Postby working on it » Sat Mar 01, 2014 8:42 pm

I measured the "original" frame at home: it is 11 gauge, not 12 (but still not strong enough for my needs/trust). Of course, the rectangular cross section helps, as do the thicker 2x3 x.125 welded to it during the build phase, and the very strong 3/4" superstructure (no twist, no worry). Started the reconstruction late today: located hangers and spring (only one in stock, will get another later) at Northern Tool. Drilled 3/8" mounting holes in the hangers (bolt to angle, then weld),
20140301_182351.jpg
20140301_182351.jpg (79.63 KiB) Viewed 993 times
and determined exact placement of the 36" angle stock to fit into allowable space inside the frame perimeter. Determined spring center point on the angle piece, and then I hit a snag: How does the rear hanger/shackle line up (angled forward, backward, or hang straight down)? My previous set-up leaned forward, but I'm not sure that it was ever correct, and my pickups are one forward/one backward. The best info I have is this picture of the part I wish to emulate:
shackle assembly 4723_st.jpg
shackle assembly 4723_st.jpg (14.28 KiB) Viewed 993 times
It shows the hangers centerlines spaced 25.25" apart, the same as the spring mounting eyes. In that case, I would assume that the unladen (suspended above ground) shackle position would be hanging straight down. ??? I bought one 25.25" spring for set-up purposes,
20140301_182212.jpg
20140301_182212.jpg (98.76 KiB) Viewed 993 times
so that's the way I will bolt/weld the sub-assembly together (later...expecting a Blue Norther tomorrow).
2013 HHRv "squareback/squaredrop", rugged, 4x8 TTT, 2225 lbs
  • *3500 lb Dexter EZ-Lube braked axle, 3000 lb.springs, active-progressive bumpstop suspension
  • *27 x 8.5-14LT AT tires (x 3) *Weight Distribution system for single-beam tongue
  • *100% LED's & GFCI outlets, 3x fans, AM/FM/CD/Aux. *A/C & heat, Optima AGM, inverter & charger(s)
  • *extended-run, on-board, 2500w generator *Coleman dual-fuel stove & lantern, Ikea grill, vintage skillet
  • *zinc/stainless front & side racks *98"L x 6" diameter rod & reel carrier tube on roof
173193172890148599
User avatar
working on it
2000 Club
2000 Club
 
Posts: 2177
Images: 457
Joined: Tue Oct 04, 2011 9:05 pm
Location: DFW Texas
Top

Re: Spring hanger torn off...probably my fault!

Postby working on it » Sat Mar 01, 2014 10:42 pm

Now I'm really confused...after my previous post, I searched some more, and found the schematic for the diagram pictured above (25.25" spring, spring hanger -at centerline- mount spacing):
shackle assembly 4723_st.jpg
shackle assembly 4723_st.jpg (14.28 KiB) Viewed 983 times
http://www.easternmarine.com/media/downloads/4795/5257035_diagram.pdf, which confirms the "hang straight down" theory. Or so I thought. Then, pricing axles (again), I found this diagram on Southwest Wheels/TrailerParts web page:
spring hanger placement alternate idea.png
spring hanger placement alternate idea.png (70.32 KiB) Viewed 983 times
So, which info is correct? Should I follow the straight down, or angle forward idea? Like this photo:
20140301_182316.jpg
20140301_182316.jpg (99.33 KiB) Viewed 983 times
2013 HHRv "squareback/squaredrop", rugged, 4x8 TTT, 2225 lbs
  • *3500 lb Dexter EZ-Lube braked axle, 3000 lb.springs, active-progressive bumpstop suspension
  • *27 x 8.5-14LT AT tires (x 3) *Weight Distribution system for single-beam tongue
  • *100% LED's & GFCI outlets, 3x fans, AM/FM/CD/Aux. *A/C & heat, Optima AGM, inverter & charger(s)
  • *extended-run, on-board, 2500w generator *Coleman dual-fuel stove & lantern, Ikea grill, vintage skillet
  • *zinc/stainless front & side racks *98"L x 6" diameter rod & reel carrier tube on roof
173193172890148599
User avatar
working on it
2000 Club
2000 Club
 
Posts: 2177
Images: 457
Joined: Tue Oct 04, 2011 9:05 pm
Location: DFW Texas
Top

Re: Spring hanger torn off...probably my fault!

Postby MtnDon » Sat Mar 01, 2014 11:46 pm

Straight up and down = a harsher ride. Shackle slanted forward from the rear spring eye is what I have always seen as the norm... exactly what the angle should be, I don't know for certain. The southwest drawing has more slant than my utility trailers have when empty.
Our 6x12 deep vee nose cargo trailer camper conversion... viewtopic.php?f=42&t=58336

We have a small off grid cabin we built ourselves in the NM mountains; small PV solar system; 624 watts PV, Outback CC & inverter/charger ... http://countryplans.com/smf/index.php?topic=2335.0
User avatar
MtnDon
2000 Club
2000 Club
 
Posts: 2200
Images: 24
Joined: Sun Aug 19, 2012 10:57 pm
Location: New Mexico
Top

Re: Spring hanger torn off...probably my fault!

Postby Redneck Teepee » Sun Mar 02, 2014 12:00 am

ImageImage
I fear the day that technology will surpass our human interaction, the world will have a generation of idiot's.
User avatar
Redneck Teepee
Silver Donating Member
 
Posts: 853
Images: 21
Joined: Fri Dec 27, 2013 5:00 pm
Location: Central Ca.
Top

Re: Spring hanger torn off...probably my fault!

Postby working on it » Sun Mar 02, 2014 11:02 am

MtnDon wrote:Straight up and down = a harsher ride. Shackle slanted forward from the rear spring eye is what I have always seen as the norm... exactly what the angle should be, I don't know for certain. The southwest drawing has more slant than my utility trailers have when empty.
MtnDon- A slightly forward angle is what my trailer had before the breakage.
hanger ripped loose.jpg
hanger ripped loose.jpg (64.61 KiB) Viewed 974 times
I don't know what the spring rating of the originals was/is, but they won't deflect any when I stand on the removed axle/spring assembly (turned upside down), even after I took off the spring stiffener/safety strap I had made.
4 leaf spring 22.5 inch eye to eye measurement.jpg
4 leaf spring 22.5 inch eye to eye measurement.jpg (37.75 KiB) Viewed 974 times
The springs I chose to replace them with (on the upgraded 3500 lb axle going in to replace the weak 1.25" square tube original), are SW3-stamped 25.25" three-leaf, rated at 3000 lbs per pair (I wanted 2500 lb, but couldn't find any listed). I wanted a 50% weight-carrying margin over my projected trailer weight increase to about 1600-1625 lbs (heavier axle, heavy angle and flat iron reinforcement structure, bigger springs and hangers, and added attachment hardware) 1625 lbs x 1.5 = 2437.5 lbs. When Redneck Teepee added the angle choice diagram he found (a definitive answer!),
definitive answer, spring shackle angle.gif
definitive answer, spring shackle angle.gif (10.04 KiB) Viewed 974 times
it shows me the way to soften that 3k rating more towards the softer rate I wanted. I'll mount the rear shackle at 25.75" from the front (eye-to-eye), thus angling the rear shackle rearwards, for an apparent softening of the nominal spring rate. 1/2" over the Easternmarine/Tie-Down Engineering recommended non-angle, and just opposite of the angle shown in the Southwest wheel/TrailerParts diagram. Any further softening of the ride will have to be furnished by the 14" tires (and shock absorbers, to be added if needed). Thanks to you both for the answer(s). P.S.>The different angling of the rear shackles on my two pickup trucks was puzzling me 'til now. But, I venture to guess why they differ: the heavy-duty work truck version springs on my 3/4-ton (actually a single rear wheel 1-ton, as built) Chevy 2500HD are angled forward and are very stiff-riding (even more now, since I installed 1000lb booster spring/shocks awhile back). The custom-made heavy-duty springs on my GMC 1500 1/2-ton (custom springs were built/installed to carry 3/4-ton loads, or more, by the previous owner) had the shackle angled rearward to soften the ride somewhat. Methodology to achieve end results; it makes sense now.
2013 HHRv "squareback/squaredrop", rugged, 4x8 TTT, 2225 lbs
  • *3500 lb Dexter EZ-Lube braked axle, 3000 lb.springs, active-progressive bumpstop suspension
  • *27 x 8.5-14LT AT tires (x 3) *Weight Distribution system for single-beam tongue
  • *100% LED's & GFCI outlets, 3x fans, AM/FM/CD/Aux. *A/C & heat, Optima AGM, inverter & charger(s)
  • *extended-run, on-board, 2500w generator *Coleman dual-fuel stove & lantern, Ikea grill, vintage skillet
  • *zinc/stainless front & side racks *98"L x 6" diameter rod & reel carrier tube on roof
173193172890148599
User avatar
working on it
2000 Club
2000 Club
 
Posts: 2177
Images: 457
Joined: Tue Oct 04, 2011 9:05 pm
Location: DFW Texas
Top

Re: Spring hanger torn off...probably my fault!

Postby 48Rob » Sun Mar 02, 2014 11:21 am

You need to mount the shackles at or near the angle shown in the picture;

Image

Straight up and down with a very slight forward angle, or better yet a half to three quarter inch forward, This is with zero weight on the assembly!

If you mount the bracket past center toward the rear, the shackles may not be able to pivot, and the force will rip the new hanger off/apart.
In other words, the center of the top bolt in the shackle hanger must be forward, toward the tongue, of the bottom shackle bolt throgh the spring eye.
The greater the angle you give it to start with, the softer the spring rate will be.
The spring rate will be very stiff at 90 degrees or just a little past, but if you start at 45 degrees, it will be extremely soft.

I can't see the rear bracket very well in your photo, but generally you want to turn the bracket to give you the most contact area on the frame.

Rob
Waiting for "someday" will leave you on your deathbed wondering why you didn't just rearrange your priorities and enjoy the time you had, instead of waiting for a "better" time to come along...
User avatar
48Rob
Super Lifetime Member
 
Posts: 3882
Images: 4
Joined: Thu Nov 17, 2005 6:47 pm
Location: Central Illinois
Top

Re: Spring hanger torn off...probably my fault!

Postby working on it » Sun Mar 02, 2014 12:12 pm

48Rob wrote:You need to mount the shackles at or near the angle shown in the picture;

Image

(A) Straight up and down with a very slight forward angle, or better yet a half to three quarter inch forward, This is with zero weight on the assembly!

If you mount the bracket past center toward the rear, the shackles may not be able to pivot, and the force will rip the new hanger off/apart.
In other words, the center of the top bolt in the shackle hanger must be forward, toward the tongue, of the bottom shackle bolt throgh the spring eye.
The greater the angle you give it to start with, the softer the spring rate will be.
The spring rate will be very stiff at 90 degrees or just a little past, but if you start at 45 degrees, it will be extremely soft.

(B) I can't see the rear bracket very well in your photo, but generally you want to turn the bracket to give you the most contact area on the frame.

Rob

48Rob -OK, here goes.... (A) I can see your point about the possible "rip off effect" of the rearward-angled shackle. Given the collapsing spring arch effect (flattening-out towards the datum line), the spring could extend past the allowed length in that case. I believe that the springs are 27" at full flattening (which should not, but could, occur). I would have to be very precise in my placement to avoid that happening (worst-case scenario). I think I see why I'm still a bit confused about the differing diagrams from different sources: we may be mixing apples with oranges here. I just noticed the caption on Redneck Teepee's second diagram: "2nd Shackle Effect (Jacking)"
2nd shackle effect.jpg
2nd shackle effect.jpg (38 KiB) Viewed 963 times
It may be referring to a tandem axle installation (i.e. "2nd shackle"), using an equalizer holding the shackle(s). In that case, the diagram makes more sense, given the effect on a single axle you outlined above. It also looks like that on my race car hauler, which I just went to examine! So, forward facing, at 24.75" eye-to-eye, as in the Southwest Wheel/Trailer Parts diagram, is how I'll install it. Thanks for that! (Maybe I should make test drawings, and explore the physics of the axle motions, before I bolt/weld anything: it's been a long time since college though....) (B) The rear bracket will be assembled square to the subframe , directly in line with the front bracket. The photo has it shown resting on an angle between the flat and sloped garage entrance concrete pads, so it looks twisted.
2013 HHRv "squareback/squaredrop", rugged, 4x8 TTT, 2225 lbs
  • *3500 lb Dexter EZ-Lube braked axle, 3000 lb.springs, active-progressive bumpstop suspension
  • *27 x 8.5-14LT AT tires (x 3) *Weight Distribution system for single-beam tongue
  • *100% LED's & GFCI outlets, 3x fans, AM/FM/CD/Aux. *A/C & heat, Optima AGM, inverter & charger(s)
  • *extended-run, on-board, 2500w generator *Coleman dual-fuel stove & lantern, Ikea grill, vintage skillet
  • *zinc/stainless front & side racks *98"L x 6" diameter rod & reel carrier tube on roof
173193172890148599
User avatar
working on it
2000 Club
2000 Club
 
Posts: 2177
Images: 457
Joined: Tue Oct 04, 2011 9:05 pm
Location: DFW Texas
Top

Re: Spring hanger torn off...probably my fault!

Postby Redneck Teepee » Sun Mar 02, 2014 12:29 pm

If you have not seen this yet it may help.Image :) Did not mean to confuse you with the 2nd shackle effect but the diagrams were hooked together on the download...sorry for any confusion but looks like you understood it anyway :thumbsup:
I fear the day that technology will surpass our human interaction, the world will have a generation of idiot's.
User avatar
Redneck Teepee
Silver Donating Member
 
Posts: 853
Images: 21
Joined: Fri Dec 27, 2013 5:00 pm
Location: Central Ca.
Top

Re: Spring hanger torn off...probably my fault!

Postby working on it » Sat Mar 08, 2014 11:01 pm

Started the second round of my repair today, by sawing/cutting off the welded-on original hanger mounts. The left rear mount (tube welded on) came off much like the other side broke off... the metal was cracked surrounding the weld, and the same amount came with it. The front hangers were in much better shape; however, my (last)metal cutting blade in my recip saw veered upward and sliced a strip off the frame tubing as the blade broke. So, I used my angle grinder (with cut-off disc) to attack the final hanger. It came off cleaner, but the welds showed signs of little penetration, so that's why it detached easier. Now I have three holes where the hangers were attached before; I'll seal them with PL Premium Adhesive (instead of auto body seam sealer, which costs much more). I'll squirt it in between frame and my hanger sub-assembly when I am bolting it in. Here's a coupla primitive drawings of my scheme:
  • HANGER DRAWING 1.png
    hanger not attached
    HANGER DRAWING 1.png (54.29 KiB) Viewed 921 times
  • HANGER DRAWING 2.png
    hangers attached (upside down u-shapes)
    HANGER DRAWING 2.png (10.43 KiB) Viewed 921 times
I've established a cross-bracing scheme, determined my mounting locations, and now can work standing over the work (not under it; when upside down, sparks and metal always get into my eyes, shielded or not!). Sub-assembly construction will begin tomorrow.
2013 HHRv "squareback/squaredrop", rugged, 4x8 TTT, 2225 lbs
  • *3500 lb Dexter EZ-Lube braked axle, 3000 lb.springs, active-progressive bumpstop suspension
  • *27 x 8.5-14LT AT tires (x 3) *Weight Distribution system for single-beam tongue
  • *100% LED's & GFCI outlets, 3x fans, AM/FM/CD/Aux. *A/C & heat, Optima AGM, inverter & charger(s)
  • *extended-run, on-board, 2500w generator *Coleman dual-fuel stove & lantern, Ikea grill, vintage skillet
  • *zinc/stainless front & side racks *98"L x 6" diameter rod & reel carrier tube on roof
173193172890148599
User avatar
working on it
2000 Club
2000 Club
 
Posts: 2177
Images: 457
Joined: Tue Oct 04, 2011 9:05 pm
Location: DFW Texas
Top

Re: Spring hanger torn off...probably my fault!

Postby 48Rob » Sun Mar 09, 2014 6:55 am

I may be misreading your drawing, but the bolt that holds the spring/shackle hanger to the angle will defeat the purpose of using the angle.
As drawn, the bolt head is between the frame and angle, which means the angle, will not rest against the bottom of the frame where it can support the frame along its length.
The bolts placed horizontally through the center of the frame will bear all the weight, and in my estimation will soon wallow out the thin frame material leaving you with another mess...
I believe I recall you saying you wanted to weld, and bolt everything because of uncertainty of your welding skills?
If so, measure thrice, tack the hangers and pay a pro to make them right.
Once done you can bolt and glue the hanger to your frame with no concern.

Rob
Waiting for "someday" will leave you on your deathbed wondering why you didn't just rearrange your priorities and enjoy the time you had, instead of waiting for a "better" time to come along...
User avatar
48Rob
Super Lifetime Member
 
Posts: 3882
Images: 4
Joined: Thu Nov 17, 2005 6:47 pm
Location: Central Illinois
Top

Re: Spring hanger torn off...probably my fault!

Postby MtnDon » Sun Mar 09, 2014 9:54 am

What Rob said about the bolts...
Our 6x12 deep vee nose cargo trailer camper conversion... viewtopic.php?f=42&t=58336

We have a small off grid cabin we built ourselves in the NM mountains; small PV solar system; 624 watts PV, Outback CC & inverter/charger ... http://countryplans.com/smf/index.php?topic=2335.0
User avatar
MtnDon
2000 Club
2000 Club
 
Posts: 2200
Images: 24
Joined: Sun Aug 19, 2012 10:57 pm
Location: New Mexico
Top

Re: Spring hanger torn off...probably my fault!

Postby working on it » Sun Mar 09, 2014 10:40 am

48Rob wrote:I may be misreading your drawing, but the bolt that holds the spring/shackle hanger to the angle will defeat the purpose of using the angle.
(A)As drawn, the bolt head is between the frame and angle, which means the angle, will not rest against the bottom of the frame where it can support the frame along its length.
The bolts placed horizontally through the center of the frame will bear all the weight, and in my estimation will soon wallow out the thin frame material leaving you with another mess...
(B)I believe I recall you saying you wanted to weld, and bolt everything because of uncertainty of your welding skills?
If so, measure thrice, tack the hangers and pay a pro to make them right.
Once done you can bolt and glue the hanger to your frame with no concern.

Rob
Rob- you didn't misread the drawings, but I left out a couple of installation "notes" on them. (A) I already have three holes in the bottom of the frames' rectangular tubing, so I might as well create eight more holes (in the necessary locations, drilled out - as small as needed , this time intentionally) to recess the heads of the hanger-to-angle bolts into. Then the (inner) side angle and the (outer) flat bar can be drawn up and tightly fastened to the surface of the frame tubing, using five grade 8 bolts (to spread the load better. If this photo is of your similar install,
48Rob's subassembly.jpg
from the website
48Rob's subassembly.jpg (22.73 KiB) Viewed 898 times
you only used two bolts, whereas I presume my weaker frame needs more help.(B) Welding the hangers to the angle will be done away from the trailer, then the subassembly will be bolted/sealed in place. I will also bolt in supporting bracing to crossmembers, inspired by this photo and gusseting at the corners. Welds to the installed subassembly are to come later, after I can move the trailer out of the crowded/cluttered garage bay. Maybe by me, perhaps by a pro. I suppose I could've said that in the text of my posting, but I didn't, showing an "exploded" view instead (how apropos for the problem is that?...). As pictured, the angle and flat bar are not in final position either, so I could show where I intended to squirt in the PL, as a sealant.
Attachments
300-01000-ZN-E-LRG.gif
300-01000-ZN-E-LRG.gif (18.03 KiB) Viewed 898 times
2013 HHRv "squareback/squaredrop", rugged, 4x8 TTT, 2225 lbs
  • *3500 lb Dexter EZ-Lube braked axle, 3000 lb.springs, active-progressive bumpstop suspension
  • *27 x 8.5-14LT AT tires (x 3) *Weight Distribution system for single-beam tongue
  • *100% LED's & GFCI outlets, 3x fans, AM/FM/CD/Aux. *A/C & heat, Optima AGM, inverter & charger(s)
  • *extended-run, on-board, 2500w generator *Coleman dual-fuel stove & lantern, Ikea grill, vintage skillet
  • *zinc/stainless front & side racks *98"L x 6" diameter rod & reel carrier tube on roof
173193172890148599
User avatar
working on it
2000 Club
2000 Club
 
Posts: 2177
Images: 457
Joined: Tue Oct 04, 2011 9:05 pm
Location: DFW Texas
Top

PreviousNext

Return to Teardrop Construction Tips & Techniques

Who is online

Users browsing this forum: No registered users and 21 guests