Teardrops n Tiny Travel Trailersor t n ttt for short (tnttt.com) |
Paint Question
41 posts
• Page 2 of 3 • 1, 2, 3
![]() by cracker39 » Wed Apr 05, 2006 8:33 pm
by cracker39 » Wed Apr 05, 2006 8:33 pm
I've sprayed latex before with good results, but this time, I just don't trust my old paint guns to work as well as they used to on pressure feed and don't want to take a chance of screwing up the finish. So, I returned the latex and bought Glidden oil-based porch and floor enamel and stayed with Zinsser, getting a can of their oil-based primer. I know I can spray the oil-based paints, thinned a little with mineral spirits, with the HF gravity feed gun I have and get a good finish. At least as far as putting on the print anyway. Just how good it will look depends on my plywood's surface, and I know it ain't perfect. I found more open grain in the curb side...you can see it better after the primer was put on. So, I still have some more filling and sanding to do before I can re-prime it. Maybe I can get both done tomorrow.
Dale
Sometimes I pretend to be normal. But, that gets boring...so I go back to being me.
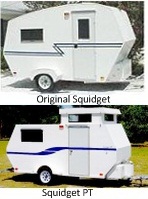
Squidget Pop Top Build Pages http://www.thesquidget.com/ptbuild/ptbuild.html
Squidget and Pop Top Plans Info and Photos: http://www.TheSquidget.com
Sometimes I pretend to be normal. But, that gets boring...so I go back to being me.
Squidget Pop Top Build Pages http://www.thesquidget.com/ptbuild/ptbuild.html
Squidget and Pop Top Plans Info and Photos: http://www.TheSquidget.com
-
cracker39 - 3000 Club

- Posts: 3069
- Images: 233
- Joined: Thu Jun 30, 2005 2:18 pm
- Location: Lake Alfred, Florida, USA
![]() by cracker39 » Thu Apr 06, 2006 3:31 pm
by cracker39 » Thu Apr 06, 2006 3:31 pm
I got two coats of primer on today. I read the label on the finish enamel, and it takes 4-6 hours to dry to touch and 24 hrs before recoating. It's after 4 PM now, so it's too late to put on the first coat today. The weather is against me finally. Tomorrow I can do one coat, but as of now, Saturday has thunderstorms forecasted, and the long range looks like rain every day until next Friday. So, it's probably going to be a week before I can get both finish coats done, unless the Saturday forecast changes.
I don't want to have to cover it up with the tarp until the first coat has 24 hrs to set up, or I may scratch the top paint pulling the tarp uo and over it. I may end up backing it back under the canopy until it gets the final coat of paint.
It all depends on the weather, which has been good to me so far, except for being HOT. I've had to pull my resperator off every 10 or 15 minutes and wipe the water out of it, and drink to make up for the water I lose thru persperation.
But, at least, something is going right. The Zinsser oil-based primer has done a really good job of helping hide the grain. It won't be auto paint quality, but it may end up looking better than I thought it would. And, it dries fast. As soon as I put on one coat, I could start hand sanding from where I has started painting. I used a fine sanding sponge and just brushed out the overspray before recoating.
I had some initial problems with my HD gravity feed paint sprayer, but I am sure it had to do with lack of volume, as the compressor isn't rated as high as the sprayer needs (14 cfm). The sprayer started spitting little specs of dry paint (which sanded out once it dried). I started listening to my compressor. When it started running, I'd spray for only 5-10 seconds longer, then wait for 5-10 seconds before making another couple of passes. When the motor shut off, I'd resume regular spraying until it started running again. That worked...no more problems.
Dale
Sometimes I pretend to be normal. But, that gets boring...so I go back to being me.
Squidget Pop Top Build Pages http://www.thesquidget.com/ptbuild/ptbuild.html
Squidget and Pop Top Plans Info and Photos: http://www.TheSquidget.com
Sometimes I pretend to be normal. But, that gets boring...so I go back to being me.
Squidget Pop Top Build Pages http://www.thesquidget.com/ptbuild/ptbuild.html
Squidget and Pop Top Plans Info and Photos: http://www.TheSquidget.com
-
cracker39 - 3000 Club
- Posts: 3069
- Images: 233
- Joined: Thu Jun 30, 2005 2:18 pm
- Location: Lake Alfred, Florida, USA