CNC Design

Did you just design your very own teardrop or tiny trailer? Want to discuss it? Here's the place to post your design for discussion!

CNC Design

Postby capnTelescope » Sat Nov 23, 2013 4:00 am

As far as I can tell, my build will be one of the few done with full access to the builder's own personal CNC router. (I don't want/have a jet ski, fishing boat, ATV, motorcycle or any of the other expensive toys, but I did want a CNC, so I got one. It's just an unusual hobby.) Because I have full access to the machine, the design can take advantage of the inherent accuracy of CNC to make possible some important design innovations. Also, I can design my tear as if I could use a CNC anytime I wanted to, or tie the machine up for a while. It also makes a nice work bench. :)

The design is a 5 x 10, the side outline is a 4-elipse shape similar to many others. I think the bare cabin will weigh in the neighborhood of 500 pounds.

Image

Strength and light weight are the main goals. I haven't seen even one builder complain that their Tear wasn't heavy enough. I also want to minimize the amount of left-over dead tree.

The walls and roof will be insulated so there can be air conditioning. Chances of me participating in winter sports are nil. I anticipate heating will seldom be needed, if at all. That's what blankets and campfires are for, anyway.

Most designs have a number of subcomponents that are added after some initial assembly. Most notably, bulkheads, the cabinetry in the cabin and galley. My design makes these an integral part of the structure, adding strength while adding minimal extra weight.

Also, we often make some compromises with good woodworking practices. Most notable here is the common way of installing bulkheads and roof spars. Often, bulkheads are mounted by screws from the outside into the edges of the bulkhead plywood. This has several disadvantages. Most notably, screwing into end grain risks splitting the wood. It is less stronger than a screw through the face of the plywood. But IMHO the bulkheads can be one of the main sources of strength of the basic cabin assembly of floor, walls and bulkheads. Also, the through screws from the outside make extra work, as you usually see them countersunk and filled over and sanded. That's a lot of extra work. It also prevents you from skinning and trimming the walls until after assembly. When the walls are vertical, you have to fight gravity. So I want to skin the wall subassemblies on the workbench, before any assembly begins. I'm risking scratches and dings, so we'll see how that goes.


QUESTIONS:
1. How much height from the floor to the bottom of the door? It's about 3-1/2 inches, now. More, less, or about right?

2. What do you do about your muddy shoes? Can't leave them outside for the critters to nibble on. Can't put them on top of the bedding. I'm thinking the bed will take up the whole cabin floor. Maybe a shelf on the wall, just aft of the door?

3. What am I doing wrong that the whole drawing image doesn't show? I'm trying to duplicate what Jonnyo did with his pix here: http://www.tnttt.com/viewtopic.php?p=1047340#p1047340

More to follow.
I'll burn that bridge when I come to it.

Brad
ImageImageImage

Building the Bed & Breakfast
User avatar
capnTelescope
Lifetime member
 
Posts: 1218
Images: 368
Joined: Sun Jun 27, 2004 3:44 pm
Location: Round Rock, TX

Re: CNC Design

Postby tony.latham » Sat Nov 23, 2013 8:51 am

What is the length of your bed area? I don't see a measurement and it looks short.

It looks like it may be a challenge to make the foot of your bed up, especially after you've taken up 5" of that space with foam. Perhaps I'm reading your plan wrong.

I think the 3.5 inches on the bottom of the door is about right but I'll be curious to hear what others say. It's too much if you are planning on a three inch mattress but fine for my six inches. I like to sit on the mattress not on the edge of the wall when getting in and out.

I've left my shoes out but it's not the best plan. I wonder how many mice have used them for a midnight nap? We now have plastic boxes on shelves to park our shoes for the night. I leave a pair of flip flops below the door for the 0300 bladder wakeup.

Make sure you design your galley around what you plan on putting in there, don't design it with the intent of trying to find the right size cooler, stove or whatever after its built.
User avatar
tony.latham
Gold Donating Member
 
Posts: 6900
Images: 17
Joined: Mon Jul 08, 2013 4:03 pm
Location: Middle of Idaho on the edge of nowhere

Re: CNC Design

Postby capnTelescope » Sat Nov 23, 2013 1:15 pm

Good points, Tony. Thanks for the feedback.

The floor is sized for a queen mattress. I've allowed 7 feet for it. I'm a couple inches short on the width, but that should help keep the sheet stay tucked in. I have been pondering if I need more room under the cabinets, and I was just thinking room for my feet. didn't even think about banging my head when changing the sheets.

Good thoughts on the shoes. Plastic boxes sound like just the ticket.

As for the Galley, I'm leaving options open until I get the stove and cooler. I'm planning on slide-out drawers for both of those, one on each side. The galley would be U-shaped in cooking mode.

I haven't researched the stove that much. I've been a coleman cooker all these years, but I would be interested in what brands/models people like or don't like. I covet a Yeti cooler, just gonna have to swallow hard when I whip out the plastic for that one.

Anyone else have any thoughts?
Last edited by capnTelescope on Sat Nov 23, 2013 1:49 pm, edited 1 time in total.
I'll burn that bridge when I come to it.

Brad
ImageImageImage

Building the Bed & Breakfast
User avatar
capnTelescope
Lifetime member
 
Posts: 1218
Images: 368
Joined: Sun Jun 27, 2004 3:44 pm
Location: Round Rock, TX
Top

Re: CNC Design

Postby capnTelescope » Sat Nov 23, 2013 1:47 pm

Let me 'splain the drawing above so you can understand what you're looking at.

It's color coded for your convenience.
Black -- outline of the finished profile
Dark blue -- lumber framing that will be between two sheets of 1/4 plywood. Insulation in the spaces between, and a space to run wiring along the top.
Light blue crosshatched -- 3/4 ply, full width.
Magenta crosshatched -- solid wood faceplates for cabinets, full width

Anyplace you see plywood up against framing, the framing will have a CNC-machined surface so the plywood surface is accurately located on both walls. Ditto for cabinet faceplates.

The walls will be assembled first, then machined as a unit. Once the rough walls are glued up, I'm committed to the plan! :frightened:

Clear as mud?
I'll burn that bridge when I come to it.

Brad
ImageImageImage

Building the Bed & Breakfast
User avatar
capnTelescope
Lifetime member
 
Posts: 1218
Images: 368
Joined: Sun Jun 27, 2004 3:44 pm
Location: Round Rock, TX
Top

Re: CNC Design

Postby 666K9 » Sat Nov 23, 2013 1:56 pm

A trick I've used to allow things to dry in plastic boxes: cut a piece of suspended light cover. with open square pattern, to fit and place in bottom. Also allows sand, etc, to drop off.
"There are some who can live without wild things, and some who cannot." Aldo Leopold... These posts are by one who cannot. (paraphrased)

"It takes an act of Congress to make a General; it takes communications to make a Commanding General."... sign in Radio School classroom

Phil Jarvi, Docent; Grass River Natural Area (http://www.grassriver.org)
666K9
Teardrop Inspector
 
Posts: 15
Images: 1
Joined: Mon Nov 11, 2013 6:45 pm
Location: NW MI
Top

Re: CNC Design

Postby capnTelescope » Sat Nov 23, 2013 2:13 pm

666K9 --

Excellent!
I'll burn that bridge when I come to it.

Brad
ImageImageImage

Building the Bed & Breakfast
User avatar
capnTelescope
Lifetime member
 
Posts: 1218
Images: 368
Joined: Sun Jun 27, 2004 3:44 pm
Location: Round Rock, TX
Top

Re: CNC Design

Postby capnTelescope » Sat Nov 23, 2013 2:21 pm

Attached (I hope) is a DXF file of the drawing.

wall framing and bulkheads1.dxf
(265.7 KiB) Downloaded 333 times
I'll burn that bridge when I come to it.

Brad
ImageImageImage

Building the Bed & Breakfast
User avatar
capnTelescope
Lifetime member
 
Posts: 1218
Images: 368
Joined: Sun Jun 27, 2004 3:44 pm
Location: Round Rock, TX
Top

Re: CNC Design

Postby 666K9 » Sat Nov 23, 2013 4:32 pm

My only concern is that headers usually go over not between uprights. But then this isn't a house. The basic design looks good.
Skip
"There are some who can live without wild things, and some who cannot." Aldo Leopold... These posts are by one who cannot. (paraphrased)

"It takes an act of Congress to make a General; it takes communications to make a Commanding General."... sign in Radio School classroom

Phil Jarvi, Docent; Grass River Natural Area (http://www.grassriver.org)
666K9
Teardrop Inspector
 
Posts: 15
Images: 1
Joined: Mon Nov 11, 2013 6:45 pm
Location: NW MI
Top

Re: CNC Design

Postby mikeschn » Sat Nov 23, 2013 4:54 pm

So which cnc router did you build?

Mike...
The quality is remembered long after the price is forgotten, so build your teardrop with the best materials...
User avatar
mikeschn
Site Admin
 
Posts: 19202
Images: 479
Joined: Tue Apr 13, 2004 11:01 am
Location: MI
Top

Re: CNC Design

Postby capnTelescope » Sat Nov 23, 2013 4:56 pm

Hi, Skip. In my mind, it's more like a big cabinet than a small house. Rails go between stiles. :D

The cabinet has cabinets? :?

The interior wall gets glued to the framing. so does the exterior wall. On the other side, of course. Or does the framing get glued to the exterior? Yeah, that's it. This is all SO complicated.
I'll burn that bridge when I come to it.

Brad
ImageImageImage

Building the Bed & Breakfast
User avatar
capnTelescope
Lifetime member
 
Posts: 1218
Images: 368
Joined: Sun Jun 27, 2004 3:44 pm
Location: Round Rock, TX
Top

Re: CNC Design

Postby capnTelescope » Sat Nov 23, 2013 5:07 pm

Hi Mike,

I built the CNC Router Parts CRP4896 kit. Aluminum extrusions with a steel weldment for the gantry riser. http://www.cncrouterparts.com/, http://www.cncrouterparts.com/crp4896-4-x-8-cnc-router-kit-p-139.html.

I will have had it 2 years in January. It went together in about 3 weeks, up and running. I have nothing but good things to say about them.

The machine often exceeds my ability to hold down the workpiece. I think I saw your machine on CNC Zone.
I'll burn that bridge when I come to it.

Brad
ImageImageImage

Building the Bed & Breakfast
User avatar
capnTelescope
Lifetime member
 
Posts: 1218
Images: 368
Joined: Sun Jun 27, 2004 3:44 pm
Location: Round Rock, TX
Top

Re: CNC Design

Postby mikeschn » Sat Nov 23, 2013 5:47 pm

Once upon a time I started some threads on open source cnc designs. But then time got away from me and I just didn't have any time to follow up on that idea...

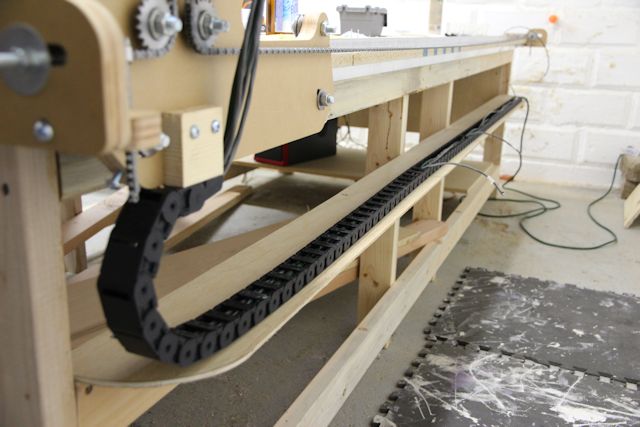
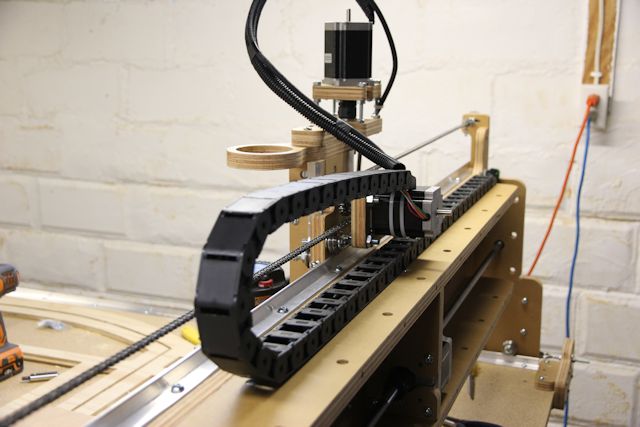
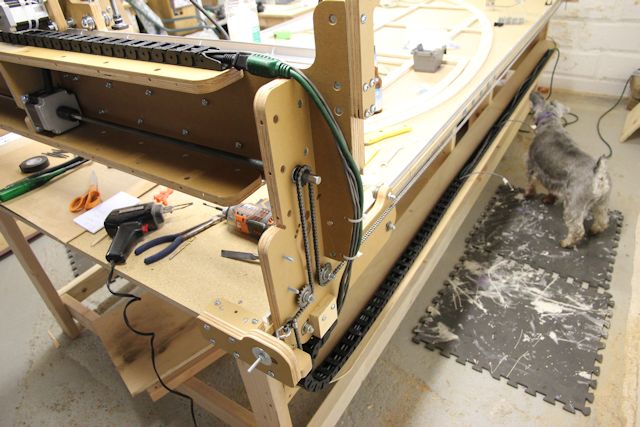
Lately I've been cutting with this...

Image

Image

Image

Not real happy with this though. I might have to adapt it to cnc joe's hybrid design...

Mike...
The quality is remembered long after the price is forgotten, so build your teardrop with the best materials...
User avatar
mikeschn
Site Admin
 
Posts: 19202
Images: 479
Joined: Tue Apr 13, 2004 11:01 am
Location: MI
Top

Re: CNC Design

Postby tony.latham » Sat Nov 23, 2013 7:14 pm

Good points, Tony. Thanks for the feedback.

The floor is sized for a queen mattress. I've allowed 7 feet for it. I'm a couple inches short on the width, but that should help keep the sheet stay tucked in. I have been pondering if I need more room under the cabinets, and I was just thinking room for my feet. didn't even think about banging my head when changing the sheets.

Good thoughts on the shoes. Plastic boxes sound like just the ticket.

As for the Galley, I'm leaving options open until I get the stove and cooler. I'm planning on slide-out drawers for both of those, one on each side. The galley would be U-shaped in cooking mode.

I haven't researched the stove that much. I've been a coleman cooker all these years, but I would be interested in what brands/models people like or don't like. I covet a Yeti cooler, just gonna have to swallow hard when I whip out the plastic for that one.

Anyone else have any thoughts?

That 2" width thing is not a problem with a 60" wide mattress. I've got a Yeti cooler and it's great for extended trips but is way too big for the galley. It goes in the back of my Tacoma.

TL
User avatar
tony.latham
Gold Donating Member
 
Posts: 6900
Images: 17
Joined: Mon Jul 08, 2013 4:03 pm
Location: Middle of Idaho on the edge of nowhere
Top

Re: CNC Design

Postby capnTelescope » Sat Nov 23, 2013 8:01 pm

Tony,

Twins! I have a white Taco with a shell, too. An '01 TRD extra cab with 4WD. I'm keeping it until one of us dies. :thumbsup:
I'll burn that bridge when I come to it.

Brad
ImageImageImage

Building the Bed & Breakfast
User avatar
capnTelescope
Lifetime member
 
Posts: 1218
Images: 368
Joined: Sun Jun 27, 2004 3:44 pm
Location: Round Rock, TX
Top

Re: CNC Design

Postby capnTelescope » Sat Nov 23, 2013 8:24 pm

Mike,

I remember considering that router design you have. Black Toe, or something? I didn't really want to build from scratch. One company i worked for went off on a CNC conversion of a big lathe, and that went late and over-budget. And those guys knew way more about what they were doing than I did. Right about the time I was going to go ahead, CRP announced their kit. I held my fire until they got one working, and bought an early one when I saw it in action. I wanted a CNC to build a teardrop from scratch. I didn't want to build a CNC from scratch, based on that earlier experience. The Tear might never have gotten started.

The CRP4896 is open source, BTW. They have(had?) free plans and sell components.

Pix!
Image
Cutting a wooden gear

Image
Waiting for G-code

Image
drawing setup

Image
Ready to draw on the wall for cardboard mockup
I'll burn that bridge when I come to it.

Brad
ImageImageImage

Building the Bed & Breakfast
User avatar
capnTelescope
Lifetime member
 
Posts: 1218
Images: 368
Joined: Sun Jun 27, 2004 3:44 pm
Location: Round Rock, TX
Top

Next

Return to Member Designs

Who is online

Users browsing this forum: No registered users and 15 guests