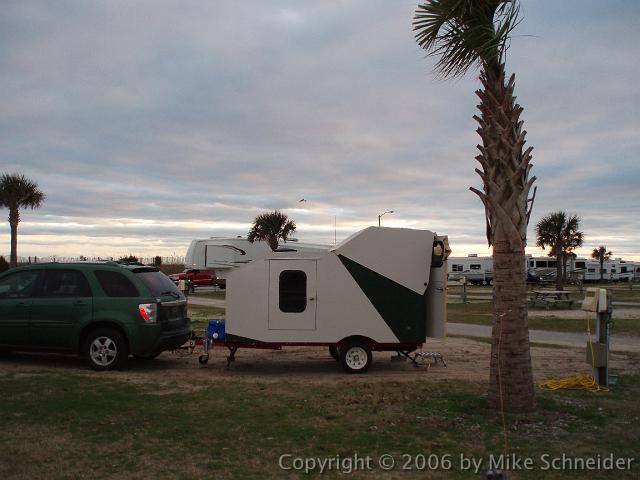
Ultralight Construction...

Did you just design your very own teardrop or tiny trailer? Want to discuss it? Here's the place to post your design for discussion!

Postby toypusher » Sun Mar 05, 2006 8:38 pm

Yes, Please!!! 8)
User avatar
toypusher
Site Admin
 
Posts: 43040
Images: 324
Joined: Fri Jan 28, 2005 12:21 pm
Location: York, PA Area

Postby mikeschn » Sun Mar 05, 2006 9:14 pm

Okay Kerry,

I found a couple more photos for you...

This one...

Image
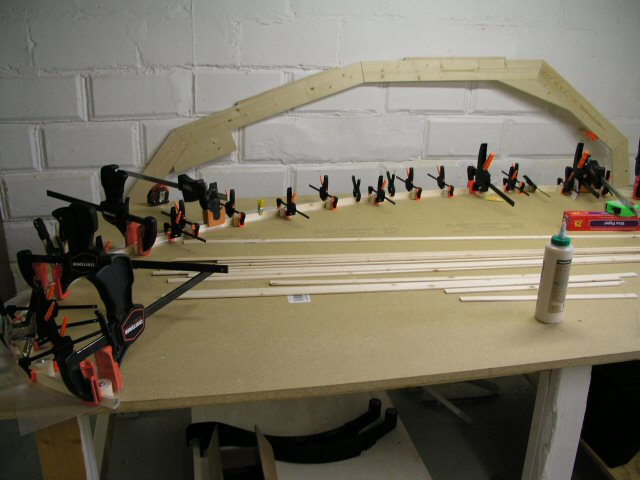
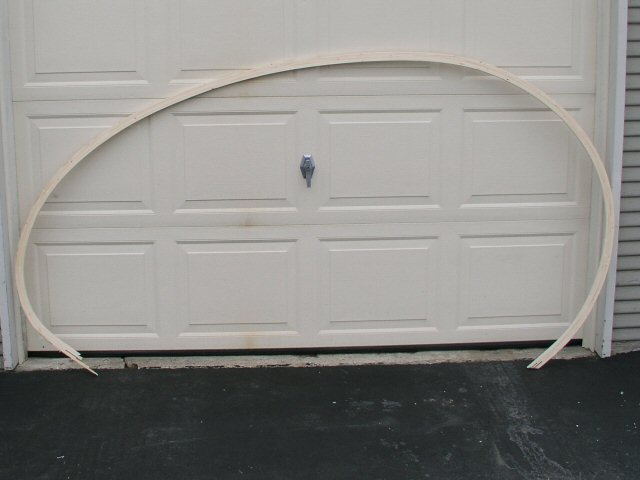
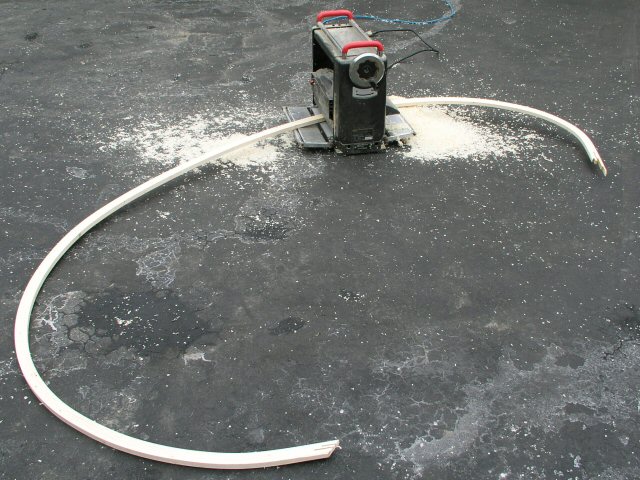
At the beginning of the laminating process... It all looks so easy... but I think I am going to have to add another set of clamps... one that presses the lamination against the table...

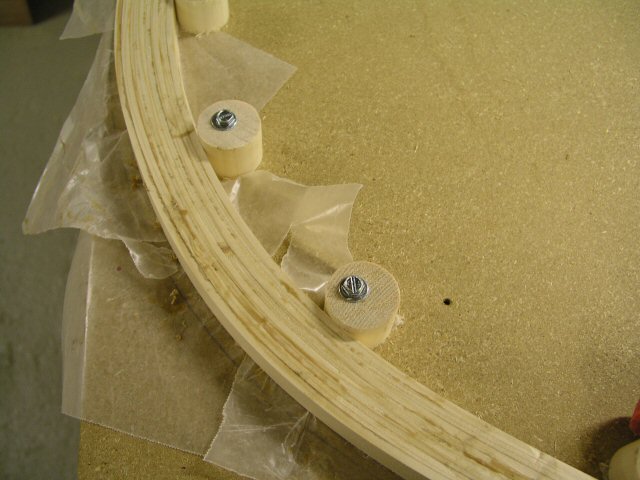
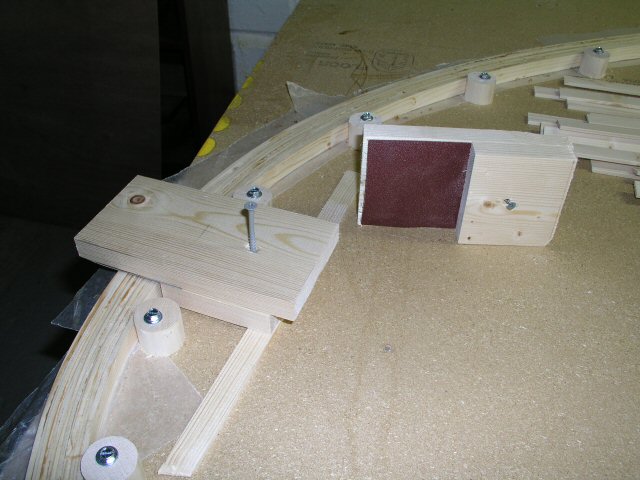
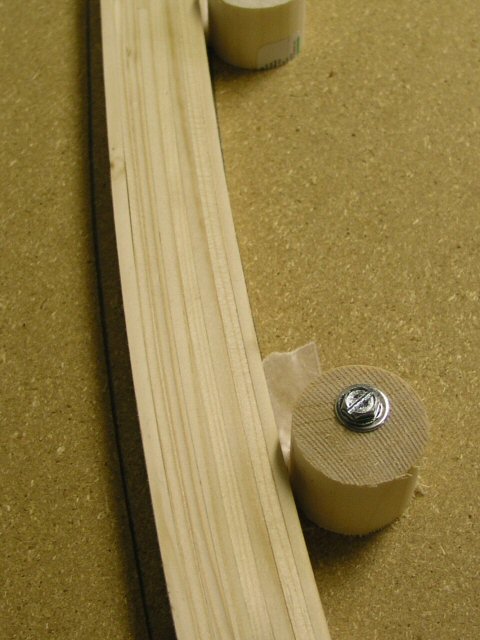
And then there is this one... it shows the waxed paper under the lamination, the offset screws in the pieces of dowel, and if you look really close, you'll see I need to do some serious sanding.... I should have used some kind of hold down clamps...

Image

Mike...
The quality is remembered long after the price is forgotten, so build your teardrop with the best materials...
User avatar
mikeschn
Site Admin
 
Posts: 19202
Images: 479
Joined: Tue Apr 13, 2004 11:01 am
Location: MI

Postby bg » Sun Mar 05, 2006 9:46 pm

Better than discovering that one side is slightly different than the other, even though they were built with the same template. I'm something like an 1/8" off. Least I'm the only one that'll know that it's there, and Since I'm not building to sell, no biggie.
Bobby(, Kim & Wayne)
bg
500 Club
 
Posts: 985
Images: 8
Joined: Fri Aug 20, 2004 11:11 pm
Location: Saginaw, TX
Top

Postby PaulC » Mon Mar 06, 2006 5:38 am

Mike that is looking good. Glad to see you found some hidden strength in it.. I had to go to work earlier, sorry. As for my question, I think what you have suggested will work along with sitting everything on top of the chassis and not continue it down the side.

Cheers
Paul :thumbsup:
Time is the only real capital we have. Money you can replace but time you cannot.
User avatar
PaulC
3rd Teardrop Club
 
Posts: 4436
Images: 36
Joined: Mon May 24, 2004 7:27 am
Location: Laura, SouthernFlinders Ranges, South Australia
Top

Postby toypusher » Mon Mar 06, 2006 6:39 am

mikeschn wrote:.....you'll see I need to do some serious sanding.... I should have used some kind of hold down clamps...

Image

Mike...


Use something like this:

Image
User avatar
toypusher
Site Admin
 
Posts: 43040
Images: 324
Joined: Fri Jan 28, 2005 12:21 pm
Location: York, PA Area
Top

Postby mikeschn » Mon Mar 06, 2006 7:30 am

I have some of those... hold on, let me grab a pic...

here ya go...

Image

But the clamps are so wide, that I can't get on the ratchet clamp inbetween the dowel pieces...

Mike...
The quality is remembered long after the price is forgotten, so build your teardrop with the best materials...
User avatar
mikeschn
Site Admin
 
Posts: 19202
Images: 479
Joined: Tue Apr 13, 2004 11:01 am
Location: MI
Top

Postby Arne » Mon Mar 06, 2006 9:02 am

Mike I did something similar when I added the galley. The verticals screwed to the side of the tear had a 1/2" block to position 4 overlapping 1/4" thick pieces of pine, which were epoxied on one at a time... it worked ok, but given that all pieces were cut the same, it did not come out to the aircraft specs I was hoping for. Epoxy squeezed out and had to be sanded down. The 1/2" offset gave me the space for the 1/2" birch ply I cobbled onto the sides.

I rubbed candle wax on the jig pieces and it worked pretty well...

Image

Image
www.freewebs.com/aero-1
---
.
I hope I never get too old to play (Arne, Sept 11, 2010)
.
User avatar
Arne
Mr. Subject Line
 
Posts: 5383
Images: 96
Joined: Fri Aug 13, 2004 12:25 pm
Location: Middletown, CT
Top

Postby toypusher » Mon Mar 06, 2006 9:13 am

Try using something hardwood like oak instead of the pine. You can then use 1" wide piece.
User avatar
toypusher
Site Admin
 
Posts: 43040
Images: 324
Joined: Fri Jan 28, 2005 12:21 pm
Location: York, PA Area
Top

Oh the games we play...

Postby mikeschn » Mon Mar 06, 2006 10:40 am

Oh the games we play with our woodworking tools...

Here's the swooshdrop for Dean...

Image

And here's a closeup of how the lamination turned out...

Image

Arn't you guys wondering how I got that so nice and clean and smooth?

Go on, take a couple guesses... I'll post the answer in a little while...

Mike... :pipe:
The quality is remembered long after the price is forgotten, so build your teardrop with the best materials...
User avatar
mikeschn
Site Admin
 
Posts: 19202
Images: 479
Joined: Tue Apr 13, 2004 11:01 am
Location: MI
Top

Postby toypusher » Mon Mar 06, 2006 10:42 am

Planner??
User avatar
toypusher
Site Admin
 
Posts: 43040
Images: 324
Joined: Fri Jan 28, 2005 12:21 pm
Location: York, PA Area
Top

Postby Boodro » Mon Mar 06, 2006 10:59 am

Probably NOT a router!
I agree with Kerry , planner! 8)
We are all travelers in this world , from the sweet grass to the packin house , birth till death , we travel between the eternities . ( Robert Duvall as Prentiss Ritter)
User avatar
Boodro
1000 Club
1000 Club
 
Posts: 1052
Images: 101
Joined: Sun Oct 10, 2004 9:35 pm
Location: Sylvania, Ohio
Top

Postby mikeschn » Mon Mar 06, 2006 11:33 am

Okay, so that was too easy... a given! Here's the picture of profile going thru the planer...

Image

I've just started the 2nd profile... again, the first two strips are the trickest... Also, be sure that your first two strips are completely free of knots... otherwise the profile will want to change shape on you!

Mike...
The quality is remembered long after the price is forgotten, so build your teardrop with the best materials...
User avatar
mikeschn
Site Admin
 
Posts: 19202
Images: 479
Joined: Tue Apr 13, 2004 11:01 am
Location: MI
Top

Postby Miriam C. » Mon Mar 06, 2006 4:22 pm

:thumbsup:
OK, What kind of strips and best kind of glue. Then I will sit back and watch with the rest of the groupies.

This looks easier than routing. Lot of clamps too.

Miriam :miriams:
“Forgiveness means giving up all hope for a better past.â€
User avatar
Miriam C.
our Aunti M
 
Posts: 19675
Images: 148
Joined: Wed Feb 15, 2006 3:14 pm
Location: Southwest MO
Top

Postby mikeschn » Mon Mar 06, 2006 4:33 pm

I bought 1x6s (#2 common pine) and ripped strips roughly 1/8" thick. Then I used Titebond III to glue the strips together. I really like Titebond III. It sets within 30 minutes, so I can move on to the next layer every 30 minutes.

I can have a swoosh side completely done in a day. :D

Mike...
The quality is remembered long after the price is forgotten, so build your teardrop with the best materials...
User avatar
mikeschn
Site Admin
 
Posts: 19202
Images: 479
Joined: Tue Apr 13, 2004 11:01 am
Location: MI
Top

Postby Chris C » Mon Mar 06, 2006 4:35 pm

(Titebond III. :thumbsup: Three cheers for Mike. :applause: He knows what to use!) :yes:
Chris :D

The tension between what is good enough and what is beyond that creates the space for character to become our work.

Teardrop Trailer Build Pictures: http://tinyurl.com/px5cd
Chris C
.
 
Posts: 3302
Joined: Sun May 15, 2005 7:24 pm
Location: Norman, Oklahoma
Top

PreviousNext

Return to Member Designs

Who is online

Users browsing this forum: No registered users and 9 guests