Ultralight Construction...

Did you just design your very own teardrop or tiny trailer? Want to discuss it? Here's the place to post your design for discussion!

Postby mikeschn » Tue Mar 07, 2006 7:45 pm

Kerry just asked for more pictures of my Ultralight construction... I've been gluing up laminations for 3 days now, and all I have to show for it is a couple swoosh drops...

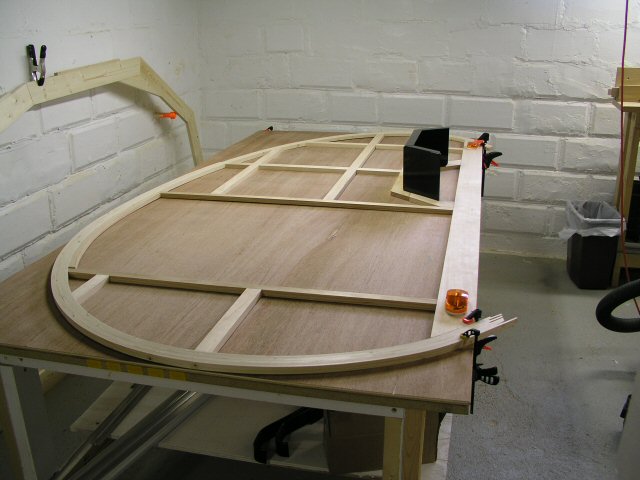
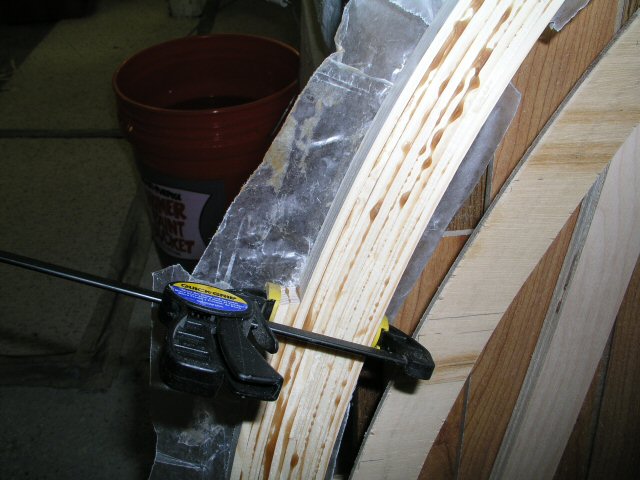
Here's the pictures of one side, and the other side is similar...


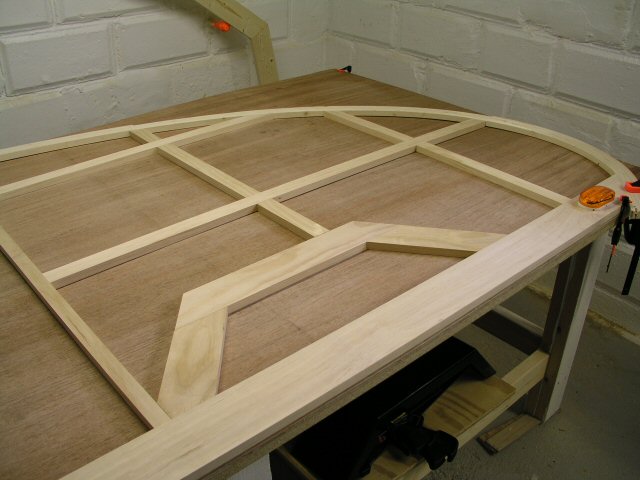
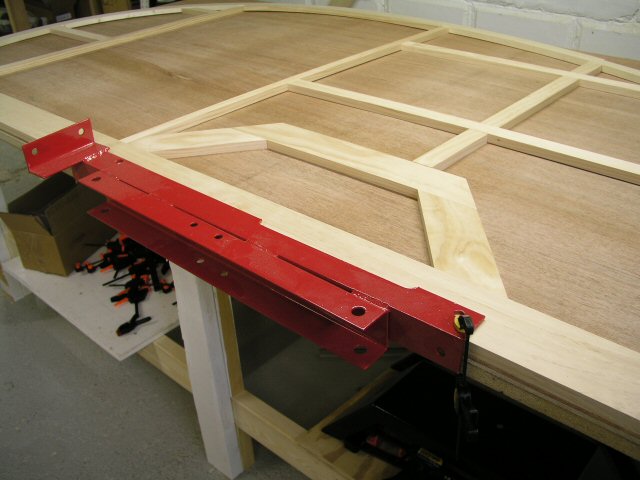
In this picture you can see the part of the framing that is going to be above the door. The ultralight only has 1 door btw... The other side gets a window.
Image

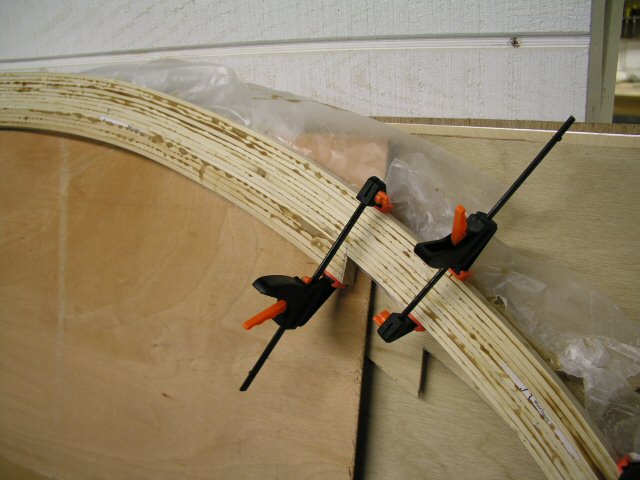
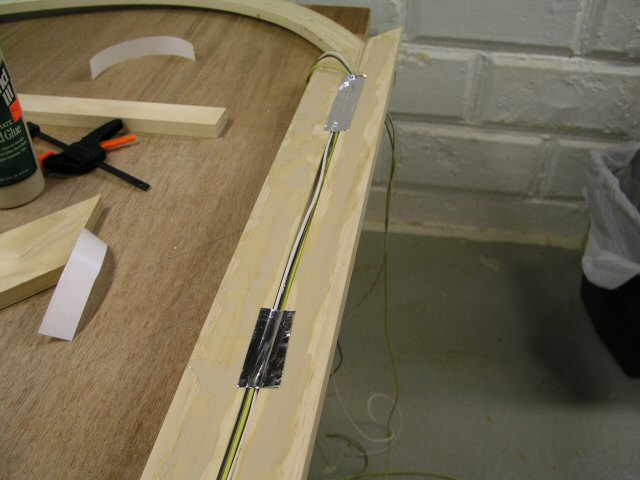
In this picture you can see where the hatch begins... in other words, what you are looking at is the notch for the hatch insulation...
Image

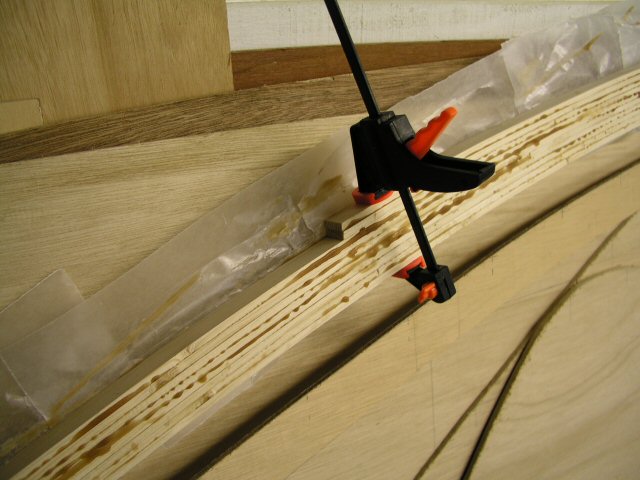
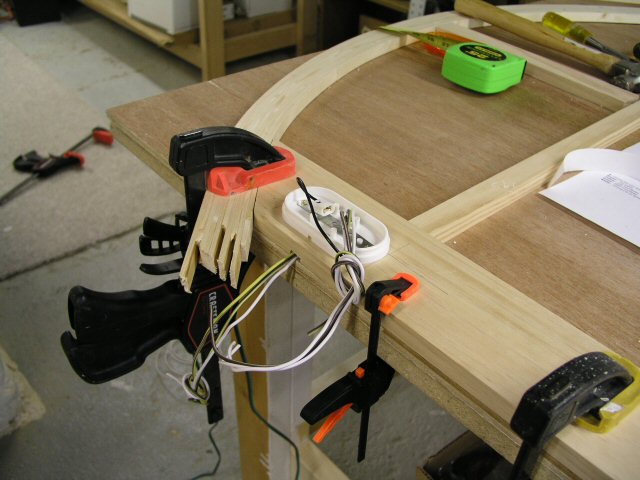
And in this picture you can see where the hatch ends...
Image

Tomorrow I take the whole mess outside and run it thru the thickness planer! :snappy:

Mike...
The quality is remembered long after the price is forgotten, so build your teardrop with the best materials...
User avatar
mikeschn
Site Admin
 
Posts: 19202
Images: 479
Joined: Tue Apr 13, 2004 11:01 am
Location: MI

Postby toypusher » Tue Mar 07, 2006 7:50 pm

But they a very nice Swoosh drops!!! :thumbsup:
User avatar
toypusher
Site Admin
 
Posts: 43040
Images: 324
Joined: Fri Jan 28, 2005 12:21 pm
Location: York, PA Area

Postby Guest » Wed Mar 08, 2006 1:34 pm

Mike,
Life size Swooshdrops for me???
Awww... You shouldn't have, but Thanks a bunch, When do they ship? :lol:
When Glen sees those, he's going to probably ask if you're ready to build a canoe... Them's some big stems you got there.
The picture of that going through a 12" wide thickness planer, is a great shot!... TURN LEFT!!! TURN LEFT!!!! :lol:
Just curious... Did you get any noticeable spring back when you took the Swoosh off of the form?
Guest
 
Top

Postby mikeschn » Wed Mar 08, 2006 2:38 pm

Dean,

With the last two layers of lamination on, there was no springback at all.

I've now got the swooshdrop on the plywood side, ready for glue up...

Image

Image

But before I can start gluing, I have to pull some wires for the marker lights, and whatever else I need. Once it's glued, there's no more wire pulling, at least not thru the sides...

Mike...
The quality is remembered long after the price is forgotten, so build your teardrop with the best materials...
User avatar
mikeschn
Site Admin
 
Posts: 19202
Images: 479
Joined: Tue Apr 13, 2004 11:01 am
Location: MI
Top

Postby mikeschn » Wed Mar 08, 2006 5:55 pm

Cut the groove in the bottom piece for the marker lights and taillights.

Image

Then I glued and clamped that bottom piece down.

Image

I'm done for today...

Mike...
The quality is remembered long after the price is forgotten, so build your teardrop with the best materials...
User avatar
mikeschn
Site Admin
 
Posts: 19202
Images: 479
Joined: Tue Apr 13, 2004 11:01 am
Location: MI
Top

Postby Micro469 » Wed Mar 08, 2006 7:17 pm

Mike, are you insulating this puppy? Sure looks good. :thumbsup:
John
Image
User avatar
Micro469
Super Lifetime Member
 
Posts: 3185
Images: 382
Joined: Mon Nov 07, 2005 10:46 pm
Location: Brampton,Ontario,Canada
Top

Postby mikeschn » Wed Mar 08, 2006 7:23 pm

No John,

This ultralight is uninsulated...

It's similar to Len's Slumbercoach, and Roly's lightweight... only this one doesn't have a frame per se. I'm trying to stretch the limits with this...

You want metal? This is just about all the metal you get...

Image

Mike...

P.S. That vertical piece of angle? It's gonna get chopped of and thrown away... Why do you think I bought a portable bandsaw? :lol:
The quality is remembered long after the price is forgotten, so build your teardrop with the best materials...
User avatar
mikeschn
Site Admin
 
Posts: 19202
Images: 479
Joined: Tue Apr 13, 2004 11:01 am
Location: MI
Top

Postby len19070 » Wed Mar 08, 2006 7:52 pm

Looks great Mike. Those "slats are great for running wires behind. I have them running all over the place in mine.
Must be a trend, my son & I are starting an ultra light, bear bones trailer ourselves. 4' wide & 6" 6" long so goes the name the "Route 66". 1 door, minimal galley and light weight. I'm thinkin' Harley Campin here.
Keep us posted.

Happy Trails

Len
:peace: :peace: :peace: :peace: :peace:
http://s26.photobucket.com/user/len1907 ... 20trailers

"If you do good things, good things will happen to you"..... Earl Hickey
User avatar
len19070
3000 Club
3000 Club
 
Posts: 3054
Images: 24
Joined: Tue Aug 17, 2004 7:44 pm
Location: S.E Pa. Morton
Top

Postby Micro469 » Wed Mar 08, 2006 8:56 pm

You using the swoosh technique for the hatch ribs too? Maybe make them now so they are the same as the sides.... just a thought....
;)
John
Image
User avatar
Micro469
Super Lifetime Member
 
Posts: 3185
Images: 382
Joined: Mon Nov 07, 2005 10:46 pm
Location: Brampton,Ontario,Canada
Top

Postby mikeschn » Wed Mar 08, 2006 9:01 pm

Micro469 wrote:You using the swoosh technique for the hatch ribs too? Maybe make them now so they are the same as the sides.... just a thought....
;)


I thought about that, but only briefly... swoosh laminations do not make a good hatch structure... I'll be using baltic birch, cut out with the jig saw for that...

But it's good to see you guys thinking about the options....

Mike...
The quality is remembered long after the price is forgotten, so build your teardrop with the best materials...
User avatar
mikeschn
Site Admin
 
Posts: 19202
Images: 479
Joined: Tue Apr 13, 2004 11:01 am
Location: MI
Top

Postby Guest » Wed Mar 08, 2006 9:13 pm

mikeschn wrote:
Micro469 wrote:You using the swoosh technique for the hatch ribs too? Maybe make them now so they are the same as the sides.... just a thought....
;)


I thought about that, but only briefly... swoosh laminations do not make a good hatch structure... I'll be using baltic birch, cut out with the jig saw for that...

But it's good to see you guys thinking about the options....

Mike...


Mike,
Why don't you use a template and your router to make the ribs???
(Rough 'em into shape with the jig saw, then trim 'em into exact copies of one another with the router)
Guest
 
Top

Postby mikeschn » Wed Mar 08, 2006 9:24 pm

Yea Dean,

I need to get a new guide bushing for the router... but then practice is a good idea... Might as well practice on them hatch ribs...

Mike...

P.s. Although I just bought some new jig saw blades from Dewalt, and they are really sweet. Cuts thru wood like butter, and a clean edge too!!! :o

Mike...
The quality is remembered long after the price is forgotten, so build your teardrop with the best materials...
User avatar
mikeschn
Site Admin
 
Posts: 19202
Images: 479
Joined: Tue Apr 13, 2004 11:01 am
Location: MI
Top

Postby Guest » Wed Mar 08, 2006 9:31 pm

Top bearing flush trim bit, no guide... template on top. :thumbsup:


Or template on bottom with bottom bearing flush trim bit...
Guest
 
Top

Postby mikeschn » Wed Mar 08, 2006 9:41 pm

the problem with either of those bits, is they require you to cut the full 3/4" at one pass... I'd like to be able to cut 1/4 inch per pass...

I tried the 3/4" per pass last summer, and cut about 2/3's of my plywood framing, before I broke the bit and buried it into the plywood.... :Oh Brother:

So I'll be looking for my guide bushing soon...

Mike...
The quality is remembered long after the price is forgotten, so build your teardrop with the best materials...
User avatar
mikeschn
Site Admin
 
Posts: 19202
Images: 479
Joined: Tue Apr 13, 2004 11:01 am
Location: MI
Top

Postby toypusher » Thu Mar 09, 2006 6:22 am

mikeschn wrote:the problem with either of those bits, is they require you to cut the full 3/4" at one pass... I'd like to be able to cut 1/4 inch per pass...

I tried the 3/4" per pass last summer, and cut about 2/3's of my plywood framing, before I broke the bit and buried it into the plywood.... :Oh Brother:

So I'll be looking for my guide bushing soon...

Mike...


Mike,

Build your template out of 3 layers of 1/4" and then just remove a 1/4" layer after each pass with the router for a 1/4" cut each time. Router bit set at 1" (May have to be a tad over 1")
User avatar
toypusher
Site Admin
 
Posts: 43040
Images: 324
Joined: Fri Jan 28, 2005 12:21 pm
Location: York, PA Area
Top

PreviousNext

Return to Member Designs

Who is online

Users browsing this forum: No registered users and 3 guests