working on it wrote:dancam wrote:tony.latham wrote:dancam wrote:Ok! How long after putting 'the mix' on the edges of the holes do i have to wait before bolting and calking it up? I bought some urethane today.
Sent from my SM-G920W8 using Tapatalk
Almost immediately if you were not caulking. But if you are going to caulk, then I'd wait at least a day.
Poly has a fast cure time but when you thin it, it takes a long time for those thinners to evaporate and thus a much longer cure time.
Tony
Hmm, ok. I had read to use mineral spirits which take forever to evaporate. What about using a faster evaporating thinner like isopropyl alcohol?
Sent from my SM-G920W8 using Tapatalk
- I tried several different types of thinner, experimenting to achieve the best combination of application time/flash time/cure time, when doing test pieces prior to actually using poly "mixes", and later thinned initial coats of my various paints (farm implement and reflective silo paints). My tests were done in 80-85 degree weather, slightly more humid than I liked, but showed that the poly "mix" worked best with the cheapest, highest VOC thinner, the farm implement paint best when thinned with the same, but the silo paint worked best when thinned with mineral spirits. The silo paint had high VOC already, so to prolong the drying time I needed mineral spirits to enable the reflective aluminum particles to spread evenly. I totally avoided the "odorless", milky-white paint thinner that I find in stores next to the good stuff...it's not even good enough to clean brushes with, IMHO.
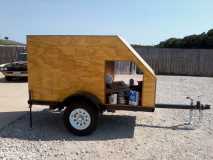
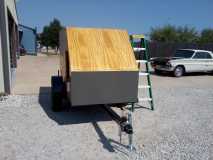
- Even so, when I poly'd the exterior, in direct sun and 106 degree heat, the two coats of 50/50 mix both dried within minutes, followed by a 100% coat of poly, dried after two hours, and another full coat, which dried overnight, after garaging it. I also painted the front, in a different manner, using only one coat each of "mix", full poly, 75% implement paint (dried in two hours), and 100% paint.
- When I applied the silo paint on the front slope, it was drying slower than the other surfaces (due to mineral spirits on the first and third coats), so I applied the final coat in the garage, the next day, when I did the sides, top, put two more coats on the front,and finished the previously started hatch in the much cooler work area. The unattached doors, and the contrasting black edging (which sealed the exposed plywood edge grain), were done later that weekend (I spent 9 consecutive afternoons over at my friend's shop, 50 miles from home, but only did work on the trailer for half that time!).
- Still, by painting most of the trailer in temperatures much higher than recommended, and using faster dissipating thinner for the "mix", I was able to apply all exterior coatings (and the inside of the hatch and doors), allowed them to dry, and never had to wait very long to continue the assembly of the trailer. I recommend using high VOC paint thinner over mineral spirits for the "mix", but use mineral spirits if paint properties require slower drying time.
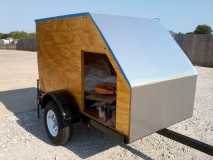
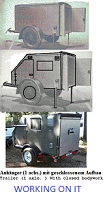
 multiple coats of poly and paint done in one afternoon in 06 degree heat
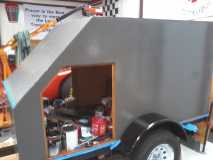 finishing the paint job in an air-conditioned 40x60 shop, the next afternoon
Ok! Good info, thanks a lot! Im sure you have that posted somewhere else, whats the title of it called? Just trying to learn the type of thing to search for for future.
I dont have anything called high voc paint thinner, so out of what i have what would be best for fast drying just to do 3/8 dia holes?
Isopropyl alcohol 99%
Mineral spirits,
denatured alcohol
Xylene
Acetone
Medium speed urethane grade reducer low voc (1.7pounds/gallon)
Methyl ethyl keyone
Gunwash (toluene,mek,methanol mix)
Thanks again!
Sent from my SM-G920W8 using Tapatalk