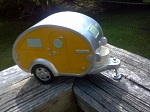
Greetings from Alaska!

This is the place where you can introduce yourself, and include a photo if so desired.

Greetings from Alaska!

Postby JagLite » Mon Dec 30, 2019 1:53 pm

First post, new guy.
I had already drawn up the plans for my vintage style Tear Drop trailer before finding this website.
I was linked here from the ADVRider.com website.
My trailer is only to haul my bikes in to protect them from the weather and to hide them.
It will look like a real camping trailer with false doors and windows and a large rear hatch to load the bikes in and out.

Then... the link on adv was to the "Foamies" section and after reading up on several builds I believe I will be changing the design of mine from wood/foam composite walls, roof, and hatch to all foam. I bought a piece of blue foam and have been making test samples with different glues and cloth types and I am very impressed with the strength.
My trailer is an aluminum 10 ft by 8 ft snow machine (snowmobile to the rest of the world) that I bought to build a TD on.
I will start a build thread when I get to work on it, other projects are also on the winter work list.

James
ATTITUDE ~
The difference between
Ordeal and Adventure
User avatar
JagLite
Teardrop Inspector
 
Posts: 19
Joined: Mon Dec 23, 2019 4:19 am
Location: Anchorage Alaska

Re: Greetings from Alaska!

Postby tac422 » Mon Dec 30, 2019 3:00 pm

Welcome !
I'm looking forward to seeing your build .
What bikes do you have ?
Tac
(proud owner of the Big Pink foamie)
viewtopic.php?f=55&t=56441
User avatar
tac422
500 Club
 
Posts: 639
Images: 224
Joined: Sun Mar 17, 2013 11:39 am

Re: Greetings from Alaska!

Postby JagLite » Tue Dec 31, 2019 10:32 am

Now to see if I can post pictures...

1965 Rickman Metisse Triumph 650

Image

Good, that worked.

Suzuki DR650

Image

Suzuki DR650 Scrambler

Image

Yamaha TW200

Image

Kawasaki Drifter 1500

Image

Honda XR200R

Image

And my current project bike is a 1940 Matchless G3 WD that I am rebuilding as it served in Africa during WWII

Image

Image
ATTITUDE ~
The difference between
Ordeal and Adventure
User avatar
JagLite
Teardrop Inspector
 
Posts: 19
Joined: Mon Dec 23, 2019 4:19 am
Location: Anchorage Alaska
Top

TD Plans

Postby JagLite » Tue Dec 31, 2019 10:56 am

Maybe the trailer plans would be more interesting?

Sorry for the low quality images, they are screen shots on my computer.

Overall layout:

Image

This is a sheet of alternate ways to make the rear loading hatch:

Image

Wall framing layout for wood/foam composite:

Image

And cap plate layout for cutting the pieces:

Image

But now that I have read several (many?) of the Foamies builds I am very interested in building the entire thing out of foam.
Much less expensive, much quicker to build, much lighter too. :thumbsup:

(The hatch would not be a ramp obviously)
ATTITUDE ~
The difference between
Ordeal and Adventure
User avatar
JagLite
Teardrop Inspector
 
Posts: 19
Joined: Mon Dec 23, 2019 4:19 am
Location: Anchorage Alaska
Top

Re: Greetings from Alaska!

Postby tony.latham » Tue Dec 31, 2019 11:51 am

Your wheels are turning. (Sweet bikes, BTW... reminds me of my old Suzuki S6 Hustler I used to race around the Tanacross airstrip. I coulda named her Miss Acceleration.)

Keep in mind that a classic teardrop relies on a rear bulkhead and countertop to lock the walls in the galley area together. You might have to have a removable brace or something along that line to keep the rear walls from flexing.

Image

:thinking:

Tony
User avatar
tony.latham
Gold Donating Member
 
Posts: 6874
Images: 17
Joined: Mon Jul 08, 2013 4:03 pm
Location: Middle of Idaho on the edge of nowhere
Top

Re: Greetings from Alaska!

Postby Pmullen503 » Tue Dec 31, 2019 12:37 pm

My foamie toy hauler has a square back and it does flex a bit. I was going to put some triangular gussets in the corners. With your curved roof you should have less of an issue. It only flexes when the door is open and much of that would go away if I hinged the door horizontally instead of on the side.

Image

P.S. I went to Alaska this summer. What an unbelievable place! Long winters=more time in the shop.
Pmullen503
1000 Club
1000 Club
 
Posts: 1101
Images: 67
Joined: Sun Nov 23, 2014 1:33 pm
Location: Fond du Lac, WI
Top

Trailer wall stiffness

Postby JagLite » Tue Dec 31, 2019 3:58 pm

Thanks, and the rear wall flex is a question in my mind too.
I can always weld up an internal hoop to bolt through the floor that would have flat plates at the roof line for the sidewalls and roof to attach to.

I made some jpegs of my plans so maybe these will be more understandable:

Image

Image

Image

Image

My plans show 1/4" plywood inside and out with 1-1/2" framing (1x2 & 2x3) with 1-1/2" blue or pink board insulation all glued/bonded to create an extremely stiff structure.
However, I really like the idea of just using 2" blue or pink rigid foam board skinned on both sides with PMF... although I do have a roll of 4 oz fiberglass cloth (50" x 200 ft) that I might use.
I have been experimenting with the fiberglass using TiteBond glue on the foam board and it is most impressive in shear strength.

I believe I can build the same trailer using ONLY the 2" foam board.

Well, it will have to have some structural wood to support the hatch in the rear, or the hinges for the hatch actually.
I am thinking of a 2x3 (flat, with a layer of 1/2" plywood to match the 2" foam) with wood dowels at 8" o.c. into the roof foam about 18" to support the hatch and hinges.
The fabric would wrap around the the wood at the hinge location.

Ideally the rear hatch would be light enough to be one piece, hinged on the top similar to my Alt 3 double hinged hatch.

I figure I will build the walls first, just 4 pieces of 2" 4'x8' foam with fabric on each side and see how strong they are.

My thoughts for the curved roof and rear hatch cover are to cover one side of the foam panels (4'x8') and when that is cured, running the panel through my table saw long ways every 2" cutting 1.75" deep on the uncovered side (exterior side) then bending the panel over plywood formers cut to the radius of the roof which will open up the cut kerfs. I would then spray expanding foam in the kerfs just enough to fill them and a little extra, (any more will just be removed). Then using a sanding board for long curves smoothing the outside surface before covering the outside with fabric. The fabric on the inside will hold the panel together and installing it once the roof is on would be a pain so this way makes it easier.
When all the roof panels are installed on the roof (more dowels through the roof and into the walls) would then be glued together and have a strip of fabric 8"x8' glued on to splice the panels together.

All fun to plan of course...
ATTITUDE ~
The difference between
Ordeal and Adventure
User avatar
JagLite
Teardrop Inspector
 
Posts: 19
Joined: Mon Dec 23, 2019 4:19 am
Location: Anchorage Alaska
Top

Re: Greetings from Alaska!

Postby Pmullen503 » Tue Dec 31, 2019 5:13 pm

I like the idea of covering one side with canvas and kerfing. Don't use expanding foam to fill the gaps. I tried that and ended up throwing the whole piece out. The expanding foam doesn't sand like blue foam. Instead, rip thin angled pieces of more blue foam to fill your kerfs. Make sure any glue is below the finished level. The wedges can easily be trimmed with a flush cut hand saw. Then sand with a long board.
The other way would be to use two layers of 1" foam and attach the first kerfs up then glue the second layer kerfs down (kerf to kerf). Then all you have to deal with are the edges.

In hindsight, I wish I would've used one of those methods rather than the "standard" method of kerfing the inner surface, calculating the distance between kerfs so they close up when the panel is bent.
Pmullen503
1000 Club
1000 Club
 
Posts: 1101
Images: 67
Joined: Sun Nov 23, 2014 1:33 pm
Location: Fond du Lac, WI
Top

Re: Greetings from Alaska!

Postby rjgimp » Thu Jan 09, 2020 5:37 pm

Welcome to the nuthouse! Nice group of bikes. The Matchless is fantastic! Is that a thumper?
-Rob


I hope to make it to a Procrastinators Anonymous meeting someday...
just as soon as the steering committee gets around to scheduling one!
User avatar
rjgimp
500 Club
 
Posts: 776
Images: 7
Joined: Fri Feb 22, 2019 3:59 am
Location: Saint Paul MN
Top

Re: Greetings from Alaska!

Postby JagLite » Wed Jan 15, 2020 5:29 pm

rjgimp wrote:Welcome to the nuthouse! Nice group of bikes. The Matchless is fantastic! Is that a thumper?

Thanks! :D
The Matchless is a 1940 G3WD 350cc thumper that was shipped to Africa from the factory where it spent the war.

I'm doing a mechanical rebuild and trying to keep it looking like a survivor, unrestored.
It had multiple paint colors on the various parts so I had to repaint.
I used flat sand color camo paint that I will distress, and dirty up.
The tires had a mfg date of 1952 but I replaced those with new for safety since I plan to ride it.
ATTITUDE ~
The difference between
Ordeal and Adventure
User avatar
JagLite
Teardrop Inspector
 
Posts: 19
Joined: Mon Dec 23, 2019 4:19 am
Location: Anchorage Alaska
Top

Re: Greetings from Alaska!

Postby pchast » Wed Jan 15, 2020 9:01 pm

Since you are using a foam infill, You can loose at least half the framing you
show in the side view without loss of strength.
:thumbsup:
pchast
Platinum Donating Member
 
Posts: 2022
Images: 97
Joined: Mon Jan 28, 2013 5:47 pm
Location: Athens, NY
Top

Re: Greetings from Alaska!

Postby rjgimp » Thu Jan 16, 2020 2:41 pm

JagLite wrote:The Matchless is a 1940 G3WD 350cc thumper that was shipped to Africa from the factory where it spent the war.

I'm doing a mechanical rebuild and trying to keep it looking like a survivor, unrestored.
It had multiple paint colors on the various parts so I had to repaint.
I used flat sand color camo paint that I will distress, and dirty up.
The tires had a mfg date of 1952 but I replaced those with new for safety since I plan to ride it.


Nice! The mish-mash of paint probably tells an interesting story. It's my sense that during the war parts were often swapped between bikes in the field (even among different makes and models) after various unfortunate incidents. I suspect that finding a bike that had actually seen service and yet retained all its original parts from the factory would be incredibly rare. Also, several layers of paint would not be uncommon. A paint job might be slapped on quickly for a slightly different shade of camouflage for a specific courier run, for example.

In the late 50s my dad was in the Army stationed in Germany. He and his buddies quickly discovered if it looked like you were doing something productive the 'Uppers' would rarely bother you. He once asked me with a twinkle in his eye,"Ever painted a two and a half ton truck with a half inch brush? It takes a loooooooong time!" :lol:
-Rob


I hope to make it to a Procrastinators Anonymous meeting someday...
just as soon as the steering committee gets around to scheduling one!
User avatar
rjgimp
500 Club
 
Posts: 776
Images: 7
Joined: Fri Feb 22, 2019 3:59 am
Location: Saint Paul MN
Top

Re: Greetings from Alaska!

Postby JagLite » Tue Jan 21, 2020 4:17 pm

Funny!

You are correct sir, during the war when a bike came into the shop they removed whatever the damaged part was and replaced it with a new or repaired one that was on the shelf.
Engine, gearbox, forks, frames, wheels, everything. It would be impossible to find a bike that had the parts it left the factory with.

And they did paint the bikes regularly to keep busy, some of the old mechanics said they had used a mop when necessary.

But the variety of colors on my bike came after the war by the many owners in the chain of ownership.
The last paint was done by a WWII museum where they painted it camo and installed parts from other brands of bikes to make it whole for display.

I'm doing similar, I just want to be able to ride it also.
ATTITUDE ~
The difference between
Ordeal and Adventure
User avatar
JagLite
Teardrop Inspector
 
Posts: 19
Joined: Mon Dec 23, 2019 4:19 am
Location: Anchorage Alaska
Top


Return to Newbies, Introduce yourselves

Who is online

Users browsing this forum: No registered users and 1 guest