20 x 8 Car Trailer Conversion by GaryDee

Converting Cargo Trailers into TTTs

20 x 8 Car Trailer Conversion by GaryDee

Postby GaryDee » Sun Aug 29, 2010 9:30 pm

Hello everyone! I wish we would have found this site before I started my conversion. It would have been a great help. We wanted a "toy hauler" style of camper to bring our golf cart with us. Not being able to afford a new one, this project started.

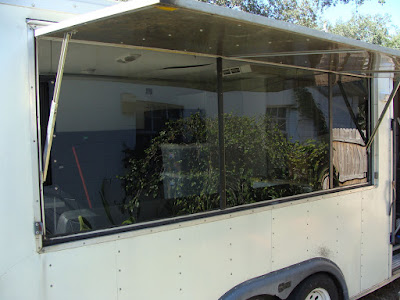
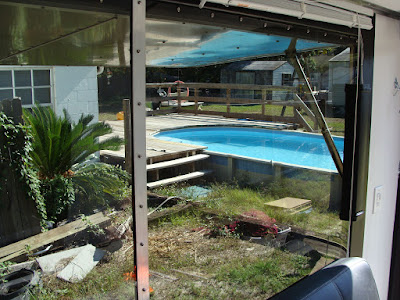
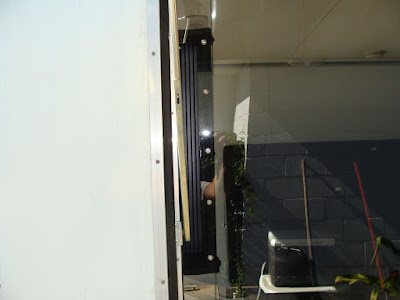
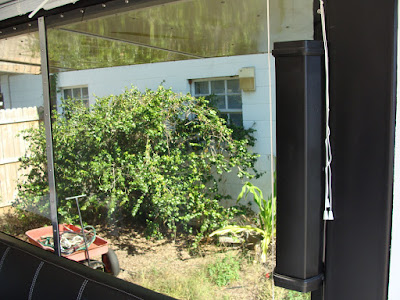
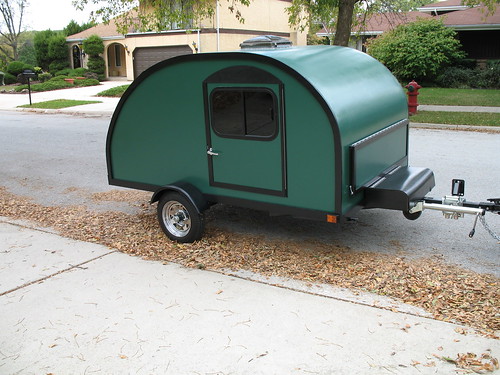
This started it's life as a 2000 - 20' Pace car trailer that I bought used and retired from my business. Lucky, this trailer has a flip open door that will work perfectly for a nice, big bay window.

I have had many campers in the last 20 years; class "A's, C's, and 5th wheels. All of our camping is done in state parks or camp grounds that have available AC power and dump stations near by. Because of this, I built this trailer around the way we use it.

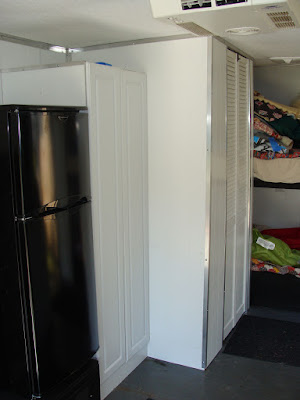
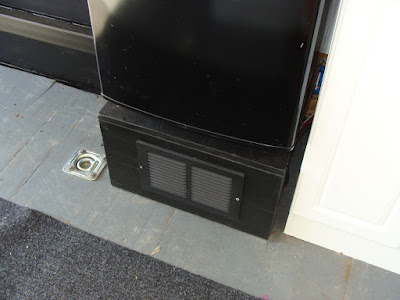
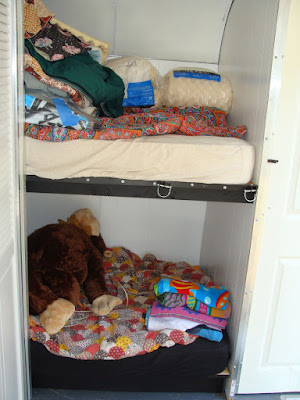
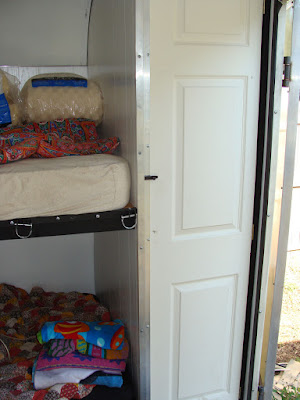
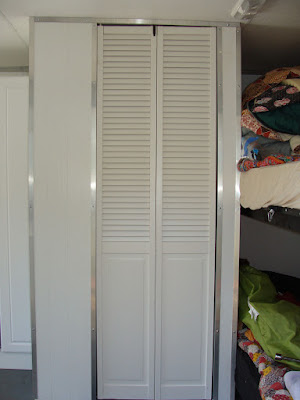
I'm no professional with wood,cabinets or electricity, but your typical "shade tree" weekend tinker. Here are some pictures of the start of the project;


Image

Image

Image

I will say I tried posting this build on another site with little interest. This site may be more appropriate.
GaryDee
Teardrop Inspector
 
Posts: 9
Joined: Wed Jun 02, 2010 3:15 pm
Location: Florida

Postby bdosborn » Sun Aug 29, 2010 11:28 pm

Looks like you've got a good trailer to work with. Good luck and post lots of pictures of your build! :thumbsup:

Bruce
2009 6.5'X11' TTT - Boxcar
All it takes is a speck of faith and a few kilowatts of sweat and grace.
Image
Boxcar Build
aVANger Build
User avatar
bdosborn
Donating Member
 
Posts: 5495
Images: 772
Joined: Wed May 05, 2004 11:10 pm
Location: CO, Littleton

Postby Curtis in Texas » Mon Aug 30, 2010 11:30 am

I reading 20" and thinking WOW! That's a big trailer!
Then reality hit me and I realize it's only 3 feet longer than mine...... :oops:

Looking forward to the build.
Document it all with pictures.
The side drop down doors would make for a nice drop down bed for the youngun I see in the Golf Cart.
Curtis in Texas
Teardrop Advisor
 
Posts: 51
Joined: Thu Aug 06, 2009 5:18 pm
Top

Hello

Postby ho-do » Mon Aug 30, 2010 12:39 pm

I also converted a 8x20 Pace (2004) model. You can see some pictures in the Album link. Main under the thread "Recirculating Toilet". Hope al works well with your rig. This past weekend we installed an electric lift for the hitch, but it won't work!! Bought it at Camping World. Will take it back to them this weekend to find out why it won't work.
ho-do
Teardrop Builder
 
Posts: 46
Images: 18
Joined: Wed May 26, 2010 2:23 pm
Location: Harvest, Alabama
Top

Postby rebapuck » Mon Aug 30, 2010 3:20 pm

At 20', I'm thinking the youngun can have his own room.
Judy
1966 VW camper
1967 VW singlecab
Image
User avatar
rebapuck
.
 
Posts: 2243
Images: 1
Joined: Thu May 14, 2009 1:55 pm
Location: Chapel Hill NC
Top

Postby GaryDee » Mon Aug 30, 2010 3:50 pm

Thanks for the reply's everyone. Your going to get a lot of pictures quick to catch you up on the build.

My original thought was to have the bunks at the door end, but it did't work out that way. I decided on bunks on the front and fold down futons toward the rear.

We (the wife and I) coated the floor with a wood/porch sealant. I figured it would be good to get at least one coat on the floor before the walls went up. It covered up the old stains perfectly.

I pulled the inside roof and side panels out to run the wiring. Lots of 115V receptacles any place I think we would need them. Also installed two outside in waterproof covers (rear and front) and one that will be switched for underneath "rope lights" that will be installed out of sight for indirect lighting. At the kids "bunks" I used receptacles with built in "nightlights" - pretty cool! All GFI.

Also run was the wiring for the low voltage lighting, switches and inverter. Again, lots of lights.

Fuse box (waterproof box), electrical hook-up and battery for the low voltage is outside in the front.

Also ran water lines for the sink, front shower and toilet. I liked the idea of these lines not hanging under the trailer.

The one thing you will notice with the pictures is the construction of a car trailer. The only wood (not particle board) is the floor and side paneling. Metal trusses on a solid metal roof (much like a semi truck trailer). Side up-risers all metal. This is one of the reasons I decided to do the conversion. After seeing many "rotted" used haulers, this would be more solid - and yes.. heavier. Still, it will be no issue for my F250.


Image

Image

Image

Image
GaryDee
Teardrop Inspector
 
Posts: 9
Joined: Wed Jun 02, 2010 3:15 pm
Location: Florida
Top

Postby pete42 » Mon Aug 30, 2010 4:24 pm

Welcome and keep posting I read almost everyday.
I'm still in the waiting stage.

Pete
User avatar
pete42
Super Lifetime Member
 
Posts: 2203
Images: 13
Joined: Sat Nov 07, 2009 11:52 am
Location: SouthWest Ohio
Top

Postby GaryDee » Thu Sep 16, 2010 10:43 pm

Here a little more catchup. The wife insisted on paneling for the walls. Lowes had panels for about $12 a sheet so it wasn't bad. Very easy to cut with a sharp razor knife. These were then stapled for the existing wall wood.

Image

I also taped all the open seams before putting the walls up. The dove-tail in the rear was a pain. The bigger 3/4 inch wood squares on the front part ceiling is where the closet and bathroom wall studs will attach.

Image

Image

This is the front where the kids front bunks will be. They both have there own nite-light/receptacle and regular light for reading.

Image

Some of the aluminum trim was on the trailer from the factory, but I had to add more. It does give it a nice finish.

Image

Unfortunately, I will jump way ahead here - some pictures with the bathroom walls up, trim and toilet. After I did the exhaust fan setup, I saw someone else had the same idea. I did not want to put holes in the roof, so three 3.5" computer fans work perfect. The outside of the hole is a "hood-vent" with the little close-able flap. The fans push it right open and you can feel the airflow.

Image

Image

Image

The toilet will be rasied.
Image

More to come.....
GaryDee
Teardrop Inspector
 
Posts: 9
Joined: Wed Jun 02, 2010 3:15 pm
Location: Florida
Top

Postby vtx1029 » Fri Sep 17, 2010 3:17 am

Looking good!

You can check out my trailer I put bunks in the front of! One of the best things we ever did!
http://www.tnttt.com/viewtopic.php?t=36850

I would turn that flip down window into a bed too like the ones on this site!

http://www.livinlite.com/VRV-gallery.php
User avatar
vtx1029
Teardrop Master
 
Posts: 251
Images: 70
Joined: Fri Apr 23, 2010 11:42 pm
Location: MN
Top

Postby GaryDee » Fri Sep 17, 2010 6:29 am

Nice on the bunks vtx - that was my plain for the lower one, to tilt up for more storage. The trailer with the fold-out is really neat. Just a little too much for this shade-tree tinkerer! I do like the way that one looks.
GaryDee
Teardrop Inspector
 
Posts: 9
Joined: Wed Jun 02, 2010 3:15 pm
Location: Florida
Top

Postby GaryDee » Thu Dec 02, 2010 10:02 pm

[color=green]Sorry I have not updated this in a while. But I pretty much finished it up and we even did a camping trip in it without real issues! Here are a couple of highlights.

The seating / bed for the wife and I consists of two “click-clackâ€
GaryDee
Teardrop Inspector
 
Posts: 9
Joined: Wed Jun 02, 2010 3:15 pm
Location: Florida
Top

Postby GaryDee » Thu Dec 02, 2010 10:37 pm

The window took some thought. I wanted to keep the door that closed over the opening, while still keeping the ratcheting arms that holds it open.

I used ¼ inch smoked acrylic (plexi-glass). I chose this over Lexan because it a little more ridged, plus will not scratch as easy. I was told with Plexi, if it gets scratched you have a better change of being able to rub it out than lexan, a another plus.

The Plexi was purchased in three pieces to match the seams in the window door. I figured if the trailer flexed any with the door closed, it would be on top of the brackets and protect the Plexi better.

I welded the steel strips to the metal around the opening. Using black silicone around the whole frame the Plexi fit perfectly. To hold it on the inside, I used aluminum strips and stainless steel screws tapped into the metal strips. The window was also bolted around the perimeter. All holes drilled through the Plexi were drilled larger than the bolts to allow expansion and contraction of the window.

Image

Image

The brain-knocker came from how to cover the door arms (that hold the flip-open door). When the window door is closed, they protrude inside the window opening. After canvassing the local Lowie’s for three of four times it hit me. What you see in the pictures is plastic gutter with end caps. It worked perfect!

Image

Image


GaryDee
Teardrop Inspector
 
Posts: 9
Joined: Wed Jun 02, 2010 3:15 pm
Location: Florida
Top

Postby Ctcanuck » Thu Dec 02, 2010 11:01 pm

Nice work GaryDee. Great ideas!!! :thumbsup:
User avatar
Ctcanuck
Teardrop Inspector
 
Posts: 15
Joined: Mon Nov 29, 2010 11:01 am
Top

Postby GaryDee » Thu Dec 02, 2010 11:57 pm

We did cheat a little when it came to the cabinets. We purchased pre-fabbed ones for the pantry and sink. A flat screen computer monitor sits on top of the fridge that hooks up to an old laptop for playing movies. There are mini speakers I picked up from Good Will (not pictured - two in the rear, one over the sink facing the couch) attached to the ceiling. A small amp powers them through the laptop.

Image

The box that the refrigerator sits on has the 115V to 12V power inverter / charger and fuses for the 12V lighting.

Image

Here’s is how the bunk area turned out for the kids. The brackets with the pins on the second bunk are for the ladder. I used a cheap folding ladder and cut the back legs off. It fits into the brackets and gets pinned. The neat thing, it can still fold flat for storage. The pantry to the right is the largest. The door is a single from a bi-folding door.

Image

Image

Here is the finished bathroom door.

Image

Pedestal for the toilet.

Image

My original thoughts were to attach a permanent black water tank to the underside of the trailer between the frame rails. But the frame of the trailer would make me position the toilet too far away from the wall. Plus, these trailers sit very low, not leaving much room for dump drain plumbing.

What I decided on was a low-profile portable drain tank to slide under the trailer. It works perfect! I can even pull it behind the golf cart to take it to the dump station. It's something like 14-16 gallons - we used it for all weekend without an issue.

Image

The reason for the low profile toilet and building the pedestal to set it on was so I could have room under it to build a vent for the portable tank. I was concerned about fermenting waste odors seeping back inside the camper. The vent comes off a plumbing T to the outside of the trailer, inside of an electrical access door I installed.

Image

Here is the hook-up under the camper. I have a short dump hose that connects between the toilet and the tank.

Image

Well that's about it. I still have some little things to finish on it (if you study the pictures, you can pick out some unfinished odds and ends). We have another weekend jaunt coming up before Christmas... I can't wait! Have a good Holiday! - GaryDee

GaryDee
Teardrop Inspector
 
Posts: 9
Joined: Wed Jun 02, 2010 3:15 pm
Location: Florida
Top

I love how simple

Postby Crazylegs » Fri Dec 03, 2010 3:11 am

Great job on the bed couch that is so simple. You Rock


I picked this up for 10$ at an RV shop and it works well but to narrow. I am working on it. I love your idea, "simple"

Image

Image

I just need to put my new extension on the back. I was trying to make it like th fold and tumble beds in the toy haller.
User avatar
Crazylegs
Teardrop Advisor
 
Posts: 51
Images: 72
Joined: Tue May 04, 2010 12:50 am
Location: Salem Utah
Top

Next

Return to Cargo Trailer Conversions

Who is online

Users browsing this forum: No registered users and 25 guests