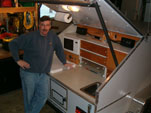
Gadget Mans Adventure Trailer Photos

Converting Cargo Trailers into TTTs

Postby Gadget Man » Wed Jan 25, 2012 3:47 pm

Johnnie

No worries on any give or flex on the floor mat, it's only about 1/8 inch thick and very dense. I did remove the aluminum wall trim that was way down on the floor and tried to cut the rubber mat to fit as tight as I could get it, but after about a week of laying in the trailer in the summer heat it started to bubble up a bit in the center due to expansion, so I removed the floor trim and trimmed about a 1/4 inch off the one side. Then it fit fine and laid perfectly flat. But now in the cold Minnesota winter I can see it has shrunk and pulled about a 1/4 inch away from the wall. I'm glad I did not glue it down at all, because I have come to the realization that it will be a floating floor and it will shrink and expand with the seasons. I'm OK with that.
I did remove the floor trim right in the door way and placed the mat under this trim. I didn't want to trip on it in the doorway.

And as far as my bike tie downs, I have not placed them yet.
Once I finish the entire build, I'll go to a truck scale and weight the trailer loaded with the heaviest bike I have. I'll then calculate my tongue weight and place the bike wheel chock in the exact spot to keep my tongue weight at about 10% of total trailer weight. Then I'll place the tie downs exactly where they need to be. More forward will add tongue weight and further back will lessen tongue weight.
My Road Star weights over 800 pounds and my Dual-sport BMW only weights about 400 pounds, so it will still be a bit of a guessing game.
I have a pretty good idea of where they will be. One will be just inside the door right under my power converter, one may actually be inside the bathroom. I'll buy the style that will bolt down on top of the rubber mat and be bolted through the floor with about a 5x5 inch metal backer plate underneath the 3/4 inch plywood floor. Or if I'm lucky enough to land on top of a frame rail, I can bolt straight through that.

Gadget Man
My kids may be smarter than me,
But I know more.
User avatar
Gadget Man
Teardrop Master
 
Posts: 298
Images: 23
Joined: Tue May 10, 2005 4:41 pm
Location: Elk River MN

rolling bench

Postby cam_tx » Wed Jan 25, 2012 11:13 pm

Gadget,

I would mind some plans for that rolling bench. It looks to me like it could be easily converted to a brewing stand for my brewing adventures.
Even still it is what I need for additional practice before I start on my cargo conversion.
Thanks,
Andrew
User avatar
cam_tx
Teardrop Inspector
 
Posts: 24
Joined: Thu Jan 05, 2012 1:20 pm
Location: Houston, TX

Postby Gadget Man » Thu Jan 26, 2012 8:12 pm

Andrew
Sorry I don't really have any plans for my welding table, but I can tell you how I built it and a few things I would change if I ever built another one.
First thing you have to do is find the plate steel for the top. I went to my local metal shop and was looking for a piece of 1/2 inch plate for the top. After I figured out that I couldn't even lift a piece of 1/2 inch, I decided on a 3/8 inch top. Then I started looking thought the scrap pile of pieces already cut. They had one that was 36x24 inches. Perfect. because I knew I wanted part of the top to be grated for my Plasma Cutter.
Then the entire frame is mad from 2x2 square stock. The bottom shelf was custom cut 1/8 inch sheet.
The thing you need to be able to do if you are building a welding table is clamp stuff to the edge. So I started with a 1 inch angle iron frame and ran that right up to the edge of the 36 x 24 plate, so the edge is the 3/8 plate and the 3/16 angle iron. Then I welded the 2x2 square legs into the 1 inch angel iron frame. I wish I would have gone with 1.5 inch angle iron around the edge so I would more room for bigger clamps.
I made it about 37 inches tall since I'm 6 foot 2.
Remember to subtract the height of your caster wheels from the height you plan to cut your legs. I put about 3 cross 2x2 braces under the top.
This table weight about 300 pounds and I know you could park a truck on it no problem.

I hope this helps some

Gadget Man
My kids may be smarter than me,
But I know more.
User avatar
Gadget Man
Teardrop Master
 
Posts: 298
Images: 23
Joined: Tue May 10, 2005 4:41 pm
Location: Elk River MN
Top

Postby Gadget Man » Thu Jan 26, 2012 11:36 pm

Here are a few shots of how I built the table.

Image

Image

Image

Image

Image

Image

Gadget Man
My kids may be smarter than me,
But I know more.
User avatar
Gadget Man
Teardrop Master
 
Posts: 298
Images: 23
Joined: Tue May 10, 2005 4:41 pm
Location: Elk River MN
Top

Postby Fung » Wed Feb 08, 2012 8:48 am

Wow! What a great trailer build !
Fung
Teardrop Inspector
 
Posts: 10
Joined: Thu Aug 25, 2011 10:25 pm
Location: Stillwater,mn
Top

Re: Gadget Mans Adventure Trailer Photos

Postby cam_tx » Thu Feb 16, 2012 5:28 pm

Thank you for the information. I am now trying to track down the raw materials and will try and start it in about a month. Too many other projects in front of it.
User avatar
cam_tx
Teardrop Inspector
 
Posts: 24
Joined: Thu Jan 05, 2012 1:20 pm
Location: Houston, TX
Top

Re: Gadget Mans Adventure Trailer Photos

Postby Gadget Man » Sun Feb 19, 2012 6:16 pm

Hey, My avatar is back, Thanks to whoever did that for me, Mike...? Thanks.
I tried a couple times and couldn't figure out how to do it. I feel better now, I can sleep again.

Gadget Man :applause:
My kids may be smarter than me,
But I know more.
User avatar
Gadget Man
Teardrop Master
 
Posts: 298
Images: 23
Joined: Tue May 10, 2005 4:41 pm
Location: Elk River MN
Top

Re: Gadget Mans Adventure Trailer Photos

Postby Gadget Man » Sun Feb 19, 2012 6:40 pm

Quick project today.
I wanted to dress up the bathroom area and break up the solid white wall. So I put up some oak wainscoting in the bathroom.
This whole thing cost me less than $15.00 for the single sheet of oak wainscoting and the top trim piece.
I had thoughts of doing this all the way around the entire trailer, so I thought I'd start here first and see how it looks.

Today I measured and cut the 1/8 inch sheet and the top oak trim cap. I still need to mount it plus make a trim piece to go vertically where the seam is.
I stained it an will have to wait till next weekend to mount it.
I removed the factory screws holding up the white wall panels so the wainscoting will lay flat against the wall. I'm not sure if I should use Liquid Nails to hold it up plus replace the factory screws or if the screws would be enough...?

Since I haven't posted any progress for the last couple weekends I thought I'd throw these pictures out and see what you guys thought.

Image

Image


Image

Image

Image

Image

Gadget Man
My kids may be smarter than me,
But I know more.
User avatar
Gadget Man
Teardrop Master
 
Posts: 298
Images: 23
Joined: Tue May 10, 2005 4:41 pm
Location: Elk River MN
Top

Re: Gadget Mans Adventure Trailer Photos

Postby pete42 » Mon Feb 20, 2012 9:35 am

That's going to make your trailer look terrible,
so much so that I'm willing to help you out, meet me in Chicago and I'll take it off your hands
just so you won't have to look at it a minute longer...........................


Does anyone think he bought that? :lol:

when I show others what a cargo trailer can look like I always bring up your post.
it will and does look good keep it going. :applause: :thumbsup: :beer:

pete
User avatar
pete42
Super Lifetime Member
 
Posts: 2203
Images: 13
Joined: Sat Nov 07, 2009 11:52 am
Location: SouthWest Ohio
Top

Re: Gadget Mans Adventure Trailer Photos

Postby Gadget Man » Mon Feb 20, 2012 10:14 pm

Pete, come on now...
This little wainscoting is a simple sheet of oak that will be glued to the wall.
But it goes to say how little details can add up to a great looking trailer. It's the "Kennedy Overkill" factor that has always been our family motto.
You can see it's in my own garage shop if you look at the photo of the stained panels standing up on my bench, I have my name on a sticker above the paper-towel holder :D

I'm still dragging my feet on my folding Murphy Bed design. That's the last thing I have to do.
I'm still thinking of building a fold-up sofa bed combo for each side. But now have thoughts of building a simple fold up bed on the drivers side and actually buying (say it isn't so) a fold up Jack Knife sofa bed for the right side. I've found a few on line, but they start at about $500. plus shipping.OUCH !!!!!


Gadget Man
My kids may be smarter than me,
But I know more.
User avatar
Gadget Man
Teardrop Master
 
Posts: 298
Images: 23
Joined: Tue May 10, 2005 4:41 pm
Location: Elk River MN
Top

Re: Gadget Mans Adventure Trailer Photos

Postby pete42 » Tue Feb 21, 2012 7:59 am

If and when my health improves and I get a cargo trailer
I would like a couple of fold up beds on each side near the rear of the trailer with a small aisle between them.
I want a trailer wide enough that would allow me to get up during the night with crawling over and waking her.
I'm almost 70 and those late night trips to the water closet are more frequent than when I was a baby. :cry:
User avatar
pete42
Super Lifetime Member
 
Posts: 2203
Images: 13
Joined: Sat Nov 07, 2009 11:52 am
Location: SouthWest Ohio
Top

Re: Gadget Mans Adventure Trailer Photos

Postby Gadget Man » Tue Mar 13, 2012 9:18 pm

Quick update...
I have been really struggling with how to do my fold up couch/sofa /beds. I had planned on building fold up Murphy beds. I had already bought 4" memory foam mattresses.
Plan-A. was to wrap them with cotton batts and sew up my own covers they would be very comfy, but, yes lots of work.

Plan-B. was to build one Murphy bed for the left side and buy a fold up Jack Knife sofa for the right side up until I started to check the prices, Ouch. $$$$$
The cheapest ones I could find were $500.+ shipping. That's why I've been dragging my feet on making a decision.

Plan-C. just fell into my lap just yesterday while poking around on E-Bay I found a matching pair of fold up Jack Knife sofa beds for sale for $199. each. I bought them both. They are now being shipped to my house. Done deal. Now I hope I can return the (8) 1x8-8 foot oak boards stacked up in my garage (about $200. worth) I still plan on building some nice oak side shelves around the sofas and a rear closet just to stick with my oak theme.

I also found one other little gem on E-Bay... a 22 inch flat panel TV with built in DVD player that will run on both 120 volts AC and 12 volts DC. for $219. with free shipping. and
a nice wall mounting bracket for $22.50 with free shipping. Now I need the roof antenna.

Gadget Man
My kids may be smarter than me,
But I know more.
User avatar
Gadget Man
Teardrop Master
 
Posts: 298
Images: 23
Joined: Tue May 10, 2005 4:41 pm
Location: Elk River MN
Top

Re: Gadget Mans Adventure Trailer Photos

Postby pete42 » Wed Mar 14, 2012 7:40 am

Good things come to those who wait.............Or nice find on the beds
User avatar
pete42
Super Lifetime Member
 
Posts: 2203
Images: 13
Joined: Sat Nov 07, 2009 11:52 am
Location: SouthWest Ohio
Top

Re: Gadget Mans Adventure Trailer Photos

Postby Pyrofish » Thu Mar 15, 2012 7:34 am

My girlfriend was leery of the cargo trailer conversion when I told her my plans. Now that we've camped in it a few times, she's come around, but it's in varying stages of completeness. The other day, as more and more things get done, she remarked, "You're so handy!"... she will never see this thread, lest her faith in my handy-ness be shaken permanently... Great looking trailer! :applause:
User avatar
Pyrofish
Teardrop Master
 
Posts: 182
Images: 14
Joined: Thu Jun 02, 2011 8:53 am
Location: Mims, Fl
Top

Re: Gadget Mans Adventure Trailer Photos

Postby pappaw » Thu Mar 15, 2012 11:11 am

Hey GM, your trailer looks super nice.

I have some questions:

Where did you get your breaker panel, your water tanks, your battery box, and your battery box vent items?

Sorry, and thanks.

Jeff
Image Cheers from Granny, Pappaw, and Cocoa (the Dachshund) Image
pappaw
Teardrop Master
 
Posts: 240
Images: 14
Joined: Mon Nov 22, 2010 12:15 pm
Location: S.W.Ohio
Top

PreviousNext

Return to Cargo Trailer Conversions

Who is online

Users browsing this forum: No registered users and 9 guests