Kankujoe,
Check out these pictures, it sounds like you are looking to do something similar like a toyhauler / camper.
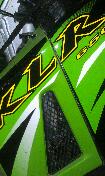
Today I rode the BMW into the back of the Adventure Trailer.
It fits just as well as I had hoped. First I had it dead center. this will work fine when my wife go alone and take the full sized 800 pound Road Star or the BMW Dual-Sport.
Then I removed my hard bags and moved the bike closer to the wall so I could figure out how well two bikes will fit inside. There will be no problem. I may stagger the handle bars to make them fit even better. The right side bike will be set-back about 1-foot. There may someday be a cabinet mounted on the right sidewall in front near the door.
I originally started to look at a 6 x 12 single axle trailers, then once I decided I was going to use a tandem axle I started to think 7 x 14.
I then looked at a 2 foot V nose, that was a little small, then I looked at a 4 foot V nose, I didn't like the look, it was to pointed. So the perfect middle ground was the 3 foot V nose.
I plan on using the removable wheel chock and two front tied down on the floor. The bikes will always be in the exact same place so I won't need adjustable tie downs.
On the Murphy beds, I have 80 inches to work with, so I plan on making two separate beds, both about 32 inches wide, so that will give me 4 inches in between the beds. Remember the two Murphy Beds will be about 6 inches wide. There will be times when I camping with my Son or my Brother, neither of which I'm planning to share a bed with.
I'm not worried about the towing thing...this is our 9th camper and this is much smaller than our last 21 foot Desert Fox toy hauler camper we had, that thing was like a sail, but it is much larger than our Weekender Teardrop style trailer that I built 3 years ago.
So here are the pictures of the BMW in the trailer.
Then a photo of it moved over so I can fit 2 full sized Dual Purpose bikes.
There is a picture of the removable wheel chock.


Gadget Man
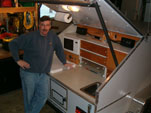
 ). I don't think I will be able to build cabinets quite that nice with the tools/equipment I possess at this time. I think I'll have to look for storebought to fit as best as possible.
 I think the a/c, insulation, and bed/seating will be the most important things at least initially.


 [/url]