Poppy's Toybox / Toyhauler Build

Converting Cargo Trailers into TTTs

Poppy's Toybox / Toyhauler Build

Postby Dirtclod » Mon Dec 31, 2012 5:16 pm

Short time poster but long time lurker here and its about time that I come out of the shadows and admit that I am hooked on this site. Maybe inspired is a better word. Some of the builds that you guys have done have pushed me over the edge and I am starting down that slippery slope of converting a cargo trailer into a toy hauler / camper. To borrow a phrase from someone else on this site a “Tramper”.

I really wanted to name the build the old gray tramper but my wife really wasn’t too keen on that idea. :thumbdown: . So for now we will go with the “Toybox” as we have a few toys that we like to haul around and play with. :twisted:

Image

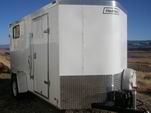
Ordered a 7 X 16 VNose Freedom Trailer locally and had it made 6” taller, Narrow Axle, Added 2nd roof vent,(braced one for AC) in a nice gray color (Matches the bike anyway). I got it just after Thanksgiving and couldn’t wait to start.

Image

So far I have added Rear Stabilizer Jacks so I can load bike without the truck being hooked up.

Image

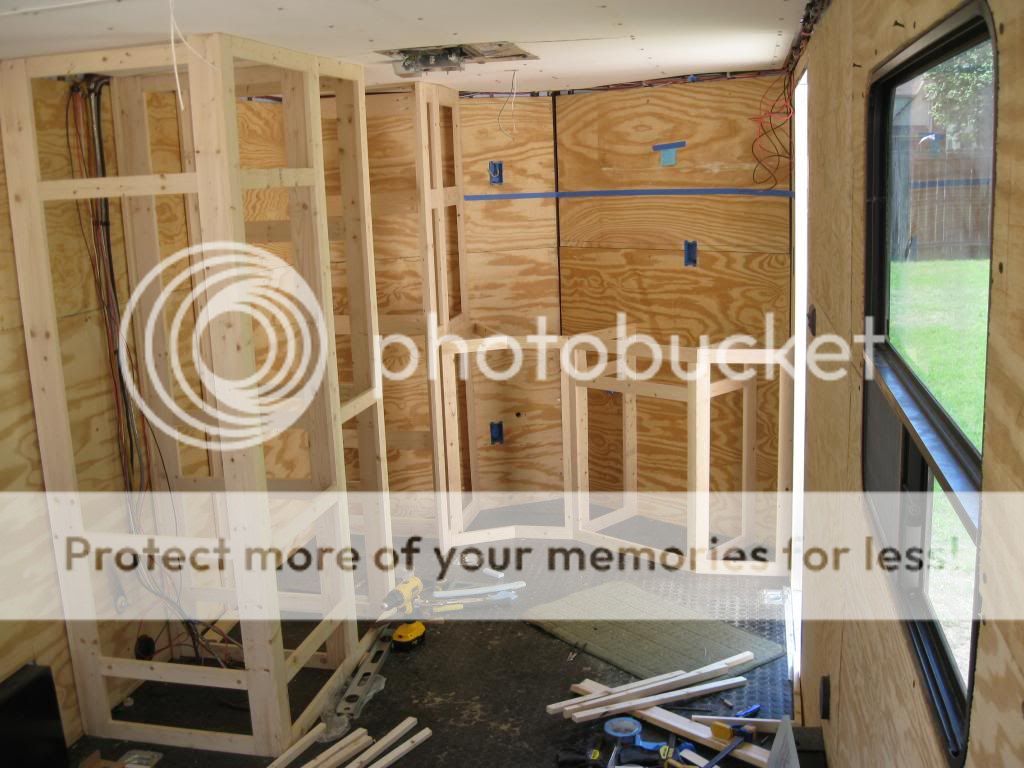
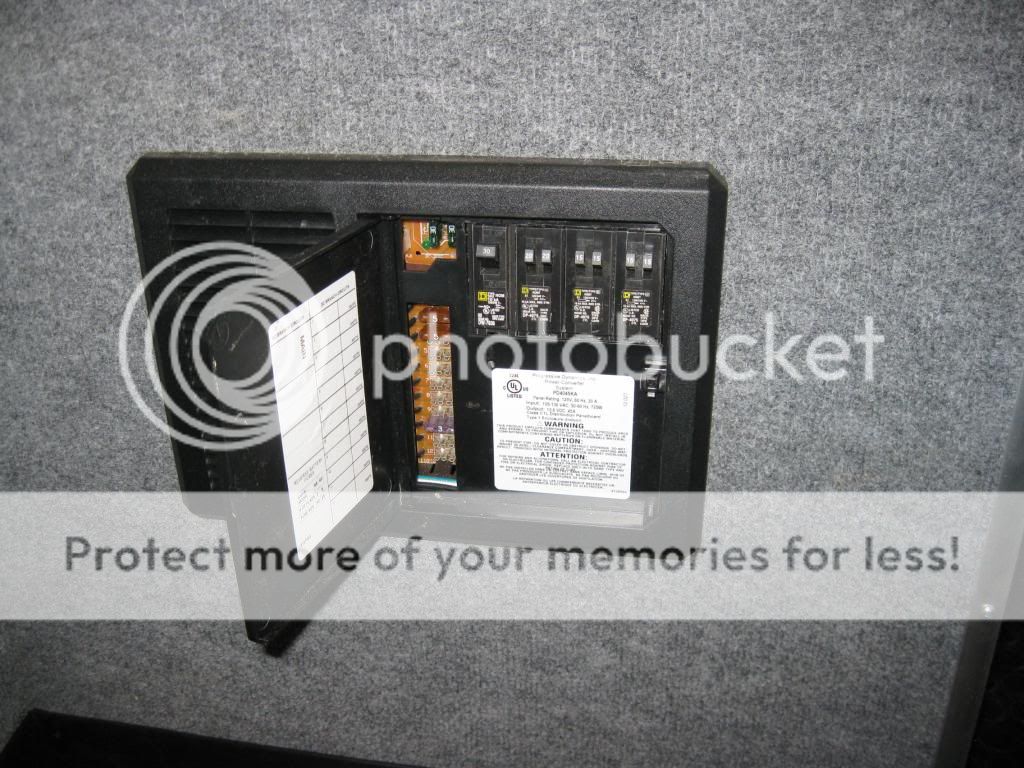
Started Insulating the roof and wired up temporary lights for a trip this weekend that didn’t happen

Image

Bought some windows from a local salvage yard to be installed soon

Image

Bought a few other goodies to install as well but yall will have to stay tuned as I get them installed.

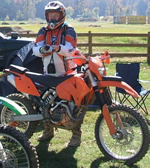
My ultimate goal is to build a trailer to hold 3 guys and 3 Big Dual Sport bikes OR 4 dirt bikes OR bike and a 4 wheeler for the wife all the while having a decent place to sleep when we go to the adventure rider rallies that we like to hit.

Progress will likely be slow as I am working on the walls/insulation/wiring and can only make progress when I can talk the wife into getting out in the cold to help. :NC

I have learned a lot from lurking around here and reading all that I can but be prepared for a volley of "newbie" questions. :oops:
Dirtclod
Teardrop Master
 
Posts: 151
Images: 9
Joined: Tue Oct 16, 2012 6:43 pm
Location: White Bluff TN

Re: Poppy's Toybox / Toyhauler Build

Postby roadinspector » Mon Dec 31, 2012 9:35 pm

Dirtclod,

Welcome!! You have a good start. :thumbsup: Looking forward to keep up with your build. Always interested in new ideas to borrow. :twisted: Plenty of :pictures: please!

As weather permits I am doing what I can too. One thing you might consider that I am going to do is add another 1/2" of insulation between the 1x that is supporting the roof insulation. I have heard that spray contact adhesive will work but my main support for it will be the ceiling material.

Keep up the good work.

Earnest (another proud Poppy)
Dadgum it! I cut that board 5 times and it's still too short!
2001 quad-cab Dodge Cummins 3/4 ton camper special, 16x7x7 CT work in progress toyhauler, 01 HD Ultra Classic, 98 HD Heritage Softail, 88 HD 1200 Sportster. viewtopic.php?f=42&t=51510
User avatar
roadinspector
500 Club
 
Posts: 599
Images: 127
Joined: Wed Mar 24, 2010 10:33 pm
Location: Texas

Re: Poppy's Toybox / Toyhauler Build

Postby Dirtclod » Tue Jan 01, 2013 6:07 pm

Made a little progress today. Pulled the plywood and insulated one half of the walls. :applause:

Image

So why is it that only the parts of the uprights that show were painted? :thumbdown: I have seen other trailer manufacturers do the same thing. Probably saved them a dollar if that.

A couple cans of spray paint took care of it.

Image

About half way through insulating the side it hit me that I havent installed the windows, and a good portion of this insulation will have to be taken back down. DOH !!! Oh well at least its not glued in, only press fit between the studs.

So for you guys that have put in windows, how hard is it? I assume that I will need to frame around the new window with 1in square steel tubing? Or would it be possible to frame the new window with wood?
Dirtclod
Teardrop Master
 
Posts: 151
Images: 9
Joined: Tue Oct 16, 2012 6:43 pm
Location: White Bluff TN
Top

Re: Poppy's Toybox / Toyhauler Build

Postby Gonefishin » Tue Jan 01, 2013 7:34 pm

Good window "sticky" thread at the top of this forum, or here: http://www.tnttt.com/viewtopic.php?f=42&t=32504
User avatar
Gonefishin
Donating Member
 
Posts: 528
Images: 119
Joined: Sat Oct 03, 2009 7:38 pm
Location: NE Utah
Top

Re: Poppy's Toybox / Toyhauler Build

Postby sandman » Fri Mar 01, 2013 12:36 pm

Come on Dirtclod...Quit leaving us in suspense. :? :? :? :?
Get to building that sucker!
User avatar
sandman
Donating Member
 
Posts: 326
Images: 154
Joined: Sat Oct 28, 2006 6:29 pm
Location: Bartlett, TN
Top

Re: Poppy's Toybox / Toyhauler Build

Postby Dirtclod » Fri Oct 04, 2013 2:06 pm

First thing I need to do is throw myself on the mercy of the forum and apologize for not keeping this build updated. :oops:

I started out and things were not progressing as fast as I thought they should and didnt want to bore everyone with one update a month and until the insulation was done all the pictures looked the same. It seemed like it took forever to get the plywood back on the walls. Im sure changing my mind about 6 times didnt help.

I am 90% done now and have lots of pictures of the journey. I know how much you boys like pictures so let me catch yall up on the progress.

So where did I leave off? Oh Yeah Windows !! The windows that my Dad found had no mathchjin trim rings. So I had to mount them from outside. Not pretty, however so far leak proof.

Framed them out with Steel cross braces and 2 sheets of 1/2 plywood to screw the frame to

Image

Scary cutting a BIG hole in a new trailer

Image

Fits like a Glove !!!

Image

From the outside. Sorry dont have a closer pic. Used 5/8 metal cuttingscrews with the rubber washer like you would use for a tin roof. Worked fine. Added cault to each one before seating them and all around the perimeter

Image

While I was cutting holes added some outdoor speakers ( Dont worry I dont play em loud if anyone is around) but at Mtorcycle rallies .. ITS ON !!

Image

I cant remember who I stole the idea of bunk beds across the back from but whoever it was thanks !!. I added vertical Etrack to the back few feet to add a 3rd and 4th bed OR a large shelf for stuff .. helmets, boots, gearbags etc .. Braced the uprights with the steel beams I cut out to make the window.

Image

After finishing the wiring .. Pretty boring stuff. 12/3 for the AC and 12 Ga for the DC cisruits. I buttoned the walls back up (for the 4th time) and added the Etrack

Image[/URL]

Stay tuned .. Flooring, chocks and a trip to East Tn mountains is next.
Dirtclod
Teardrop Master
 
Posts: 151
Images: 9
Joined: Tue Oct 16, 2012 6:43 pm
Location: White Bluff TN
Top

Re: Poppy's Toybox / Toyhauler Build

Postby Dirtclod » Fri Oct 04, 2013 2:44 pm

We had a 3 day Dual Sport Rally over in Tellico Plains so I had to make it usuable long before I was finished so flooring and bike chocks were next.

I went with GFloor coin flooring and it has proved to be very durable and pretty nice. It does expand and contract a bit leaving it bumped up if in the direct sun but will go right back down after it cools. I didnt glue it in because I was scared of how it might react when it expanded. Since I was going to add cabinets and storage along the front I taped off the floor and we added place for 3 big bikes to fit in.

Image[/URL]

Bought 10 heavy D Ring with backing plates from Ebay and screwed these in place.

Image

The chocks came from Northern Tool and are held in place with eye bolts. I bought these deals from Home Depot that are made to put in the floor of a trailer and you can screw and unscrew the eye bolts as needed. These worked out slick as you can take em out or use them if you need to tie anything else in.

http://i880.photobucket.com/albums/ac10 ... ebf9ba.jpg[/IMG]

Image

The trailer worked great that weekend. Hauled 3 big bikes and all our stuff across the state and we had a great time but one thaing was apparent we needed storage. Spaces to just put stuff. Time to build CABINETS. Yep .. Build em from scratch. This was a HUGE undertaking and one that took me what seemed like forever but I got them to look just like I wanted.

First was the cabinet for Fridge, Electircal panel and storage

Image

Framed in a "future" wet bath bathroom. Made it 24 X 32 so it will fit one of those all in one shower toilet combo deals. And base cabinets for the front. I wanted to keep the V nose shape. All pocket screwed and glued together.

Image

AAAGHH ! for some reason the Upper cabinet photo will not upload. Just use your imagination on this one. Same general shape as the lower cabinets just hangin from the wall via large bolts into the steel studs.

All framed up

Image

Thats about all the time I got this afternoon. Sucks when work gets in the way !!

We aint even half way there fellas .. Stay tuned.
Dirtclod
Teardrop Master
 
Posts: 151
Images: 9
Joined: Tue Oct 16, 2012 6:43 pm
Location: White Bluff TN
Top

Re: Poppy's Toybox / Toyhauler Build

Postby OverTheTopCargoTrailer » Fri Oct 04, 2013 2:55 pm

Hey Dirtclod

I think I could handle working at your pace in my old age....
what can you afford to pay by the hour..... :thumbsup: :thumbsup:

are those water proof outdoor speakers ?

Jerry

Hey no fair....you just added 10 more months of work in the last 38 minutes

Fri Oct 04, 2013 11:06 am

to

Fri Oct 04, 2013 11:44 am
User avatar
OverTheTopCargoTrailer
1000 Club
1000 Club
 
Posts: 1628
Images: 0
Joined: Sun Jun 26, 2011 8:53 pm
Top

Re: Poppy's Toybox / Toyhauler Build

Postby Dirtclod » Fri Oct 04, 2013 3:45 pm

OverTheTopCargoTrailer wrote:
are those water proof outdoor speakers ?


Yes sir they are waterproof. They are marine grade ,made to go in a boat. Dyno Audio (I think) they were given to me by a good friend of mine. Thanks Sandman :thumbsup: When sitting right in front of them outside they sound decent. Now the ones I put on the inside ROCK !! :shock: Gotta stay tuned for that episode.
Dirtclod
Teardrop Master
 
Posts: 151
Images: 9
Joined: Tue Oct 16, 2012 6:43 pm
Location: White Bluff TN
Top

Re: Poppy's Toybox / Toyhauler Build

Postby MtnDon » Fri Oct 04, 2013 6:16 pm

Dirtclod wrote:The windows that my Dad found had no mathchjin trim rings. So I had to mount them from outside. Not pretty, however so far leak proof.


With all the other screws nobody will notice the window screws. :D
Our 6x12 deep vee nose cargo trailer camper conversion... viewtopic.php?f=42&t=58336

We have a small off grid cabin we built ourselves in the NM mountains; small PV solar system; 624 watts PV, Outback CC & inverter/charger ... http://countryplans.com/smf/index.php?topic=2335.0
User avatar
MtnDon
2000 Club
2000 Club
 
Posts: 2200
Images: 24
Joined: Sun Aug 19, 2012 10:57 pm
Location: New Mexico
Top

Re: Poppy's Toybox / Toyhauler Build

Postby jwhite » Fri Oct 04, 2013 7:41 pm

Not sure what kind of stereo your going to use inside but I highly recommend a Marine CD/DVD player I have one in my trailer and it has the RCA plugs that you plug into a flat screen TV they have a small remote control and are 160 watts=40 watts per chanel
I also have 2 home stereo speakers and I will tell you it sounds great and it plays the DVD through the stereo
the remote is good up to about 50 ft so you can control the stereo from outside.
I had a Rockford fosgate that I am going to replace with this one, I hope it sounds as good as the old one.
http://www.starmarinedepot.com/jensen-dv2011-marine-stereo-am%2ffm%2fcd%2fdvd.html
I would rather watch a movie in my trailer than in my house.
jwhite
The 300 Club
 
Posts: 479
Images: 46
Joined: Wed Mar 24, 2010 10:11 am
Location: South GA
Top

Re: Poppy's Toybox / Toyhauler Build

Postby Dirtclod » Sat Oct 05, 2013 8:48 am

JC .. I already put the stereo in. I picked up a Sony on a Black Friday deal .. $39 .. It has a remote too but doesn't from outside unless I leave the door open. We took it to Charleston SC 3 weeks ago and one evening it rained and we had to stay inside and watch DVD's too. Hooked the laptop up the Aux port on the stereo and bingo .. Stereo Audio.

Image

Picked up some Yamaha indoor / Outdoor speakers for the inside and these things ROCK. Yeah kinda big but I really wanted something that sounded nice. And these things deliver.

Image

But we are getting ahead of ourselves. More to come later.
Dirtclod
Teardrop Master
 
Posts: 151
Images: 9
Joined: Tue Oct 16, 2012 6:43 pm
Location: White Bluff TN
Top

Re: Poppy's Toybox / Toyhauler Build

Postby tnriverluver » Sat Oct 05, 2013 9:22 am

Just a suggestion, but replace those hex bolts in your tie-downs with carriage bolts. Those are going to be very unpleasant to step on when you have to get up in the middle of the night barefooted! Nice build so far! Looks like you have the exact same carpet on your walls as I have on mine.
User avatar
tnriverluver
Teardrop Master
 
Posts: 162
Joined: Mon Sep 24, 2012 6:16 pm
Top

Re: Poppy's Toybox / Toyhauler Build

Postby Dirtclod » Sun Oct 06, 2013 12:26 pm

tnriverluver wrote:Just a suggestion, but replace those hex bolts in your tie-downs with carriage bolts. Those are going to be very unpleasant to step on when you have to get up in the middle of the night barefooted! Nice build so far! Looks like you have the exact same carpet on your walls as I have on mine.


Hey Tnriverluver, The interior of your trailer was definitely an inspiration on the build. :thumbsup: Just wait ..Mine is not quite a twin of yours but is at least a distant relative ...

Yeah I Realize those bolts are kinda big. The plates are countersunk too but I couldn't find bolts in a hurry before the Rally in Tellico at the time. I still plan on swapping them out ... One day ...

More pics later.
Dirtclod
Teardrop Master
 
Posts: 151
Images: 9
Joined: Tue Oct 16, 2012 6:43 pm
Location: White Bluff TN
Top

Re: Poppy's Toybox / Toyhauler Build

Postby Dirtclod » Sun Oct 06, 2013 7:41 pm

The cabinets turned out to be a very time consuming affair. I not only had to frame in the cabinets but I had to build 13 doors to go with the framing.

Side cabinets for Fridge, Electrical, Coat closet etc. ...

Image

After much discussion with my wife (she won) I decided to go with Gray, Dark Gray and Black for the interior. I wanted orange and black .. OH well. I found some pretty cool looking vinyl on Ebay that looked like Carbon Fiber so I used that as the flat center panels on the doors. I wanted some bling in there so I went with Diamond Plate for a backsplash.

Front cabinets mostly done. (Diamond plate still has blue protective plastic here. )

Image

With most of the cabinetry in I turned to the walls and ceiling. Walls got some indoor / outdoor carpet from Lowe's glued to the original plywood walls. Gave it a real clean look. Thanks Tnriverluvr !!

Image

Had to remove and remount the Etrak again :thumbdown: But its starting to come together.

Image

Installed a Progressive Dynamics PD4045 for power. (Thanks again Sandman !)

Image

More to come
Dirtclod
Teardrop Master
 
Posts: 151
Images: 9
Joined: Tue Oct 16, 2012 6:43 pm
Location: White Bluff TN
Top

Next

Return to Cargo Trailer Conversions

Who is online

Users browsing this forum: No registered users and 10 guests