California 7x16 Toy Hauler Conversion

Converting Cargo Trailers into TTTs

California 7x16 Toy Hauler Conversion

Postby pyramid » Wed Jan 18, 2017 11:23 pm

Hi everyone, I am new to the forum. I have referred to the forum many times thus far into my conversion.

Originally the trailer started out as a nothing fancy 2016 7x16 Carry-On Cargo Trailer. Originally I purchased it to move from Washington to California. Once I had it I decided the heck with it and tore into it.
Image

So I started out and gutted the original paneling in the trailer. I did 1" rigid foam insulation throughout.
Image

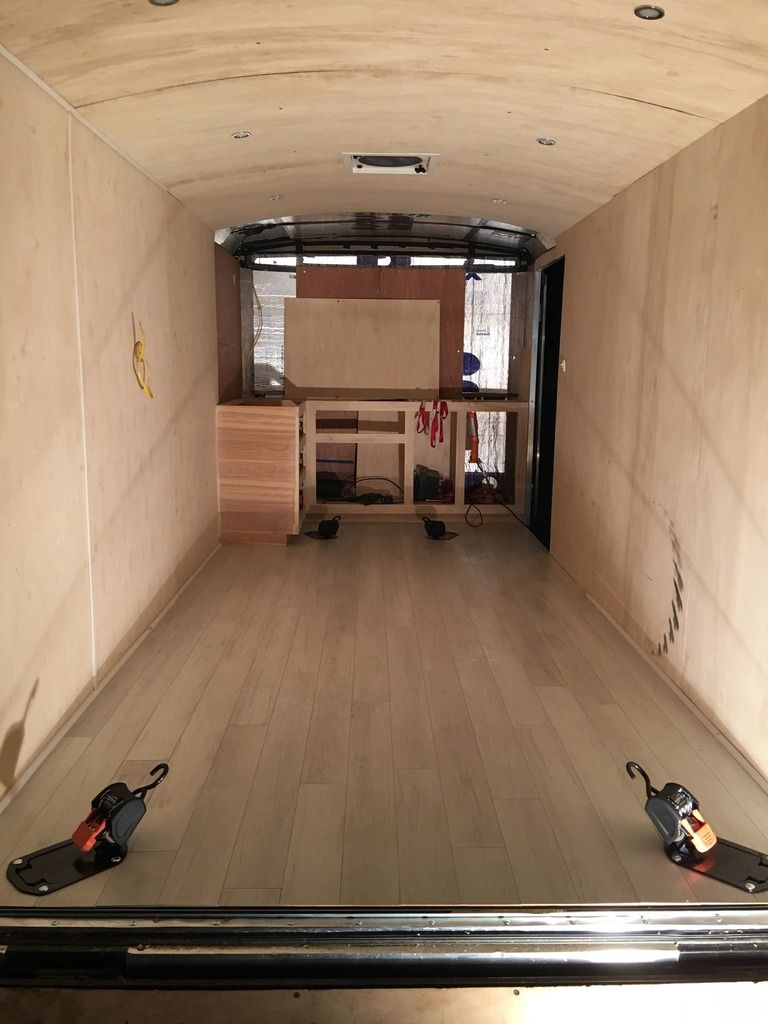
I got a good deal on some laminate flooring and installed that as well.
Image

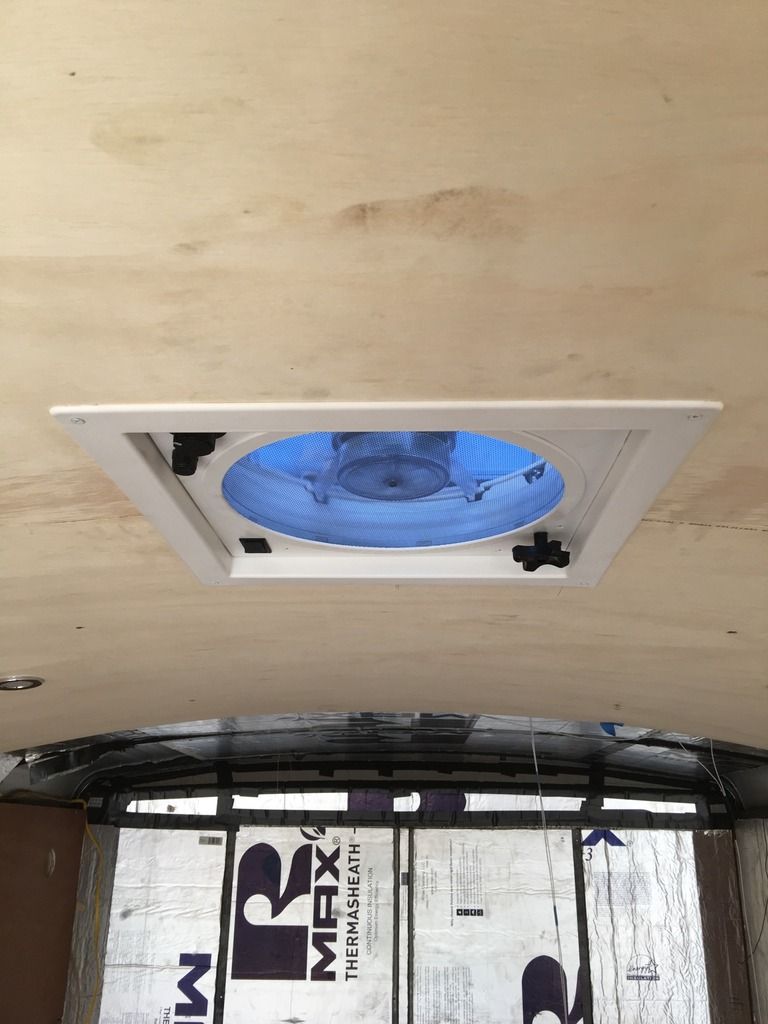
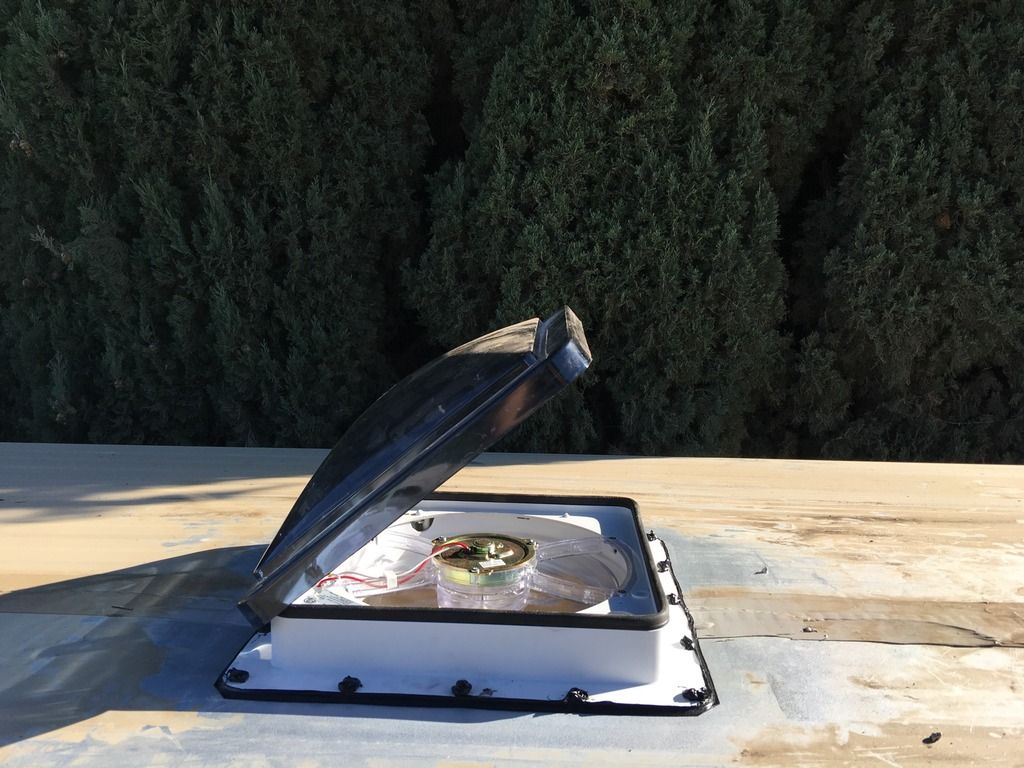
Then I moved on to install the wall paneling. I ran wires for a 110 outlet on one side and installed the roof paneling and LED lighting. Also I got the fantastic vent installed.
Image
Image
Image

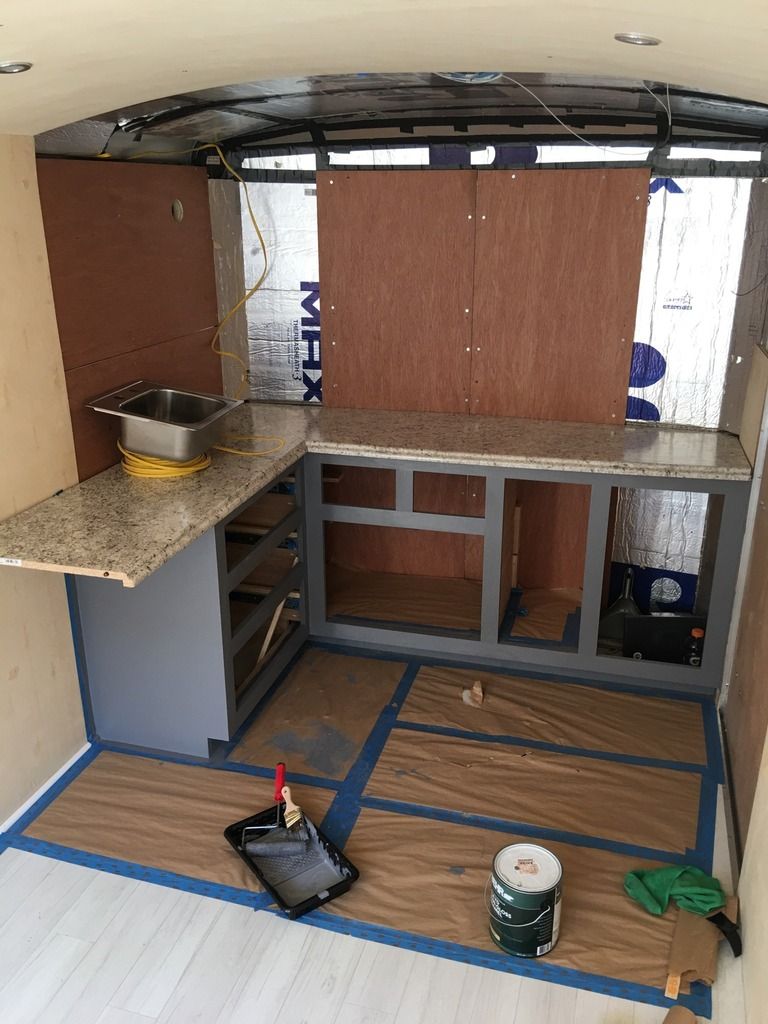
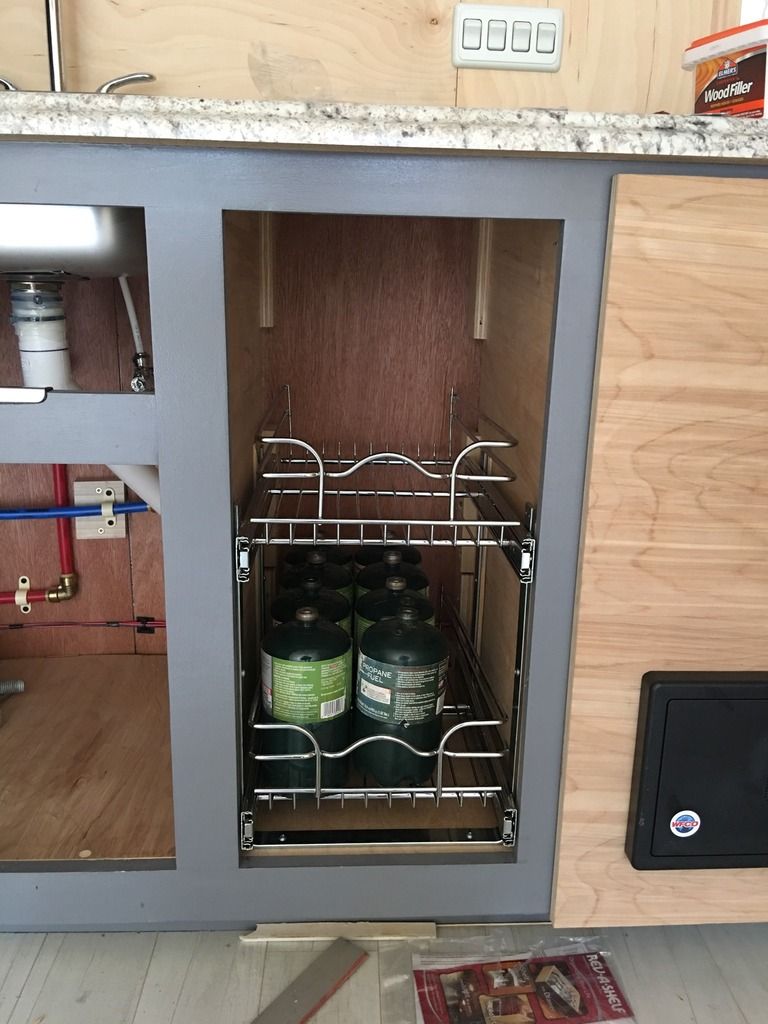
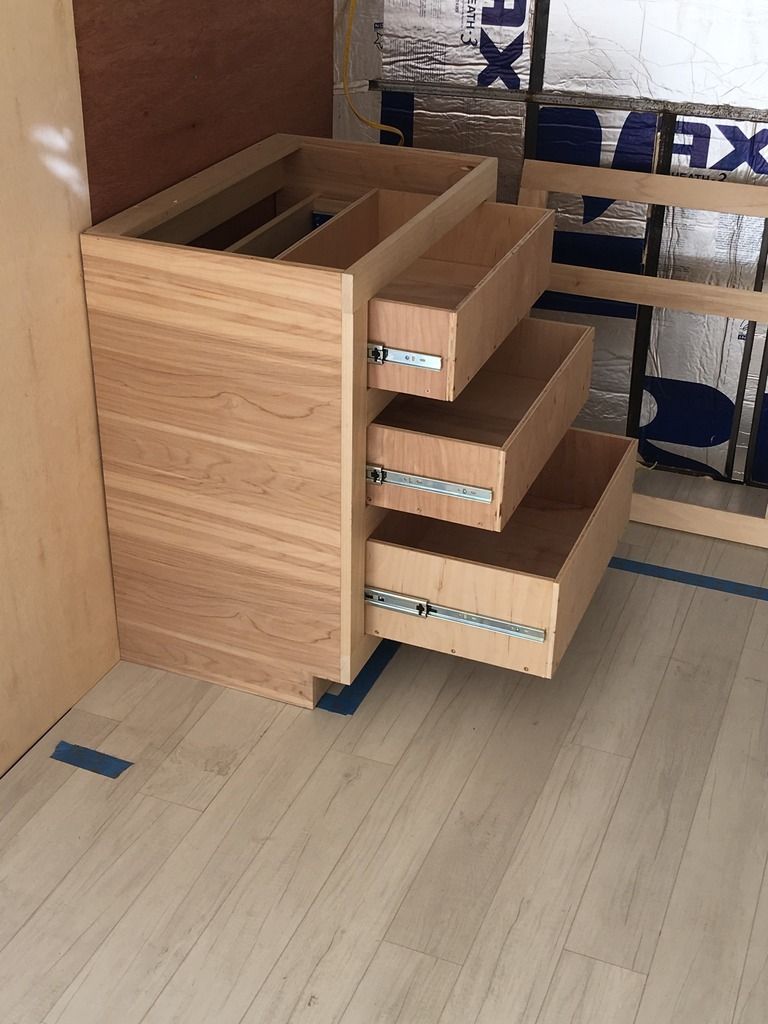
I ended up getting the cabinet configuration I wanted and went to work on that. Three drawers on the left side then a large cabinet at the front with two smaller cabinets to the right. The cabinet farthest right will end up being for my electrical power panel and associated equipment.
Image
Image
Image

Underneath I got two 20 gallon water tanks and plumbed them together. I then made brackets to tuck them between the axles and between the frame rails. I installed a standard rv fill port along with a city water connection. I went inside and installed a shurflo water pump beneath the drawers. I plumbed all interior lines with PEX and installed the sink, faucet, and shower.
Image
Image
Image
Image
Image
Image
Image
Image

Now this is where I am starting to rack my brain. I want to build a shower that is portable and can be used indoors and something that is aesthetically pleasing both erected and stored away. Any ideas would be great.

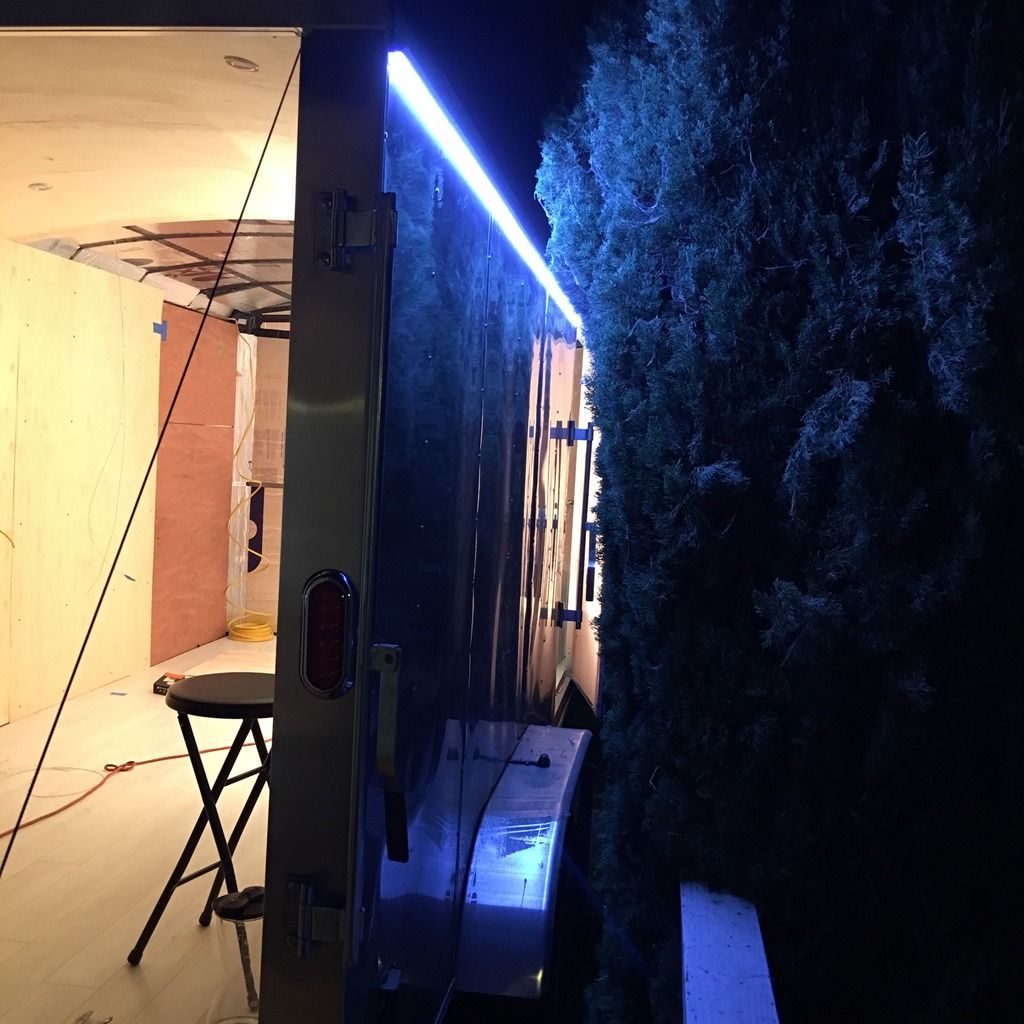
So after the plumbing was knocked out I started to work the electrical. I got the power converter mounted up, the 30 amp outlet installed and ran the 120 to two outlets temporarily. I hooked up all the 12v systems and installed a LED light strip on the side of the trailer.
Image


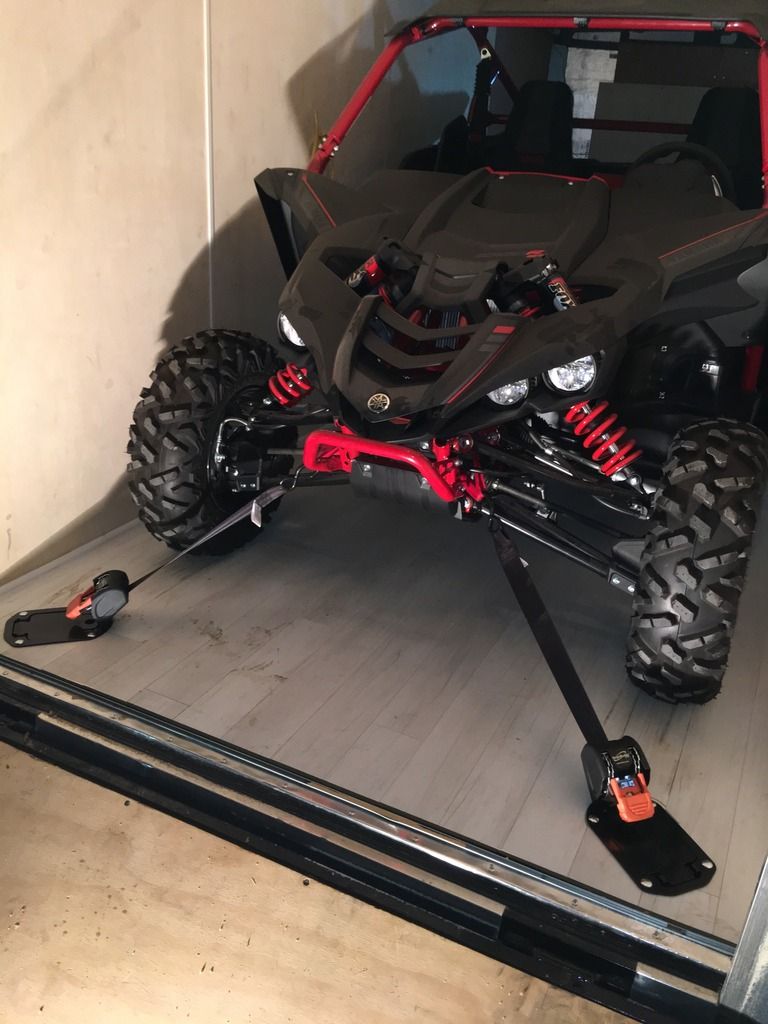
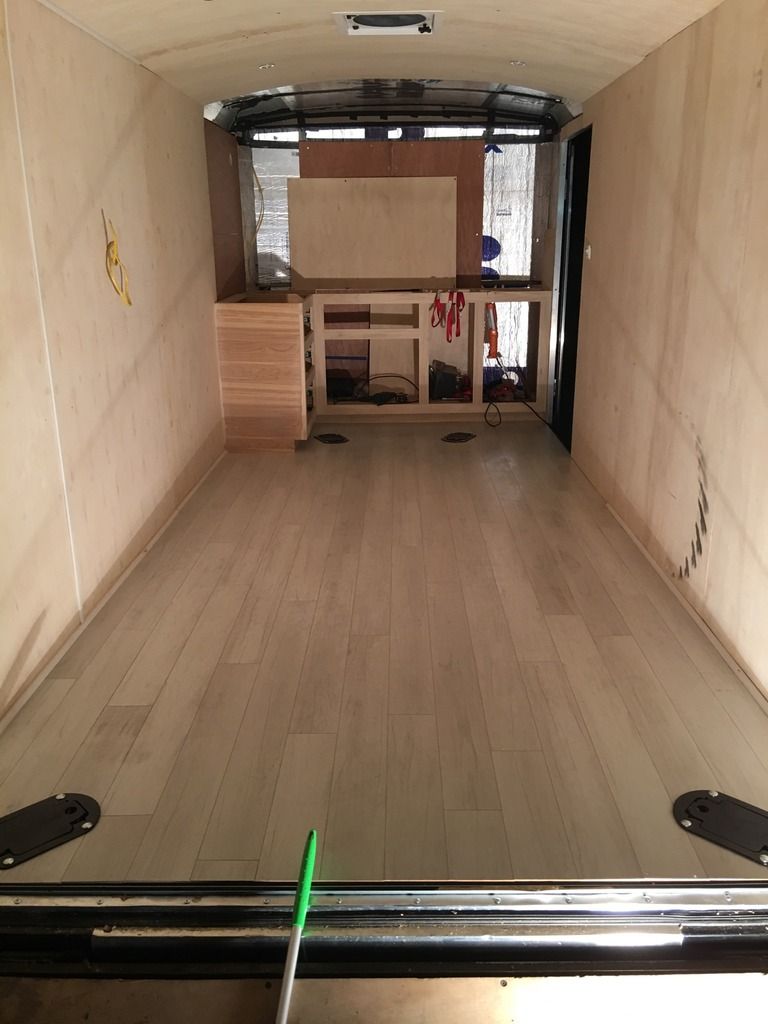
I then installed the cargo-buckle tie downs in the trailer. I am a big fan of these, flush mount design, integrated ratchets strap and good and strong.
Image
Image

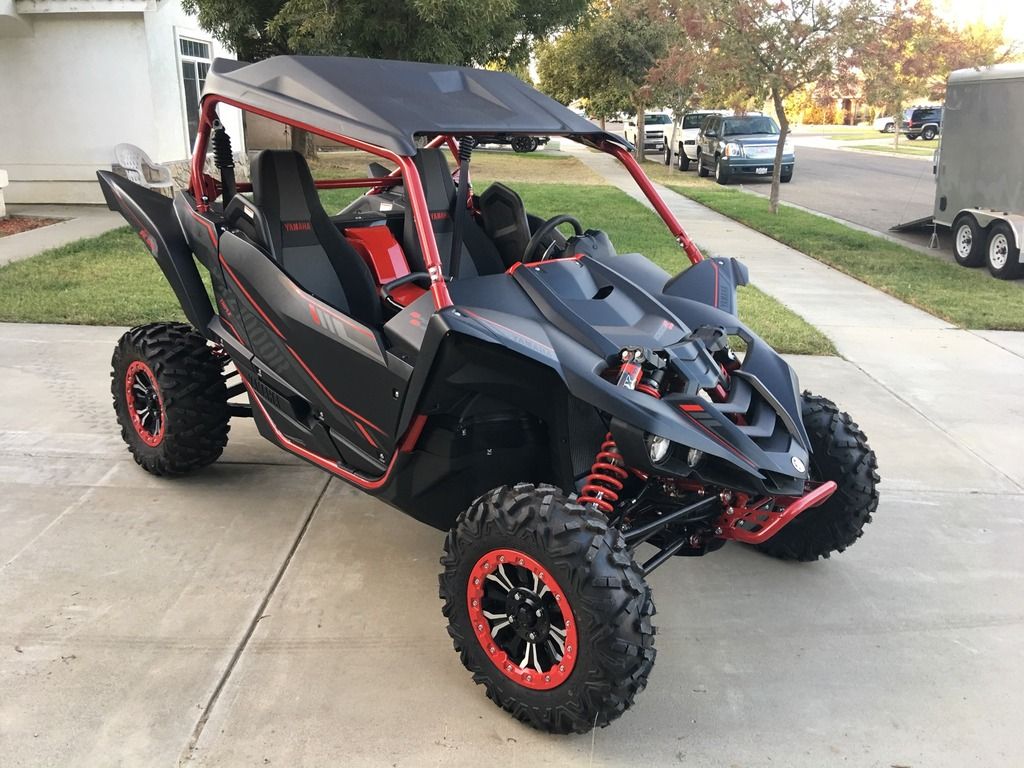
So a little more backstory as to why I am going with a toy hauler design over a standard trailer with living quarters and a dedicated bathroom is so I can haul this guy out for desert trips.
Image
Image

So after I got all of the above installed it was time to take the trailer out for its maiden voyage and test out the systems and make notes for improvements. One thing I found is the floor gets good and cold, I have decided to install 2 inch rigid foam insulation under the trailer. Another issue is heating in general. I have a Mr. Buddy Portable Buddy heater but to be honest I have never felt comfortable running it. I felt like I should have brought a bird along that way I know when I need to get out of there! (I installed a carbon monoxide/ propane detector prior to the trip though). I think I want to go with this ducted heating system right here:

http://www.rockymountainwesty.com/Prope ... hs2211.htm

Should be sufficient for the size of the trailer and it has a low amp draw on the batteries.

One thing I forgot to mention was the water heater setup. I went with the ecotemp tankless water heater. I sourced quick disconnects for brewing beer and mounted the female end in the lower front end of the trailer. I hooked the male ends to the water heater. This allows me to easily connect the water heater during setup and just as easily disconnect and drain during teardown. I also made a jumper hose while trailering just in case the water pump switch gets turned on I'm not spewing water down the road and empty when we get to the campsite.

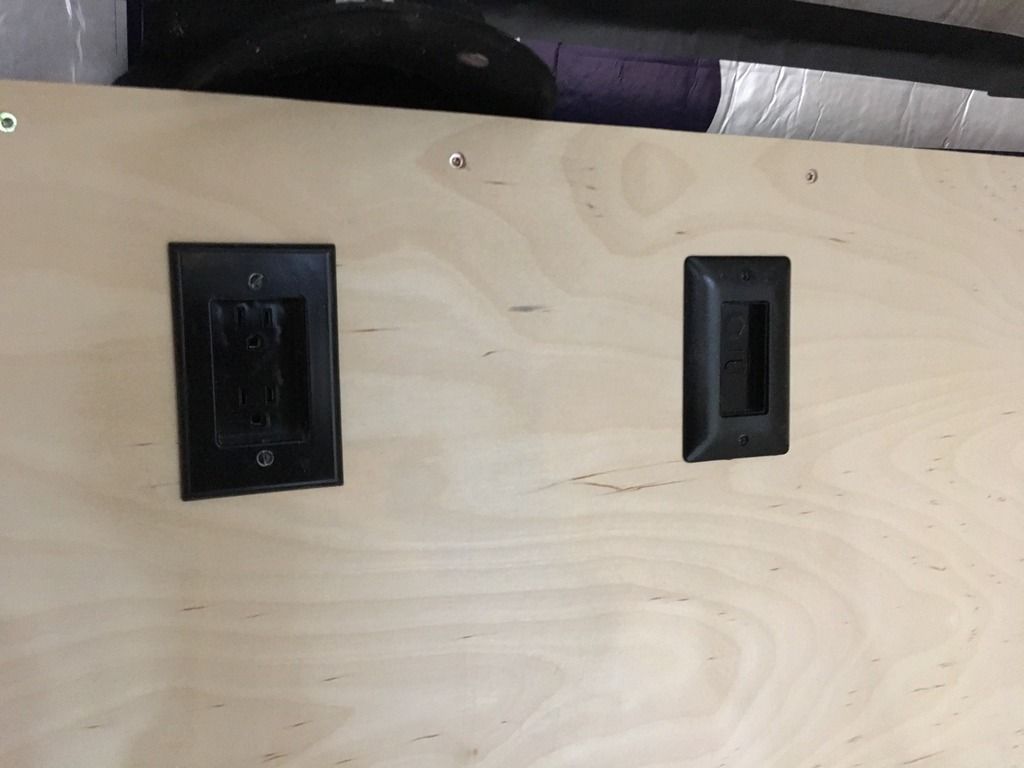
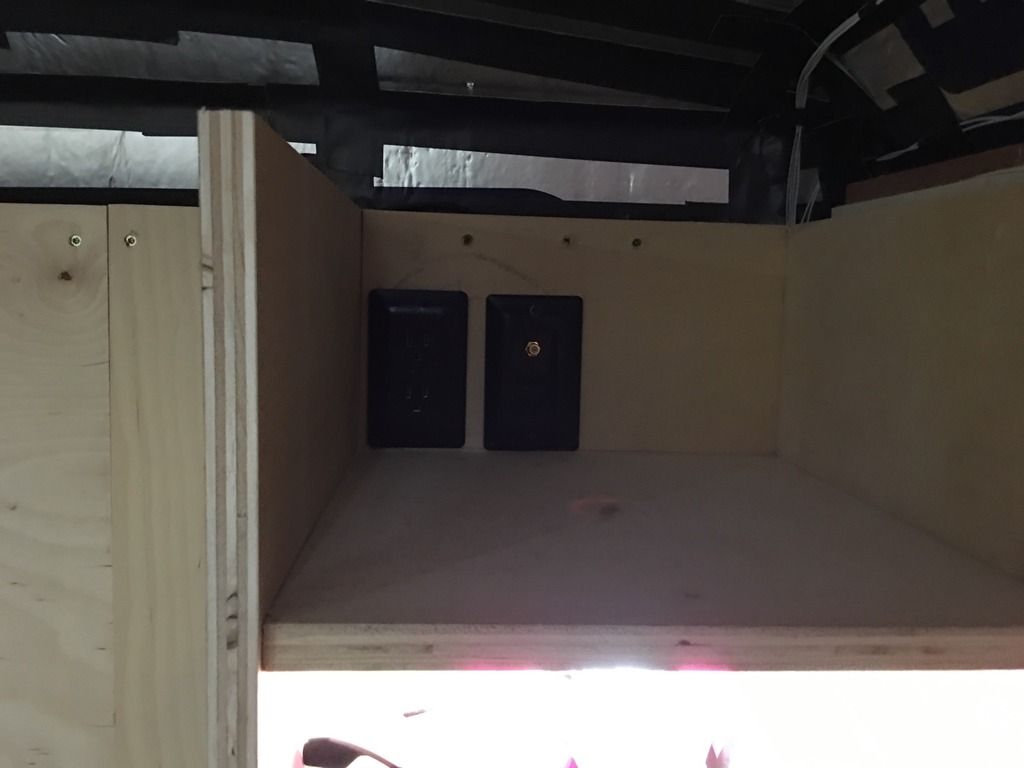
In the last few days I have been getting back into the flow of things. Built shelving for the helmets. I decided to do LED lighting in the shelves as well to give it a little bit nicer look. I also installed two more outlets and got them all wired up to the power converter. I got the HDMI/Coax ports installed to. The HDMI runs from the upper shelf to behind the TV. And the coax will run out and through a port in the exterior of the trailer just in case I ever want to do satellite.
Image
Image
Image

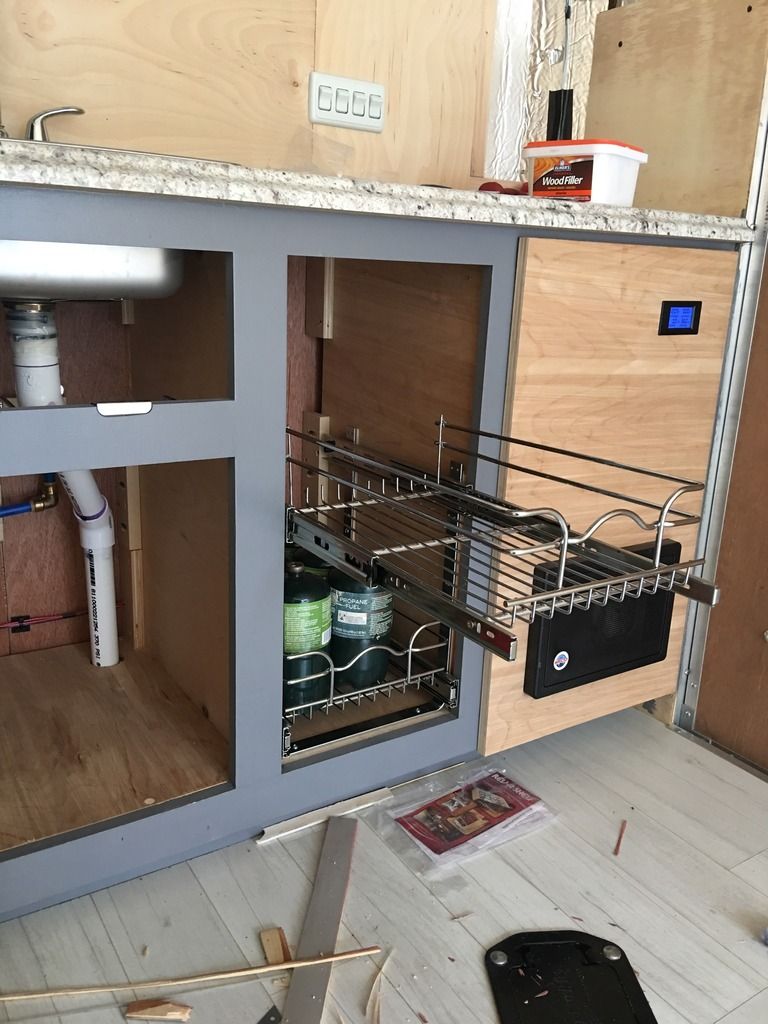
Yesterday I got the sliding shelves installed adjacent to the power cabinet. This was a total fluke that they fit so well, it was never my intention but I saw them and did a little modification to fit the depth, but the width is spot on.
Image
Image

So far that where I am at. Still have quite a bit of work to do until it's complete. I have OCD so taking my time and doing it right is key at all points. Please provide feedback or any constructive criticism you may have.
pyramid
Teardrop Inspector
 
Posts: 17
Joined: Wed Jan 18, 2017 4:10 pm

Re: California 7x16 Toy Hauler Conversion

Postby McDave » Thu Jan 19, 2017 5:43 am

Oh Boy! I like what I'm seeing there. I'm gonna have to go back a re-read all that, but she looks good, real good. You're doin it right. Keep that stuff up... :thumbsup:

McDave
User avatar
McDave
Donating Member
 
Posts: 2288
Images: 412
Joined: Sun Jan 25, 2015 5:21 am
Location: Tiny Town, Montana

Re: California 7x16 Toy Hauler Conversion

Postby hankaye » Thu Jan 19, 2017 9:10 am

pyramid, Howdy;

Welcome to the forum, hellofva first post! 8) , :thumbsup: !

Only thing I can see to point out is ya might want to cross the tie-down straps on the side-by-side.
That keeps slack from occurring should it shift any. Check out some equipment hauler's trailers next
time you find yourself near a truck stop. Other than that tid bit, I think everything you've done so far
is top notch. Lookin' forward to more.

hank
Striving for a less complicated life since 1949 ...
Every day I beat my own previous record for number of consecutive days I've stayed alive.
hankaye
2000 Club
2000 Club
 
Posts: 2567
Images: 1
Joined: Thu Dec 06, 2012 5:35 pm
Location: S.W. New Mexico
Top

Re: California 7x16 Toy Hauler Conversion

Postby Yukon Cornelius » Thu Jan 19, 2017 9:47 am

Off to a great start! Looks like it'll be a great build!
User avatar
Yukon Cornelius
Teardrop Builder
 
Posts: 29
Joined: Thu Aug 04, 2016 5:33 pm
Location: Falcon CO
Top

Re: California 7x16 Toy Hauler Conversion

Postby CoventryKid » Thu Jan 19, 2017 7:13 pm

Hi Pyramid and welcome!

Your conversion is looking really great!

Regarding an idea for your shower...
Now this is where I am starting to rack my brain. I want to build a shower that is portable and can be used indoors and something that is aesthetically pleasing both erected and stored away. Any ideas would be great.

I designed our small bathroom to have the shower in it, but over time, I realized doing so would mean a shower that was just going to be way too cramped. I was also concerned about how I could keep the whole thing watertight. So I scrapped that idea, but continued wondering how......

Over the course of our trips, It dawned on me that while it would be really nice to have a permanent shower, a "temporary " one could work just as well. And a temporary one wouldn't eat up valuable real estate inside our trailer, to be used for 5-10 minutes a day.

Our kitchen is in the middle of our trailer so I figured I'd put the shower right under our Maxxair fan in the kitchen. I started with bungee cords to hold the shower curtains - I used 2 of the plastic liners hooked together and connected a hand-held shower head to the kitchen faucet. My wife and I tried this for a few weeks (we were travelling so I couldn't do anything permanent anyway!). Admittedly it was a 2 person operation - me showering and my wife turning the water on and off, and vice versa.

When we got to friends in Nova Scotia last fall, I made the shower permanent. Because of the layout, I decided to place drapery I-beam track around our front skylight instead of around the Maxxair fan. I attached the shower curtains and placed them in a storage container we got from WMart. I mounted the holder for the shower head to the ceiling and installed an on/off fitting at the shower head.

Now it's just a matter of turning the water on at the faucet with the shower head valve in the off position, hop in and turn on the water and shower away - no help needed! And as it turned out, one of the two gaps between the 2 shower curtains is right at the corner closest to the kitchen counter - a great place for shampoo, soap, etc.

I took these pics with my old BlackBerry, but I hope you can see how it works. The shower curtain store in the corner out of the way, but unfortunately not out of sight.
146628 146629 146630 146631 146632

This sure beats wandering up to the RV park's showers and paying to have a shower. By the way, the blue "tub" stores in the back of our van when not in use.

Hope this helps!
Doug
Vancouver Island, BC

Image
GMC Savana Explorer Limited SE hightop conversion van
NEO NAVR 7x16 V-nose aluminum trailer now a comfortable travel trailer

Build: http://www.tusker-international.com/1-trlr-build.html
CoventryKid
Teardrop Master
 
Posts: 279
Images: 130
Joined: Mon Aug 05, 2013 3:48 pm
Location: Vancouver Island, BC
Top

Re: California 7x16 Toy Hauler Conversion

Postby pyramid » Thu Jan 19, 2017 8:30 pm

Thank you all, this project has definitely been a learning experience but at the some time very fun . I have a good working knowledge of carpentry and electrical but all the other trades were somewhat a learn as I go thing.
pyramid
Teardrop Inspector
 
Posts: 17
Joined: Wed Jan 18, 2017 4:10 pm
Top

Re: California 7x16 Toy Hauler Conversion

Postby pyramid » Thu Jan 19, 2017 8:32 pm

hankaye wrote:pyramid, Howdy;

Welcome to the forum, hellofva first post! 8) , :thumbsup: !

Only thing I can see to point out is ya might want to cross the tie-down straps on the side-by-side.
That keeps slack from occurring should it shift any. Check out some equipment hauler's trailers next
time you find yourself near a truck stop. Other than that tid bit, I think everything you've done so far
is top notch. Lookin' forward to more.

hank


I have been wantring to make that work, but to my surprise I can't find a halfway decent tiedown point on the side -by-side. It amazes me that they wouldn't manufacture some tiedowns into them.
pyramid
Teardrop Inspector
 
Posts: 17
Joined: Wed Jan 18, 2017 4:10 pm
Top

Re: California 7x16 Toy Hauler Conversion

Postby pyramid » Thu Jan 19, 2017 8:35 pm

CoventryKid wrote:Hi Pyramid and welcome!

Your conversion is looking really great!

Regarding an idea for your shower...
Now this is where I am starting to rack my brain. I want to build a shower that is portable and can be used indoors and something that is aesthetically pleasing both erected and stored away. Any ideas would be great.

I designed our small bathroom to have the shower in it, but over time, I realized doing so would mean a shower that was just going to be way too cramped. I was also concerned about how I could keep the whole thing watertight. So I scrapped that idea, but continued wondering how......

Over the course of our trips, It dawned on me that while it would be really nice to have a permanent shower, a "temporary " one could work just as well. And a temporary one wouldn't eat up valuable real estate inside our trailer, to be used for 5-10 minutes a day.

Our kitchen is in the middle of our trailer so I figured I'd put the shower right under our Maxxair fan in the kitchen. I started with bungee cords to hold the shower curtains - I used 2 of the plastic liners hooked together and connected a hand-held shower head to the kitchen faucet. My wife and I tried this for a few weeks (we were travelling so I couldn't do anything permanent anyway!). Admittedly it was a 2 person operation - me showering and my wife turning the water on and off, and vice versa.

When we got to friends in Nova Scotia last fall, I made the shower permanent. Because of the layout, I decided to place drapery I-beam track around our front skylight instead of around the Maxxair fan. I attached the shower curtains and placed them in a storage container we got from WMart. I mounted the holder for the shower head to the ceiling and installed an on/off fitting at the shower head.

Now it's just a matter of turning the water on at the faucet with the shower head valve in the off position, hop in and turn on the water and shower away - no help needed! And as it turned out, one of the two gaps between the 2 shower curtains is right at the corner closest to the kitchen counter - a great place for shampoo, soap, etc.

I took these pics with my old BlackBerry, but I hope you can see how it works. The shower curtain store in the corner out of the way, but unfortunately not out of sight.
146628 146629 146630 146631 146632

This sure beats wandering up to the RV park's showers and paying to have a shower. By the way, the blue "tub" stores in the back of our van when not in use.

Hope this helps!


That's exactly what I want to do, I don't have the space/need for a deification ahower. This is what I have been looking for .

I rigged up a really rough system simar to this but I found the shower pan was too small and that the frame for the curtain was too flimsy. it essentially collapsed into itself and then I put a little hook on the ceiling to hang it from. It was absolutely a two person job.

What did you end up using for the curtain rod?

Thanks again ,gives me some great ideas!!
pyramid
Teardrop Inspector
 
Posts: 17
Joined: Wed Jan 18, 2017 4:10 pm
Top

Re: California 7x16 Toy Hauler Conversion

Postby pyramid » Thu Jan 19, 2017 8:50 pm

So for the bed system I want to go with a bed that raises all the way to the ceiling and slides down while in use. I also want to integrate a couch into it aswell. My. Iffy and I went out and measured the height of the side by side while backing it in. Measured at multiple different points and found that the highest point (where the bed would be) is around 12 inches and meandered 1ft off the wall and it was at 7 inches. This really gives me ample space to execute. I will first rig up a pvc frame and test the theory with the trailer ramp at different angles but it was pretty steep tonight so I don't forsee there being any major issues. Anyone have advice on building this? This is what I was looking at using for the channel:
http://openbuildspartstore.com/v-slot-linear-rail/

Then this for the slides, I would upgrade to steel wheels to decrease compression and increase stability.
http://openbuildspartstore.com/v-slot-gantry-set/

Still have to figure out the electrical portion. Don't know if I want use screws or create a belt/chain system. Either way I will wire in limit switches at both ends to ensure safe operation.
pyramid
Teardrop Inspector
 
Posts: 17
Joined: Wed Jan 18, 2017 4:10 pm
Top

Re: California 7x16 Toy Hauler Conversion

Postby pyramid » Thu Jan 19, 2017 9:07 pm

Image
Image
Image

Here is the hot water heater setup I spoke of in my first post. And the jumper also.
pyramid
Teardrop Inspector
 
Posts: 17
Joined: Wed Jan 18, 2017 4:10 pm
Top

Re: California 7x16 Toy Hauler Conversion

Postby CoventryKid » Fri Jan 20, 2017 12:32 pm

Pyramid: re the shower "rod" I used....

I purchased 2 of these: https://www.homedepot.ca/en/home/p.i-beam-track---8-ft.1000121942.html. Package here in Canada comes with mounting brackets, etc (see description below in link). Interestingly, this product is made in US, but I couldn't find (didn't look too long) anything similar on Home Depot.com. Hopefully you will be able to find it.

The I-beam bends easily if you are careful - I used my old neighbour's well head (about 6" diameter) and carefully bent the I-beam quite easily.

Image
I mounted the brackets and I-beam to my 1/4" plywood ceiling. I've had no problems with brackets coming loose in 5 months of every-other-day use.

Here's the "tub" we use as a shower base (from Walmart Canada)
Image

Hope this helps.
Doug
Vancouver Island, BC

Image
GMC Savana Explorer Limited SE hightop conversion van
NEO NAVR 7x16 V-nose aluminum trailer now a comfortable travel trailer

Build: http://www.tusker-international.com/1-trlr-build.html
CoventryKid
Teardrop Master
 
Posts: 279
Images: 130
Joined: Mon Aug 05, 2013 3:48 pm
Location: Vancouver Island, BC
Top

Re: California 7x16 Toy Hauler Conversion

Postby pyramid » Sat Jan 21, 2017 11:44 pm

Started working the bed lift today. I found a garage door installed that had some nice used tracks. He ended up giving me tracks rollers and connecting hardware. Here is the progress so far. I temporarily attached the cross braces to test the sliding. It's fairly smooth, I sense one I get the rest of the supports in the rigidity of the frame will help keep it smooth also.

Image
pyramid
Teardrop Inspector
 
Posts: 17
Joined: Wed Jan 18, 2017 4:10 pm
Top

Re: California 7x16 Toy Hauler Conversion

Postby Padilen » Sun Jan 22, 2017 7:35 am

Glad your able to use the garage door tracks. That was one of my plans that didn't work out.
I'm not sure of how your building your platform. But I see Dexion - perforated angle iron. It isn't as strong as non perforated angle. So with a lot of weight may bow or bend it.


Sent from my iPhone using Tapatalk
Padilen
Donating Member
 
Posts: 1536
Joined: Fri Jan 30, 2015 4:20 pm
Top

Re: California 7x16 Toy Hauler Conversion

Postby pyramid » Sun Jan 22, 2017 10:31 am

Padilen wrote:Glad your able to use the garage door tracks. That was one of my plans that didn't work out.
I'm not sure of how your building your platform. But I see Dexion - perforated angle iron. It isn't as strong as non perforated angle. So with a lot of weight may bow or bend it.


Sent from my iPhone using Tapatalk


Why weren't you able to use the garage door tracks? Were you running into issues with them? I know the perforated angle is not as strong but I was looking for something that doesn't weigh a whole lot. If it doesn't work out I'll prolly end up using 1x1 square. Between both my lady friend and I it would be a max of 330 lbs or so.
pyramid
Teardrop Inspector
 
Posts: 17
Joined: Wed Jan 18, 2017 4:10 pm
Top

California 7x16 Toy Hauler Conversion

Postby Padilen » Sun Jan 22, 2017 10:53 am

My biggest issue was I traded : One driveway plow for a working bed design. But I didn't get what I bargained for. With my trailer & bed size the design configuration was off. If I mounted the rails flush as you have done I'd have no room for the springs. Because I had to mount the rails into the trailer uprights. If I had mounted the rail using brackets, even cut down bed wouldn't fit. I also wondered about the door track rollers, binding. Since my friend wasn't willing to redesign I went with Unistrut and trollies. I just made another loft/lift bed for my friends.
Here's some pics of theirs.
ImageImage
Image


Sent from my iPhone using Tapatalk
Padilen
Donating Member
 
Posts: 1536
Joined: Fri Jan 30, 2015 4:20 pm
Top

Next

Return to Cargo Trailer Conversions

Who is online

Users browsing this forum: No registered users and 4 guests