7x24 "Rustic" Toyhauler

Converting Cargo Trailers into TTTs

7x24 "Rustic" Toyhauler

Postby Rustic313 » Thu Jun 28, 2018 4:31 pm

This thread will be a build journal for our new CTC.

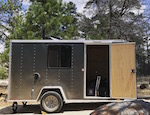
About four years ago, I did a 6x12 GA steel trailer conversion. Pretty standard: full-size murphy bed in the back, some basic project source Lowe's cabinets and a shelf up front in the V, 200W of solar and 200AH of batteries for a nice 12V system. The trailer is a Diamond Cargo and I had them do the windows, doors, etc. I never did get the walls insulated properly but the ceiling has 2" of polyiso and its held up well in Nevada heat as well as Southeast humidity and even some frigid winter camping in the mountains out west. We've towed it with a cross-over SUV and it works well enough.

We added it up, and in the past four years we've easily spent over 24 nights per year in our trailer. Probably more like a month plus every year. Its also really saved our bacon a few times... Whether it was breaking down for two weeks (no hotel cost -- just camp!), or the main house HVAC going out in the summer in the southeast (just sleep in the trailer), its been used a lot.

Since then, we've added a few family members (up to three kiddos and a dog) and 6x12 just isn't enough space. Additionally, I move for work every two years so having something that can (1) haul a bunch of stuff and (2) let us live out of it for a week on the road plus 1-3 weeks on the arrival side while securing a house (if necessary), or (3) that I can geo-bachelor out of for awhile would be super helpful. We do a lot of boondocking camping, typically for 2-14 nights at a time, so building something that can be used off-grid (and not "needing" a KOA) is important, so that means lots of insulation and thought towards solar, etc.

Our tow vehicle is a Chevy 2500 with baby duramax, tow capacity 6200 lbs.

So... we are upgrading to a 7x24. This thread will chronicle the build!
Last edited by Rustic313 on Thu Jun 28, 2018 5:21 pm, edited 3 times in total.
Rustic313
Teardrop Builder
 
Posts: 40
Images: 9
Joined: Sat Aug 03, 2013 2:55 pm

Re: 7x24 "Rustic" Toyhauler

Postby Rustic313 » Thu Jun 28, 2018 4:47 pm

SIZE/MATERIAL
We wanted aluminum for this build to cut weight as our tow capacity is only 6200 lbs. We figured we could get a 24' aluminum, or an 18-20' steel... The extra size was compelling when we started looking at floor plans. We opted for 7' over 8.5'. The weight savings is significant: most of the 8.5's seem to use a thicker frame which adds a lot of weight. Additionally, its nice being able to see behind you easily without needing tow mirrors. Our floor plans worked out fine with 7' so there we are.

To put some numbers on it, I estimate that the Rance 7x24 alum will be about 2290 lbs from the factory. I anticipate putting 1500-2000 lbs into it, so we'll be around 4K lbs dry. That's fine with a 6200lb tow capacity, with plenty of room for cargo.

As a comparison, the ATC 8.5x25 bedroom weighs 5000 lbs dry. A Diamond Cargo (GA steel) 7x24 is about 3020 lbs (plus the 1.5 lbs I need to put in there), weighing in at 4.5K+ lbs.

Ultimately aluminum is saving us 500-1000 lbs over the steel product, or the most comparable aluminum offering. Given that we use this for moving every few years, that's an extra 500-1000 lbs of cargo which is pretty significant. My employer pays me about $1/lb I move so that's $500-1K every two years which slowly but surely will offset the price premium vs. steel.

As a philosophy I am avoiding anything that can ever rot or be water damaged. We want this trailer to last for 20+ years. So I don't mind paying up front for things like aluminum decking that will never rot when the trailer inevitably gets wet.

ORDERING PROCESS

We ended up ordering a Rance 7x24 aluminum custom toy hauler from Trailer Showroom.

We did investigate a few other alumimum options, to include other dealers of the Rance product. I don't think we got an amazing price deal on the trailer from Trailer Showroom. Our steel trailer from GA was a bargain, but there are a LOT of resellers of GA trailers and there's a lot of competition in that market segment. Less so in the aluminum trailer world, especially given where we could pickup.

We placed our order in mid-January, and the trailer was completed last week. I'll be headed out to pick it up next week. So plan ahead if ordering a Rance product. After your deposit is in, their engineers will work up a CAD sketch for your approval. Changes can be made after the fact but it will be a ~$80 change fee for each one so plan ahead.

Trailer Showroom has been a good middle-man. I've been working with Chris. He's worked a number of non-standard issues with the factory... For example, I want the walls bare to the studs, don't want them to put in a battery box (with venting that I'll have to rip out later), etc. All of this is non-standard and he worked it with the factory.

OPTIONS/PRICE
This is what we ordered.

- 7 X 24 V-Nose Aluminum TA Renegade Trailer (REEC724TA2)
- 18 Inches Additional Interior Height
- 5K Scissor Type Stabilizer Jacks X 2 Sets
- Upgrade F-2 Aluminum Jack
- Rear Bogey Wheels
- Renegade Series Trailer RV Door Upgrade
- Aluminum Grab Handle
- Custom Door Light Package
- 30 X 30 Egress Window X 2
- 15 X 30 Horizontal slider Window X 2
- Non-Powered Roof Vent
- Brace For Roof Mounted A/C
- 12V Powered Fantastic Roof Vent & Thermostat X 2
- Max-Air Roof Vent Cover X 2
- Two Tone Color With Anodized Divider
- Upgrade To 24" Stainless Steel Stone Guard
- Powder Coated Hardware
- 16" On Center Floor Members
- Extruded Aluminum Ramp With Flap
- 7 Foot Width Extruded Aluminum Flooring
- Aluminum Tread Plate Transition Flap
- Recessed Floor Mounted D-Ring X 6
- 18' Lippert Power Awning
- Pewter Awning Color
- Back Up Lights
- Exterior Light Upgrade Package
- Welded Step

Total cost of the shell from the factory was $17K. :? :shock:

That said, in comparison, price tag on the 8.5x25 ATC bedroom trailer is $40K. So we're still well-under what a premium aluminum trailer costs.
Rustic313
Teardrop Builder
 
Posts: 40
Images: 9
Joined: Sat Aug 03, 2013 2:55 pm

Re: 7x24 "Rustic" Toyhauler

Postby Rustic313 » Thu Jun 28, 2018 5:14 pm

THE PLAN
Of course there will be some "figure it out as we go along" but its always good to start with a plan... "Plans are worthless, but planning is indispensable!" The graphic below shows the ultimate goal.

155103

Key:
- Blue circle = person size for scale
- Yellow = overhead luggage bins
- Red = roof vents
- Grey = cabinets
- Orange = Beds

FRONT BEDROOM
Up front we'll have a bedroom. That's a queen bed sideways. It is a large enough space that we can have the bed go forward and aft too but I think it'll be too tight to want to squeeze through the side. If we get sick of crawling over each other though we can go with a full size bed, forward and aft in that space.

All of the battery array and a fair amount of the plumbing will likely end up under the bed and cabinet in this space as well.

The passenger window is a nice big 30x30, and the driver side window is 30x15 to allow cross-ventilation when boondocking.

The V-nose will be used for the mechanical stuff as mentioned, which should keep the tongue weight plenty heavy to offset cargo in the rear garage area. Batteries are heavy. It will also be a "walk in closet" area with lots of shelving, hooks, and hangers. Somewhat awkward to access, but not impossible.

BATHROOM
In the middle we've got a bathroom. This will be bare bones. Just a 24x32 (or maybe 32x32, or 32x36) shower, and some hooks on the wall for towels, coats, etc. THis is dual-purpose as a mud room. The primary use is to hose down our kids and give wet outergarments (ski jackets, etc) somewhere to hang and dry. We should also be able to squeeze a dorm-style washing machine in there to clean undergarments and kid clothes, and set up a folding table that can be used as a sink station for washing dishes.

We are not doing a toilet. I don't want to mess with the complexity and weight of a black water system. Even boon docking we've had no trouble finding pit toilets at a minimum. Worst case we have the 5 gallon honeybucket which is used on really cold winter nights.

KITCHEN
Aft of the bathroom is a kitchen. Wrap around cabinets and a dorm fridge in the center of the cabinet array is the plan. My wife doesn't want to waste counter space (and cabinet storage) on a tiny sink so it'll be dry in here. If she really needs an indoor sink we'll use the folding table in the shower stall.

This air vent will have a ducted AC. I got enough extra height to be able to run a drop ceiling through the trailer for extra insulation and ductwork. We've got 88" of internal height to use and I'm only 69" tall, so a 5.5" drop ceiling should be very doable.

On the little 6x12, 2" of poly iso in the ceiling made a huge difference. On this trailer, I'll have at least 6.5" of insulation (probably 1" poly iso in between the ceiling studs, and then 5.5" of cheaper polystyrene in the drop ceiling). We do a lot of boondocking so the extra insulation will be nice. The ducting should make a big difference for getting A/C (on generator/shore power) up to the front bedroom and maximizing the efficiency of a relatively small roof unit.

REAR BEDROOM
The rear bedroom will have a lifting twin XL bed that goes across the trailer. I plan on engineering it so that it can be in one of four positions: up against the ceiling (stowed), bunk bed height, table height, or couch height. I won't have any false ceiling in the last few feet of the trailer, so the bed frame should largely stow up flush with the drop ceiling in the rest of the trailer.

The other beds will just be floor beds/cots that can be rolled up out of the way when no longer needed.

Of course, all of those can be moved out of the way to reconfigure the whole space for toy (or cargo) hauling. There should be space to fit something up to the size of a golf cart. I think all of our bicycles will fit just fine.

Windows are same as the bedroom: a large 30x30 picture window on the passenger side, and a 15x30 on the driver's side for cross-ventilation.

SYSTEMS
- DC Power: We'll have 900W of solar panels on the roof and an extra 300W auxiliary panel to put out on the sun. Probably about 300 aH of batteries. We do a lot of boondocking, and wanted enough to run either a dorm fridge (beer fridge!) and swmap cooler in the summer or electric blankets in the winter plus run the fantastic fans, lights, some tablet charging, and keep a laptop running (if I end up geo-baching for awhile).
- AC Power: We have a 2K watt generator and a 1K watt inverter-charger. I'll wire the trailer up for 30A service.
- Water: I anticipate being able to fit a 24 gallon fresh tank and grey tank under the trailer in between the floor framing. We're going to run it through a smaller 2.4 GPM shurflo pump and a tankless on demand heater (EZ101 vented to outside) for hot showers. Dry boondocking means the 0.5 GPM shower head or sink diverter comes out, which means we'll have enough water onboard to hose down our kids for a weekend of camping no problem. Otherwise if water is available we should have 1-1.5 GPM for relatively normal showers. No black water tanks or toilet as mentioned above.
- A/C: We're going to go with one of the powersaver models that can run off the little 2000 watt generators.
Rustic313
Teardrop Builder
 
Posts: 40
Images: 9
Joined: Sat Aug 03, 2013 2:55 pm
Top

Re: 7x24 "Rustic" Toyhauler

Postby PrecisionLook612 » Sat Jul 07, 2018 5:41 pm

Rustic313 wrote:
Our tow vehicle is a Chevy 2500 with baby duramax, tow capacity 6200 lbs.


Not to totally detract from your build but what baby Duramax are you referring to? What year is your truck that a 2500 only has a 6200 lb tow capacity?
User avatar
PrecisionLook612
Teardrop Builder
 
Posts: 33
Images: 1
Joined: Thu Nov 23, 2017 6:28 am
Top

Re: 7x24 "Rustic" Toyhauler

Postby Rustic313 » Sat Jul 07, 2018 10:51 pm

PrecisionLook612 wrote:
Rustic313 wrote:
Our tow vehicle is a Chevy 2500 with baby duramax, tow capacity 6200 lbs.


Not to totally detract from your build but what baby Duramax are you referring to? What year is your truck that a 2500 only has a 6200 lb tow capacity?


In 2017 Chevy started fielding a 2.8l 4 cyl Diesel Duramax in the Express. It's the same engine used in the Colorado trucks.

Pros: I get 25+ mpg highway, about 19 mpg in town. Towing I get 15 mpg uphill from Vegas to flagstaff with a 5k lb load. 16.5 or so on flat highway towing miles. In comparison the gas express gets 15 mpg best case without towing... Maybe 10 or worse with a load.

Cons: the emissions control system is a mess. Car has been to the shop three times in a year because the dpf won't Regen properly. There is no indicator that it needs to Regen, or that it is regening, until it fails and goes to limp mode. They just replaced the whole dpf under warranty so hopefully that resolves it.

Also, the max tow capacity is lower. I'd feel comfortable exceeding the 6k limit at low speeds for moderate distances because the frame, suspension, brakes etc are all the same as any other 2500. But I wouldn't push the engine or transmission at high speeds with a very heavy load.

Right now I am towing a 5k uhaul and it's handling fine... Rpm are reasonable, maintaining speed, etc.

The engine is an option that cost like 2k extra, plus the 6k or so extra we paid to go to aluminum instead of steel.
Rustic313
Teardrop Builder
 
Posts: 40
Images: 9
Joined: Sat Aug 03, 2013 2:55 pm
Top

Re: 7x24 "Rustic" Toyhauler

Postby PrecisionLook612 » Sun Jul 08, 2018 5:43 pm

Rustic313 wrote:
PrecisionLook612 wrote:
Rustic313 wrote:
Our tow vehicle is a Chevy 2500 with baby duramax, tow capacity 6200 lbs.


Not to totally detract from your build but what baby Duramax are you referring to? What year is your truck that a 2500 only has a 6200 lb tow capacity?


In 2017 Chevy started fielding a 2.8l 4 cyl Diesel Duramax in the Express. It's the same engine used in the Colorado trucks.


Oh the 2500 van, not the truck. That makes way more sense! Good luck on the build
User avatar
PrecisionLook612
Teardrop Builder
 
Posts: 33
Images: 1
Joined: Thu Nov 23, 2017 6:28 am
Top

Re: 7x24 "Rustic" Toyhauler

Postby Rustic313 » Sun Jul 29, 2018 1:29 pm

WEEK OF 16-20 JULY
- Picked up trailer in Elkhart, IN at the factory. Easy process. Everything was in order. The only thing I am a little bummed about is they used solid black roof vent covers instead of the sunlight style. Its really only a factor for one of the vents in the future bathroom so I can swap that out later if I want. Otherwise it was all good. They used remote control fantastic fans which are in theory nicer but I'm afraid of losing the remotes.
- Drove to East Coast. Averaged 15+ MPG with a load of several thousand pounds of cargo. Not bad.
- Got empty weight tickets. Will update this post with them once I have the tickets in front of me.
- Ordered Azdel wallboard.

TIME: N/A, driving time
COST: $30 for weight tickets and tolls, ~$1431 for 29 Azdel panels, shipped (got a few extra, shipping was $300!!!).

WEEK OF 22-29 JULY
- Purchased wall insulation at Home Depot. I opted for the good Polyiso 1" stuff. They were able to use their large saw to cut it to the right height, as well as cut to the spaces between the studs. The high school kid working the lumber department had no problem hanging out and running the saw for over an hour. It will save me a TON of time on install. I'll end up with 1-2 extra boards but that's ok.
- Purchased some new tools. I treated myself to a cordless jigsaw and cordless sander. They are GREAT. Well worth the cash for the time and hassle I am saving.
- Received the Azdel wallboard. PITA to lug it off the truck but it is secure now. Cut a test strip off and sanded it so I can test primer/paint.
- Installed about 70% of the wall insulation.

TIME: 4 hours installing insulation, 1 hr trip to Home Depot
COST: $300 for tools and sawhorses, $333 for insulation & tape

Need to take some pictures!

EDIT: Pictures added!
155853155849155850
Last edited by Rustic313 on Sat Aug 18, 2018 5:15 pm, edited 1 time in total.
Rustic313
Teardrop Builder
 
Posts: 40
Images: 9
Joined: Sat Aug 03, 2013 2:55 pm
Top

Re: 7x24 "Rustic" Toyhauler

Postby Rustic313 » Sat Aug 18, 2018 12:59 pm

WEEK OF 1-18 AUGUST
- Finally got around to getting some pics!
- Lots of insulation over the last few weeks. Moving slow due to real life commitments. Plus my trailer has a lot of braces at odd angles which slow down insulation placement. The cordless jigsaw is awesome for this quick cut detail work though. I'm about 95% done with the walls now though.
- Researched primers for my Azdel wallboard. Settled on Sherwin WIlliams product. Examined lots of paint chips. Got some paint samples, and got a piece of Azdel primed for color testing (hopefully tomorrow).

TIME: Approx 6 hours insulating, 1 hr trip to Home Depot and Sherwin Williams
COST: $80 for primer, paint samples, and paint supplies

EDIT -- ADDING PHOTOS!

155852155851
Rustic313
Teardrop Builder
 
Posts: 40
Images: 9
Joined: Sat Aug 03, 2013 2:55 pm
Top

Re: 7x24 "Rustic" Toyhauler

Postby SalsaDog » Thu Aug 23, 2018 8:01 am

Very nice looking trailer.

We have a 6x12, it's working great for now. In a couple of years, my wife will retire and then we are selling the house and full timing. We are looking at a 7x 20 to 24. I'm German, she is British, we need are own space at times. So, I will be following your build closely.

We make every effort to boondock exclusively. We have found the best boondocking is on the worst roads. That being said, your trailer appears low (ground clearance) for that length. I can see transitions between roads and parking lots and such creating a "drag". Just something to think about?

If the trailer has springs? You can flip them. OR, throw some blocks in and raise the box some to provide more ground clearance for the rear of the trailer.

Disclaimer:
If you don't agree? Just ignore me and carry on.

How does one subscribe to a thread? Is it automatic after a reply?
SalsaDog
Teardrop Advisor
 
Posts: 62
Images: 2
Joined: Tue Feb 24, 2015 4:08 pm
Top

Re: 7x24 "Rustic" Toyhauler

Postby Rustic313 » Thu Sep 06, 2018 6:54 am

SalsaDog wrote:Very nice looking trailer.

We have a 6x12, it's working great for now. In a couple of years, my wife will retire and then we are selling the house and full timing. We are looking at a 7x 20 to 24. I'm German, she is British, we need are own space at times. So, I will be following your build closely.

We make every effort to boondock exclusively. We have found the best boondocking is on the worst roads. That being said, your trailer appears low (ground clearance) for that length. I can see transitions between roads and parking lots and such creating a "drag". Just something to think about?

If the trailer has springs? You can flip them. OR, throw some blocks in and raise the box some to provide more ground clearance for the rear of the trailer.

Disclaimer:
If you don't agree? Just ignore me and carry on.

How does one subscribe to a thread? Is it automatic after a reply?


We also have a 6x12 and do a lot of boondocking. I would be hesitant to recommend anything larger than 7x14 for heavy boondocking unless you are out West with lots of large gravel pits on BLM land. The 7x24 is definitely something you can't be as bold with regarding destinations. The ground clearance on my model is low, its a car hauler style. Its about 12" off the ground. The advantage is better MPG and better clearance under low bridges... We cleared a 11' 3" bridge on our last trip that could have been problematic for a larger rig. We may flip the axle and raise it if we need the space for water tanks but I think we'll probably be ok. We have the Bogey wheels underneath and haven't had trouble bottoming it out yet, but I've been conservative about what types of parking lots and slopes I take it on as well...


WEEK OF 23-30 JULY
- Got the walls up! Involved cutting azdel boards to correct height (and cutting windows), sanding, priming, and painting.
- I used the Sherwin Williams super-good primer, and the Home Depot Behr premium paint. The paint wasn't "one coat" but it does seem to be sticking well to the Azdel.
- I forgot to wipe the boards down with acetone after the sanding, and I had a bunch of pollen, dust, etc fall on the boards while painting... So the paint job ended up a little "popcorn" looking. Still, its pretty slick and looks good.
- Got insulation up between half of the ceiling joists.
- Went on labor day camping trip! We took the trailer out for four nights. It was great. Furnishings consisted of a curtain to divide off the kids and some home depot plastic shelves, but hey, that's fine. Kids had a blast and we enjoyed the extra space. We got an average of 16.5 MPG towing up into East Coast mountains then back down (almost 15 on the way up, almost 18 on the way down).
- Next step: The ceiling. I've ordered our AC plenum/grill so I can map out the ductwork. I'll also do wiring. Once the ducts and electrical runs are in, I'll put in the furring strips between the joists and get more insulation in before putting up the ceiling panels... Which means more priming and painting. My tentative goal is to have the ceiling up by Columbus Day weekend, but we'll see how that goes.


TIME: 24 hours -- this step took forever, in large part to cutting the windows and priming/painting.
COST: $300 for misc paint stuff

Need to add photos!
Rustic313
Teardrop Builder
 
Posts: 40
Images: 9
Joined: Sat Aug 03, 2013 2:55 pm
Top

Re: 7x24 "Rustic" Toyhauler

Postby McDave » Fri Sep 07, 2018 2:55 pm

Hey rustic,
I am just now getting caught up with your build and must say that is one fine looking trailer to start a build with. If I had known I was going to end up with a full conversion when I started, I think I would have started with a new/better trailer. However, I am happy with mine and the price was right. But there is something to said for looking good and getting what you want.
I also tow with a van, but its a g2500 3/4ton 5.7l. It has NEVER seen 15 mpg even going downhill in neutral! But c'est la vie. It does what I need and I love it too.
You are doing the good work there, keep it up. I'll be following.
Good luck!

McDave
User avatar
McDave
Donating Member
 
Posts: 2288
Images: 412
Joined: Sun Jan 25, 2015 5:21 am
Location: Tiny Town, Montana
Top

Re: 7x24 "Rustic" Toyhauler

Postby Rustic313 » Thu Oct 11, 2018 2:10 pm

Hi McDave, this was our second trailer... We did the first one on the cheap, and then once we decided we liked the lifestyle, knew exactly what we wanted, etc etc spent the $$$ to get exactly what we want, built for the long haul. I'm hoping that the new trailer will last for 20+ years. There will be zero materials inside that are subject to water damage so we'll see.

Not much posting as we've been busy. Took it out for camping trips on Labor Day and Columbus Day weekends. Continued to average 16.5 MPG on both which was fantastic.

The Maiden Voyage to Lake George on Labor Day!
156404

This is the interior shot, looking aft. For now we've just got a shelving unit up for all our junk, and a shower curtain rod to fence off the boy's sleeping area. We've been opening the curtain and flipping their beds up to create an indoor eating area for cold mornings.
156405

Columbus Day in Acadia.
156403

Haven't spent much time on this in the last month just due to being busy.

COMPLETED:
- Ceiling Insulation: I finished insulated the ceiling which took awhile as I was using up small bits of insulation board.
- Queen Bed: We also got our foam mattress (queen!) ordered and setup. Its on a folding queen mattress bed frame now. I was hoping that the frame would fit sideways but alas it does not fit, its too long. So I will likely need to build my own bed frame that will fit. I was really hoping to get a frame "off the shelf" that works to keep it lighter and save time.
- Anti-Sway Bar: I also got an anti-sway bar installed. I was hoping for a full weight distributing hitch but the one I ordered won't install due to where the front wheel-jack on the frame is. So I returned that and got a basic anti sway hitch. Of course I then needed to get a new drill bit. Ultimately I got the thing installed. It makes a HUGE difference. The van pulled pretty well before but you could feel the big semis passing. On our last trip it was like nothing was there. Money very well spent.

To Do:
- FLOOR INSULATION: I've contracted with a spray foam insulation company for the floor -- it got bitterly cold on our last trip so I want to get that insulated before the winter arrives. That will run about $800.
- AC: I also ordered our A/C (about $750 with all the accessories like heat strip, control board, etc). A local place will install it for $450, I'm thinking of doing that. I am not keen on lifting an 80 lb AC unit up and wrestling it into position myself. If they can do the interior walls cheap I may just pay them to frame those out too.
- CEILING: Once the AC is in place, I will run ducting and wiring, then I can insulate the rest of the ceiling and get the ceiling panels up.

TIME: 6 hours for ceiling insulation + 1 hr to get the bed setup + 2 hr for the antisway hitch. Also a few hours of research.
COST: $50 for another few insulation panels for the ceiling, +$100 for the antisway bar and a few tools.
Rustic313
Teardrop Builder
 
Posts: 40
Images: 9
Joined: Sat Aug 03, 2013 2:55 pm
Top

Re: 7x24 "Rustic" Toyhauler

Postby Rustic313 » Sun Jun 09, 2019 10:45 pm

I got behind on the journal here!

Over the winter things were in stasis... Cruddy weather, everyone sick, etc = not much done.

I've kicked into gear however as we had trips in April and May, and a 3 week trip this summer.
Rustic313
Teardrop Builder
 
Posts: 40
Images: 9
Joined: Sat Aug 03, 2013 2:55 pm
Top

Re: 7x24 "Rustic" Toyhauler

Postby Rustic313 » Sun Jun 09, 2019 11:04 pm

Milestones:

AC mounted. I paid a shop to do this, and the wiring. Came out to $250 to mount the AC with the shop lift and like $450 for the wiring (3 hrs labor -- guy claimed it took awhile to figure out the pin diagram for the thermostat, I felt a bit ripped off and could have just done it myself had I known it would be that much). It works.

I am a little bummed that it doesn't run on my 2K generator. I got one of the Coleman PS3 units that is designed to run on a 2K genset, but even on the "low" setting there isn't enough juice to kick on the compressor.

AC ducting designed and installed. This was a PITA project. I used regular residential rectangular stack ducting (10x3.25"). To make it work, I had to do a few things.
- Drop ceiling. I used ledger board with joists running across it in the middle third of the trailer to create a drop ceiling. This allows the ducting to run on top of the joists.
- "Raceway" to support the ductwork. I built a three-sided frame out of 1" thick wood for the duct to sit in. I built it large enough to accomodate a 0.5" layer of poly-iso foam. The exterior got a nice wrap of Reflectix.
- Side vents. Originally I put in side vents by cutting holes in the rectangular ducts. I had 2" flex hose and 2" vents ready to go to add a bunch of additional vents so that I could get close to the suggested sq in vent area from the manual. However, once installed, the air pressure was pretty low. I ended up plugging up the vents (silver tape + great stuff) and will just be using one large rectangular vent fore and aft.
- DIY Plenum. The materials provided with the coleman "chill grille" are intended for a ceiling that is only ~6" deep (maybe even a bit less). WIth my drop ceiling (4" for the stack duct + 3.5" for the 2x4 joists + 0.75" for strapping + 1" wiggle room) I had to improvise a DIY plenum out of plywood and polyiso board. It was a PITA but I have something that's pretty airtight now, and still allows access to the wiring.

If I could do it all over again I would seriously look at engineering a through-wall AC unit like our old camper had, or skipping the ducting and going with a straight-through roof unit. The airflow is just so low to the forward vent (even with everything else closed) that I don't think it will be worth the trouble I put into it. We'll see what my opinion is after living in it for three weeks in the summer.

Wiring Run. Most of the wiring is in the ceiling so that's all run -- 12v and AC circuits.

Internal Walls & Shower. I put up two non-loadbearing walls with a 36" shower-stall between them. Shower is rough-plumbed with fixtures (that go nowhere as of yet).

Cabinets. I got nice aluminum cabinets from Trailercraft for this one. It was spendy (about $3K shipped) but we have a gorgeous L-base and wall cabinets. The L-Base is mounted.

Heaters. The roof AC has a heat strip installed. I put a 500/1K W ceiling forced air heater in the aft part of the trailer. I have a 400W radiant heat panel for the master bedroom area up front that's ready to mount.

Electrical. I put a 15A and 30A motor base plug through the wall. The intent is to give us up to 45A total; eventually I will have a transfer switch that can put the roof AC/heat strip unit onto the 15A circuit all by itself, or run it through the 30A circuit depending on what's available to plug into. The inverter (1000W) and batteries (420 aH 12V) are installed and working. The water heater is mounted on the wall (but not connected to anything). A/C breaker boxes are installed and I've started wiring them but they're not fully operational yet. 12V breaker box is installed (for the inverter/battery tie-in) but sub-circuits aren't running yet.

Roof Antennas. Antennas are mounted for UHF radio (walky talkie GMRS base station), WiFi (2.4/5.2), Cell, and TV.

Roof Paint. 5 gallons of white elastometric paint up on the roof -- on my last trailer, I found this cut the interior temperature by about 5-10 degrees so while a pain it should be worth it. Found and isolated a small leak -- one of the factory-installed roof vents was poorly sealed, so I dumped a tube of DAP onto it which seems to have fixed the issue.

Ceiling Insulation & Panels. I'm closing up the ceiling now. In the front and the back, I'm throwing another 1.5" of foam-board up between the strapping for a total of 2.5" of foam insulation. In the drop ceiling area, I have 1" polyiso between the ceiling studs; I'm going with reflectix between the joists in the drop ceiling area.

So all in all, lots of progress. Still have quite a bit to do though. The biggest objectives before we depart for our summer trip are:
- Finish mounting ceiling panels
- Install TV
- Install wall cabinets.
- Jury-rig some more electrical runs. They won't necessarily be final configuration (example -- final version will be nice wall outlet, temp fix is a plug on the end of the romex cord) but we need a few more branch circuits for the cross-country move for things like the fridge.

I don't think plumbing or the solar panel install is going to happen before we hit the road.
Rustic313
Teardrop Builder
 
Posts: 40
Images: 9
Joined: Sat Aug 03, 2013 2:55 pm
Top

Re: 7x24 "Rustic" Toyhauler

Postby Rainier70 » Mon Jun 10, 2019 9:08 am

Nice build. I like your overall plan, and envy all your extra room.
User avatar
Rainier70
1000 Club
1000 Club
 
Posts: 1083
Images: 244
Joined: Wed Jan 30, 2013 4:35 am
Location: Southeast Idaho
Top

Next

Return to Cargo Trailer Conversions

Who is online

Users browsing this forum: No registered users and 7 guests