In an email from a fellow who worked at Semaphore Industries he sent the link to the patent on the caboose.
http://www.google.com/patents/USD222346 ... &q&f=falseHe also sent this info on the construction...
"We put 110-volt rooftop air conditioners on many of them. You could plug a 110-volt cord from the outside (left rear) to run it. Or, if you paid extra, you could have a 110-volt gasonline generator installed in the left rear. The small refrigerator could also use 110 vols AC, or 12 volts, or LPG. LPG was also used for the stove and furnace--the gas being provided by one or two standard tanks mounted on either side of the V-shaped tow bar.
CONSTRUCTION:
Each trailer begain with a steel frame laid out to a template, and welded, then painted black. Atop that were bolted sheets of 1/2-inch or 3/4-inch particle board, I don't remember which. Vinyl was cut and glued on the floor (bathroom, mostly) and the carpet was cut to shape and glued down. The automotive 12-volt wiriing was run beneath the floor, I believe, for the lights and brakes. 110-volt wires were run inside the walls, with approproiate channels and openings for recepticles being drilled and cut. A minority of the wiring was laid out on the floor in places where cabinets and other elements would cover them.
The walls (sides, front and rear) were built separately, laid out horizontally. The firrst layer was the aluminum exterior. Sheets of that came to the factory already sized, painted and corrugated. On top of the aluminum (remember: these walls were lying on their sides) was glued sheet of plastic to serve as a vapor barrier (same thing on the floor). The glue was pink, sprayed on.
Next came two-inch by two-inch pine studs, which made up the framework, and a small amout of fiber-glass insulation was placed between the studs. These were glued down, and in certain places fastened in with nails or bolts. Holes were drilled in the studs and cut in the paneling (see below) to accommodate wires and pipes.
Next: wood panels, also glued. This was the thin, inexpensive type of paneling used in apartments and houses--very popular in the 1970s. The kind of paneling made of quarter-inch plywood, with a finished surface on one side, and simulated vertical grooves.
When a wall was finished, it had window and door holes cut into it, per a temporary pattern laid atop it. Aluminum framing lined the holes, then the windows and door were attached to each unit after the trailer was assembled.
Speaking of which, the next step in assembly was for two or three people to carry the wall (usually the sides went first) to the base/frame, line it up, and hold it while a couple of guys tacked and then bolted it into place. There was much leveling and aligning and use of squares to make sure everything went in at all the right angles. Otherwise the frames and windows and doors would warp and make for lots of leaks. The sides were attached to the front and rear with bolts/nails, a rubber strip put over the joints, and chrome strips screwed on over that.
With the sides, front and fear in place, the roof went on. It was assembled like the walls. Wires came up through the walls to serve the 12-volt lights at the top. The ceiling was made of the same find of white material you see in dropped ceilings, except it was cut into units that stretched across the width of the trailer. I think they were three or four feet in the other direction, and thin wood trim was placed where two sheets came together. It was sealed to the sides the same way the sides were screwed to one another.
Some of the interior stuff (especially cabinets) was sometimes installed on the floor before the walls went on. The color of the carpet escapes me at the moment. The final touches were added to the rear deck (ladder, handrails, etc.) after the exterior was completed. The deck surface was part of the initial frame assembly."


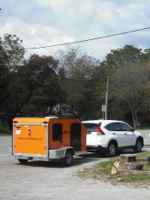
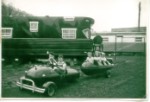
 I can afford to sink quite a bit into mine and still come out ok. That's one of the few pics I've found online. The other Semaphores that I'm aware of are the one at Hicksville RV Resort in CA, one that was for sale a couple years ago in west Texas, one in SC, one that I've seen a photo of but no contact info or comment about where it was. Surely there must be a few more somewhere, but I haven't been able to find any info on them if they are.


 So I'm back to having to title it as a home built. Both the RV folks and the mechanic said I should be able to pull it home without a license plate as long as I have the bill of sale with me in case I get pulled over.