Angular mega tear ideas

Design & Construction of anything that's not a teardrop e.g. Grasshoppers or Sunspots

Angular mega tear ideas

Postby jimqpublic » Tue Mar 15, 2005 6:37 pm

My ultra tear idea keeps perking along. Someday, somehow, maybe so, maybe no. Our Chalet trailer is just fine and I keep thinking that a school bus conversion would be the ticket for a long sabbatical to tour the Americas with.

But on to the subject at hand. For weight, strength, and insulation nothing beats ISP's (insulated structural panels). For a small trailer I would go with 1/8" luan over 1" of extruded polystyrene (XPS), which is much stronger than expanded polystyrene (eps) foam.

Doesn't work well for curved surfaces though. After looking at Mike's
quickbuild Weekender idea I got to thinking. Angular is okay if it has good proportions.

I was way ahead of him on the idea of an epoxy-friendly self leveling boat paint for the final surface. Eliminates all the edge trim and makes repairs easy. I've used some of the West System products on boats as well as Rot Doctor products around the house. Both are good but West is more of a component system where everything starts with the resin. You can add solvents for more penetration, micro-balloons or fibers for thickening/strength, etc. If you have a West Marine nearby (Not related to West System) and know a professional boat repair guy he probably has a "Port Supply" commercial account and can buy the West System stuff well off list.

I read an article way back on crazing/cracking of paint over plywood boat hulls and the recommendation was to use at least a very light fiberglass cloth with epoxy to stabilize the plywood surface before the first topcoat. I would do this and use 1/8" luan for both inside and outside skins. Wood splines at the panel junctions and the various inner walls and bulkheads should make this very strong and stiff.

Built this way, with paint outside and varnish inside the panels should weigh under 1.5 pounds per square foot and insulate to R6. Consider that the typical teardrop with 3/4" plywood and 0.060" Filon weighs about 3 psf and has R1 insulation value.

Also it's amazing how much tradespeople like interesting projects. I bet you could go to a local SIP maker and ask them to glue up some panels like I've described and they would do them in their big fancy press! Otherwise make up a stack and vacuum bag the whole lot.

So on to my ultra TD. I'll draw it up sometime but the idea is enclosed wheelwells and dropped floor, 6'4" wide and 6'4" tall inside. Dropped floor to keep the total height under 7'9" to fit in my garage. Probably a bit over 12' long for the body. With this much width/height there won't be too much material loss if I could maximize the use of 4'x 6'4" sheets running crosswise or vertically. (Of course every 6'4" sheet starts out 8')

Describing the layout from front to back:
-30" Double bunks crosswise right at the front
-30" Curb side door and street side cassette toilet/shower enclosed bathroom. Dropped floor in this area.
-54" Full or 60" Queen bed on platform over the wheelwells with plenty of storage under. Platform quite high to maximize space for storage, tankage, batteries, etc. right over the axle for stability.
-26" Kitchen area accessible from rear hatch and/or doors.

It adds up to a body about 12' long. Total trailer length would be a nicely garagable size at about 16' long and 6-1/2' wide. (With an 8' high door opening of course!)

Jim
Jim
2002 Chalet Arrowhead but always wanted a Teardrop
2 kids and a Dear Wife
http://community.webshots.com/user/jimqpublic
User avatar
jimqpublic
The 300 Club
 
Posts: 398
Images: 2
Joined: Fri Jun 18, 2004 12:41 pm
Location: Long Beach, CA

Re: Angular mega tear ideas

Postby JunkMan » Tue Mar 15, 2005 7:47 pm

jimqpublic wrote:I keep thinking that a school bus conversion would be the ticket for a long sabbatical to tour the Americas with.

Jim


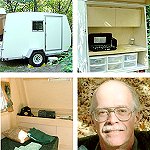
We did a skoolie conversion, but got rid of it after a couple of years. It was an 85 Ford B-600 with a 8.2 Detroit diesel. They ride rough as hell unless you have them loaded very heavy (we are food vendors, and when we had ours loaded with supplies to take to a event, it rode great), and are also very noisy. Top speed is usually about 63mph. Some campgrounds can be picky, and not let you in. Although we never had any trouble, several people we know have. It's very hard to cover the yellow paint (and make it look good), and it is illegal in most states to leave them yellow.

An old highway bus isn't much more expensive, and will make a much nicer conversion. I've also heard that the RTS busses can make a nice conversion, and there are a few companies out there that make custom body panels, doors, and such for them.

We have a 1947 Flxible Clipper that we will re-build some day (it was converted years ago, and needs to be completely re-done, including the driveline).
Jeff & Odie
Black Hills of South Dakota
User avatar
JunkMan
500 Club
 
Posts: 974
Images: 50
Joined: Sun Oct 24, 2004 6:21 pm
Location: Rapid City, South Dakota

Postby jimqpublic » Wed Mar 16, 2005 12:57 pm

Off the main topic here, on the Schoolie idea-

Our tour of the Americas would include some of the US and Canada, but mostly points South. Used US school busses become the main transportation in Latin America. The advantage of using one for travel is that they're tough, the roads can handle their length/width/height/clearance, and there are lots of mechanics who know how to fix them. Also the advantage of having a vehicle that has to meet federal rollover tests is obvious when traveling to areas with bad roads and limited emergency services. I want my kids to be riding in something that can handle an accident without turning into a pile of sticks and styrofoam.

For Latin America a 63 mph top speed is more than fast enough. In fact I would probably try to find a two speed/locking differential off a dump truck to allow better traction and gearing way down for steep roads. Ride can be tailored by removing leaves. For paint, there's a good shop that specializes in busses in Mexicali. If I did the conversion, it wouldn't be specifically to save money. I'd buy a fairly late model unit and use good components. We'd end up spending more than a used motorhome but less than a new one.
Jim
2002 Chalet Arrowhead but always wanted a Teardrop
2 kids and a Dear Wife
http://community.webshots.com/user/jimqpublic
User avatar
jimqpublic
The 300 Club
 
Posts: 398
Images: 2
Joined: Fri Jun 18, 2004 12:41 pm
Location: Long Beach, CA
Top

Postby angib » Wed Mar 16, 2005 2:54 pm

OK, Jim, here is my 1 hour rendition of your design:
Image
That's a 12" grid and here's the interior you described:
Image
Andrew
User avatar
angib
5000 Club
5000 Club
 
Posts: 5783
Images: 231
Joined: Fri Apr 30, 2004 2:04 pm
Location: (Olde) England
Top

Postby DANL » Wed Mar 16, 2005 4:13 pm

Good design, Andrew. While we're at it, how about having the upper bunk hinge down to create a sofa?
The tiny trailer in the avatar is designed to carry our recumbents and sometimes sleep in. We LOVE having a kitchen in the woods and a place for most of our gear.
Dan Jones http://sunsetlanding.com/teardrop/teardrop_intro.html
User avatar
DANL
Donating Member
 
Posts: 199
Joined: Mon May 24, 2004 10:42 pm
Location: Plymouth MN
Top

Postby jimqpublic » Wed Mar 16, 2005 4:20 pm

Thanks Andrew, that's pretty close. I would give more rake over the front bunk and make the rear hatch slightly angled like Dan Jones' trailer. Lower the bottom bunk to be at the top of the angled bottom front panel (1'x1'?), lower the top bunk a bit (26" above bottom for 4"mattress+24"), and then start the top angled piece 1' above the top of the top mattress. Slope it back so it hits just at the front of the bathroom. Adjust it a bit so that the panel isn't longer than our 48" sheet of plywood. My Subaru and many similar vehicles are about 60" tall so this would bring the angled front section to about even with the car roof for a bit of an aerodynamic advantage. (A little math says that if the bunk is 32" wide and we use a 48" sheet of plywood then it would end 36" below the peak. Probably a bit too much height taken out of the bunk headroom so bump it up a few inches for a 45 degree angle (32" below the high point).

Ground clearance issues- I think I'd go with 2"x3" steel box or channel for the frame. Let's set the frame bottom at 12" off the ground to maintain enough clearance. The front "A-Frame" tongue would step up by 3" to keep the hitch from bottoming on driveways. The top-of-ball would therefore be about 17-1/2" which is common for popup trailers here. The drop section of the floor would nest between the frame rails so it would be about 13" off the ground. Add my requested 6'4" standing height, 2" roof section, and you get an overall height of 91". Gee, we could even use a roof vent and still get into an 8' tall garage door!

Stabilizing jacks would mount to flanges welded to the top of the frame rails so when cranked up they wouldn't hang down below the frame.

Toilet would be a Thetford C-200 series. http://www.thetford-europe.com/the/thom ... _C200_S_en I would prefer the bench type C-2 or C-400 but that woudn't work unless I made the bathroom a bit longer front to back (34" minimum) and made the full width of the trailer floor flat.

After thinking more about materials use I think it's important to keep 4' intervals in mind. The total body length should be kept to 12' so I'd change the bed to a "RV Full" which has a 54"x75" mattress.

For construction details I've thought about how to make assembly easier so going up to 1-1/2 foam cores would make it stiffer, insulate better, and be able to use 2" nominal lumber (1-1/2" actual) for splines and reinforcements. Interior bulkheads, partitions, bed platforms, etc. could be 3/4" foam core allowing 1" nominal (3/4" actual) lumber for splines. The floor would be foam core also, maybe buy whatever Chalet is now using: http://www.chaletrv.com/chalet-flier.pdf

The kitchen is huge for an RV of any size at 6'4" wide. The countertop would be about 41" off the ground to allow space for a 24" tall compressor fridge under the counter. I would use a standard RV gas range with oven. A water heater would be installed and would serve the shower, sink, and a hydronic heat system.

Storage access under the bed would be a combination of shelves accessed from the small floor area plus gas struts to lift up the whole bed platform. The bed would be higher than shown at 24" off the floor (27" above the dropped floor area) to allow batteries and tankage in the bottom half where low, central CG will help stability. Then the upper half, above the wheel wells, would all be available for storage. A large baggage door would be mounted on the curb side behind the wheel well to allow camp chairs, toys, etc to be accessed.

The front bunks would be designed to both flip up so bicycles could be transported. The top bunk could also flip down to provide a sofa backrest for the bottom bunk. For use by two people it could be left in sofa mode and the area in front of the bathroom would be a hanging wardrobe. To flip down the pivot point can't be at the back, instead it would need to be a few inches away from the wall so that the pivoting bunk won't hit the bottom mattress. Have a stop so it has a nice 15 degree back angle. This will give a decent seat depth (no more than 24") with storage behind for all the bedding.

As the shower floor is the lowest point in the trailer, a sump pump would be used to lift water up to a grey water holding tank. The sink would gravity drain to the tank.

Air conditioning would be by a standard window unit mounted in an overhead cabinet above the "foot" of the master bed, probably on the curb side of the trailer.
Last edited by jimqpublic on Wed Mar 16, 2005 6:47 pm, edited 5 times in total.
Jim
2002 Chalet Arrowhead but always wanted a Teardrop
2 kids and a Dear Wife
http://community.webshots.com/user/jimqpublic
User avatar
jimqpublic
The 300 Club
 
Posts: 398
Images: 2
Joined: Fri Jun 18, 2004 12:41 pm
Location: Long Beach, CA
Top

Postby jimqpublic » Wed Mar 16, 2005 6:17 pm

On further thought- scrap the dropped floor section. Make the main frame out of 2" box steel, cross braces and outriggers 1"x2" angle. Double the main frame so it's two 2x2's stacked vertically like an "8" from the point the A-frame attaches back until about 2' behind the axle. This gives plenty of strength in the middle where it's needed and less further out where clearance becomes an issue. Set the frame so the main portion has 12" ground clearance. Add up from the ground: 12" to frame, 2" frame, 1" floor, 6'3" standing height (reduced from original plan), 2" roof = 92". Still plenty of spare for an 8' garage door.

With this there's no dropped floor. The shower pan will reduce standing height a bit but hopefully only about an inch. Now we can use my preferred Thetford Cassette C2 or the new C400 series. In fact they have integrated prefab toilet/shower enclosures that I believe are 26" wide (across the trailer) by 34" long.

Also the kitchen counter is now lower. The floor is 15" off the ground, 24" cabinet height, 1" countertop for 40" total (Same as our house but 4" over standard). By having the rear bumper only 1" behind the door hatch, and the door hatch tight against the countertop, you wouldn't be leaning in to get to the kitchen.

Back to the dimensions. The corners of my trailer will have wooden splines so I will get the full 12' inside the box while using three sheet widths of plywood. That gives us 144":

From the front again:
28" front bunks (32" is a standard size for bunk mattresses and bedding)
1" bulkhead
34" shower/toilet unit
1" bulkhead
54" 'full' bed
1" bulkhead
24" kitchen cabinet
1" countertop overhang

144" total

If we want to stretch the front bunks to 32" there are a few options. One is to make a boxed rear hatch similar to Dan Jones for both strength and to add a few inches to our overall length. Another option is to slide the upper bulkhead between the bed and kitchen countertop back 4". I plan for both to be 24" above the floor so you would still have enough depth for a 24" deep fridge underneath but only 20" depth on top.

Rear hatch could be a straight slab but I'd prefer it to be vertical from the floor up to the countertop height then angle forward by 1'. It would swing up and become a rigid awning so the hinge point would want to be high enough that nobody's going to bump their head even if the ground slopes up from the axle location. With a roof peak height at 7'8" off the ground let's let the roof slope down by 1' for 6'8" at the hatch hinge.
Jim
2002 Chalet Arrowhead but always wanted a Teardrop
2 kids and a Dear Wife
http://community.webshots.com/user/jimqpublic
User avatar
jimqpublic
The 300 Club
 
Posts: 398
Images: 2
Joined: Fri Jun 18, 2004 12:41 pm
Location: Long Beach, CA
Top

Postby benjamin » Wed Mar 16, 2005 6:50 pm

http://www.shortcuthigh.com/photoalbum/big/pic006b.jpg

Now if it is a bus you want check this thing out. I have sat in this thing and it is way cool.
Pop ups are good (99 Coleman) But Tear drops are better!
The trees are talking are you listening?
User avatar
benjamin
Teardrop Advisor
 
Posts: 59
Joined: Wed Mar 09, 2005 10:20 am
Location: NE Nebraska
Top


Return to Non-traditional Designs

Who is online

Users browsing this forum: No registered users and 18 guests