my first teardrop updated 1-16-11

...ask your questions in the appropriate forums BUT document your build here...preferably in a single thread...dates for updates, are appreciated....

my first teardrop updated 1-16-11

Postby emtgared » Thu Oct 21, 2010 9:48 pm

well this is my first teardrop build.. its not gonna be perfect, but all im looking for is something better than a tent lol.. im not much of a carpenter, but its turning out pretty good so far..


got the fever and started doing some research..

same day, found this on craigslist for free.. :D

Image

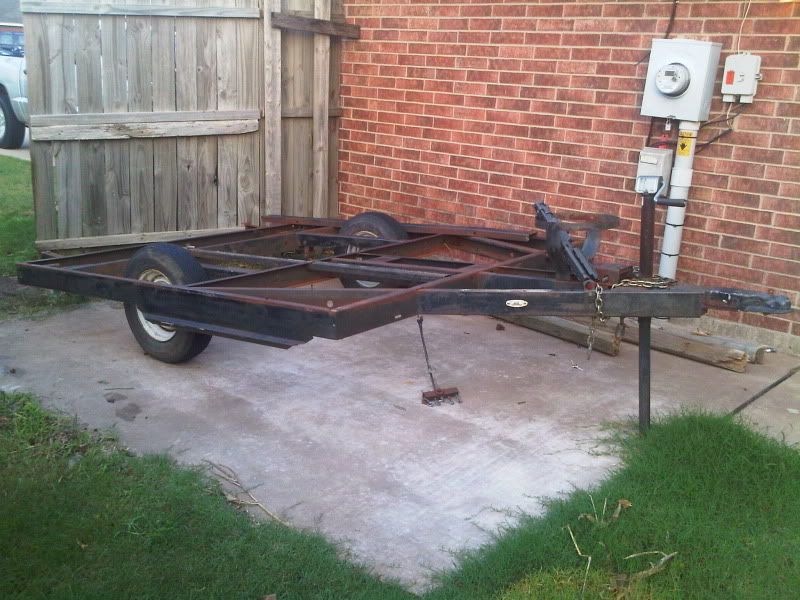
so i took it home, stripped it down re greased the bearings, and wire wheeled the frame to get a little rust off.. all in all its in great shape, just a little surface rust..
Image

i then painted it with a high quality rust inhibiting primer..

and then forgot to take a picture i was so excited lol..

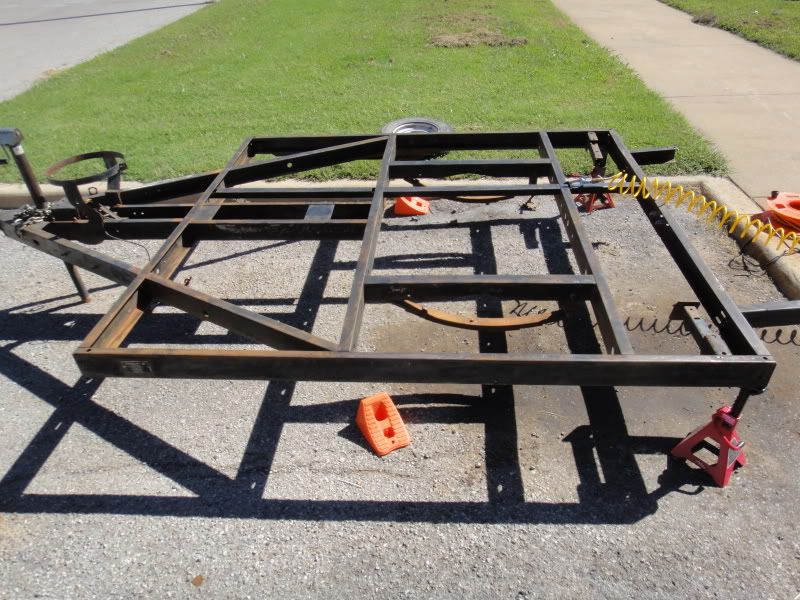
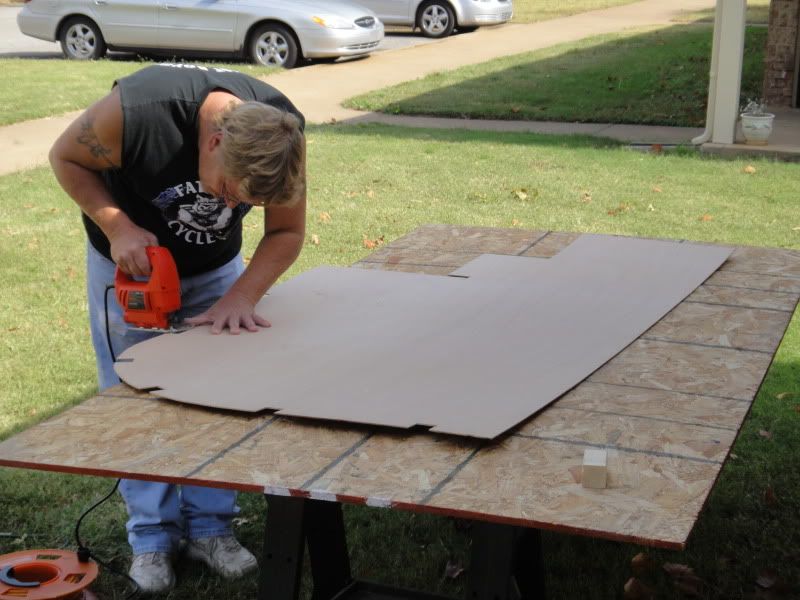
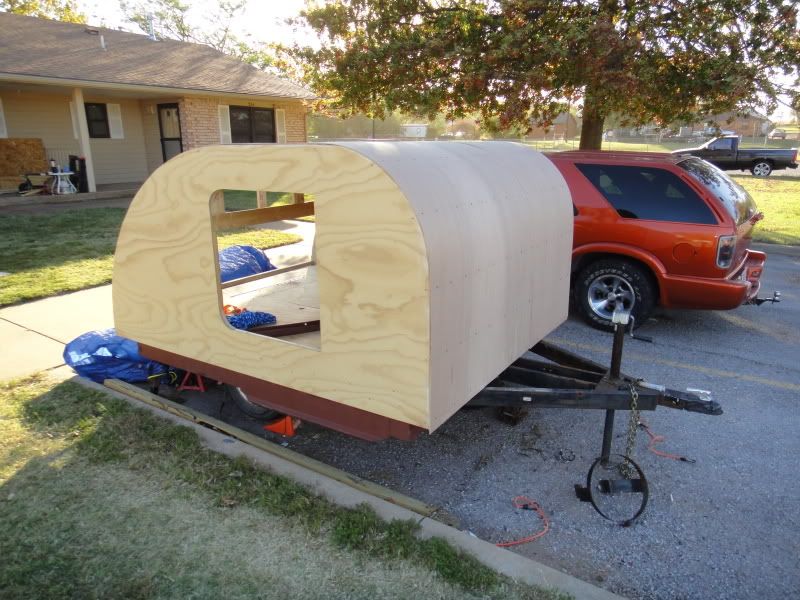
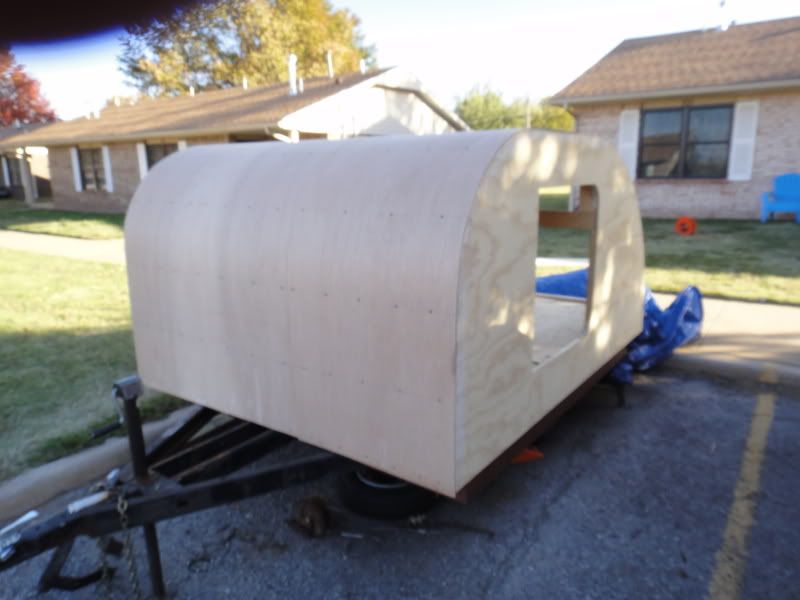
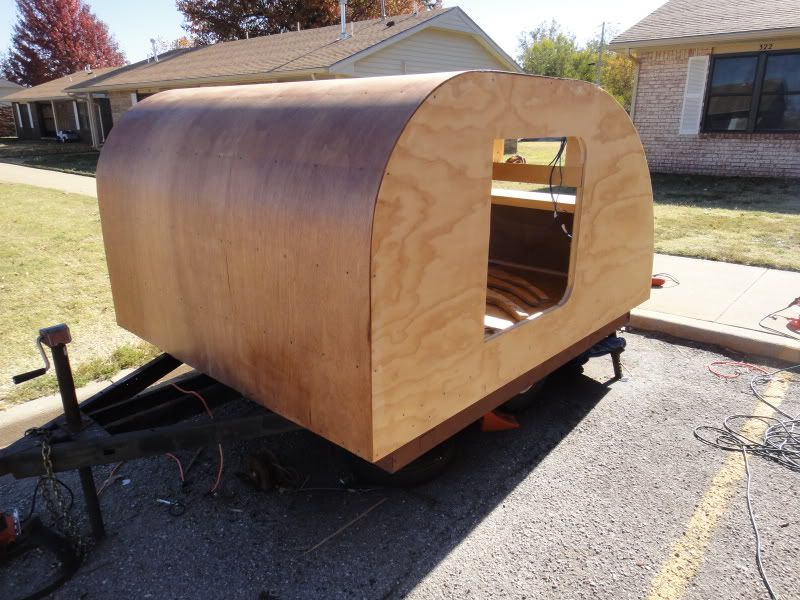
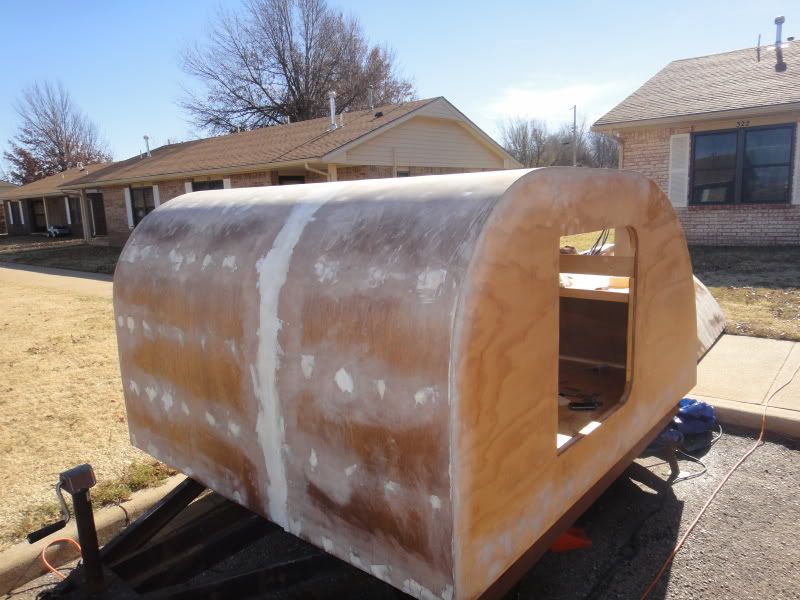
i then started planning it out.. after several computer drawings and playing, i came up with a home design similar to a benroy i guess, but mainly just kinda making it up as i go lol.. it will be 4 feet tall, 8 ft long, and about 6 ft wide, since the trailer is that wide and i dont wanna modify it..

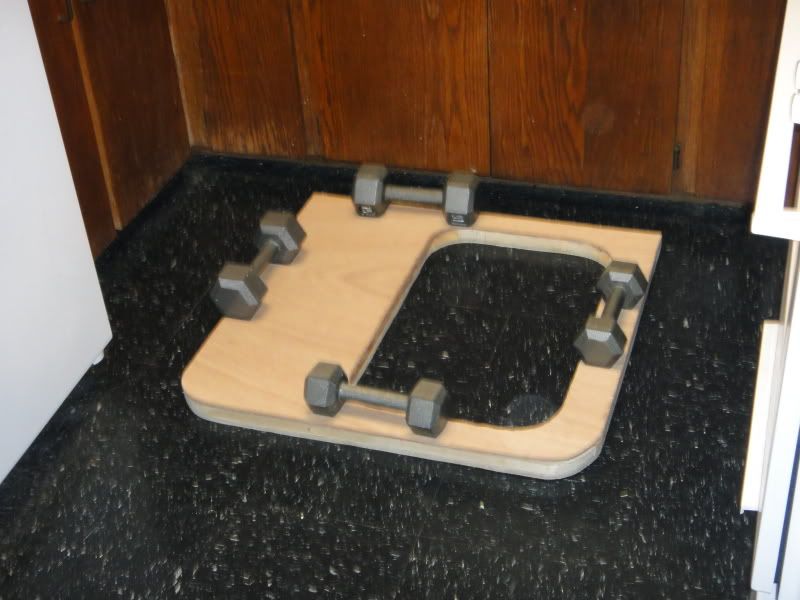
since the wheels are interior and needed clearance, i thought about floor with raised wheel wells for the wells, but theres not enough space between them for a full size bed which is my plan. so i then thought about raising the whole floor, which i ended up doing.. this allows me to have a 7 inch tall storage space under the entire floor pretty much, and i really like the extra storage.. it cuts down on the headroom, but i still will be able to sit up no problem..

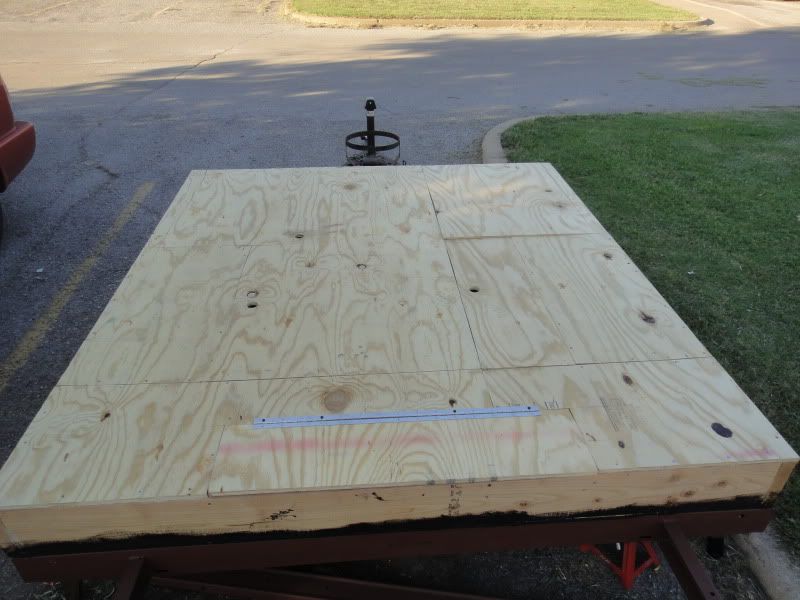
so i built the frame with 2x8s ripped down to 6.5 inches, which with the plywood on both sides gives 7 inches for the tires (tires stick up 4 inches plus 3 inches travel until the axle will hit the frame, so max travel.)

yes i know it is pretty overbuilt.. i considered using a sandwich type sides to the base, but after figuring the weight saved it really wasnt a whole lot difference and a lot more work.. and the sides of the base gives me an excellent place to attach the sides.

heres the base semi built, enough for the wheel wells built and me to be able to cover it with the lovely black gooy mess..

Image

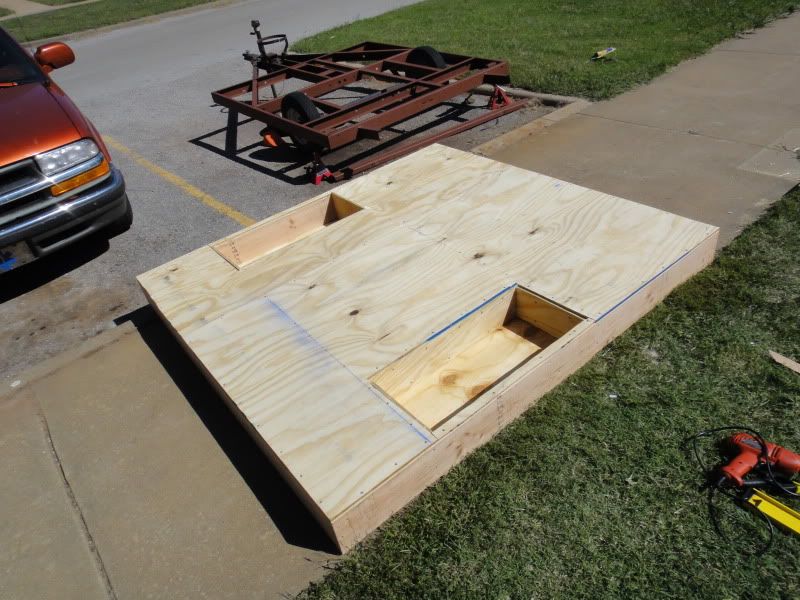
and again i forgot to take a picture after i covered it and myself with blackness lol.. if only i could train my dog to take photos id be set..

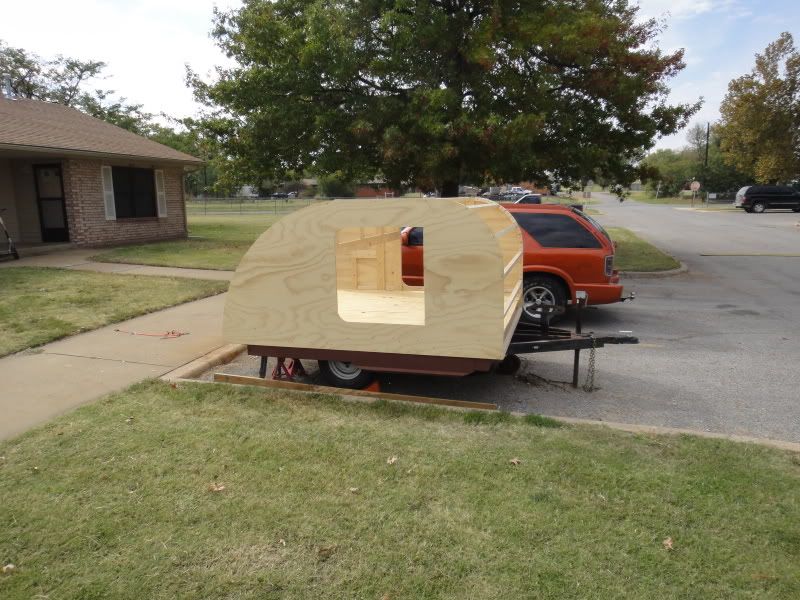
after a few days at work i returned home and put it on the trailer..

Image

i then finished putting in my bracing ( again probably overbuilt)

Image

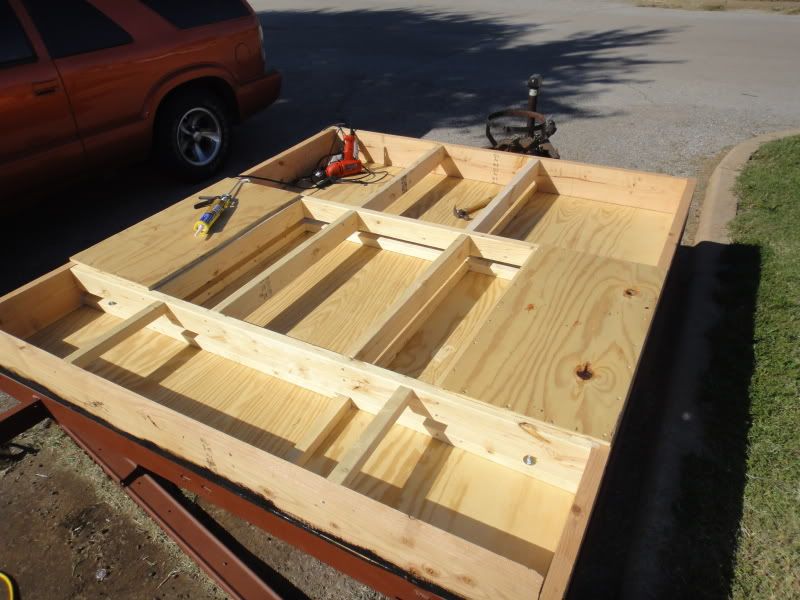
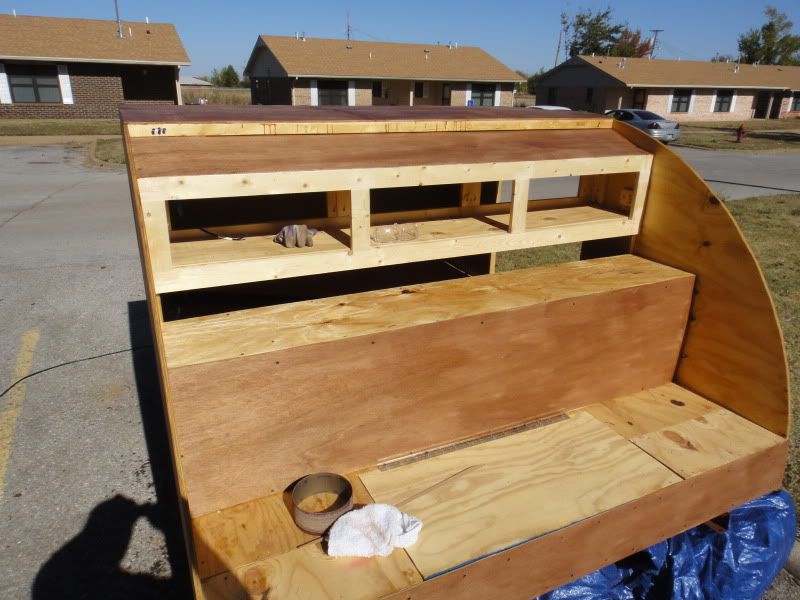
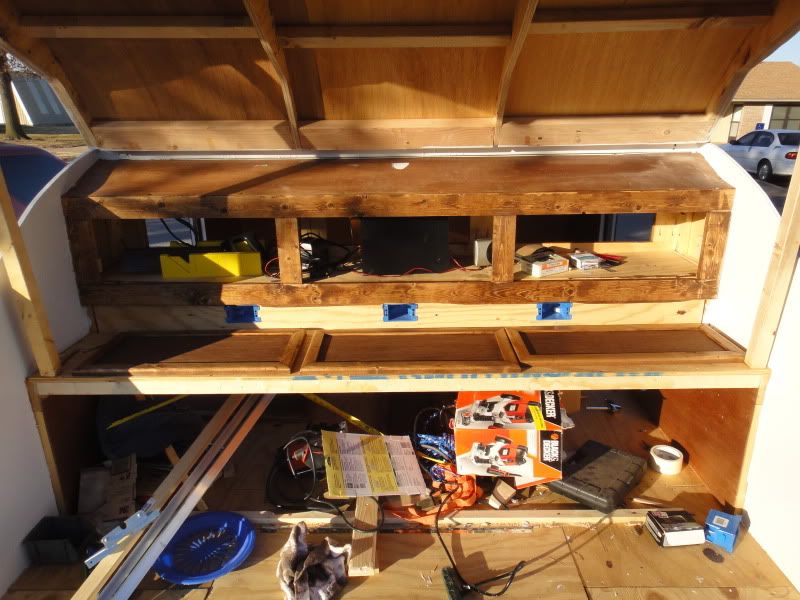
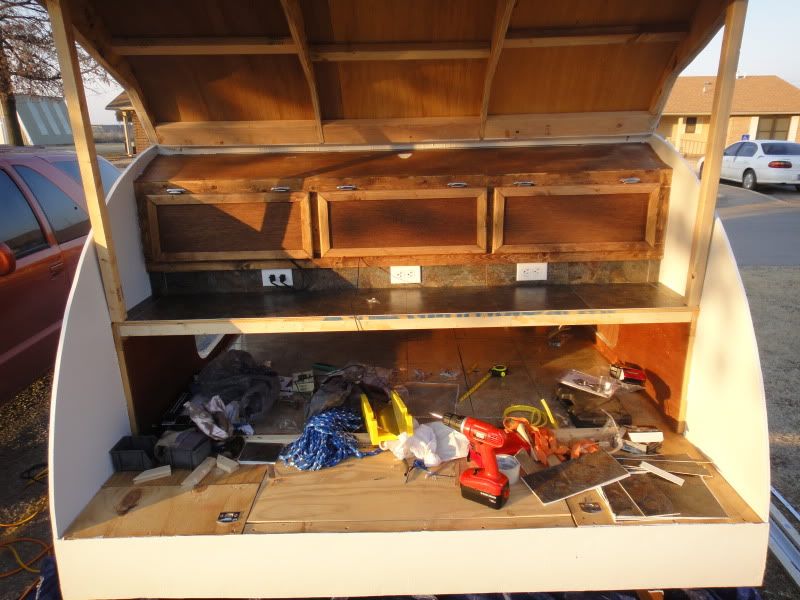
you can see where all my storage will be :D

i then built the interior floor panels. this are all able to be removed, so i can get to the storage.. oh and im plannng on using a futon style mattress inside, so it will allow me to fold the mattress out of the way to get to the storage. i will probably use this storage for items for camp set up, things i wont be needing access alot so i dont have to keep moving my bed.

Image

then, back to work for a few days.. im an EMT, so i took advantage of my down time at the shop, playing with the projector and the computer playing with the deign of the walls on a full size scale lol..

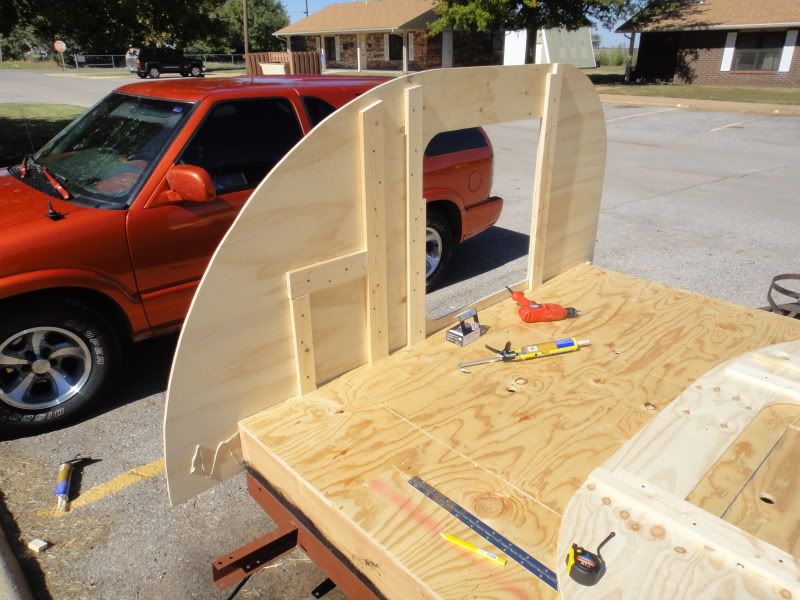
i came home. drew out some walls, and build away i went lol..

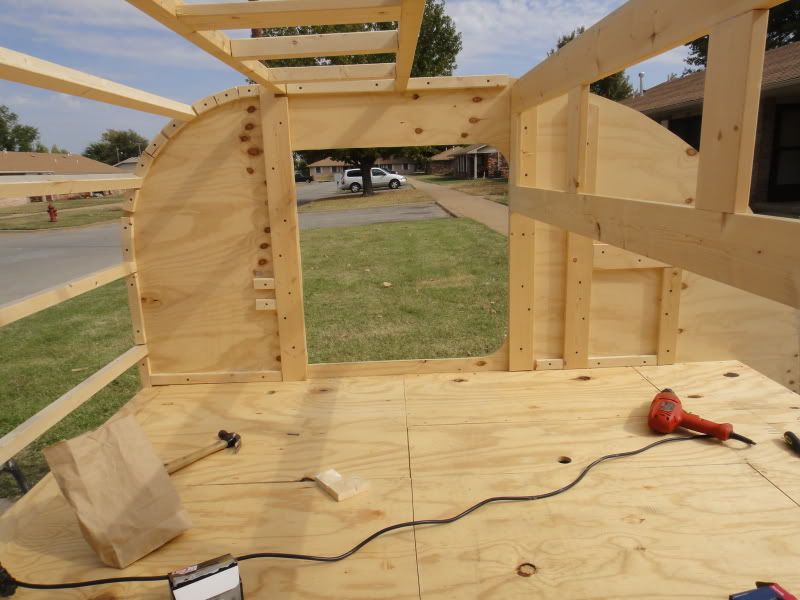
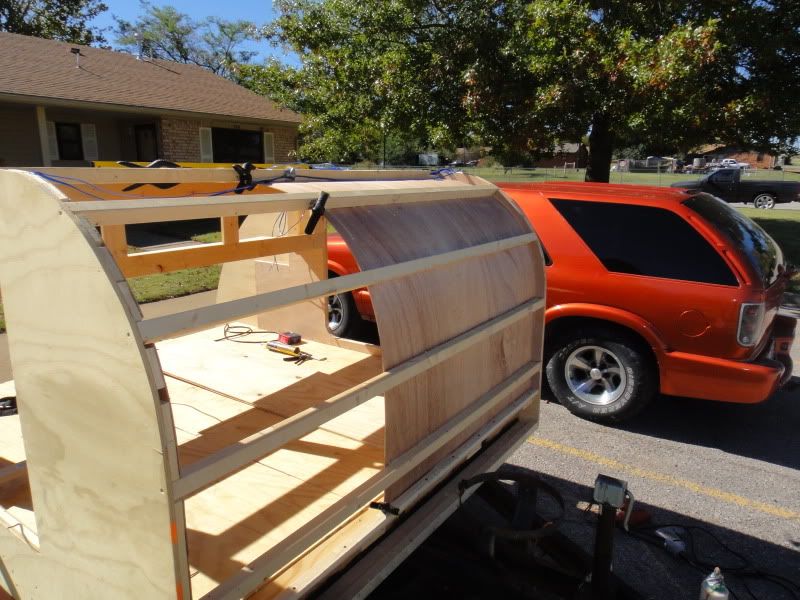
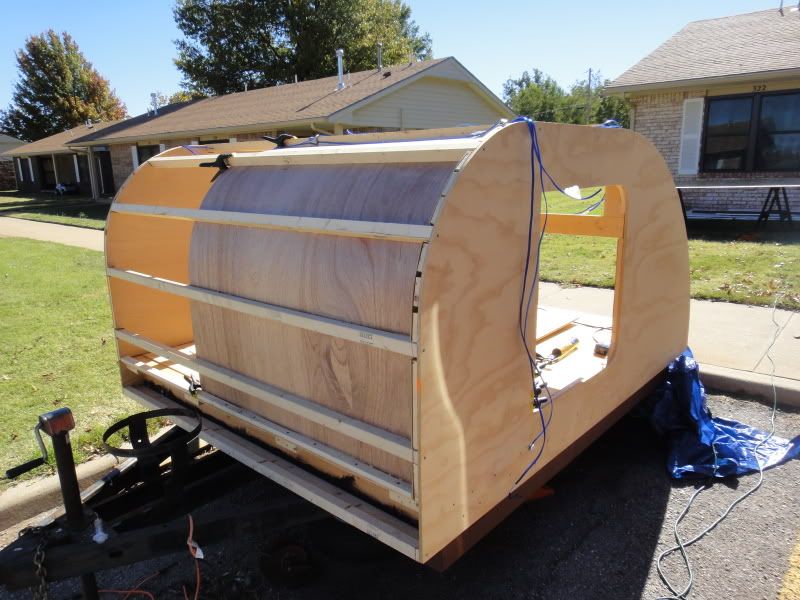
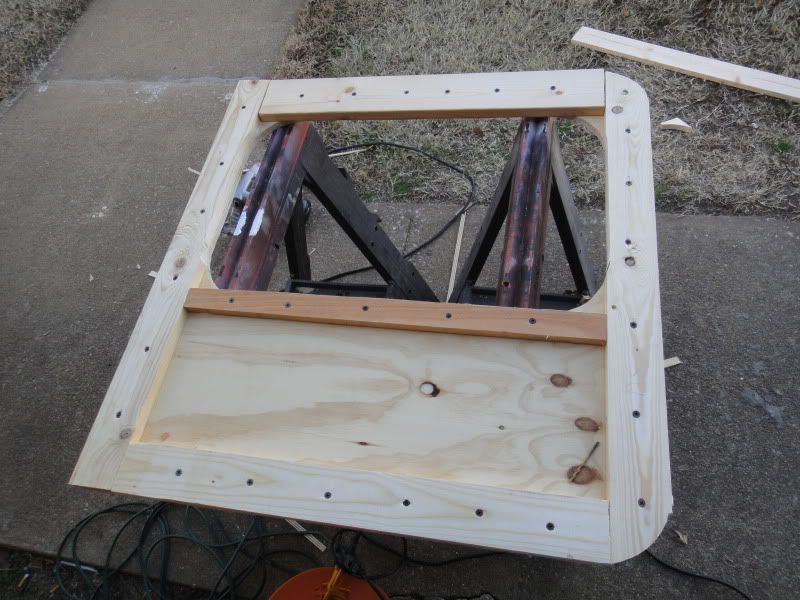
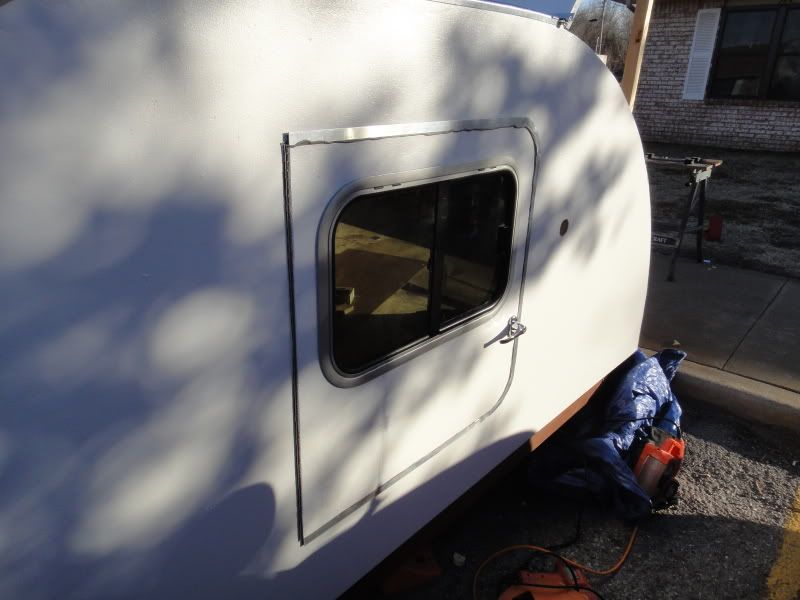
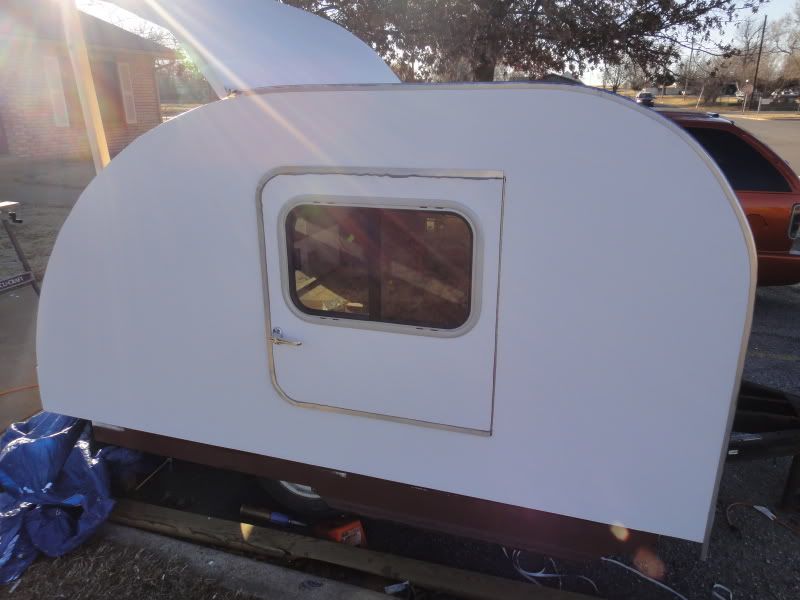
first wall up.. you can see some of the supports for the interior cabinets i had planned up.. these helped setting the wall on the base, i then screwed the walls to the base..
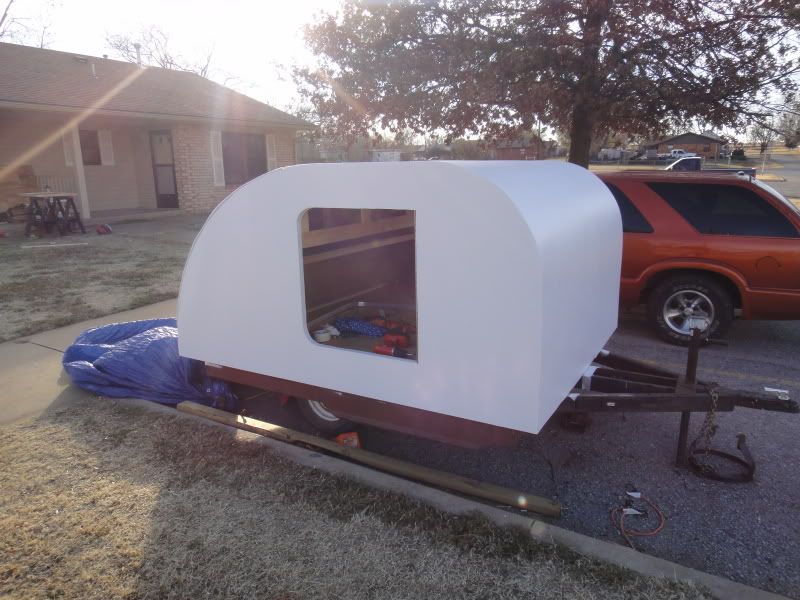
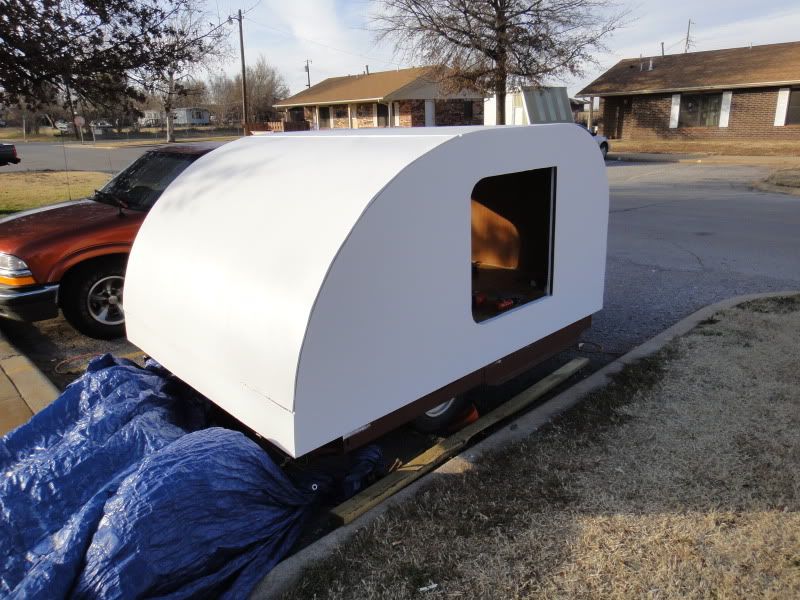
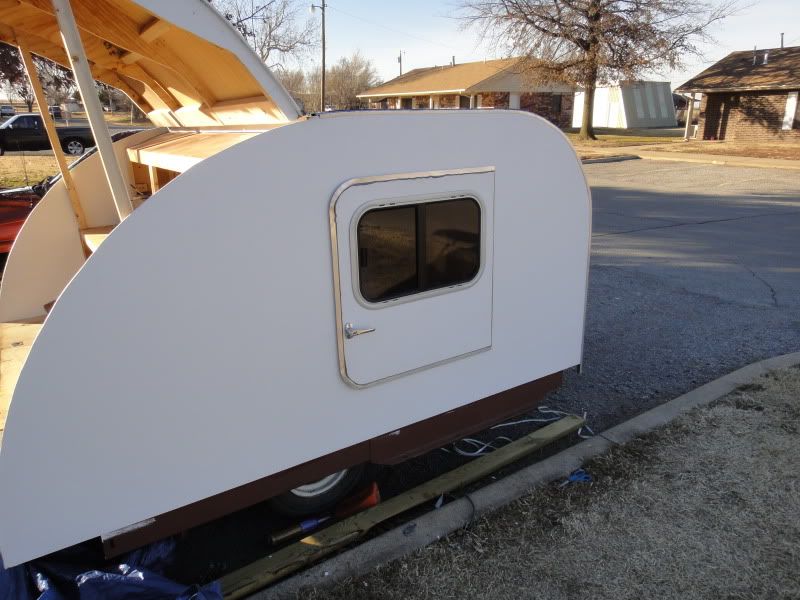
Image

both walls up

Image

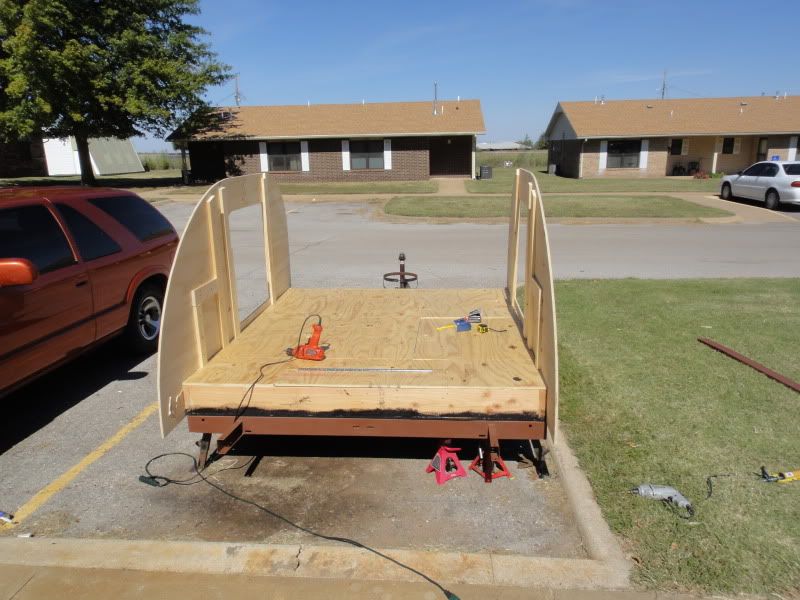
since they are attatched to the base so well, even wothout any roof spars in place they are really sturdy.. helps in this oklahoma wind lol..

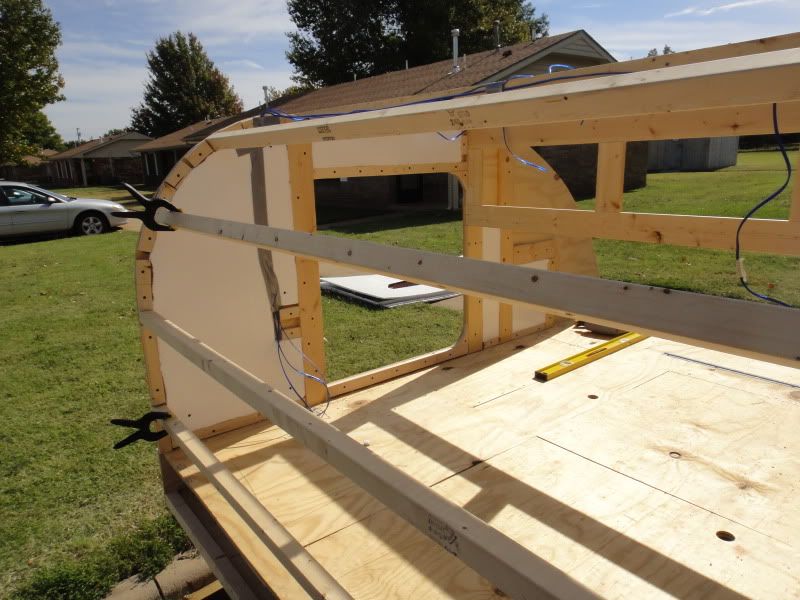
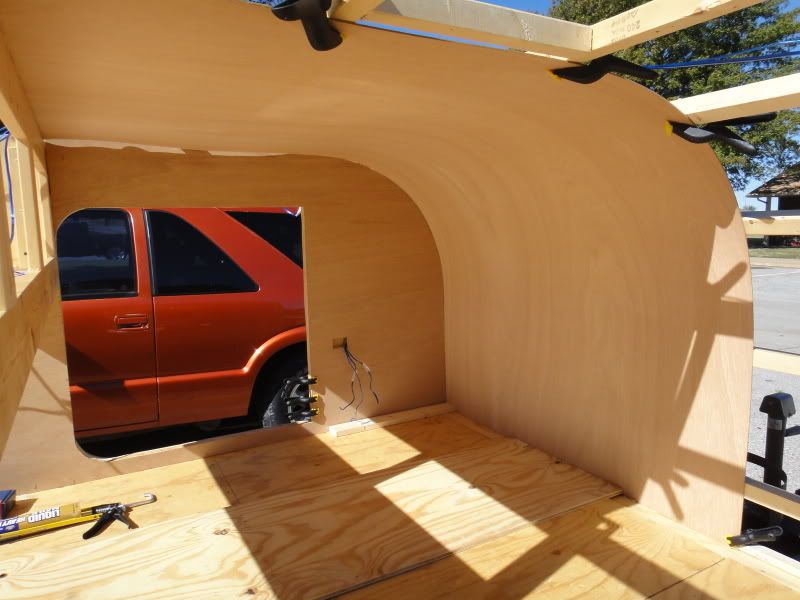
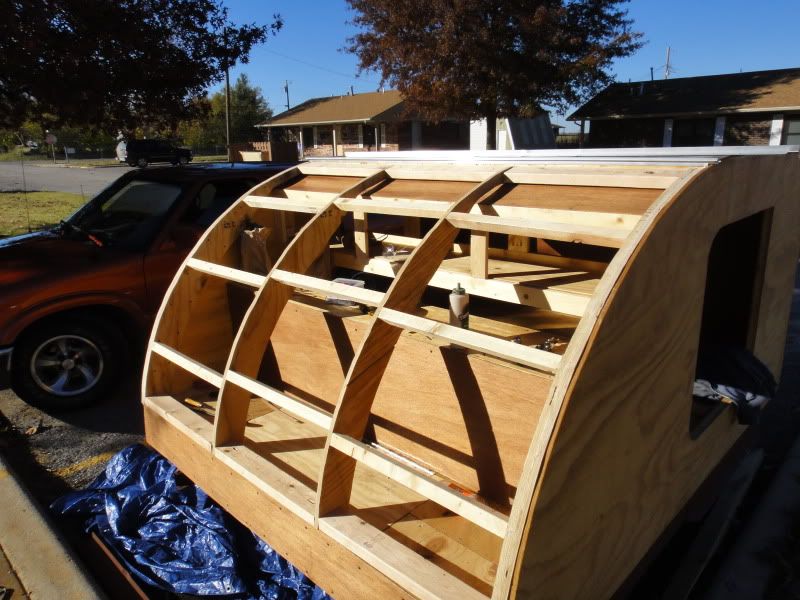
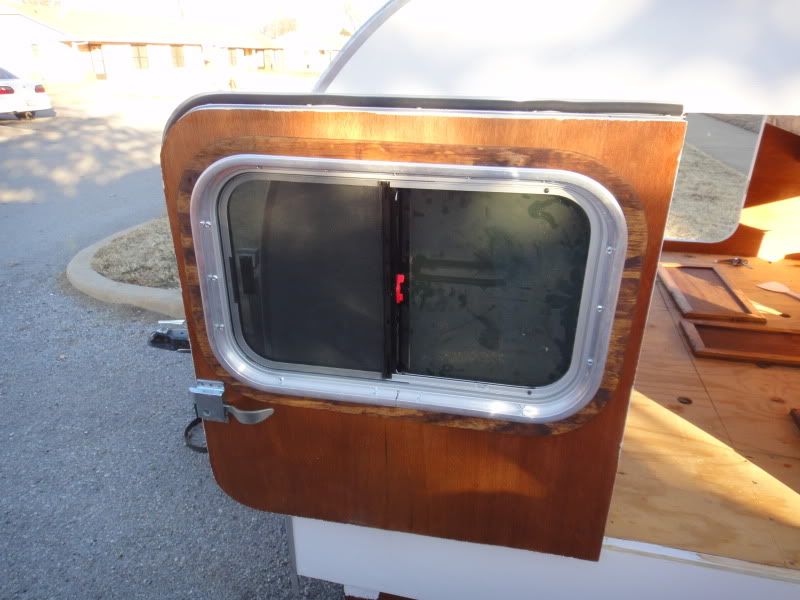
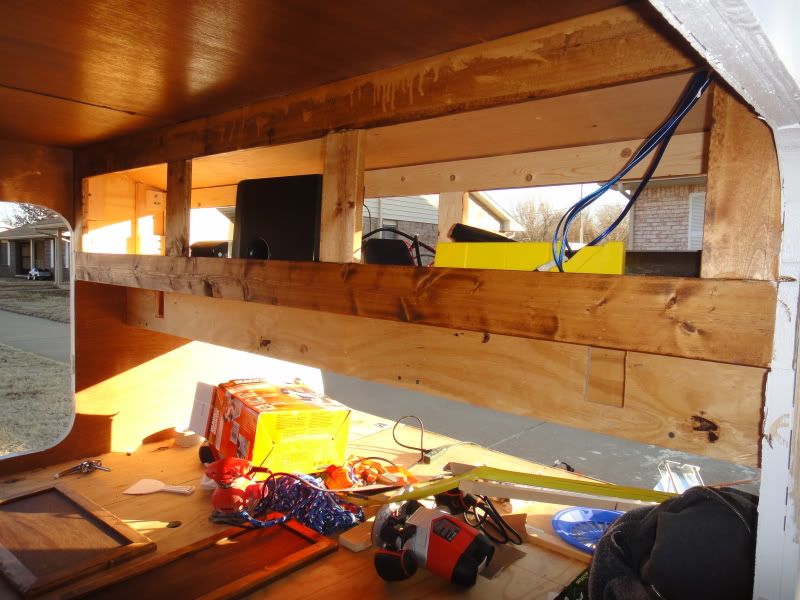
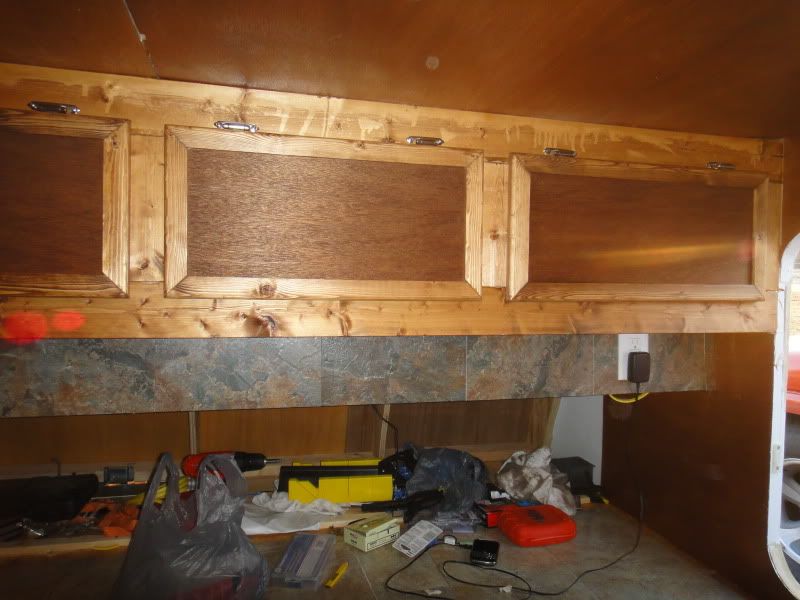
i then began placing the roof spars in. i also framed in the roof vent ( i framed in one one both sides, in case i ever want to add a second one.. i just have one fantastic vent to go in now, but i figured a few extra boards wouldnt hurt in case i ever want to add another vent or something later.. also put in the interior upper cabinent frame to give extra stabilization.. this cabinent will have doors on both the galley side and bed side, so i can access items from both sides if needed.. im gonna have a small galley, but i like it simple.. probably wont have a sink or anything, just mainly storage.

Image

Image

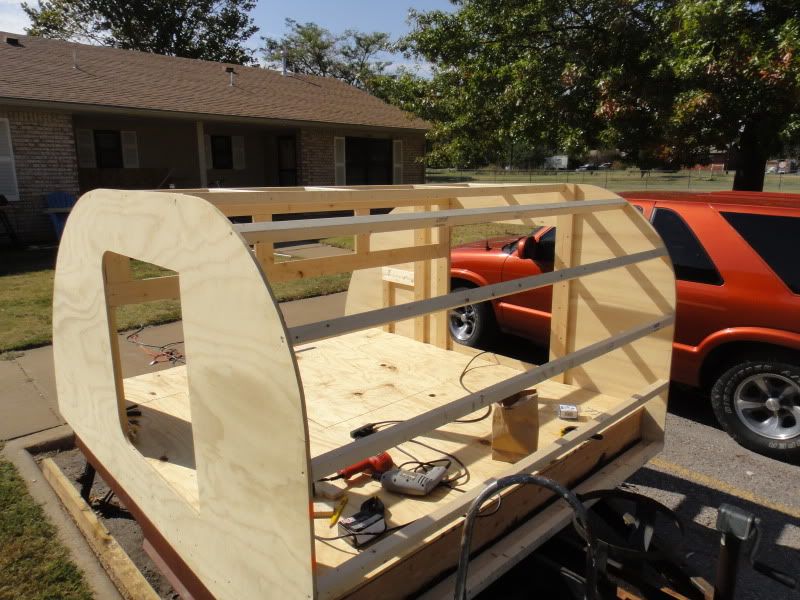
i also started placing in the nailing strips for the walls and roof..

Image

Image

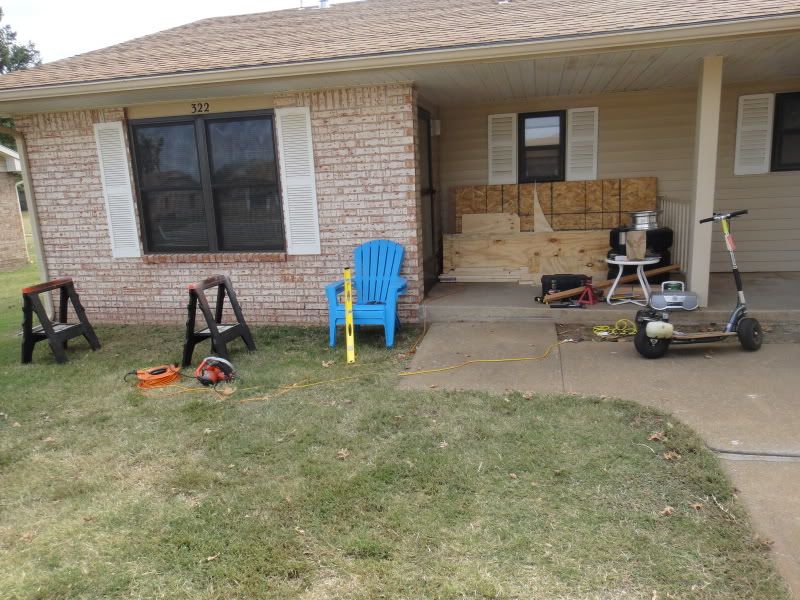
oh and my workshop.. at least my landlord is very nice :)

Image

and my helper.. he supervises me through the window, but hes not much for running power tools..

Image
thats about where i am right now.. im back to work until saturday, and if the weathers nice ill be back at it.. hoping to get the wall insulation and wiring in, then the walls and interior ceiling in this weekend..
Last edited by emtgared on Mon Jan 17, 2011 12:22 am, edited 1 time in total.
"living life one day at a time"
User avatar
emtgared
Teardrop Inspector
 
Posts: 15
Joined: Sun Oct 17, 2010 10:32 pm
Location: Geary Oklahoma

Postby Juneaudave » Thu Oct 21, 2010 9:51 pm

Really, really nice!!!!! Give yourself a big pat on the back! :thumbsup:
User avatar
Juneaudave
Super Duper Lifetime Member
 
Posts: 3237
Images: 380
Joined: Sun Jul 03, 2005 12:11 pm
Location: Juneau, Alaska

Postby starleen2 » Thu Oct 21, 2010 9:56 pm

you're coming along real good - don't forget to take plenty of :pictures: - you might need them later on!
User avatar
starleen2
5th Teardrop Club
 
Posts: 16272
Images: 224
Joined: Sat May 12, 2007 8:26 pm
Location: Pea Ridge ,AR
Top

Postby StPatron » Thu Nov 04, 2010 10:22 pm

You're moving right along! :thumbsup:

Congratulations and welcome to the forum.
User avatar
StPatron
Donating Member
 
Posts: 748
Images: 297
Joined: Tue Dec 15, 2009 8:38 pm
Location: OK
Top

Postby Miriam C. » Thu Nov 04, 2010 10:38 pm

:applause: :thumbsup: :thumbsup: :woohoo: :beautiful: You have one heck of a start! Good job!

Image
“Forgiveness means giving up all hope for a better past.â€
User avatar
Miriam C.
our Aunti M
 
Posts: 19675
Images: 148
Joined: Wed Feb 15, 2006 3:14 pm
Location: Southwest MO
Top

Postby emtgared » Mon Jan 17, 2011 12:20 am

ive been slacking on the updates so i figured id catch up today.


insulated and ran some wiring in the walls.
Image


dad came over and had to work on something. so he helped me on the inner wall panels

Image

inner walls in, and inner ceiling skin being put in place

Image

Image

Image

Image

roof insulated and skinned

Image

Image

a couple of coats of cpes.

Image

Image

Image

Image

started framing up the hatch

Image

hatch skinned

Image

Image

filled the seams and screw holes

Image

Image

painted exterior with a high quality exterior paint. will probably cover with aluminum in the future, but for now paint will work.

Image

Image

framed up doors
Image

Image

doors hung
Image

Image

Image

stained doors and interior

Image

Image

Image

built interior electrical panel
Image

cabinent doors made and mounted. counter top and backsplash covered with stick on floor tiles from lowes :) (glued on though for better hold) carried in to electrical panel inside.

Image

Image

Image

now just to finish tiling the floor, figure out what handles to use on the cabinents, and some more trim work tomorrow.
"living life one day at a time"
User avatar
emtgared
Teardrop Inspector
 
Posts: 15
Joined: Sun Oct 17, 2010 10:32 pm
Location: Geary Oklahoma
Top

Postby YuGun » Mon Jan 17, 2011 12:30 am

:applause: :applause: :applause: :thumbsup:

Hello, Ä°t is going well!.
Have good chance of your build!
User avatar
YuGun
The 300 Club
 
Posts: 445
Joined: Sun Apr 11, 2010 1:25 pm
Location: Turkey
Top

Postby StPatron » Mon Jan 17, 2011 12:36 am

Outstanding! Thanks for all the pics.
User avatar
StPatron
Donating Member
 
Posts: 748
Images: 297
Joined: Tue Dec 15, 2009 8:38 pm
Location: OK
Top

Postby mezmo » Mon Jan 17, 2011 1:35 am

Hi emtgared,

Great Going!

You've made significant progress so far, best of luck as you
get towards the finish.

I like the radius-ed corners on the non-hinge side of your doors.
Nice and distinctive, but still clean and simple. I think it's a good
example of the design providing the ornamentation.

Cheers,
Norm/mezmo
If you have a house - you have a hobby.
User avatar
mezmo
1000 Club
1000 Club
 
Posts: 1817
Images: 194
Joined: Fri Jan 01, 2010 4:11 am
Location: Columbia, SC
Top

Postby aggie79 » Mon Jan 17, 2011 9:37 am

:o Good...ness! You have really been working! The teardrop is looking incredible!

Are you going to make the Beavers Bend outing?

Take care, Tom
Tom (& Linda)
For build info on our former Silver Beatle teardrop:
Build Thread

93503
User avatar
aggie79
Super Duper Lifetime Member
 
Posts: 5405
Images: 686
Joined: Tue Aug 07, 2007 5:42 pm
Location: Watauga, Texas
Top

Postby emtgared » Mon Jan 17, 2011 11:34 am

mezmo wrote:Hi emtgared,

Great Going!

You've made significant progress so far, best of luck as you
get towards the finish.

I like the radius-ed corners on the non-hinge side of your doors.
Nice and distinctive, but still clean and simple. I think it's a good
example of the design providing the ornamentation.

Cheers,
Norm/mezmo


thanks, those corners turned out to be a major pain. t molding wouldnt work, even with heating it it kept breaking. so i ended up using some alluminum angle from lowes. heated it and bent it around a mold. took forever and lots of heat, but made it out ok. ill take some pics of the mold i made and up close of the doors today.
"living life one day at a time"
User avatar
emtgared
Teardrop Inspector
 
Posts: 15
Joined: Sun Oct 17, 2010 10:32 pm
Location: Geary Oklahoma
Top

Postby emtgared » Mon Jan 17, 2011 11:44 am

thanks everyone for the replies. ill be making it to as many meets as i can this year, so i hope to meet some of you. the tear is not perfect, but for a home built camper in my driveway, with little experience i think its turning out ok. one mistake you can see is the interior cabinet face, i cpes the luan on the ceiling, and it gets kinda messy upside down, and i got some on the cabinet face. since it soaks into the wood, i sanded and sanded but never really got deep enough to get past it, so it left a pattern when i stained the cabinet frame. oh well it adds character lol

you can see it above the cabinet doors in this photo.

Image
"living life one day at a time"
User avatar
emtgared
Teardrop Inspector
 
Posts: 15
Joined: Sun Oct 17, 2010 10:32 pm
Location: Geary Oklahoma
Top

Postby parnold » Mon Jan 17, 2011 11:51 am

Wow!

I really like the "wide body". Your carpentry looks just fine too!

Keep up the good work.

:thumbsup: :thumbsup:
User avatar
parnold
Donating Member
 
Posts: 2344
Images: 302
Joined: Mon Feb 08, 2010 4:49 pm
Location: Northwest New Jersey
Top

Postby b.bodemer » Mon Jan 17, 2011 11:59 am

Lookin good. I just love watching all the trailer builds!

Barb
User avatar
b.bodemer
1000 Club
1000 Club
 
Posts: 1600
Images: 319
Joined: Mon May 08, 2006 5:43 pm
Location: Lakewood OH
Top

Postby Facemeltingly Epic » Mon Jan 17, 2011 11:12 pm

Very nice work! I hope mine turns out that well (once I decide what exactly I want to build, and THEN once I get off my duff and start building it :thinking: ).
Scot

My build journal: http://www.tnttt.com/viewtopic.php?t=42585

Not enough photos there? Try here:
http://www.facebook.com/media/set/?set= ... c3e73ca184

Or here:
http://www.facebook.com/media/set/?set= ... cf567dd7b7

"Politicians are like diapers. They should be changed often, and for the same reason." - Mark Twain
User avatar
Facemeltingly Epic
Teardrop Master
 
Posts: 143
Joined: Sun Jul 11, 2010 8:27 pm
Location: San Jose, CA
Top


Return to Build Journals

Who is online

Users browsing this forum: No registered users and 17 guests