The Willamettear? Updated Pictures 5/14/2011

...ask your questions in the appropriate forums BUT document your build here...preferably in a single thread...dates for updates, are appreciated....

The Willamettear? Updated Pictures 5/14/2011

Postby TDPhil » Thu Mar 17, 2011 12:54 am

Just started building my 4x8 Benroy last week and decided it was time to get a build journal going. I'm currently in the process of welding together the trailer frame out of 3'/1 1/2' tube steel (no pictures of this yet). Since I'm building the trailer away from home, when I have time around the house I have been getting together the wooden portions of the teardrop.


Image
Cutting some pink board to insulate the floor.

Image
Getting the underside all sealed up. Used Polyurethane, exterior latex primer, and black exterior latex paint (I had it laying around and wanted to get rid of it).

Image
Doors being cut out of the 3/4 inch birch plywood walls.

Image
One door test mounted back on with a 2 foot stainless piano hinge. I put a 1/4 inch round-over on the inside of the door and the frame, the fit came out really nice.

I'll keep uploading pics as things get more technical and once I get a few photos of the trailer. Lets just hope I can keep my forward momentum![/img]
Last edited by TDPhil on Sat May 14, 2011 2:51 am, edited 4 times in total.
-TDPhil

My Build Journal - The Willamettear?
User avatar
TDPhil
Teardrop Inspector
 
Posts: 8
Images: 31
Joined: Wed Mar 16, 2011 10:38 pm

Postby doug hodder » Fri Mar 18, 2011 6:04 pm

Once you get the body on the frame...it'll start to really get going. Looks great, keep up with it....camping season is coming up really soon! Doug
doug hodder
*Snoop Dougie Doug
 
Posts: 12625
Images: 562
Joined: Tue Dec 14, 2004 11:20 pm

Postby emiller » Sat Mar 19, 2011 11:13 am

Yeah when that body goes on it will be pretty quick after that you will be camping in your tear. I too built my frame away from home (at work) brought it home and started putting on the aluminum.
User avatar
emiller
Donating Member
 
Posts: 3421
Images: 157
Joined: Sun Jun 13, 2004 11:00 pm
Location: Arizona, Phoenix
Top

Trailer is Done! Well not quite.

Postby TDPhil » Mon Mar 28, 2011 12:02 am

No updates lately because I've been busy building a frame in my dads barn. Finally got it finished and towed home yesterday so here are some pictures. It is mostly 1 1/2 x 3 tube steel with aluminum diamond-plate fenders. The wiring and light job was just to get it home, I'll start priming and painting the frame tomorrow.

Image
Finally got it home. I'm very happy with the quality, but a pre-fabricated trailer would have been a huge time-saver.

Image
The fenders were a little bit of a problem since I don't have access or skills to weld aluminum. We ended up bending these in a press then attaching them to steel supports that are welded onto the frame.

Image
The tongue is 4 ft of 3x3 tube steel.

Image
During the test drive I lost a taillight from my temporary light set-up and drug it down the road for a while (hard to say how long). Surprisingly it still worked and i was able to reattach it for the drive home.

Next up is priming and painting the frame, then I can attach my floor that I've already made and I'm off and running. Now that all the work will be done at my house I should be able to move much faster. Wish me luck!
-TDPhil

My Build Journal - The Willamettear?
User avatar
TDPhil
Teardrop Inspector
 
Posts: 8
Images: 31
Joined: Wed Mar 16, 2011 10:38 pm
Top

Update 4-3-11

Postby TDPhil » Sun Apr 03, 2011 8:57 pm

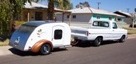
Alright well I finally have a little to report and some pictures. The big progress was on the floor of the trailer, but I have some pictures of other small projects.

Image
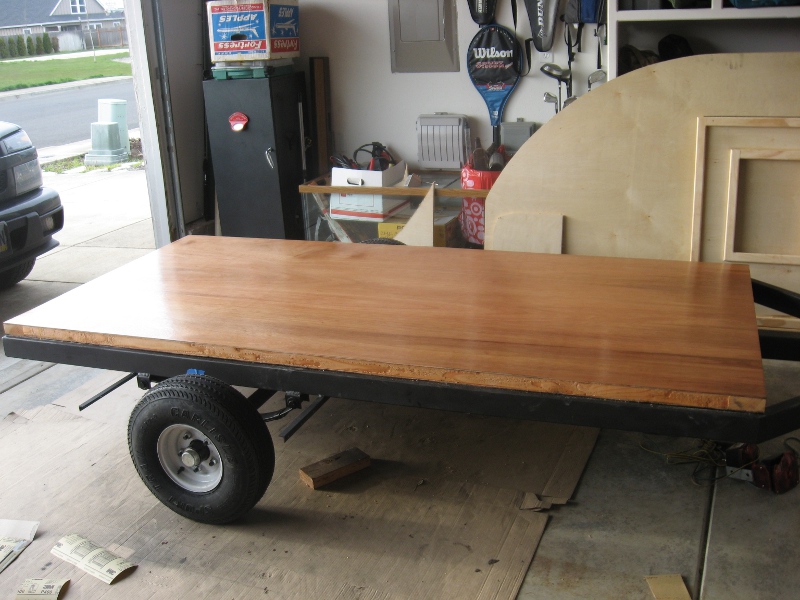
Got the trailer frame painted black, did the whole thing with rattle cans and it actually gave a pretty good finish.

Image
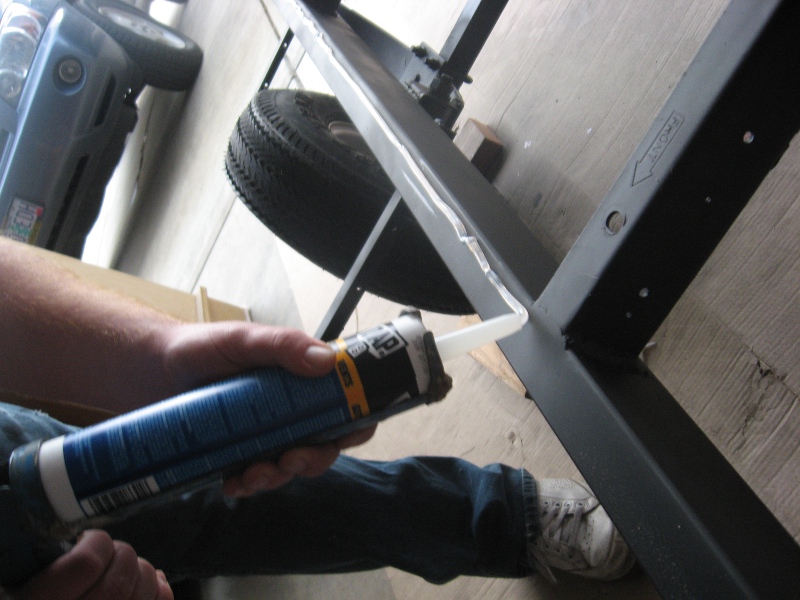
I ran silicon caulk around the whole thing prior to putting the floor down to prevent water from entering from below and getting into the floor or walls.

Image
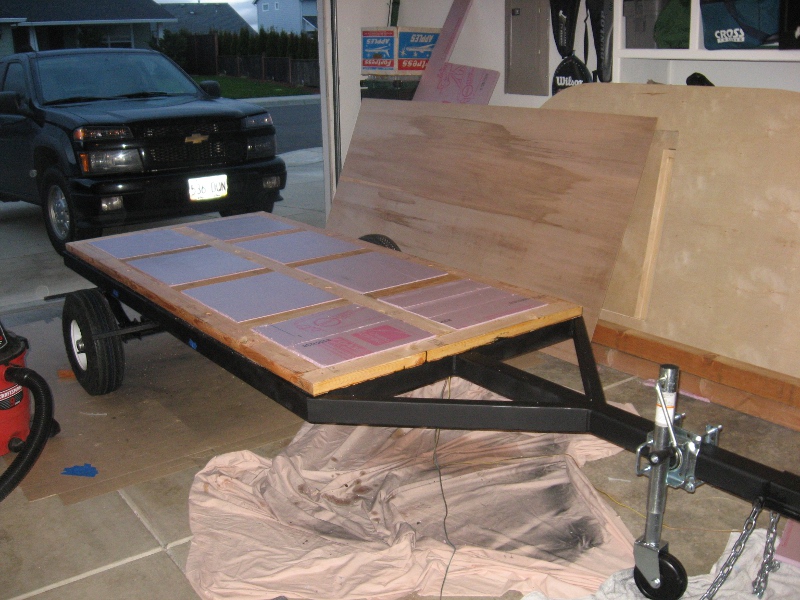
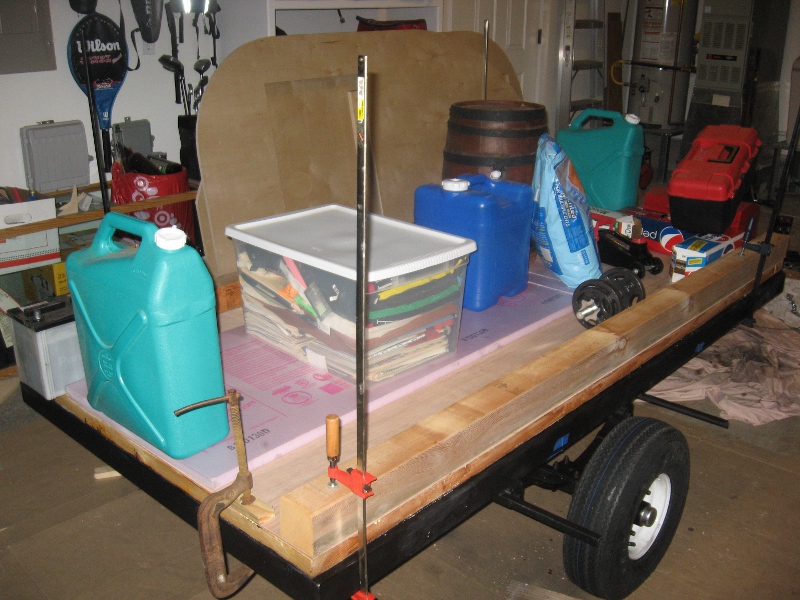
Floor frame is bolted down and the insulation is all cut to size.

Image
Gluing down the Mahogany top of the floor unit. I didn't want any screws or nails showing on the floor so I glued the whole thing down with as much weight as I could find. It ended up really being stuck on there and it looks nice with no fasteners showing.

Image
Here is the Mahogany floor with a couple coats of Poly on it. It wont be seen much, but I think the contrast with the Birch walls will look nice.

Image
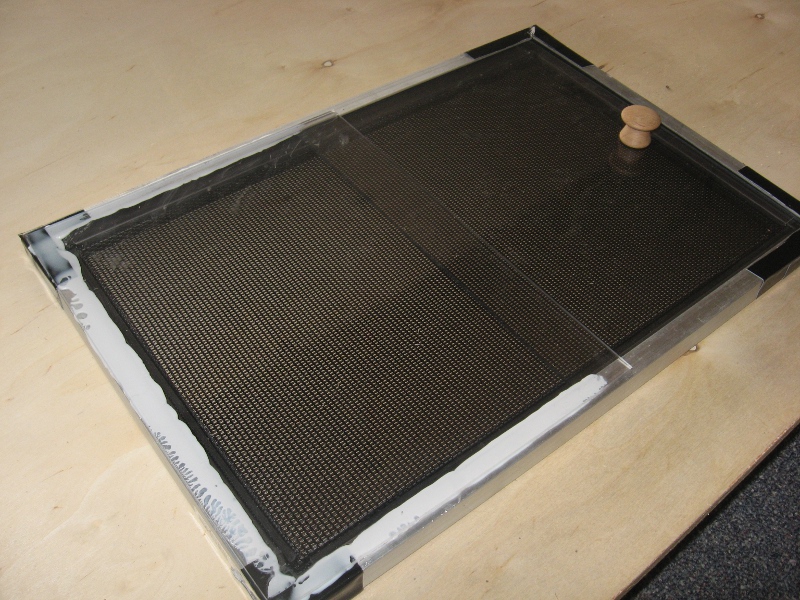
I was having trouble finding windows that fit my needs, so i built these out of window screen, aluminum channel and lexan. It's a slider that will be framed into the walls, one on each side. Once the wood trim is framed in around it you won't be able to see the aluminum anymore, just the lexan and screen. I like the screen because it has almost the same effect as using a tinted lexan, keeping some of the light out.

Image
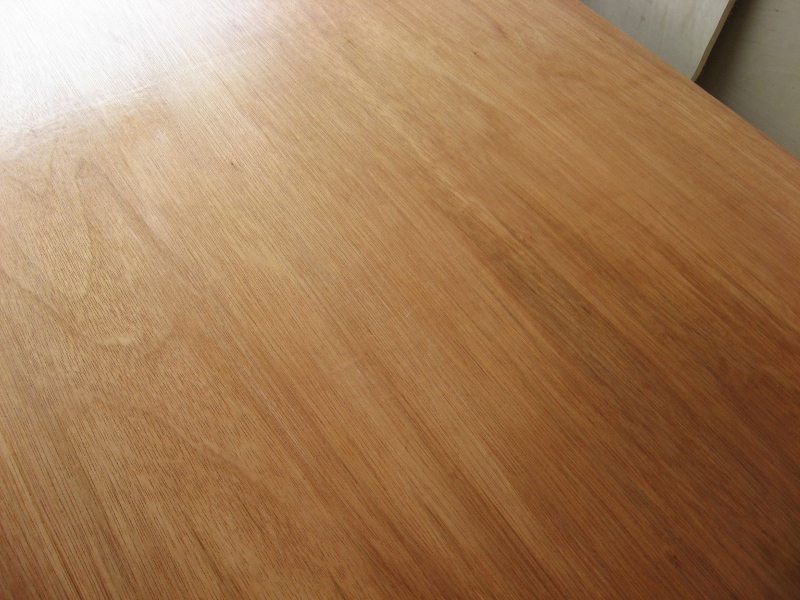
A closer shot of the Mahogany floor. I like how the look turned out, but it is a little dark for doing the whole interior (the lighter birch might make it seem bigger inside.)

Image
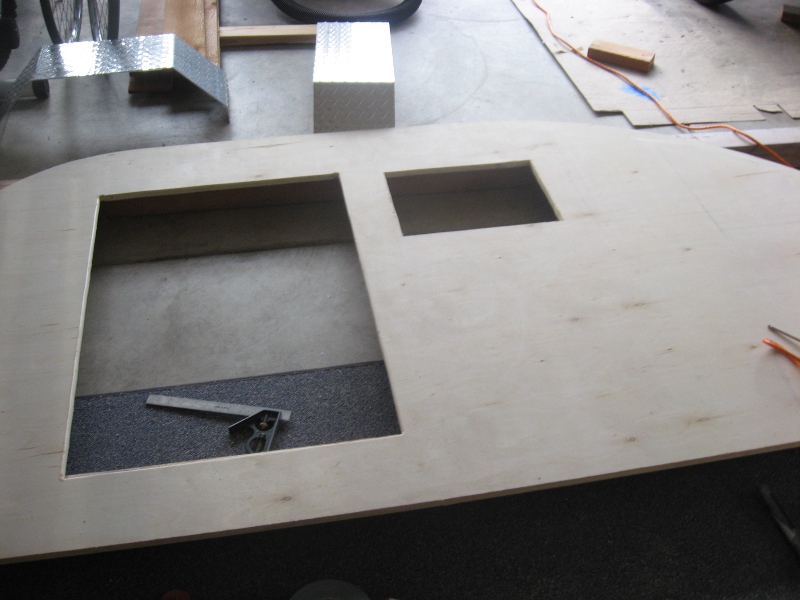
Here is the window cutout on the sidewall, showing the window placement.
There will be large tinted double paned glass windows in both doors, then one of these smaller sliders on each side.

That's all I've got for now, I'm planning for the next step to be putting the Poly on the interior of both sidewalls then up they go!
-TDPhil

My Build Journal - The Willamettear?
User avatar
TDPhil
Teardrop Inspector
 
Posts: 8
Images: 31
Joined: Wed Mar 16, 2011 10:38 pm
Top

Postby myoung » Mon Apr 04, 2011 6:19 am

Looking real good. I'm guessing that a lot of thought and planning has preceded every step.

I wonder if an added benefit of the silicone caulk bead will be elimination of the squeaking that can happen when the undercoated floor flexes against the chassis. That happens with my build that does not have the silicone caulk although it has diminished as the trailer weight has increased during construction.
Mike Young
build thread: viewtopic.php?t=40459
User avatar
myoung
500 Club
 
Posts: 644
Images: 250
Joined: Sat Aug 07, 2010 11:21 am
Location: Nipomo, CA
Top

Postby Loader » Mon Apr 04, 2011 7:59 am

Looks Great! I love the mahogany. :thumbsup:
Earl & Kerry

"Loader"

Blue Yonder Build Thread - viewtopic.php?f=50&t=42611

ImageImage
User avatar
Loader
Platinum Donating Member
 
Posts: 1584
Images: 245
Joined: Tue Apr 26, 2005 2:33 pm
Location: Fort Worth, Texas
Top

Postby Sawyer » Mon Apr 04, 2011 9:53 am

Phil,

Great Job! It's a shame your floor will be hidden by a bed, it's quite beautiful! I know Danny B would approve, it looks like all your experience re-skinning doors came into play there... The frame looks extremely strong as well, is that 3x3 on the tongue? Those windows are fantastic, great thinking! I want to see them in person and maybe "borrow" your ideas...

Excellent update, Keep it up!
"Those who would give up a little freedom to get a little security shall soon have neither" - Benjamin Franklin
User avatar
Sawyer
Teardrop Advisor
 
Posts: 72
Images: 36
Joined: Tue Apr 22, 2008 10:02 pm
Location: Eugene, Or
Top

Update 04-12-11

Postby TDPhil » Tue Apr 12, 2011 10:14 pm

Time for another quick update. I got the walls attached and square then secured in most of the roof spars. I'm doing all the polyurethane on the interior prior to installing these pieces which is slowing me down a little, but I'd rather do it now than get inside later and do all the surfaces at once.
Image
Here are the exterior frames for the smaller sliding windows.

Image
Got the walls attached and square with the floor using clamps and scraps.

Image
Here is the front of the TD. The reason for the vertical spars is that I am making the tongue box accessible from inside the trailer as a spot to keep backpacks so they aren't taking up mattress space.

Image
Here is an interior shot after getting most of the spars installed.

Image
Here is a shot of the spars from the front.

Thanks for the comments and input. MYoung, I hadn't thought of the silicon as a way to reduce squeaking on the frame, but I will take any benefit I can get on this project. Loader, I kind of wish I would have done the whole thing in Mahogany, but I thought the light birch would make it seem bigger inside. Now that it is all going together I think I may have really liked the red for the whole interior. Sawyer, it is a 3x3 on the tongue, it was a piece that was laying around so i took the angle grinder to it, I like how it looks, I like the strength and it was easy to attach the coupler to. You'll have to make it over here to take a look in person!

I plan to attach the front 8 ft. piece of roof next and get my cabinets all framed up. Hopefully I'll get some good pictures.
-TDPhil

My Build Journal - The Willamettear?
User avatar
TDPhil
Teardrop Inspector
 
Posts: 8
Images: 31
Joined: Wed Mar 16, 2011 10:38 pm
Top

Postby S. Heisley » Tue Apr 12, 2011 10:38 pm

Oh, that looks really nice! I like the contrasting wood tones. It really pops! :thumbsup:
User avatar
S. Heisley
Super Lifetime Member
 
Posts: 8774
Images: 495
Joined: Mon Sep 17, 2007 10:02 am
Location: No. California
Top

Update 5-14-2011

Postby TDPhil » Sat May 14, 2011 2:50 am

Alright I've been bad about updating with pictures, but have actually made some progress on the build. I'm approaching the point where i start sealing and painting, hopefully these pictures will give some idea how I've been going about it. So let's get to it.

Image
here is the front roof piece bent on and fastened with drywall screws and wood glue.

Image
And the interior view.

Image
Here is the counter top and base for the cabinets.

Image
And a rear view of the base installed.

Image
Here are the interior cabinet faces.


Image
This is the cutout so that we will have access to the tongue box from inside.

Image
I skipped a few steps on pictures, but here is the slide out cooler that is going in below the galley.

Image
And here it is with the rest of the "roof" installed and the hole routed out.

Image
Here it is with the faceplate installed.

Image
And here it is opened up.

My next two big goals are to build the tongue box and to build the hatch for the galley. Instead of trimming all the edges I've been putting a 1/4 inch round-over on the whole thing then sealing it with body filler. So far I like the look of the round-over and it will hopefully hold the paint better than a 90 degree connection between the roof and sides. With the amount of rain we get here in Oregon "Teardrop Time" is a really useful concept to keep yourself from going crazy with how many little jobs there are.
-TDPhil

My Build Journal - The Willamettear?
User avatar
TDPhil
Teardrop Inspector
 
Posts: 8
Images: 31
Joined: Wed Mar 16, 2011 10:38 pm
Top

Postby Shadow Catcher » Sat May 14, 2011 4:18 am

you are certainly making great progress in a short time frame. Looking Good :thumbsup:
User avatar
Shadow Catcher
Donating Member
 
Posts: 5996
Images: 234
Joined: Sat Apr 11, 2009 8:26 pm
Location: Metamora, OH
Top

Postby Sawyer » Tue Aug 23, 2011 12:17 am

Let's see some more pics!!!!
"Those who would give up a little freedom to get a little security shall soon have neither" - Benjamin Franklin
User avatar
Sawyer
Teardrop Advisor
 
Posts: 72
Images: 36
Joined: Tue Apr 22, 2008 10:02 pm
Location: Eugene, Or
Top


Return to Build Journals

Who is online

Users browsing this forum: No registered users and 15 guests