The White Pearl

...ask your questions in the appropriate forums BUT document your build here...preferably in a single thread...dates for updates, are appreciated....

The White Pearl

Postby paperdoor » Mon Jan 18, 2010 12:15 pm

I have been in the process of building my first Tear and I figured why not start sharing now - The winter weather has been slowing me down a bit ,but my goal is to be completed by the end of Feb 2010 and get back on the Road again.
I made a road trip across the country from CA to the east coast with my dog in a 86 Volvo wagon (it had a tow hitch when I bought it:) ) ,and I've always liked those little trailers the first time I saw one. So, I figured what a great project to do with my father in his last years. We'll my initial plans for the Tear were very simple, until my father introduced me to his buddy Greg - who owns a woodshop with every tool imaginable. The plans ( all of which were in my head from hours of research on the web) started to grow. Why not? I've got access to this amazing shop, Greg the owner ,fascinated with the whole project offered full support, as well as all the neighbors coming by with cozies in hand to chat and check on the progress of this alien looking vessel taking shape in their back yards.
Image
I'm putting all the best of what I've seen on the web and using my 20+ years of carpentry/design exp, my fathers 50+ years exp(at this point he's not picking up tools, his help is more in the lines of "why don't you do it this way", or "why DID you do it that way?" and Greg's vast knowledge and friendship.
Image

Hope that my posts will help future Tear projects as did all the others who have posted in the past have helped me.

I have also started a website to doc the whole project from start to finish, as well as getting back on the road in the Tear.
http://www.edmattson.com/roadtrip
Thanks Ed -
Last edited by paperdoor on Mon Jan 18, 2010 7:44 pm, edited 1 time in total.
User avatar
paperdoor
Teardrop Builder
 
Posts: 46
Joined: Mon Jan 18, 2010 10:17 am
Location: In the Shop

The Trailer

Postby paperdoor » Mon Jan 18, 2010 12:30 pm

Image
My dad.
Purchased on-sale for a mere $274.95 from Harbor Frieght - (no Tax in Delaware), this bolt together 4'x8' utility trailer, including lights and 12" wheels and tires comes neatly packed in two (very heavy) boxes.
Image

If I were to do it again I would have bought a prebuild trailer from Tractor Supply , only $100 more , but a lot less work.

Image

Had plans to weld anyway - Here is the drop floor , spare tire holder and water tank and space for battery and water pump.

Image

Image

Trailer painted and ready for flooring.
Image
Last edited by paperdoor on Mon Jan 18, 2010 4:05 pm, edited 1 time in total.
User avatar
paperdoor
Teardrop Builder
 
Posts: 46
Joined: Mon Jan 18, 2010 10:17 am
Location: In the Shop

The Floor

Postby paperdoor » Mon Jan 18, 2010 12:43 pm

Image
Now that the frame is complete and painted I build the floor out of 1/2 " plywood, framed with 2x2 and sealed with Henry solorlex 287 white roofing sealer - much nicer to work with than that black tar roof cement- Its a rubberized roof sealer that's like a thick primer, I applied three coats ,dries in a little over an hour. We'll see how it holds up.

Image
I used 1 1/2" solid insulation between floor framing.

Image
This was one of the best methods I've found online - bending a piece of plastic tubing - to get the shape of the side walls.

Image
2x2 framing to support the walls -each had to be compound mitred - and I used 2 1/2" screws, predrilled, thru the side walls.

Image
I used 1x3s across the galley hatch for a smaller profile, which will get sheathed on the top with Masonite, Fiberglass and 1/4 birch finish ply on the interior.
User avatar
paperdoor
Teardrop Builder
 
Posts: 46
Joined: Mon Jan 18, 2010 10:17 am
Location: In the Shop
Top

Postby paperdoor » Mon Jan 18, 2010 12:51 pm

Image
My goal is to design the Tear similar to my 86 Volvo 240 DL - So the Tear needs Flares!
Image
Image
Image
Which get shaped and sanded, alot of sanding.
User avatar
paperdoor
Teardrop Builder
 
Posts: 46
Joined: Mon Jan 18, 2010 10:17 am
Location: In the Shop
Top

Wrapping the Hull

Postby paperdoor » Mon Jan 18, 2010 1:09 pm

Image
I'm using 1/8" Masonite, which is cheap and very flexible , for the exterior of the hull. This will be glassed over with 6mil glass cloth and epoxy resin.
The stuffs very expensive, but I shopped around and found epoxy online at AeroMarine Products Inc..Here is their site http://www.jgreer.com/ They sell a 3 gallon kit , 2 gallons of epoxy resin and one gallon of hardener w/pumps for $170 including shipping. The owner is great with giving advice and the product has worked flawlessly so far. He even said that he gets a call a week about Teardrop projects.

Image
Here is an interior shot of the Masonite wrap.
Image
Detail of Galley framing
Image
I've skinned the entire hull, and now it's time to fill holes and sand.
I used epoxy with filler for any large holes, and plain old water based wood filler for screw holes as suggested by the epoxy resin dealer - I was told to stay away from bondo.
User avatar
paperdoor
Teardrop Builder
 
Posts: 46
Joined: Mon Jan 18, 2010 10:17 am
Location: In the Shop
Top

Forming Rain Gutters

Postby paperdoor » Mon Jan 18, 2010 1:24 pm

Image
Here's were I start to go off the deep end - well I think I was already there by planning on living out of a teardrop for about a year. I figured if I'm going to do so, then this little trailers got to be sound , sweet and waterproof. I chose to use the rain gutter design, which is tested and used on every car since who knows when. I used 1/2" ply ,kerfed every 1/2" or so to allow flexibility and a strip of 1/8" masonite to form the edge. It is actually very strong, and will be stronger once the epoxy resin is applied.
Image
Image
Image
I even used this method around the cabin door as well. Both the galley and the cabin doors will get a piece of weather stripping that will compress into the rain gutter and (hopefully) give us a watertight seal.
User avatar
paperdoor
Teardrop Builder
 
Posts: 46
Joined: Mon Jan 18, 2010 10:17 am
Location: In the Shop
Top

Postby Miriam C. » Mon Jan 18, 2010 1:37 pm

:applause: :thumbsup: Looks great! I sure hope you have plans to use the the extra space on the sides. A few cubbies might come in handy. :thumbsup:

Image
“Forgiveness means giving up all hope for a better past.â€
User avatar
Miriam C.
our Aunti M
 
Posts: 19675
Images: 148
Joined: Wed Feb 15, 2006 3:14 pm
Location: Southwest MO
Top

Oh yeah

Postby paperdoor » Mon Jan 18, 2010 1:57 pm

I like cubbies, they are a little tight , but great for a few books, even a fishing pole, or camera tripod can fit on the port side cubbie. The one on the starboard side has a vent leading to the outside which will eventually get a fan. Will have pics soon-
User avatar
paperdoor
Teardrop Builder
 
Posts: 46
Joined: Mon Jan 18, 2010 10:17 am
Location: In the Shop
Top

Glassing

Postby paperdoor » Mon Jan 18, 2010 2:03 pm

Image
CU of glass on the Tear.
Image
I had to pull it into the shop , the weather is starting to turn on me. I'm almost done with all the glass, still needs alot of sanding- So at this point I started to work on the interior.
User avatar
paperdoor
Teardrop Builder
 
Posts: 46
Joined: Mon Jan 18, 2010 10:17 am
Location: In the Shop
Top

Postby Ageless » Mon Jan 18, 2010 2:11 pm

I really like this one!! But why didn't you run the flare to the rear? Think some look alike Volvo tailights would look neat
Strangers on this road we are on; we are not two, we are one - Raymond Douglas Davies
User avatar
Ageless
Platinum Donating Member
 
Posts: 1603
Images: 8
Joined: Tue Aug 04, 2009 8:34 am
Location: Pt. Orchard, WA
Top

Before the Winter

Postby paperdoor » Mon Jan 18, 2010 2:12 pm

Image
Before winter set in I fit the hinges I pulled off a Volvo wagon at the local Junk Yard - Ever since I was a kid I wanted to go into a Junk Yard and , I don't know, didn't have any need back then - But now the time has come and conveniently located 5 min from the shop.
Vintage Volvo Hinges - on line price , about $140 a piece, "Pick and Pull" price , $5 a piece.
I also "Pulled" a back handle for the galley, Mud flaps off a Volvo and some running lights off a Jag. Need to head back and get door handle and lock.
Image
Galley Hatch Latch
User avatar
paperdoor
Teardrop Builder
 
Posts: 46
Joined: Mon Jan 18, 2010 10:17 am
Location: In the Shop
Top

The Interior

Postby paperdoor » Mon Jan 18, 2010 2:29 pm

Well the Winter hit us ALL horribly hindering any sort of temperature sensitive processes ie Glass/epoxy and paint. So I'm forced to move inside and stoke up the wood burning stove - oh which works wonders for the soul.

I moved onto the Interior of the Tear!
Image
The neighbor "Frank" offered me a few pieces of "black walnut" that he had sitting under a tarp for the last 5 years - Ok free wood, walnut at that , yes please. I joined two pieces for the upper galley counter- unfortunatly the only tool that shop owner Greg did not have was a power planer- he had an edger , a table planer , a joiner - but not a power planner - so I did it thee old school way - nothing better to keep you warm than a wood burning stove and a hand planer.
Image
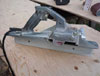
Seriously- though the belt sander came to the rescue.

Image
Here is the upper counter installed.
I also used walnut for the interior seat backs a shelf and have a nice piece left over for the exterior side table.
Image
I love wood.
User avatar
paperdoor
Teardrop Builder
 
Posts: 46
Joined: Mon Jan 18, 2010 10:17 am
Location: In the Shop
Top

Postby teardrop_focus » Mon Jan 18, 2010 2:42 pm

:applause: on the unique shape!

I had wondered about how to build the lower 2 feet @ 4.5' wide and the upper two feet tapering to 4.0'... but, after all the pondering I think I'll leave my first build simple and stay with plumb walls.

You, sir, have created something very neat and unusual in the teardrop world.

I salute you!

:thumbsup:
.
Image

"There is something about these little trailers that brings out the best in people." - BigAl, Scotland, 2010

"Climb the mountains and get their good tidings. Nature's peace will flow into you as sunshine flows into the trees...
The winds will blow their own freshness into you and the storms their energy, while cares will drop away like autumn leaves..." - John Muir, 1898


Chris Squier / teardrop_focus :-)~
User avatar
teardrop_focus
Donating Member
 
Posts: 5975
Images: 127
Joined: Sat Apr 11, 2009 3:18 pm
Location: SoCal
Top

Taillights

Postby paperdoor » Mon Jan 18, 2010 2:58 pm

Ageless wrote:I really like this one!! But why didn't you run the flare to the rear? Think some look alike Volvo tailights would look neat


I so did look at the volvo taillights, but didn't find a set that were in good cond. :(
User avatar
paperdoor
Teardrop Builder
 
Posts: 46
Joined: Mon Jan 18, 2010 10:17 am
Location: In the Shop
Top

Postby paperdoor » Mon Jan 18, 2010 3:03 pm

teardrop_focus wrote::applause: on the unique shape!

I had wondered about how to build the lower 2 feet @ 4.5' wide and the upper two feet tapering to 4.0'... but, after all the pondering I think I'll leave my first build simple and stay with plumb walls.

You, sir, have created something very neat and unusual in the teardrop world.

I salute you!

:thumbsup:


Thanks Chris - Your probably better off - the TIME that that added to the project , ouch , everything from that point on needed to have an angle added to it , everything!
:?
User avatar
paperdoor
Teardrop Builder
 
Posts: 46
Joined: Mon Jan 18, 2010 10:17 am
Location: In the Shop
Top

Next

Return to Build Journals

Who is online

Users browsing this forum: Bing [Bot] and 5 guests

cron