THE Teardrop Explorer

...ask your questions in the appropriate forums BUT document your build here...preferably in a single thread...dates for updates, are appreciated....

Re: 2013 Teardrop Explorer

Postby rebapuck » Thu Aug 29, 2013 10:34 pm

I know how you feel about the perfect license plate. I put KAMPER on mine 23 years ago. For nearly that long, a guy has been trying to get me to turn it in so he could get it.
Judy
1966 VW camper
1967 VW singlecab
Image
User avatar
rebapuck
.
 
Posts: 2243
Images: 1
Joined: Thu May 14, 2009 1:55 pm
Location: Chapel Hill NC

Re: 2013 Teardrop Explorer

Postby TRP » Thu Aug 29, 2013 10:45 pm

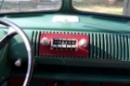
Regarding license plates for teardrops, I wasn't creative enough to come up with anything catchy, so I went the other way.

I went with the garden variety government issue:
97006

I was really surprised when the lady at DMV didn't even bat an eyelash when I went to register it. She took the plate in back and a few minutes later she said, "Yup, checks out... you'll have your official registration arrive in the mail, have a nice day..."
User avatar
TRP
Silver Donating Member
 
Posts: 316
Images: 341
Joined: Wed Jun 27, 2012 2:50 pm
Location: Morgan Hill, CA

Re: 2013 Teardrop Explorer

Postby Hvysteel » Fri Aug 30, 2013 5:52 pm

It's been a while since I've been on these forums, but I gotta say this build is looking to be fantastic! :applause:
In fact, it's been a good inspiration for me, and I've been doing some CAD work at the office trying to create a profile.

During my spare time of course :R
Hvysteel
Teardrop Inspector
 
Posts: 10
Joined: Tue Jun 30, 2009 7:15 pm
Location: Kansas City
Top

Re: 2013 Teardrop Explorer

Postby PubUltraStar » Thu Sep 05, 2013 9:50 pm

Still working on electrical when I can find time. Fishing wire through the conduit for the raised deck, and getting everything ready to seal the deck is challenging.

I made this wire whip with mesh cover because this is the wiring that will go outside and through the trailer tongue to the trailer connector.
Image

This wire runs down the center 2x2 tube and exits near the front of the trailer.
Image

The wiring enters the trailer into the raised deck through the stainless steel wire flange. I trimmed a bit of the plywood down, as I'll be permanently sealing this port with epoxy.
Image

A washer was added to the flange so that I'd have a way to secure it to the deck. I used a circular template and filled it with epoxy just over the rim of the washer, and it sealed the wiring exit from the top.
Image

Some leftover blue conduit was used to help protect the wire as it goes through the opening of the 2x2 framing.
Image

Here is all the wiring mess converging on the mid-section of the raised deck.
Image

Somewhat cleaned up, you can see that the marker light and trailer brake wiring go through the conduit to the outside edges. The top conduit has the radio remote wiring and speaker wires for Galley speakers. The middle blue conduit has power for 12V receptacle, USB outlet, and return wiring for the galley light switch. The bottom conduit has the wiring for the 110V outlet. Holes will be cut into the top deck to allow these wires to pass through, but this will be within the space of the front cabinet, so hidden.
Image
Image
There is always risk in being awesome!
http://www.diy-teardrop.com/
http://www.m2-photo.com
User avatar
PubUltraStar
Gold Donating Member
 
Posts: 184
Joined: Thu Jul 26, 2012 8:11 pm
Top

Re: 2013 Teardrop Explorer

Postby PubUltraStar » Tue Sep 17, 2013 6:34 pm

I have been traveling for work, and haven't had much time to work on the teardrop, so it's been slow going. I did make a trip to Menards and picked up a sheet of insulation that will be used in my raised deck. and got a few pieces cut. I also cut the gutter pipe that will be used for the return for the AC/Heater. I'm gone again for the next week, so I'm looking at maybe a weekend coming up that I can put some time into the build.

Image

Image
Image
There is always risk in being awesome!
http://www.diy-teardrop.com/
http://www.m2-photo.com
User avatar
PubUltraStar
Gold Donating Member
 
Posts: 184
Joined: Thu Jul 26, 2012 8:11 pm
Top

Re: 2013 Teardrop Explorer

Postby PubUltraStar » Sat Sep 28, 2013 6:20 pm

Got to spend some overdue time with the teardrop today. I was also able to mow the lawn, weed wack, and take the doggies for a bike ride/run, so I'm exhausted. Waiting for the Wisconsin / Ohio State Game to come on. Here is my updated progress:

This is a modified stainless flange that the brake wiring goes through to the underside of the deck. Just like the previous wiring that exits the deck, I'm using a mesh cover.
Image

Image

The running light wiring will get routed through the wood.
Image

Image

The spare tire bracket was installed with an aluminum plate to strengthen the mount.
Image

Image

Weights are used to keep the air duct down while using adhesive to attach to the deck bottom.
Image

I used expanding foam to seal the remainder of the deck.
Image

Shaving down the excess foam with a hacksaw blade and then a surfoam, I'm almost done with the insulation. I have some additional work to do to remove excess foam, but then I'm ready to put the top deck on.
Image
Image
There is always risk in being awesome!
http://www.diy-teardrop.com/
http://www.m2-photo.com
User avatar
PubUltraStar
Gold Donating Member
 
Posts: 184
Joined: Thu Jul 26, 2012 8:11 pm
Top

Re: 2013 Teardrop Explorer

Postby PubUltraStar » Tue Oct 01, 2013 9:08 pm

Tonight I installed the front piece of the top deck. I had to cut out holes for the air return gutter and wiring, which all get routed into the front cabinet.

Image

The wiring within the conduit comes up into the front, separated by stereo, internal 12V power, 110V, and trailer wiring. I still need to test the wiring before I get too far, to ensure that they all are good. Once this is sealed, no going back really.
Image

I'll try and get the remainder of the upper deck installed later this week. I'm looking forward to being able to put the sides up to see how everything looks. :)
Image
There is always risk in being awesome!
http://www.diy-teardrop.com/
http://www.m2-photo.com
User avatar
PubUltraStar
Gold Donating Member
 
Posts: 184
Joined: Thu Jul 26, 2012 8:11 pm
Top

Re: 2013 Teardrop Explorer

Postby redmech » Tue Oct 01, 2013 9:52 pm

Your attention to detail and quality of work is first rate. As I'm looking through your thread, and you said you were not going to paint where it would not be seen, it surprised me. Then a post or two later, you went ahead and painted it. This is a top notch build. Will make a great teardrop for sure.

Great work!!
redmech
Teardrop Inspector
 
Posts: 17
Joined: Mon Sep 30, 2013 12:54 am
Top

Re: 2013 Teardrop Explorer

Postby aggie79 » Wed Oct 02, 2013 10:40 am

Way cool! :thumbsup: :applause: :thumbsup:
Tom (& Linda)
For build info on our former Silver Beatle teardrop:
Build Thread

93503
User avatar
aggie79
Super Duper Lifetime Member
 
Posts: 5405
Images: 686
Joined: Tue Aug 07, 2007 5:42 pm
Location: Watauga, Texas
Top

Re: 2013 Teardrop Explorer

Postby PubUltraStar » Wed Oct 02, 2013 9:42 pm

redmech wrote:Your attention to detail and quality of work is first rate. As I'm looking through your thread, and you said you were not going to paint where it would not be seen, it surprised me. Then a post or two later, you went ahead and painted it.

I find that I change my mind all the time, or think of new ideas. I have a lot of planning into this teardrop, but still sort of winging it as I go.

Got the back half of the deck installed tonight. Cut holes for the air return and wiring that will fuel the galley. The last step will be to install a 14" section in the middle, then fill in the screw holes, which will complete the deck.

Image

Speaker wire / Stereo Remote, 12V Power, and then 110V come to the galley under the deck through separate conduit.
Image
Image
There is always risk in being awesome!
http://www.diy-teardrop.com/
http://www.m2-photo.com
User avatar
PubUltraStar
Gold Donating Member
 
Posts: 184
Joined: Thu Jul 26, 2012 8:11 pm
Top

Re: 2013 Teardrop Explorer

Postby KCStudly » Wed Oct 02, 2013 10:02 pm

PubUltraStar wrote:... I have a lot of planning into this teardrop, but still sort of winging it as I go.


Amen to that. You are not alone.
KC
My Build: The Poet Creek Express Hybrid Foamie

Poet Creek Or Bust
Engineering the TLAR way - "That Looks About Right"
TnTTT ORIGINAL 200A LANTERN CLUB = "The 200A Gang"
Green Lantern Corpsmen
User avatar
KCStudly
Donating Member
 
Posts: 9616
Images: 8169
Joined: Mon Feb 06, 2012 10:18 pm
Location: Southeastern CT, USA
Top

Re: 2013 Teardrop Explorer

Postby redmech » Wed Oct 02, 2013 10:24 pm

I have to ask about the air duct. Will this tear have central heat and air? I haven't figured out what the plan for it is.

Thanks!!
redmech
Teardrop Inspector
 
Posts: 17
Joined: Mon Sep 30, 2013 12:54 am
Top

Re: 2013 Teardrop Explorer

Postby PubUltraStar » Wed Oct 02, 2013 10:39 pm

redmech wrote:I have to ask about the air duct. Will this tear have central heat and air? I haven't figured out what the plan for it is.


Yes, I plan on using a ClimateRight unit that has both A/C and Heat. The current year model only has A/C, and they advertise that the 2014 model will have both, so I'm waiting to pull the trigger. Basically the duct comes up through the deck into a small front cabinet and then out the front into the custom tongue box. There are examples of users on this site who have installed A/C, a PetCool, into their Teardrop. I don't think that is available anymore, which is why I'm probably going to go with ClimateRight. The other ones that I've seen routed their return air duct underneath the trailer. I wanted to try and make it a bit more seamless, and came up with the raised deck option. It seemed like a good plan to hide the duct and some wiring, and add some insulation. Hopefully, this helps. Otherwise, stay tuned as I continue the build, slowly but surely.

http://www.climaterightair.com/rv-trailer-air-conditioning-and-heating

Example image from ClimateRight:
Image
Image
There is always risk in being awesome!
http://www.diy-teardrop.com/
http://www.m2-photo.com
User avatar
PubUltraStar
Gold Donating Member
 
Posts: 184
Joined: Thu Jul 26, 2012 8:11 pm
Top

Re: 2013 Teardrop Explorer

Postby Ned B » Sat Oct 05, 2013 3:35 am

Incredible build to date, Can't wait to follow along and see the project through to the finish! Great job!
User avatar
Ned B
1000 Club
1000 Club
 
Posts: 1036
Joined: Sat Apr 16, 2011 10:25 am
Location: Syracuse NY (ish)
Top

Re: 2013 Teardrop Explorer

Postby pchast » Sat Oct 05, 2013 6:54 pm

It seems amazing that they show reducers on their conduits.
that will wreak havoc on flow rates and capacity. If you go
with the system look for round hatch covers used in boats
as a possible means of providing full flows.
:thinking: :thumbsup:
pchast
Platinum Donating Member
 
Posts: 2036
Images: 97
Joined: Mon Jan 28, 2013 5:47 pm
Location: Athens, NY
Top

PreviousNext

Return to Build Journals

Who is online

Users browsing this forum: No registered users and 15 guests