


![]() by RAYVILLIAN » Mon Feb 09, 2009 6:59 pm
by RAYVILLIAN » Mon Feb 09, 2009 6:59 pm

![]() by starleen2 » Mon Feb 09, 2009 10:55 pm
by starleen2 » Mon Feb 09, 2009 10:55 pm
RAYVILLIAN wrote:It's looking great Scott. Can't wait to see it down at LCG or maybe sooner. I've considered real strong on making our next one wider. One question are you going to make the double wall off set at the bottom of the hatch when it is down? Mike and I both did and I've wondered if it was necessary.
Gary

![]() by mikeschn » Tue Feb 10, 2009 4:52 am
by mikeschn » Tue Feb 10, 2009 4:52 am

![]() by starleen2 » Tue Feb 10, 2009 2:59 pm
by starleen2 » Tue Feb 10, 2009 2:59 pm


![]() by RAYVILLIAN » Tue Feb 10, 2009 4:21 pm
by RAYVILLIAN » Tue Feb 10, 2009 4:21 pm
![]() by mikeschn » Tue Feb 10, 2009 8:32 pm
by mikeschn » Tue Feb 10, 2009 8:32 pm
starleen2 wrote:Mike,
The wall and hatch construction will be 1/4 ply, 3/4 foam insulation, and 1/8 ply for the interior. The exterior will be fiberglassed along the seams and coated in resin to give it strength.
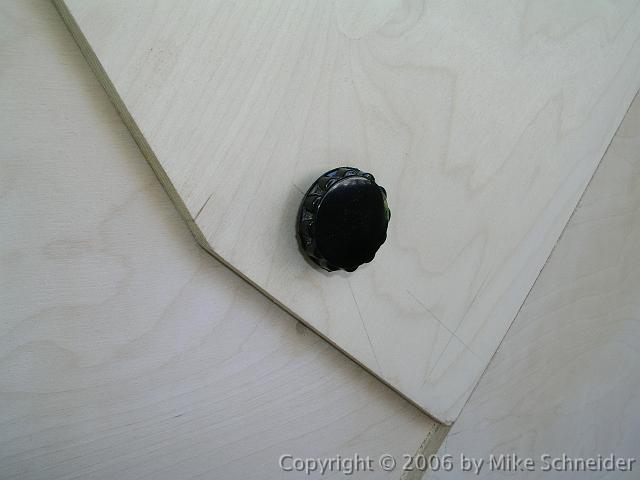
These T- nuts are what I’m going to used to keep the hatch locked in the upper position with a bolt going through the wood and into the T-nut. I’m thinking about embedding the matching stainless bolt into a wooden knob or plastic handle. When the hatch is down, regular enclosure clamps will do
![]() by Senior Ninja » Tue Feb 10, 2009 9:06 pm
by Senior Ninja » Tue Feb 10, 2009 9:06 pm


![]() by starleen2 » Tue Feb 10, 2009 9:59 pm
by starleen2 » Tue Feb 10, 2009 9:59 pm
mikeschn wrote: Here is my "Big Bolt"...
Mike...
![]() by mikeschn » Tue Feb 10, 2009 10:59 pm
by mikeschn » Tue Feb 10, 2009 10:59 pm

![]() by starleen2 » Thu Feb 12, 2009 2:45 pm
by starleen2 » Thu Feb 12, 2009 2:45 pm
![]() by starleen2 » Thu Feb 12, 2009 11:19 pm
by starleen2 » Thu Feb 12, 2009 11:19 pm

![]() by starleen2 » Fri Feb 13, 2009 9:56 am
by starleen2 » Fri Feb 13, 2009 9:56 am
![]() by Miriam C. » Fri Feb 13, 2009 11:24 am
by Miriam C. » Fri Feb 13, 2009 11:24 am
 Looks like it worked great! I sure wish you could work double time.

![]() by S. Heisley » Fri Feb 13, 2009 2:57 pm
by S. Heisley » Fri Feb 13, 2009 2:57 pm


Users browsing this forum: No registered users and 10 guests