My Shasta Miniflyte build

...ask your questions in the appropriate forums BUT document your build here...preferably in a single thread...dates for updates, are appreciated....

Postby Wolffarmer » Sat Jul 24, 2010 11:28 pm

About the length of your trailer tongue. As you will have a single post tongue. I would make it 1/2 the width of your tow vehicle plus about 2 inches.

Then you can do this.

Image

Has come in handy a few times when I have had to turn around out in the rough. And it keeps it as close to the TV as possible to keep in the wind shadow. Do not calculate the distance the hitch ball from bumper.

Randy
"these guys must be afraid of the dark"
User avatar
Wolffarmer
Donating Member
 
Posts: 4612
Images: 309
Joined: Wed May 02, 2007 1:32 pm
Location: Idaho Rupert

Postby sly1990 » Sun Jul 25, 2010 12:10 pm

Great tip Wolffarmer.... :thumbsup:
Never tought of that one....


Gerry, I love the pic of you standing in your trailer.... :lol: :thumbsup:
Looks like you'll be Ruling that one... 8)


About the trailer standards, The only one I knew was :
Your tongue weight should reflect 10% of overall weight when fully loaded.

1200lb total = 120lb @ tongue

I guess the lenght depends on that too.
Last edited by sly1990 on Sun Jul 25, 2010 12:20 pm, edited 1 time in total.
User avatar
sly1990
Teardrop Builder
 
Posts: 38
Joined: Sat May 15, 2010 7:05 pm
Location: Montreal, Québec

Postby xddorox » Sun Jul 25, 2010 12:11 pm

Thanks for the tip Randy. Now that I think about it, it was pretty obvious. Turns out I won't have to trim the tongue after all since I want to carry the bikes in front of the trailer.

Got my hands on some material today. While dumping the remnants of the old trailer box at the local recycling center I found some steel bed frame sides. All 4 of them for $10! They will do great for extending the frame.

Image

I'll also keep track of the cost. Since I am fully committed to this project, other projects that were waiting in the wings are being removed from the household. Selling some of that stuff will bring in some funds for the Miniflyte.

So far it goes like this:

Trailer purchase $150
Registration $67
Steel $10

Sold "overstock" +$110

Total so far: $117

Gerry :)
User avatar
xddorox
Teardrop Advisor
 
Posts: 82
Joined: Tue Jul 06, 2010 10:19 pm
Location: Montreal, Canada
Top

Postby xddorox » Sat Jul 31, 2010 8:20 pm

Here's what time and budget has permitted this week on the project. I managed to borrow an angle grinder so I was able to prep the original frame for a coat of Corostop rust paint. I had the paint lying around from a previous project so it was free. The color is not important since it will be the first coat.

Image

I then got assistance from my son and we got to work on extending the frame using the bed frames and some stove bolts, nuts and lock washers I got for $10

Image

Image

Testing our handy work

Image

I still need to add a cross brace but we ran out of time today. I will probably give the extension it's first coat of rust paint sometime this week.

Image

Cost so far, $127

Gerry :)
User avatar
xddorox
Teardrop Advisor
 
Posts: 82
Joined: Tue Jul 06, 2010 10:19 pm
Location: Montreal, Canada
Top

Postby whtknight » Sat Jul 31, 2010 8:37 pm

Great Start... looks like you will have some fun thats for sure.... :D
User avatar
whtknight
Teardrop Builder
 
Posts: 27
Joined: Wed Jun 16, 2010 9:14 pm
Location: Irving, Texas
Top

Postby xddorox » Sun Aug 01, 2010 9:23 pm

Thanks :D 
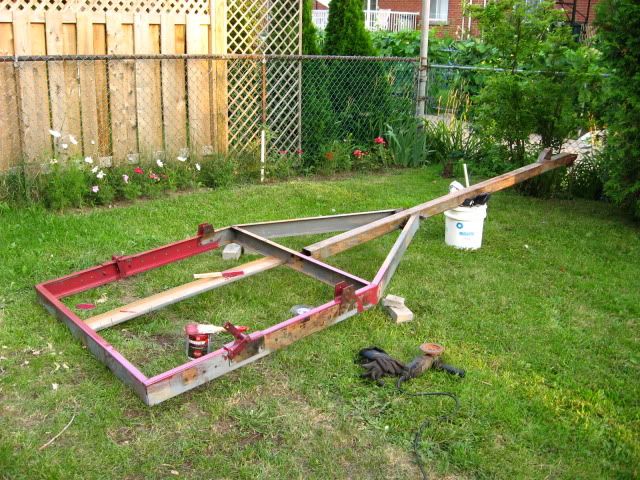
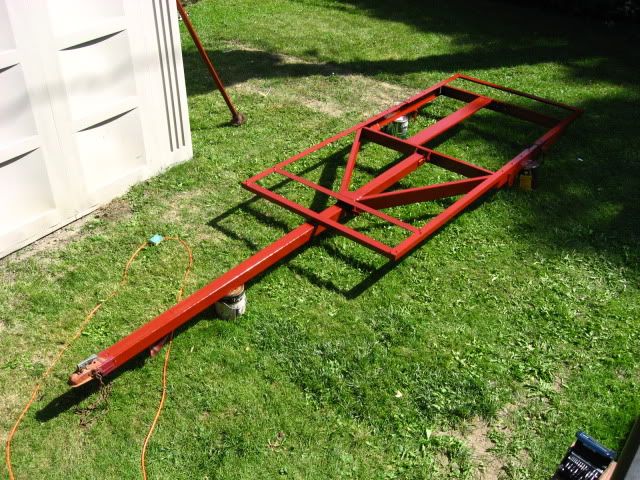
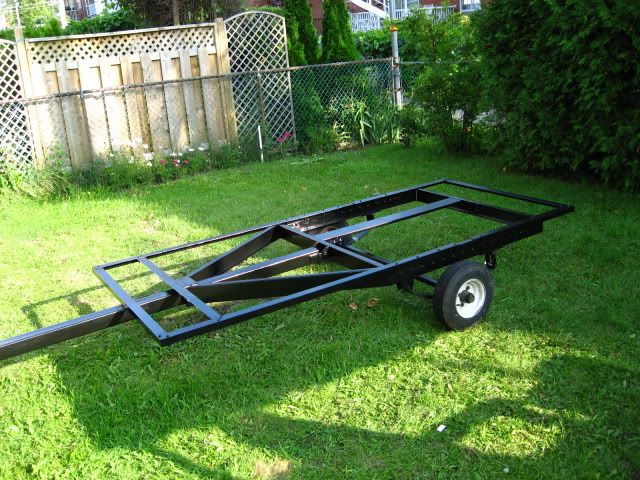
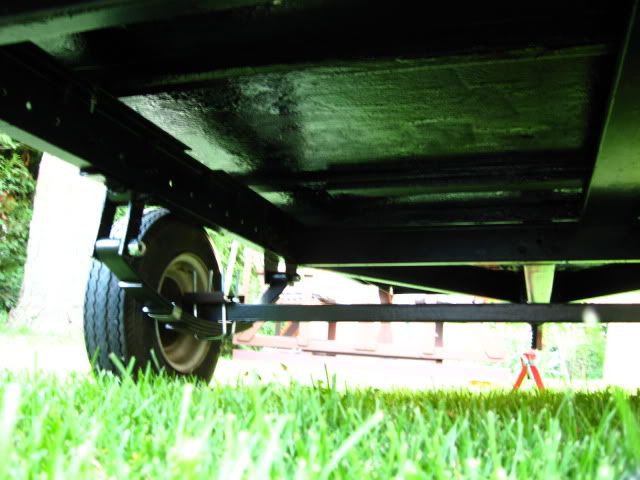
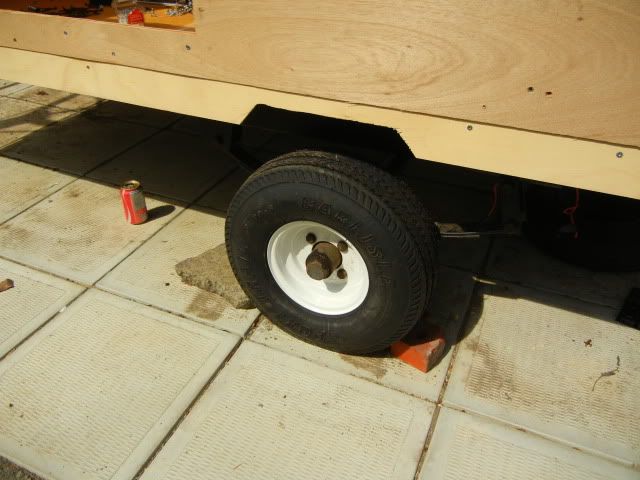
Here is the completed frame with it's second coat of primer. The final coat of black will go on this week weather permitting and then we rebuild the suspension.

Image

Gerry :)
User avatar
xddorox
Teardrop Advisor
 
Posts: 82
Joined: Tue Jul 06, 2010 10:19 pm
Location: Montreal, Canada
Top

Postby 2bits » Mon Aug 02, 2010 11:02 pm

Looking good! I love watching the progress!
Thomas

Image
User avatar
2bits
2bit Member
 
Posts: 5130
Images: 8
Joined: Thu Dec 27, 2007 6:04 pm
Location: Lake Tawakoni, TX
Top

Postby xddorox » Sat Aug 07, 2010 10:39 pm

I now have a real trailer base. Got my suspension at http://www.remorquebgs.ca/accueil/index.html today at a great price and installed everything. Now that it sits on its wheels, I can start the fun part and build. I will be getting wood for the floor tomorrow. So now it begins for real at last! :)

For those in Montreal and the townships, BGS has everything, I do mean everything, and they are great people to deal with. They welcome hobby builders and have great tips. I'll be going back there for sure.

Image

Spendometer now sits at $165

Gerry :)
User avatar
xddorox
Teardrop Advisor
 
Posts: 82
Joined: Tue Jul 06, 2010 10:19 pm
Location: Montreal, Canada
Top

Postby xddorox » Sun Aug 29, 2010 9:14 pm

Well finally got the time, weather and money planets to align so I was able to complete my floor in one fell swoop over the week-end. Here it is in photo.

Image

Image

Image

Image

Image

Image

Image

Gerry :)
User avatar
xddorox
Teardrop Advisor
 
Posts: 82
Joined: Tue Jul 06, 2010 10:19 pm
Location: Montreal, Canada
Top

Postby xddorox » Wed Oct 06, 2010 10:15 pm

Well I got my hands on some cash and got most of my lumber. The weather cooperated last week end and we ended the day with the walls done and mounted. I hope to finish the rough layout this week end weather permitting and install the inside cabin dividing wall.

Spendometer stands at $750 right now.

Image

Image

Gerry :)
User avatar
xddorox
Teardrop Advisor
 
Posts: 82
Joined: Tue Jul 06, 2010 10:19 pm
Location: Montreal, Canada
Top

Postby xddorox » Sat Apr 30, 2011 7:04 pm

Well Spring finally decided to show its face around here and it was time to pull the tarp and give a go at this project once again. I have to be ready to pull in mid-July so this project will be flying in the next few weeks.

I was able to complete 95% of the framing, built the dividing wall between the cabin and kitchen. More work tomorrow for the entire day, gotta use the nice weather when it actually shows up since I'm outdoors for this.

Image

Image

Image

I'm glad it's actually starting to look like something.

Gerry :)
User avatar
xddorox
Teardrop Advisor
 
Posts: 82
Joined: Tue Jul 06, 2010 10:19 pm
Location: Montreal, Canada
Top

Postby xddorox » Sun May 01, 2011 5:21 pm

Finished framing the doors today and got a new set of tires. Higher weight rating and bigger diameter. I had to switch over the axle on the leaf springs to get better clearance in the wheel well. I also started the wiring since I want to skin the interior asap. It is very stiff now and I can't wait to go at it soon. Rain in the forecast for the next couple of days so I'll have to wait.

Image

Image

Image

Gerry :)
User avatar
xddorox
Teardrop Advisor
 
Posts: 82
Joined: Tue Jul 06, 2010 10:19 pm
Location: Montreal, Canada
Top

Postby xddorox » Sun May 08, 2011 7:04 pm

Didn't feel Zen enough to work on it over the week end so I went parts chasing. Lucky me I found these 2 windows on a junkyard trailer. $75 for the pair ended up being a sweet deal over the $360 brand new ones would have cost me around here.

Image

:)
User avatar
xddorox
Teardrop Advisor
 
Posts: 82
Joined: Tue Jul 06, 2010 10:19 pm
Location: Montreal, Canada
Top

Postby xddorox » Sun May 08, 2011 9:07 pm

...............crickets....................
User avatar
xddorox
Teardrop Advisor
 
Posts: 82
Joined: Tue Jul 06, 2010 10:19 pm
Location: Montreal, Canada
Top

Postby StandUpGuy » Sun May 08, 2011 9:14 pm

Don't feel bad I get crickets too. You are doing a nice job. I too am doing it on a budget so I can really appreciate the nice job you are doing and your creative use of cash.
User avatar
StandUpGuy
1000 Club
1000 Club
 
Posts: 1090
Images: 52
Joined: Sun Mar 27, 2011 6:15 pm
Top

PreviousNext

Return to Build Journals

Who is online

Users browsing this forum: No registered users and 7 guests