Cider House...some finishing touches, 9.27.10

...ask your questions in the appropriate forums BUT document your build here...preferably in a single thread...dates for updates, are appreciated....

Postby 2bits » Thu Sep 24, 2009 12:22 am

MMMM Axle time.. sweetness! ! !
Thomas

Image
User avatar
2bits
2bit Member
 
Posts: 5131
Images: 8
Joined: Thu Dec 27, 2007 6:04 pm
Location: Lake Tawakoni, TX

Postby Jiffypop207 » Fri Sep 25, 2009 6:15 am

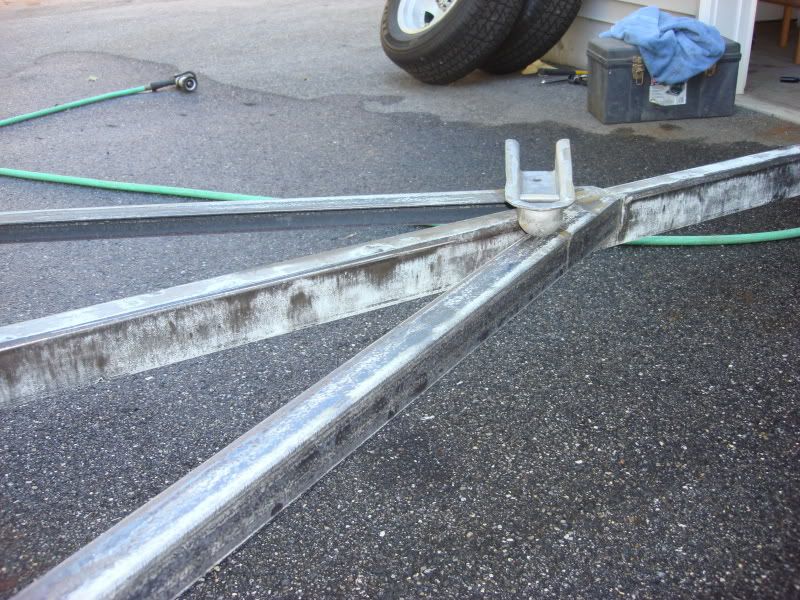
I was able to get out in the garage again last night and made some good progress. First I worked on the brackets for the axle mounting
Image
Image
Image
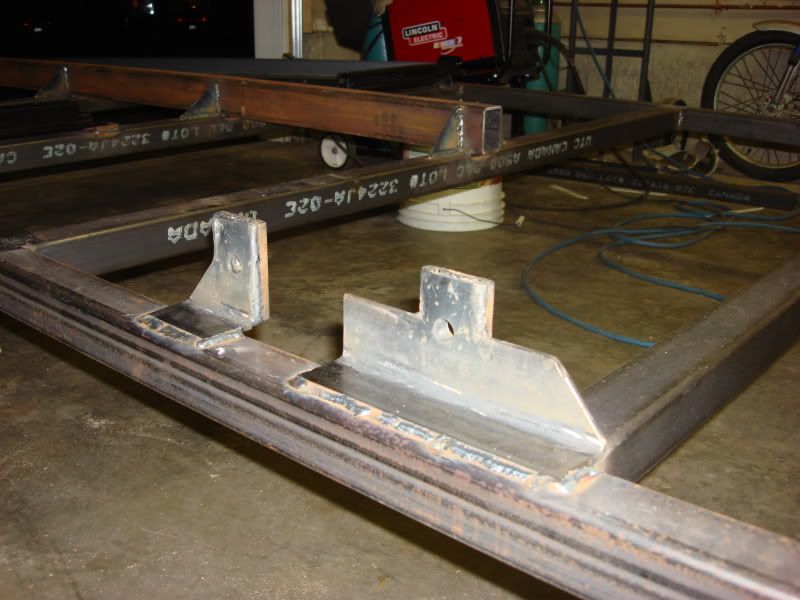
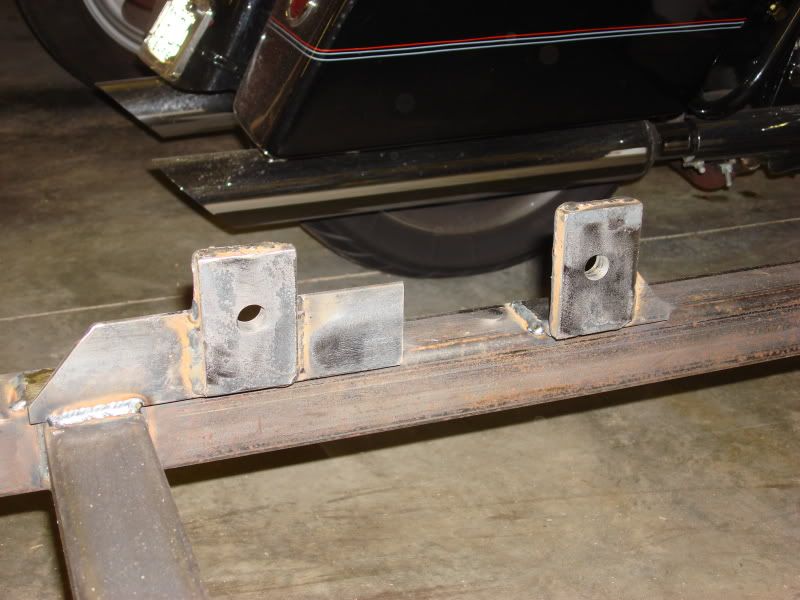
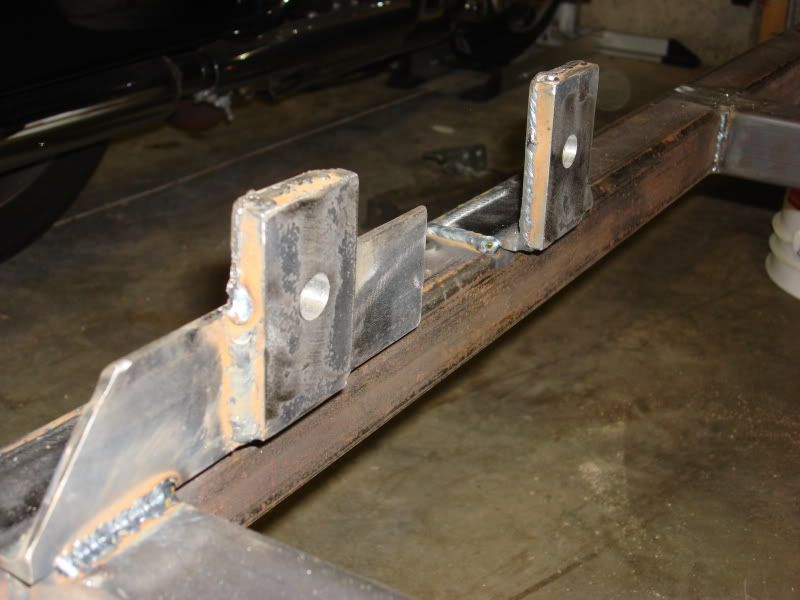
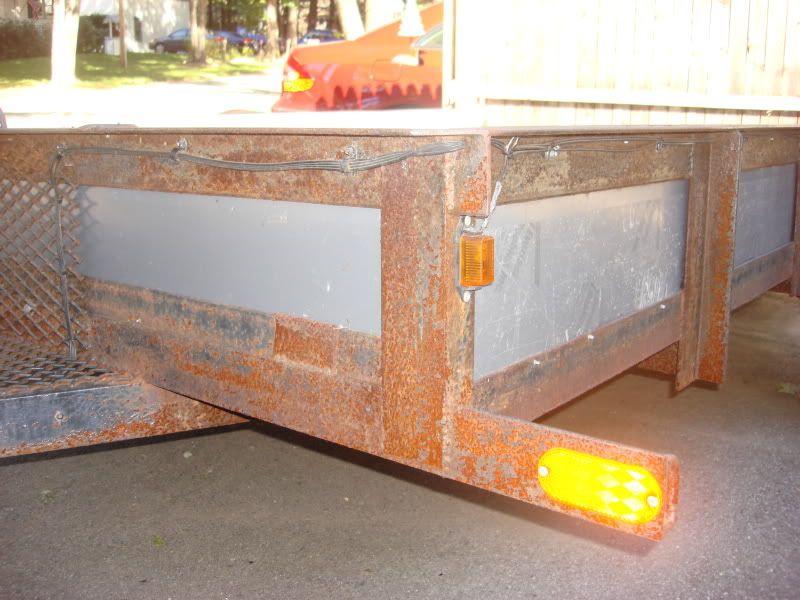
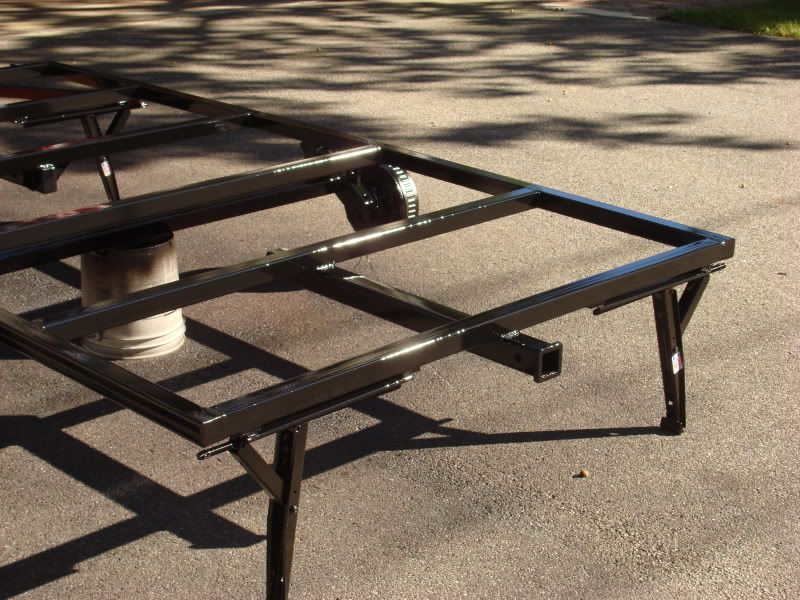
Then I put on some "pads" to lift the stabilizers away from the trailer so paint can get in between the stabilizer and the frame as well as let water get out, then I mounted the stabilizers
Image
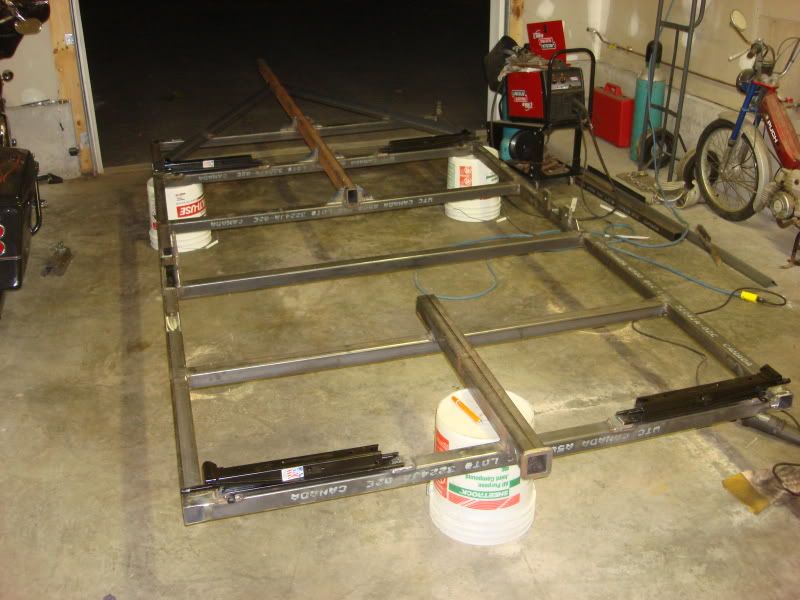
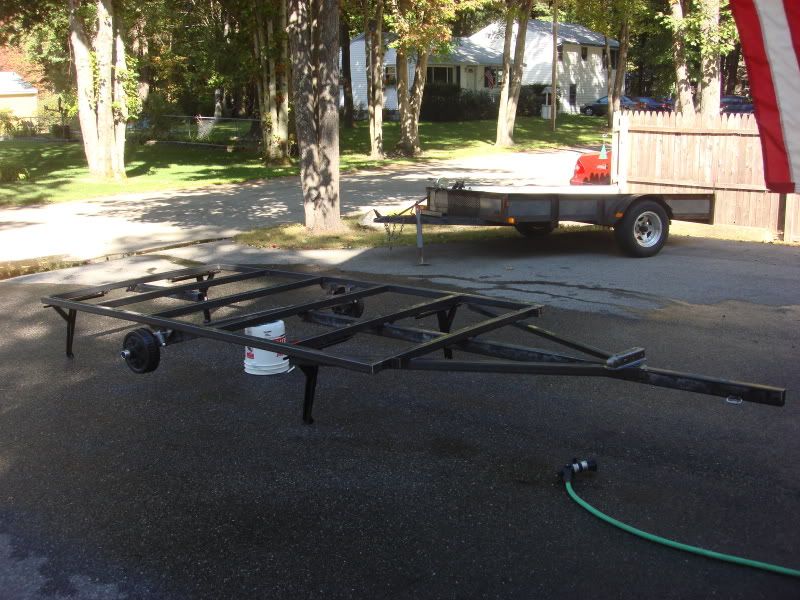
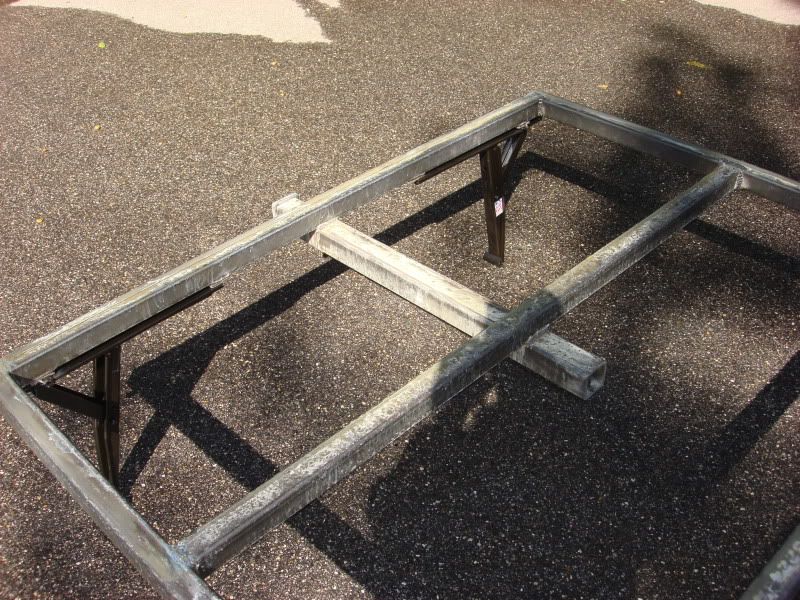
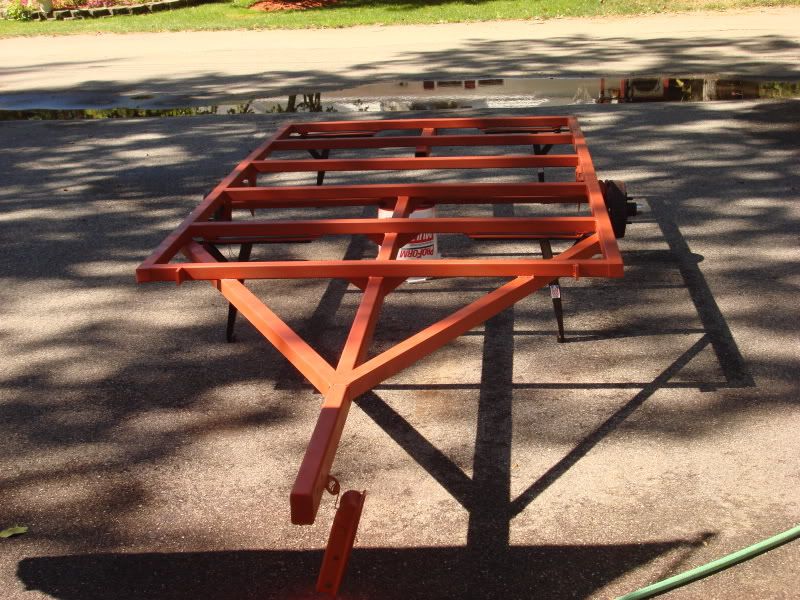
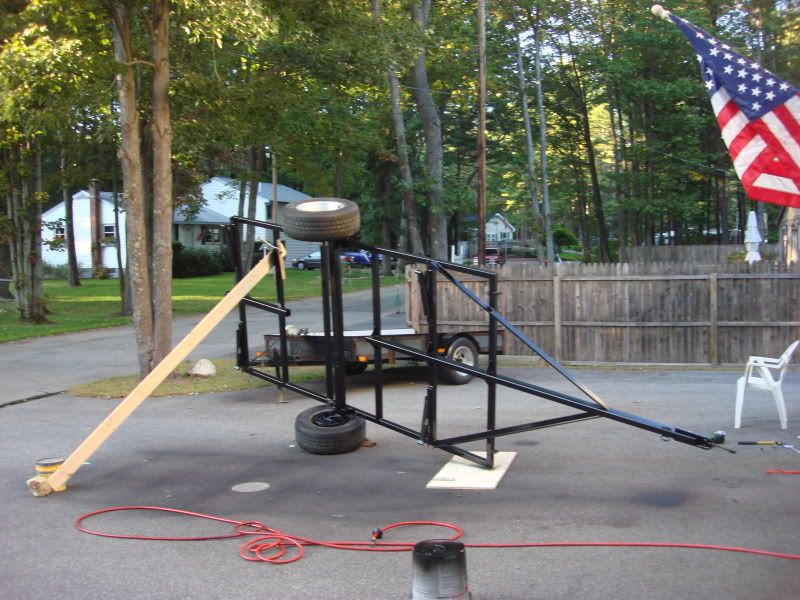
Then I flipped the frame over and mounted the axle
Image
Image
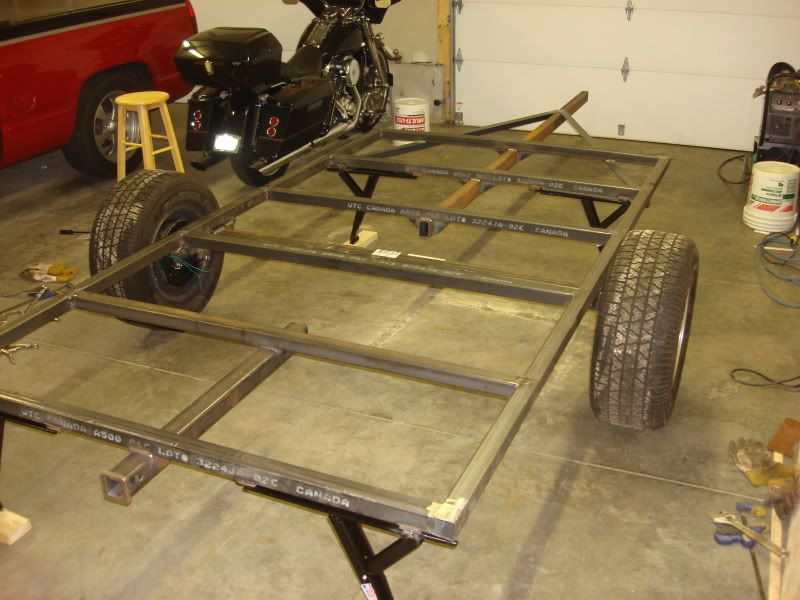
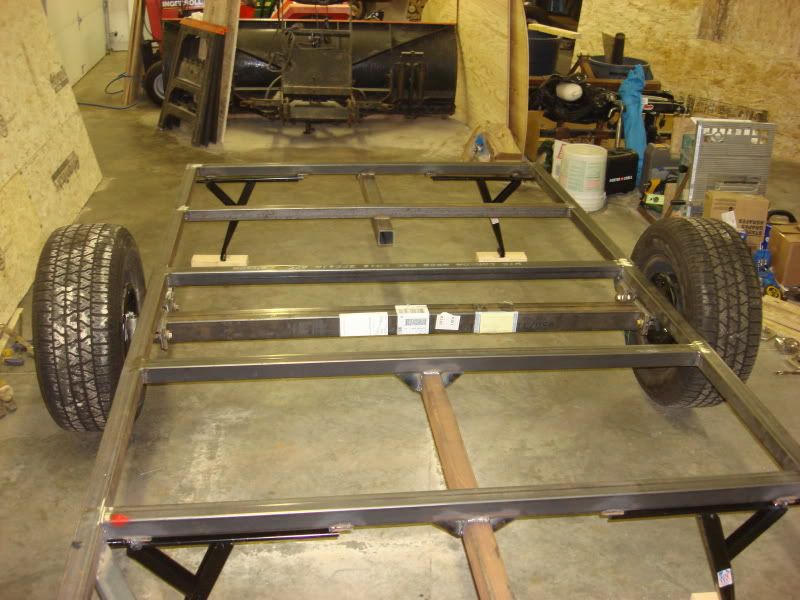
Then mounted the tires
Image
Image
Image
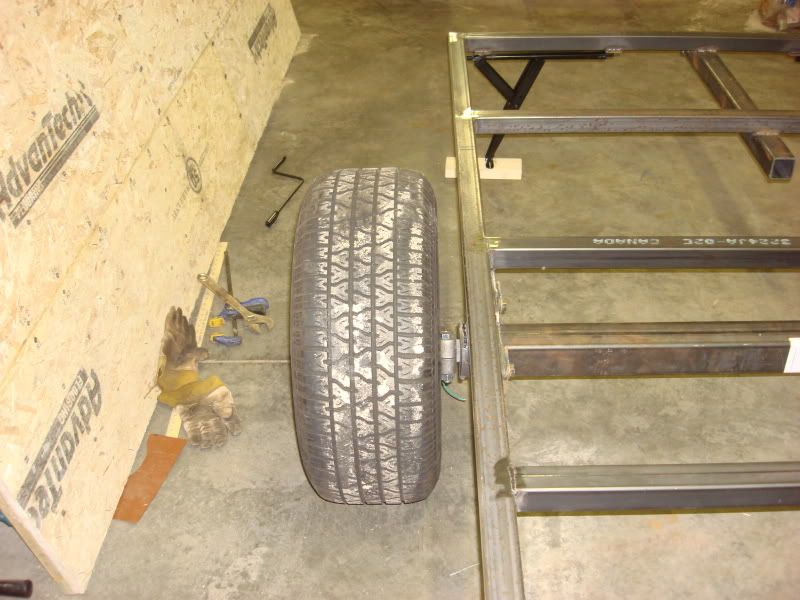
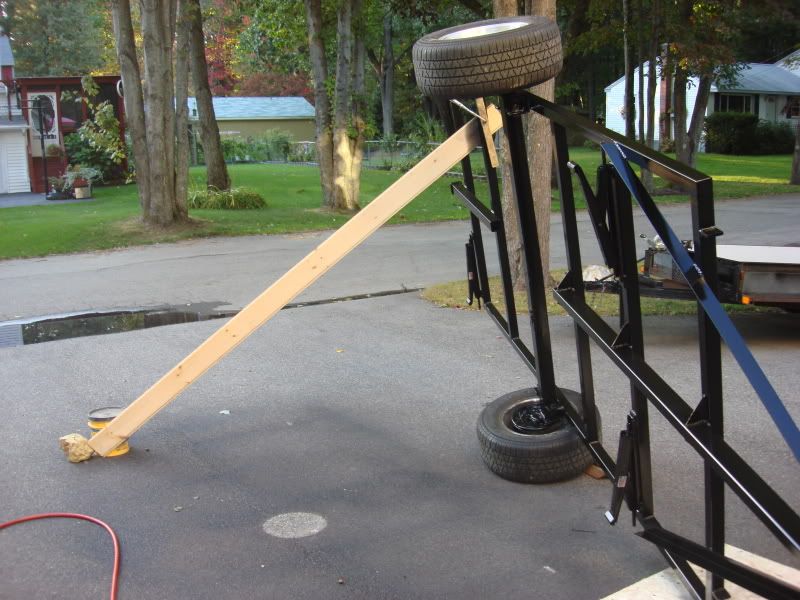
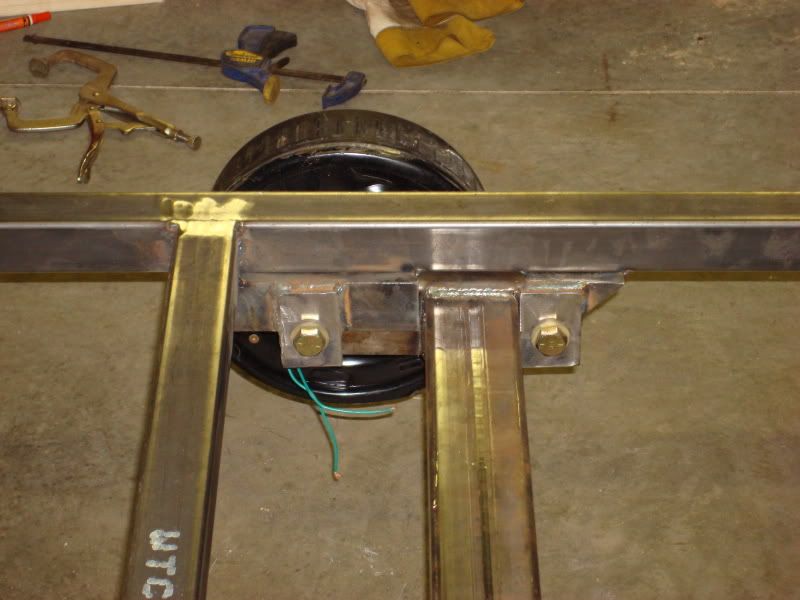
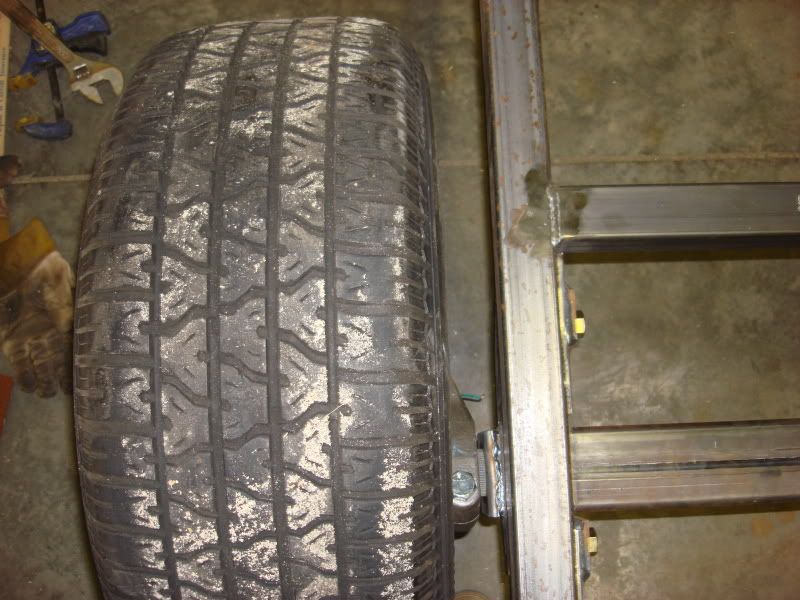
Close up of the axle clearance
Image
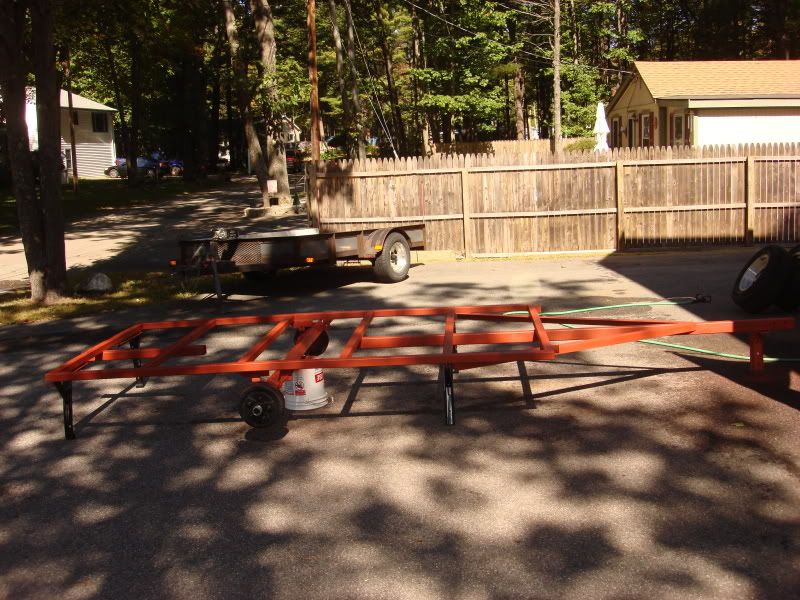
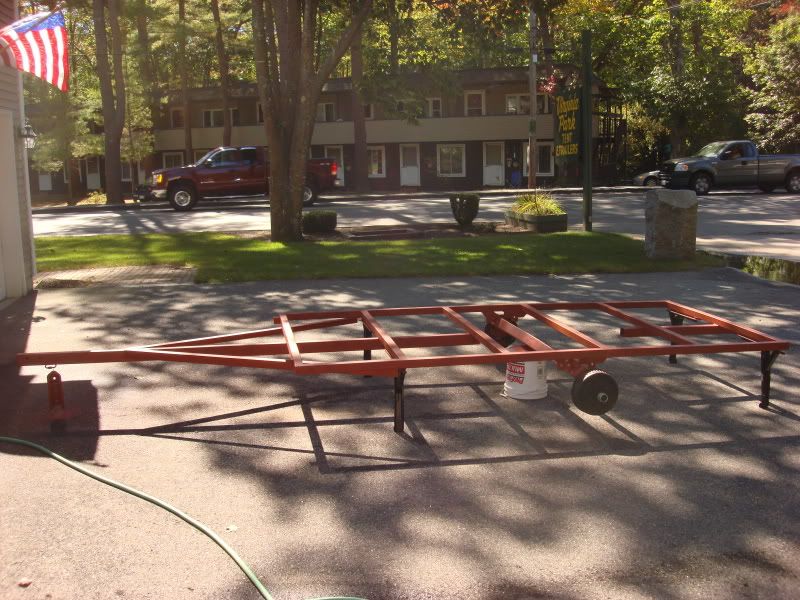
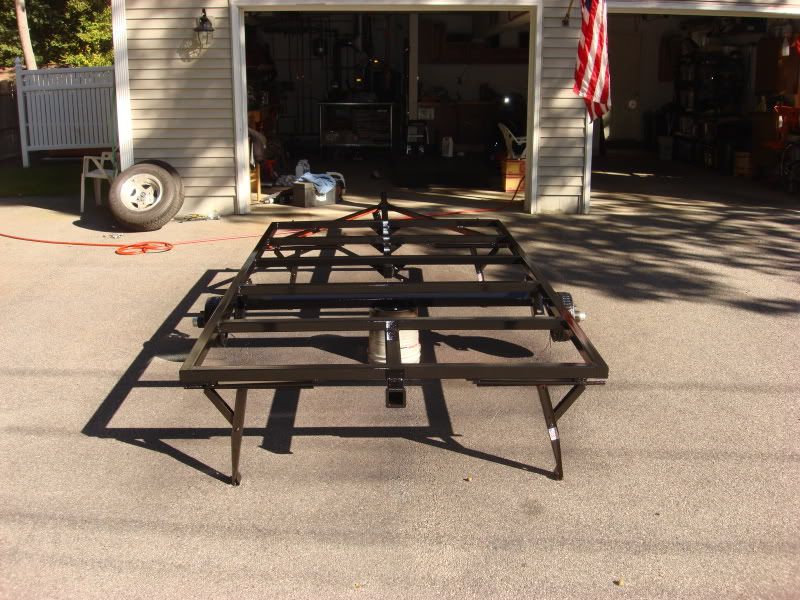
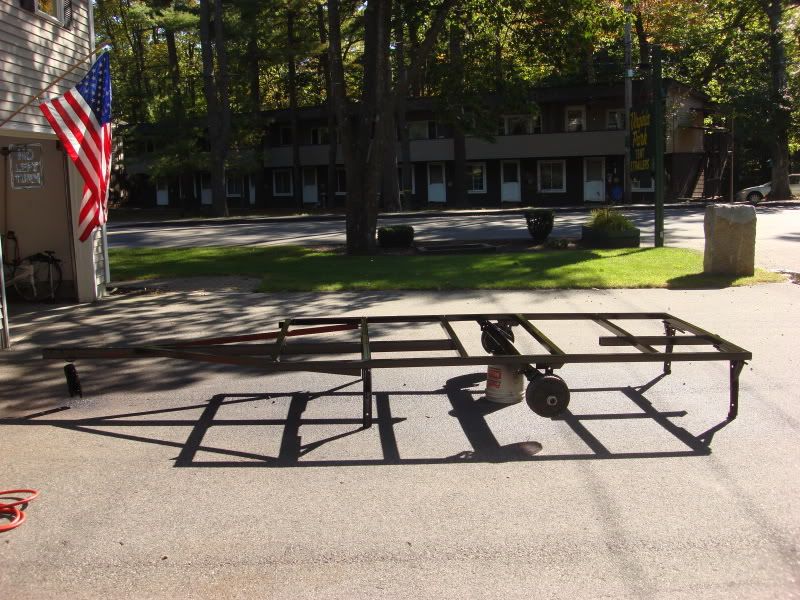
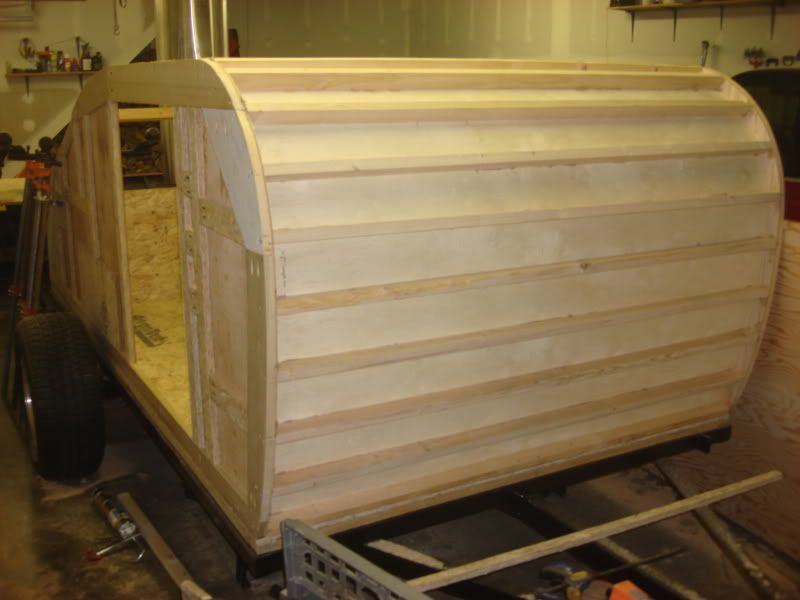
A picture of the trailer sitting on its tires only for the first time
Image
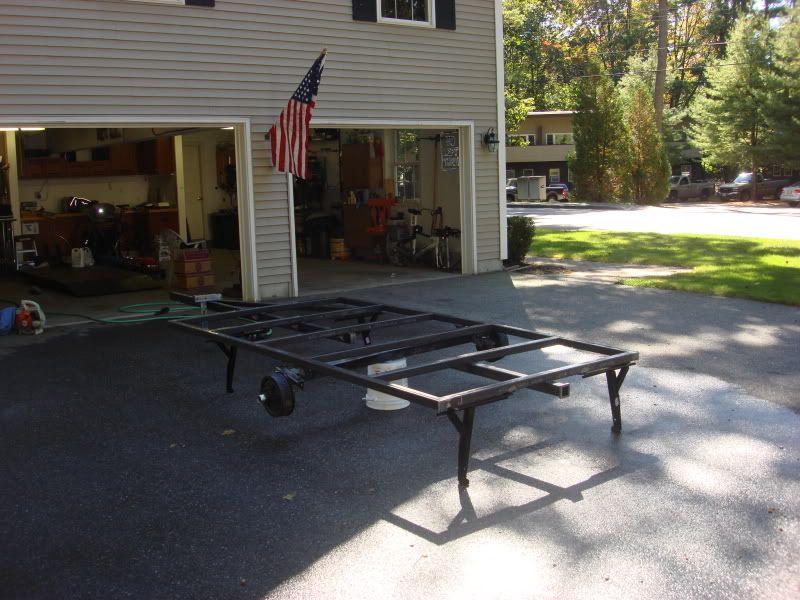
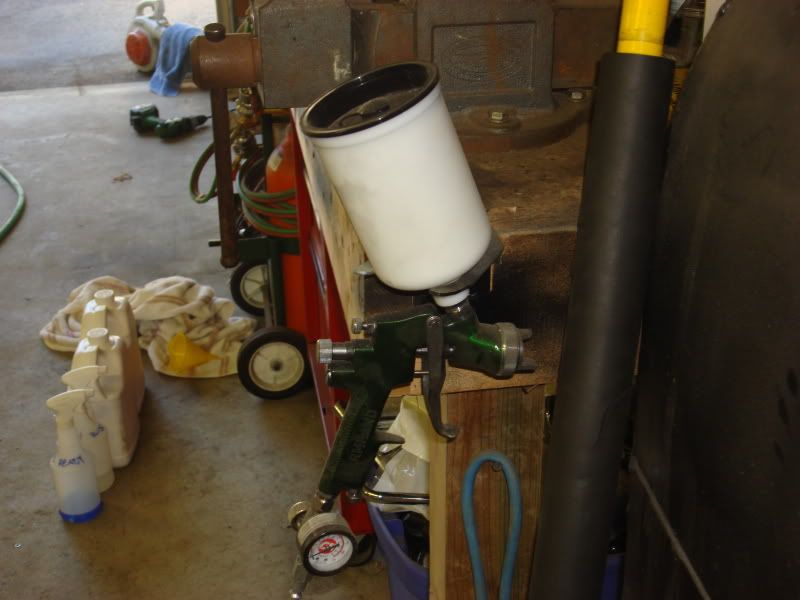
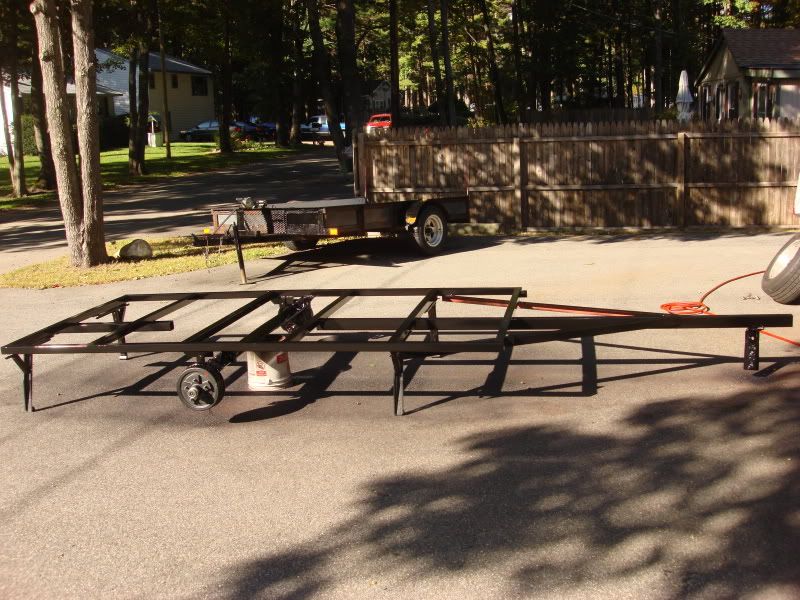
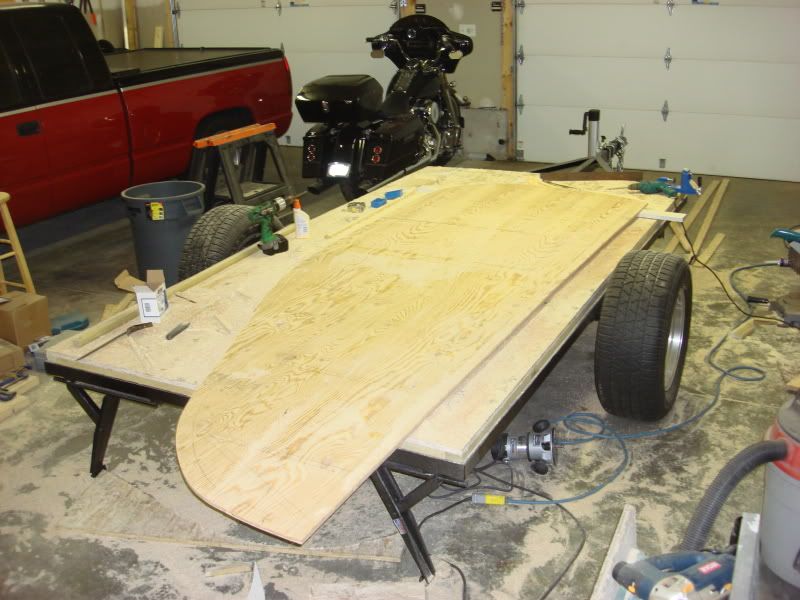
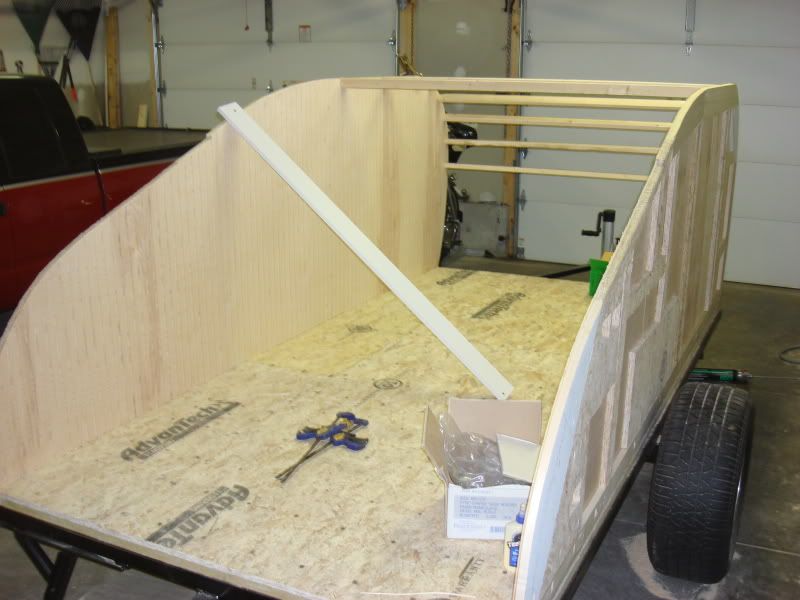
Then I finished up by capping off the open tubing members and some grinding. I wheeled the trailer into my other garage to prep for paint. Hopefully I will get it painted tomorrow as it is supposed to rain on Sunday.

Adam
User avatar
Jiffypop207
Teardrop Master
 
Posts: 205
Joined: Wed Sep 09, 2009 8:39 pm
Location: Old Orchard Beach, ME

Postby 2bits » Fri Sep 25, 2009 9:06 pm

That is truly a beautiful thing! I love your craftsmanship! :thumbsup:
Thomas

Image
User avatar
2bits
2bit Member
 
Posts: 5131
Images: 8
Joined: Thu Dec 27, 2007 6:04 pm
Location: Lake Tawakoni, TX
Top

Postby Jiffypop207 » Fri Sep 25, 2009 9:27 pm

2bits wrote:That is truly a beautiful thing! I love your craftsmanship! :thumbsup:


Thanks for the encouraging words. They definitely motivate.

Adam
User avatar
Jiffypop207
Teardrop Master
 
Posts: 205
Joined: Wed Sep 09, 2009 8:39 pm
Location: Old Orchard Beach, ME
Top

Postby High Desert » Fri Sep 25, 2009 10:02 pm

Looking real good. Keep up the great work, looking forward to see your progress. :thumbsup:
Shaun

"it's not the years honey, it's the mileage"
High Desert
Platinum Donating Member
 
Posts: 8780
Images: 27
Joined: Wed Apr 08, 2009 1:46 pm
Location: SW Washington state
Top

Postby Jiffypop207 » Sat Sep 26, 2009 11:08 pm

Well my goal was to get the frame painted today and that is exactly what I did. It is supposed to rain for the next four or so days and I did not want to hold up production. The prep was what concerned me as I read the instructions for the two products I bought to ready the raw metal to accept paint. The first step I did was clean the frame with marine clean, the cleaner pushed by POR15. After that application I brushed the entire frame for a little agitation, then rinsed with fairly warm water as instructed. Here is the frame after I rinsed the Marine clean off.
Image
Image
Second step was to etch the metal to give the paint something to bite. For this I used Metal ready, which is also pushed by the POR15 people. Here are the two products.
Image
I made a utility trailer a few years ago and it is my inspiration to take my time and properly prep the frame for a quality paint job. She has a case of the rusties.
Image
Image
Image
After rinsing the Metal Ready and drying the frame completely with my trusty outdoor drying utensil I was left with this.
Image
Image
Image
Here is a shot of my professional drying apparatus
Image
Finally time for some primer. Prep wasn't as bad as I expected. Took me four cans total for 1 light complete primer coat being sure that everything got covered.
Image
Image
Image
Have to say that my fingers get tired some quick holing those spray cans. Time for the black. This is the gun I used to shoot it down with.
Image
I used Valspar tractor and implement paint with hardener in gloss black.
Here is coat one on the top and side surfaces.
Image
Image
Here is coat 2 of the top and sides.
Image
Image
After it dried enough, I bolted the axle and wheels back on and tipped it on its side so that I could shoot two coats to the bottom surfaces. Here it is in the tipped position all painted.
Image
Image
Dropped it down and rolled it in the garage just before the sun set to let in harden for a day or two. Maybe tomorrow I will get the floor coated so that I can mate them together sometime early in the week.


Adam
User avatar
Jiffypop207
Teardrop Master
 
Posts: 205
Joined: Wed Sep 09, 2009 8:39 pm
Location: Old Orchard Beach, ME
Top

Postby WesGrimes » Sat Sep 26, 2009 11:21 pm

That looks great. :thumbsup:

Good looking foundation, can't wait to see what it ends up like.
User avatar
WesGrimes
Teardrop Master
 
Posts: 289
Images: 31
Joined: Mon Jun 22, 2009 5:41 pm
Location: Garland, TX
Top

Postby Jiffypop207 » Wed Oct 07, 2009 6:58 am

Haven't posted in a bit, but have been steadily plugging along after work on the week nights. Might actually get to work some on it this weekend for longer than a 2 hour stint.

Got the deck mounted. I used the self threading trailer deck bolts....very slick. Here is a shot of my pattern/exterior ply sitting on the mounted deck
Image
Here are the 2 inner wall frames made of 3/4" this and that
Image
Wall interiors skinned with Birch bead board plywood, mounted and some spars installed
Image
Image
Image
A profile shot
Image
I found some good srews for installing my spars. I did not want to use drywall screws as I know how easily their heads can snap off in situations like this, so I picked up some decking screws
Image
The shank is thinker than a drywall type screw, it is ceramic coated, and the best part is they have a self-boring tip much like a Kregg screw so I did not need to pre-drill or countersink as they seated themselves quite nicely.
Image

More to follow. Hopefully by the weekend the headliner will be in.

Adam
User avatar
Jiffypop207
Teardrop Master
 
Posts: 205
Joined: Wed Sep 09, 2009 8:39 pm
Location: Old Orchard Beach, ME
Top

Postby WesGrimes » Wed Oct 07, 2009 7:11 am

Nice progress. How tall is the cabin?
User avatar
WesGrimes
Teardrop Master
 
Posts: 289
Images: 31
Joined: Mon Jun 22, 2009 5:41 pm
Location: Garland, TX
Top

Postby Jiffypop207 » Wed Oct 07, 2009 7:49 am

WesGrimes wrote:Nice progress. How tall is the cabin?

Short. Floor to ceiling inside is like 42 1/2"

Adam
User avatar
Jiffypop207
Teardrop Master
 
Posts: 205
Joined: Wed Sep 09, 2009 8:39 pm
Location: Old Orchard Beach, ME
Top

Postby Jiffypop207 » Mon Oct 19, 2009 3:18 pm

Still plugging away on my trailer. Only seem to be able to work on it after work as the weekends have been booked. I am happy to be able to get an hour or two in when I am able to work on it. I ordered some wacky wood as we call it form a local supply house. Because my drop is 5'-6" wide I needed the wacky to bend along the length (making a taller column) otherwise they had some that bent in the other direction in stock. I believe the technical name for the stuff is directional plywood because it will bend in one direction, but not the other. Here it is with the weight of my hand shaping it
Image
I used this for the parts of my ceiling that have a radius to them as I feared that I would not be able to get standard plywood to take the shape. I had a hard enough time getting the wacky in there, but I got the front ceiling on. Glued and screwed
Image
Image
Image
I have also been working on my lower rear cabinets. I really liked the look of the Walnut in the pictures, but it really was not going to work out the way I wanted and it would always be on my mind if it was going to fall apart. Walnut is so dang hard. I did make that cabinet faces, drawer face and door perimeters out of Oak, but have not taken a picture of them yet. Tonight I hope to stain the ready Oak pieces I have, and either work on the rear some more, put in some more ceiling, or work on the cabin front shelves. Little by little she comes along.
Some pics of the rear cabinets taking shape
Image
Image
Image
Image
Tossed the fender in its general area to get a feeling for what that was going to look like.
Image
More to follow.

Adam
User avatar
Jiffypop207
Teardrop Master
 
Posts: 205
Joined: Wed Sep 09, 2009 8:39 pm
Location: Old Orchard Beach, ME
Top

Postby 2bits » Mon Oct 19, 2009 8:23 pm

Hey Adam , that is looking good, I love the car style wheels, and the fender. It makes it seem more like a hot rod. Where did you get your fenders? I like how they go so far down.
Thomas

Image
User avatar
2bits
2bit Member
 
Posts: 5131
Images: 8
Joined: Thu Dec 27, 2007 6:04 pm
Location: Lake Tawakoni, TX
Top

Postby Jiffypop207 » Tue Oct 20, 2009 5:24 am

2bits wrote:Hey Adam , that is looking good, I love the car style wheels, and the fender. It makes it seem more like a hot rod. Where did you get your fenders? I like how they go so far down.


I got them here and simply ordered the 13" wide fenders.

Adam
User avatar
Jiffypop207
Teardrop Master
 
Posts: 205
Joined: Wed Sep 09, 2009 8:39 pm
Location: Old Orchard Beach, ME
Top

Postby john » Tue Oct 20, 2009 12:10 pm

Nice! :thumbsup:
Build I -- Scenic ---
http://www.flickr.com/photos/8121727@N04/
Goto the Tear Build file

Build II -- Scenic II ---
viewtopic.php?t=29603

Build III -- Scenic Solo---
viewtopic.php?f=50&t=50324

Travel Blog----Now without Political Commentary
http://polifrogblog.blogspot.com/2009/0 ... -2009.html

The Constitution was ratified, not an interpretation thereof...

Penomeli ikibobo
john
User avatar
john
500 Club
 
Posts: 663
Images: 261
Joined: Tue Oct 05, 2004 6:26 pm
Location: eden nc
Top

Postby 2bits » Tue Oct 20, 2009 7:02 pm

Thanks Adam!
Thomas

Image
User avatar
2bits
2bit Member
 
Posts: 5131
Images: 8
Joined: Thu Dec 27, 2007 6:04 pm
Location: Lake Tawakoni, TX
Top

PreviousNext

Return to Build Journals

Who is online

Users browsing this forum: No registered users and 11 guests