My Shasta Miniflyte build

...ask your questions in the appropriate forums BUT document your build here...preferably in a single thread...dates for updates, are appreciated....

Postby xddorox » Sun May 08, 2011 9:21 pm

Your project involves a lot more work than mine. My hat is off to you for such a gutsy build.
User avatar
xddorox
Teardrop Advisor
 
Posts: 82
Joined: Tue Jul 06, 2010 10:19 pm
Location: Montreal, Canada

Postby StandUpGuy » Sun May 08, 2011 9:23 pm

xddorox wrote:Didn't feel Zen enough to work on it over the week end so I went parts chasing. Lucky me I found these 2 windows on a junkyard trailer. $75 for the pair ended up being a sweet deal over the $360 brand new ones would have cost me around here.

Image

:)
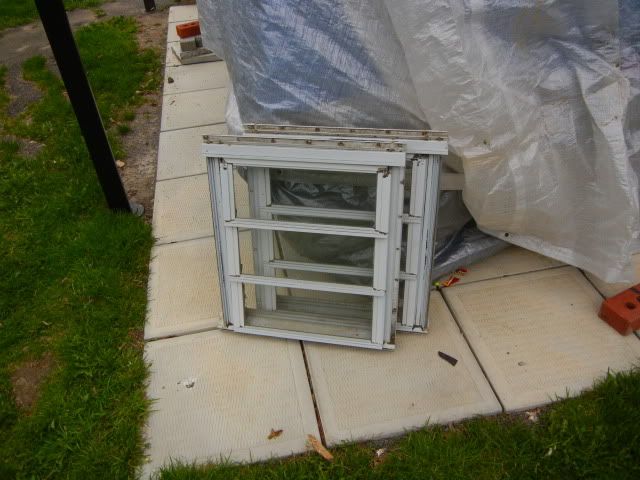
I like those kind of windows. They let a lot of air in and are good in the rain.
User avatar
StandUpGuy
1000 Club
1000 Club
 
Posts: 1090
Images: 52
Joined: Sun Mar 27, 2011 6:15 pm

Postby bdosborn » Sun May 08, 2011 9:43 pm

Don't worry, we're watching. :thumbsup: :thumbsup:

Bruce
2009 6.5'X11' TTT - Boxcar
All it takes is a speck of faith and a few kilowatts of sweat and grace.
Image
Boxcar Build
aVANger Build
User avatar
bdosborn
Donating Member
 
Posts: 5503
Images: 777
Joined: Wed May 05, 2004 11:10 pm
Location: CO, Littleton
Top

Postby StandUpGuy » Sun May 08, 2011 9:46 pm

xddorox wrote:Your project involves a lot more work than mine. My hat is off to you for such a gutsy build.
We will see how it turns out. You may have to put that hat back on. :lol:
User avatar
StandUpGuy
1000 Club
1000 Club
 
Posts: 1090
Images: 52
Joined: Sun Mar 27, 2011 6:15 pm
Top

Postby StandUpGuy » Sun May 08, 2011 9:58 pm

What kind of an interior layout do you have planned?
User avatar
StandUpGuy
1000 Club
1000 Club
 
Posts: 1090
Images: 52
Joined: Sun Mar 27, 2011 6:15 pm
Top

Postby xddorox » Sun May 08, 2011 10:11 pm

Simple shelf with two cupboards on each end with the middle open for DVD player and radio. I'm varnishing the interior with polyurethane.

People are watching? :shock: :)
User avatar
xddorox
Teardrop Advisor
 
Posts: 82
Joined: Tue Jul 06, 2010 10:19 pm
Location: Montreal, Canada
Top

Postby StandUpGuy » Sun May 08, 2011 10:20 pm

xddorox wrote:Simple shelf with two cupboards on each end with the middle open for DVD player and radio. I'm varnishing the interior with polyurethane.

People are watching? :shock: :)
What are your overall dimensions? Looks like you have a pretty roomy cabin.
User avatar
StandUpGuy
1000 Club
1000 Club
 
Posts: 1090
Images: 52
Joined: Sun Mar 27, 2011 6:15 pm
Top

Postby Cliffmeister2000 » Mon May 09, 2011 10:35 am

It's looking good! What are you going to skin the inside with? Painting, or clear coat of some kind?
God Bless

Cliff

♥God. ♥People.
1 John 4:9-11

My Teardrop build pictures
User avatar
Cliffmeister2000
Titanium Donating Member
 
Posts: 3622
Images: 157
Joined: Thu Jul 26, 2007 10:18 pm
Location: Phoenix, AZ
Top

Postby xddorox » Mon May 09, 2011 4:23 pm

The interior is 5 X 6 and it will be covered with a polyurethane varnish. I also got a dome light with separate reading lights off a Chevy Astro at the scrap yard for it.
User avatar
xddorox
Teardrop Advisor
 
Posts: 82
Joined: Tue Jul 06, 2010 10:19 pm
Location: Montreal, Canada
Top

Postby xddorox » Thu May 12, 2011 9:02 pm

Got to work on the trailer all day today. I managed to finish the back so now the outside body is one flush unit. All that is missing is the bottom skirt. I also managed to skin the interior of the cabin with the help of my Dad.

Image

Image

Gerry :)
User avatar
xddorox
Teardrop Advisor
 
Posts: 82
Joined: Tue Jul 06, 2010 10:19 pm
Location: Montreal, Canada
Top

Postby StandUpGuy » Thu May 12, 2011 9:18 pm

Looks really nice and I especially like the fact that you are (like me) getting used elements from alternative sources to retrofit your trailer. I have to appreciate another thrifty soul 8)
User avatar
StandUpGuy
1000 Club
1000 Club
 
Posts: 1090
Images: 52
Joined: Sun Mar 27, 2011 6:15 pm
Top

Postby xddorox » Sun May 15, 2011 8:29 am

No work these past few days, too much rain going non-stop. That trailer is supposed to be comfy for sleeping. I hope so because it sure is a pain to work inside it. My body aches all over!
User avatar
xddorox
Teardrop Advisor
 
Posts: 82
Joined: Tue Jul 06, 2010 10:19 pm
Location: Montreal, Canada
Top

Postby Deryk the Pirate » Sun May 15, 2011 10:16 am

Looking Good!

Your crank out windows look like mine! So far their keepin the rain out nicely lol.
Build Thread lil vardo 1: http://tinyurl.com/baqe6py
Build Thread lil vardo 2: http://tinyurl.com/b3rwffm
User avatar
Deryk the Pirate
500 Club
 
Posts: 809
Images: 158
Joined: Tue Aug 18, 2009 11:03 am
Location: Parlin NJ
Top

Postby xddorox » Sat May 21, 2011 10:14 pm

Here's what you get for putting your Son through electromechanics school, your very own free electrician. All the wiring was done today thanks to the great work of my kiddo.

Image

Finished the inside trim in the cabin.

Image

and applied the first coat of varnish (polyurethane)

Image

This is the result. Not great but considering I have never done this type of work before, I'm pretty pleased with myself.

Image

Gerry :)
User avatar
xddorox
Teardrop Advisor
 
Posts: 82
Joined: Tue Jul 06, 2010 10:19 pm
Location: Montreal, Canada
Top

Postby bdosborn » Sun May 22, 2011 9:20 am

Looks pretty good to me!

:thumbsup: :thumbsup:
Bruce
2009 6.5'X11' TTT - Boxcar
All it takes is a speck of faith and a few kilowatts of sweat and grace.
Image
Boxcar Build
aVANger Build
User avatar
bdosborn
Donating Member
 
Posts: 5503
Images: 777
Joined: Wed May 05, 2004 11:10 pm
Location: CO, Littleton
Top

PreviousNext

Return to Build Journals

Who is online

Users browsing this forum: No registered users and 7 guests