Albuquerque teardrop

...ask your questions in the appropriate forums BUT document your build here...preferably in a single thread...dates for updates, are appreciated....

Recut the wall spar supports

Postby ChasCABQ » Tue Dec 09, 2014 7:17 pm

After avoiding the subject of redoing my work I finally did what any man does in this situation. Yeah, that's right I went shopping, for tools, at the nearby hardware store. I went in to buy Kreg pocket screw jig (got one) and look at sawhorses. Now I own a pair of these back-saving items. Then I noticed a $50 jig saw much better than mine which is 20+ years old. The saw was marked down to less than a bottle of Scotch so I got one.

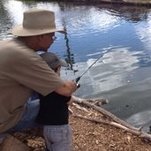
Oh my! The new saw and new blade cut smooth, fast, and easy. My wall spars are all redone now. Four pieces to clean up and attach to wall top edges. Then I'll line the walls up and clean up the edges. Then I'll cut the front panel that goes below the curved transition to the roof. Looking forward to making some progress now that I can work more easily without having to bend over my work.
Sawing spar supports Dec 9, 2014, 3-38 PM.jpg
Sawing spar supports Dec 9, 2014, 3-38 PM.jpg (66.83 KiB) Viewed 2495 times
Last edited by ChasCABQ on Tue May 05, 2015 3:53 pm, edited 1 time in total.
Build journal: http://www.tnttt.com/viewtopic.php?t=61303
In 2016, I received a kidney transplant, finished my teardrop, and took it on the road! In 2017 I sold it and am back to car camping.
Thanks to all forum members who provided advice about my build and posted info to help me get started.
User avatar
ChasCABQ
Donating Member
 
Posts: 95
Images: 18
Joined: Sat Sep 27, 2014 3:54 pm
Location: Albuquerque, NM

Albuquerque teardrop - changed my design and cut new sidewal

Postby ChasCABQ » Wed Apr 29, 2015 3:12 pm

I had to overcome my fear of making a mistake and I got back to work on my trailer.

I decided to start over on my sidewalls since my vented Kammback design was starting to present more difficulty in the details than I was comfortable with. I got new 3/4" thick 4'x8' marine plywood and cut both sidewalls and the divider today.

New design is a modified Benroy. I cut the sidewalls with a 20" radius in the front and a 36" radius in the rear (hatch). I also cut openings for my manufactured RV-type doors purchased last year. Here's a view from Sketchup with one wall and hatch hidden.
Screen Shot 2015-05-04 at 5.45.32 PM.jpg
Screen Shot 2015-05-04 at 5.45.32 PM.jpg (54.63 KiB) Viewed 2342 times

Next step is to prepare the walls and hatch divider then erect them and attach to the trailer floor.
Last edited by ChasCABQ on Thu May 21, 2015 11:22 am, edited 2 times in total.
Build journal: http://www.tnttt.com/viewtopic.php?t=61303
In 2016, I received a kidney transplant, finished my teardrop, and took it on the road! In 2017 I sold it and am back to car camping.
Thanks to all forum members who provided advice about my build and posted info to help me get started.
User avatar
ChasCABQ
Donating Member
 
Posts: 95
Images: 18
Joined: Sat Sep 27, 2014 3:54 pm
Location: Albuquerque, NM

Built galley divider and prepared walls for erection

Postby ChasCABQ » Mon May 04, 2015 6:28 pm

I built my galley divider using 3/4" birch plywood and poplar 1x2s. I countersunk the screws and used Titebond III to attach the pieces leaving a gap for galley counter. I started putting in the screws with an impact driver and found it was breaking the #8 wood screws so I did them by hand.
IMG_20150504_154856609-2.jpg
IMG_20150504_154856609-2.jpg (43.68 KiB) Viewed 2344 times

Next I prepared the walls by drilling the edge with holes for the bolts on the floor and sanding the cut edges.
IMG_20150504_154924541.jpg
IMG_20150504_154924541.jpg (46.18 KiB) Viewed 2344 times

Next step is stand up the walls and divider and attach them together and to the floor with 1x2s, glue and screws.
Build journal: http://www.tnttt.com/viewtopic.php?t=61303
In 2016, I received a kidney transplant, finished my teardrop, and took it on the road! In 2017 I sold it and am back to car camping.
Thanks to all forum members who provided advice about my build and posted info to help me get started.
User avatar
ChasCABQ
Donating Member
 
Posts: 95
Images: 18
Joined: Sat Sep 27, 2014 3:54 pm
Location: Albuquerque, NM
Top

Walls are up!

Postby ChasCABQ » Tue May 05, 2015 3:47 pm

With my friend's help we got the walls and divider erected and secured with glue and screws. Now it looks like something. Next I'll start putting in roof spars. I hope to be rolling down Route 66 by the end of the month.
IMG_20150505_125524455.jpg
IMG_20150505_125524455.jpg (45.49 KiB) Viewed 2298 times
Build journal: http://www.tnttt.com/viewtopic.php?t=61303
In 2016, I received a kidney transplant, finished my teardrop, and took it on the road! In 2017 I sold it and am back to car camping.
Thanks to all forum members who provided advice about my build and posted info to help me get started.
User avatar
ChasCABQ
Donating Member
 
Posts: 95
Images: 18
Joined: Sat Sep 27, 2014 3:54 pm
Location: Albuquerque, NM
Top

Re: Albuquerque teardrop

Postby ChasCABQ » Thu May 07, 2015 7:20 pm

Installed galley counter and misc. bracing then started on roof spars. First piece was made of two 1x2s screwed together into an ell then secured to the floor's front edge. Roof panel will start here when rest of spars are done.
IMG_20150507_104445424_HDR.jpg
Galley counter with typical camp gear underneath
IMG_20150507_104445424_HDR.jpg (47.95 KiB) Viewed 2251 times

IMG_20150507_104503729.jpg
Front roof panel spars glued to bottom edge
IMG_20150507_104503729.jpg (53.44 KiB) Viewed 2251 times
Build journal: http://www.tnttt.com/viewtopic.php?t=61303
In 2016, I received a kidney transplant, finished my teardrop, and took it on the road! In 2017 I sold it and am back to car camping.
Thanks to all forum members who provided advice about my build and posted info to help me get started.
User avatar
ChasCABQ
Donating Member
 
Posts: 95
Images: 18
Joined: Sat Sep 27, 2014 3:54 pm
Location: Albuquerque, NM
Top

Re: Albuquerque teardrop

Postby Eulalia » Thu May 07, 2015 10:03 pm

Now that you have switched to a Benroy style, your tear is pretty similar to mine. Same dimensions too (5x8). It's always nice to make some sawdust and progress! How is the Kreg jig working out for you? I bought the mini single hole jig and liked it so much I bought the other small kit (2 holes side by side) and a clamp that hooks directly to it. It has been indispensable for me so far.

Jesse
Never mind the maneuvers, always go straight at 'em. - Horatio Nelson
User avatar
Eulalia
Donating Member
 
Posts: 46
Images: 90
Joined: Thu Jun 12, 2014 4:00 pm
Location: Southwest Washington State
Top

Re: Albuquerque teardrop - Kreg tool

Postby ChasCABQ » Sat May 09, 2015 1:29 pm

I will start using my Kreg tool this week when I start installing longitudinal roof spars to the sidewalls. Got the two hole rig also. All attachments to this point have been made with wood screws and TB3 glue. I'll check your build journal to see how you did yours.

FYI - roof panels will be attached to the spars with TB3 and boat nails as suggested by Capn. Bob who's a local teardrop builder.
Build journal: http://www.tnttt.com/viewtopic.php?t=61303
In 2016, I received a kidney transplant, finished my teardrop, and took it on the road! In 2017 I sold it and am back to car camping.
Thanks to all forum members who provided advice about my build and posted info to help me get started.
User avatar
ChasCABQ
Donating Member
 
Posts: 95
Images: 18
Joined: Sat Sep 27, 2014 3:54 pm
Location: Albuquerque, NM
Top

Re: Albuquerque teardrop - working on roof spars

Postby ChasCABQ » Thu May 21, 2015 11:06 am

Starting putting in roof spars beginning with the front. First few will be backed with 1/2" plywood inside for comfort. I'm using Kreg pocket screw jig. I tested it on some scrap wood and it's incredibly strong so I'm just using screws, no glue, for the spars.
IMG_20150520_175113206_HDR.jpg
First roof spars installed using pocket screws into sidewalls
IMG_20150520_175113206_HDR.jpg (55.03 KiB) Viewed 2090 times

IMG_20150520_175123257.jpg
Closeup showing pocket screw holes
IMG_20150520_175123257.jpg (49.66 KiB) Viewed 2090 times
Build journal: http://www.tnttt.com/viewtopic.php?t=61303
In 2016, I received a kidney transplant, finished my teardrop, and took it on the road! In 2017 I sold it and am back to car camping.
Thanks to all forum members who provided advice about my build and posted info to help me get started.
User avatar
ChasCABQ
Donating Member
 
Posts: 95
Images: 18
Joined: Sat Sep 27, 2014 3:54 pm
Location: Albuquerque, NM
Top

Re: Albuquerque Benroy-type teardrop

Postby KCStudly » Thu May 21, 2015 12:25 pm

Glue them, too. In a few years of bouncing down the road things can shift around a bit and those screws might wallow out. Glue will increase the joint strength substantially keeping there from being any relative motion at all.

"Glue and screw".
Last edited by KCStudly on Sat May 23, 2015 8:19 pm, edited 1 time in total.
KC
My Build: The Poet Creek Express Hybrid Foamie

Poet Creek Or Bust
Engineering the TLAR way - "That Looks About Right"
TnTTT ORIGINAL 200A LANTERN CLUB = "The 200A Gang"
Green Lantern Corpsmen
User avatar
KCStudly
Donating Member
 
Posts: 9616
Images: 8169
Joined: Mon Feb 06, 2012 10:18 pm
Location: Southeastern CT, USA
Top

Re: Albuquerque Benroy-type teardrop

Postby Sheddie » Thu May 21, 2015 4:25 pm

Well done Chas, you are making a great job so far :thumbsup:
I have to say that you have to be congratulated for listening to, and taking advice. :applause: Also that you were prepared to go back and start again. It may have cost you a couple of sheets of ply (although I am sure you can use them elsewhere), but it would have been cheaper to do this now than further down the track. Keep up the good work.
User avatar
Sheddie
1000 Club
1000 Club
 
Posts: 1499
Images: 1129
Joined: Mon Jul 01, 2013 3:26 pm
Location: Whangarei, New Zealand
Top

Re: Albuquerque teardrop

Postby ChasCABQ » Sat May 23, 2015 12:58 pm

I installed 1/2" thick birch plywood panel inside front spars for lateral strength and easier sleeping (won't bump heads on protruding spars this way). As noted by KCStudly above :thumbsup: , it's best to "glue and screw" so that's what I did. Now I'm cutting and preparing more roof spars via assembly line and will glue and screw those as well. Hope to have first roof panel installed this weekend. Note: I neglected to carefully measure where to put my screw holes in the panel so I have some extra holes I need to plug with wood putty :( I hope to avoid that in the future - measure twice, cut (or drill) once...
Build journal: http://www.tnttt.com/viewtopic.php?t=61303
In 2016, I received a kidney transplant, finished my teardrop, and took it on the road! In 2017 I sold it and am back to car camping.
Thanks to all forum members who provided advice about my build and posted info to help me get started.
User avatar
ChasCABQ
Donating Member
 
Posts: 95
Images: 18
Joined: Sat Sep 27, 2014 3:54 pm
Location: Albuquerque, NM
Top

Re: Albuquerque Benroy-type teardrop

Postby ChasCABQ » Wed May 27, 2015 2:26 pm

I installed first roof panel using TB3 glue and bronze boat nails (recommended by Capn. Bob). The 1/8" birch plywood bent around the 20" radius with no problem. Boat nails really hold well. I bent a few while hammering since they're quite soft and I really had to work to get them out.
Attaching first roof panel.jpg
Attaching first roof panel.jpg (20.74 KiB) Viewed 1993 times

First roof panel installed.jpg
First roof panel installed.jpg (23.29 KiB) Viewed 1993 times

It's looking good now if I overlook the mistakes I've made to date. Good thing it's wood and can be sanded and patched. Next will install more spars and second roof panel and then the hatch build. Love making sawdust and seeing progress. Time for a beer to celebrate and rest... :beer:
Teardrop behind tow vehicle - first hookup.jpg
Teardrop behind tow vehicle - first hookup.jpg (27.16 KiB) Viewed 1975 times
Last edited by ChasCABQ on Wed May 27, 2015 3:39 pm, edited 1 time in total.
Build journal: http://www.tnttt.com/viewtopic.php?t=61303
In 2016, I received a kidney transplant, finished my teardrop, and took it on the road! In 2017 I sold it and am back to car camping.
Thanks to all forum members who provided advice about my build and posted info to help me get started.
User avatar
ChasCABQ
Donating Member
 
Posts: 95
Images: 18
Joined: Sat Sep 27, 2014 3:54 pm
Location: Albuquerque, NM
Top

Re: Albuquerque Benroy-type teardrop

Postby Sheddie » Wed May 27, 2015 2:37 pm

Hi Chas,
Going well :thumbsup:
Point to ponder: :thinking: If you haven't put it on already, consider leaving the rest of the roof open until you have done the interior cabinets. It can be very cramped trying to work in there once you have it closed in. :roll:
User avatar
Sheddie
1000 Club
1000 Club
 
Posts: 1499
Images: 1129
Joined: Mon Jul 01, 2013 3:26 pm
Location: Whangarei, New Zealand
Top

Re: Albuquerque Benroy-type teardrop

Postby ChasCABQ » Wed May 27, 2015 3:43 pm

Sheddie wrote:Point to ponder: If you haven't put it on already, consider leaving the rest of the roof open until you have done the interior cabinets. It can be very cramped trying to work in there once you have it closed in.

Great point! I was thinking the same thing. I'm short some 1x2s to finish so I'm going to work on interior shelves and then close it up. I'm keeping it simple, light and in line with my skill set: small corner shelves in front and a larger shelf with a tall lip in back. This is in line with my basic camping style; I used to sleep out of the back of my 4Runner so this will be a step up.
Build journal: http://www.tnttt.com/viewtopic.php?t=61303
In 2016, I received a kidney transplant, finished my teardrop, and took it on the road! In 2017 I sold it and am back to car camping.
Thanks to all forum members who provided advice about my build and posted info to help me get started.
User avatar
ChasCABQ
Donating Member
 
Posts: 95
Images: 18
Joined: Sat Sep 27, 2014 3:54 pm
Location: Albuquerque, NM
Top

Re: Albuquerque Benroy-type teardrop - mistakes to date

Postby ChasCABQ » Wed May 27, 2015 3:53 pm

Mistakes to date:
  • Cut interior galley wall little short leaving side walls 1/4" to 1/2" closer than planned.
  • Floor panel bolt holes didn't line up so well leaving 1/8" gap in middle of floor to be sealed.
  • Roof panel overhangs sidewall slightly. Needs to be trimmed.
  • Front curves had some very small flat spots in a few places. Nails and glue fixed this.
  • First design, vented Kammback, looked too difficult so changed to generic Benroy
  • First wall panels based on Kammback profile were 1/2" thick. New wall panels are 3/4" which provide better attachment to roof with only a little extra weight.
  • Mismeasured some screw holes which will be patched.
Build journal: http://www.tnttt.com/viewtopic.php?t=61303
In 2016, I received a kidney transplant, finished my teardrop, and took it on the road! In 2017 I sold it and am back to car camping.
Thanks to all forum members who provided advice about my build and posted info to help me get started.
User avatar
ChasCABQ
Donating Member
 
Posts: 95
Images: 18
Joined: Sat Sep 27, 2014 3:54 pm
Location: Albuquerque, NM
Top

PreviousNext

Return to Build Journals

Who is online

Users browsing this forum: No registered users and 18 guests