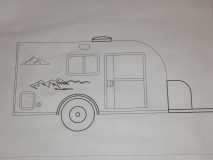
Lance and Becky's Sagwagon

...ask your questions in the appropriate forums BUT document your build here...preferably in a single thread...dates for updates, are appreciated....

Re: Lance and Becky's Sagwagon - Hatch Finally ON!!

Postby PKCSPT » Mon May 27, 2013 4:28 am

I am impressed, :clapping hands:
121172 116946 159644
PKCSPT
Silver Donating Member
 
Posts: 1515
Images: 61
Joined: Wed Mar 31, 2010 11:27 pm
Location: Minnesota

Re: Lance and Becky's Sagwagon - Hatch Finally ON!!

Postby AlgoDan » Mon May 27, 2013 4:36 am

A well crafted TD you have, some nice detail going on. Good job :thumbsup:
Here now but Camping later.............Dan

Build Journal
http://www.tnttt.com/viewtopic.php?f=50&t=54681
102535 103199 105576
From .................Paper...........................To.......................... Pavement............................
User avatar
AlgoDan
The 300 Club
 
Posts: 449
Images: 238
Joined: Mon Feb 25, 2013 4:08 am
Location: Ontario, Canada

Re: Lance and Becky's Sagwagon - Hatch Finally ON!!

Postby Doubltap » Mon May 27, 2013 5:30 am

Great looking drop! I think you'll find that those LED lights use very little battery current, hence a good battery life; at least that's the case with the ones I installed in my sailboat. I also think you were correct in forging ahead with the hatch part of the build, as you sometimes just have to move on and do a bit of "catch as catch can" with certain elements of the construction. As you have already surmised, a good thick gasket combined with beefy haul down clasps will go a long way toward ameliorating any water seepage problems attributable to hatch misalignment. Keep on Keepin' on! You're almost there! 8)

Al Thompson
Topeka, Kansas

Build thread: viewtopic.php?f=50&t=53840
When your outgo is more than your income, your upkeep will be your downfall !
User avatar
Doubltap
Silver Donating Member
 
Posts: 47
Images: 181
Joined: Sat Oct 06, 2012 8:00 am
Location: Topeka, Kansas
Top

Re: Lance and Becky's Sagwagon - Hatch Finally ON!!

Postby Oldragbaggers » Mon May 27, 2013 8:14 am

Forrest, Larry, Sharon, Karen, Dan, thank you for your nice comments. As always I appreciate your support, and that you take the time to read my ramblings.

Norm, thanks for the idea about the "wedge" of dense rubber under the gasketing at the top. I think this is a great idea and if I am not mistaken I believe I have an old garden kneeling pad out in the garage somewhere. I appreciate you taking the time to give me that detailed, and very helpful, response.

Paul, thank you for your nice compliment about the paint job. The inside is Rustoleum and was applied with a foam roller with a little bit of tipping with a chip brush. The outside is Interlux Brightsides 1 part polyurethane marine paint. I applied several coats that I wasn't happy with. Various methods used were foam roller (just roll, and roll and tip), nap roller, HVLP sprayer. In the end, my husband came to the rescue. He is a master with a brush, so the final coat is done completely with a badger hair brush, and it turned out really nice. I don't have his touch when it comes to brush painting, that's for sure.

Al, thank you and I'm glad to hear that the lights will likely give me good use. I like them very much and best part, no wiring. My husband is looking at your build as we speak :thumbsup:

Another beautiful day. Can't decide whether to work on the teardrop some more or maybe just pick a trail and go for a nice bike ride. Whatever we do, I'm relieved and happy today knowing that one huge obstacle is out of the way. Actually, if I was sure we weren't going to encounter rain, we could actually go camping at this point. That's a nice feeling. Now the devil is in the sealing details.
Life is sooooo good.........
Sail...camp....bike...repeat
Becky

Build Journal http://www.tnttt.com/viewtopic.php?f=50&t=45917
Visit our blog at http://www.oldragbaggers.com
Image Image
User avatar
Oldragbaggers
Gold Donating Member
 
Posts: 1842
Images: 331
Joined: Mon Aug 01, 2011 9:22 pm
Location: Essex, MD
Top

Re: Lance and Becky's Sagwagon - Hatch Finally ON!!

Postby jonw » Mon May 27, 2013 8:37 am

Hi Becky -

Looks great! I especially like your galley struts - very classy.

Re: your hatch I had the same issues. It looks like the very top of your side molding is not bent enough to follow your profile curve which is causing the gap on the side. I think the only way to correct this now is to take the molding off and carefully bend a little more at the end.

As for the open/gap under the hurricane hinge I put a small (1 inch or so) piece of thick (3/8 ?) self-stick weatherstripping from Home Depot there, attached to the non-pivoting side of the hinge aluminum. Works like a champ and keeps water out both when the hatch is closed. I also put a small piece of drip rail just in front of it to keep driven water away from the area when driving on the highway in the rain. Both can be seen in the picture below.

Hope this helps.

84879
User avatar
jonw
Titanium Donating Member
 
Posts: 525
Images: 163
Joined: Thu Oct 22, 2009 6:22 pm
Location: Marlboro, Mass.
Top

Re: Lance and Becky's Sagwagon - Hatch Finally ON!!

Postby Oldragbaggers » Mon May 27, 2013 9:32 am

Thanks, Jon, for the reply and the nice comment.

Actually the bend in the aluminum isn't the problem. My trim is absolutely flush against the edge of the hatch at all points. I came up with a very good system of bending and clamping and took a LOT of time with that process, so that much I am sure of. I just cut much too deep a notch in the wall at that point and I think also the build up of fiberglass cloth and resin on the roof of the tear (2 layers of 12 oz cloth plus many coats of resin) raised the roof up higher and widened the gap even more. I tried building up the edge of the wall last year with fiberglass tape, and while it did help I just didn't take it far enough in that area. Adding a few more layers at some point in time may be an option, but not now. This season we want to get camping. Maybe at the end of the season or next year when I am fresh and not exhausted of the build process I will tackle that again.

I like what you have done with the piece of drip rail and I am also planning on the extra gasketing on the non pivoting side. I thank you for taking the time to reply and give these good suggestions.

For this year I will just build up enough gasketing to fill that void and even though the gasketing will be visible in the gap there, I am not going to obsess over it for now. It's frustrating to be sure. I tried so hard to be careful so to get to this stage of the game and have this big glaring mistake is a huge disappointment. But in the end it will not diminish the fun of the camping, so I am moving on.
Last edited by Oldragbaggers on Mon May 27, 2013 10:05 am, edited 1 time in total.
Life is sooooo good.........
Sail...camp....bike...repeat
Becky

Build Journal http://www.tnttt.com/viewtopic.php?f=50&t=45917
Visit our blog at http://www.oldragbaggers.com
Image Image
User avatar
Oldragbaggers
Gold Donating Member
 
Posts: 1842
Images: 331
Joined: Mon Aug 01, 2011 9:22 pm
Location: Essex, MD
Top

Re: Lance and Becky's Sagwagon - Hatch Finally ON!!

Postby aggie79 » Mon May 27, 2013 9:42 am

Very nice Becky! I love the nautical theme and details. :applause: :thumbsup: :applause: The paint came out beautiful!

As Jon said, a rain diverter works great functionally. On my build, they are a little long to cover up some "oops" moments from construction. As far as the trim caps, I used aluminum Chicago bolts/screws. These are also called binding posts.

Take care,
Tom
Tom (& Linda)
For build info on our former Silver Beatle teardrop:
Build Thread

93503
User avatar
aggie79
Super Duper Lifetime Member
 
Posts: 5405
Images: 686
Joined: Tue Aug 07, 2007 5:42 pm
Location: Watauga, Texas
Top

Re: Lance and Becky's Sagwagon - Hatch Finally ON!!

Postby KCStudly » Mon May 27, 2013 10:02 am

Wow, Becky, you've been busy! It looks great. :thumbsup:

The finish on the under side of your hatch is awesome, and the galley table came out very nice. :applause:

I'm sure you can work your way through the issues with the hatch seal, and eventually find a permanent solution that you are comfortable with.

At the back where the hatch meets the floor, does the hatch overlap and seal against the back edge of the floor? Are you going to put a piece of trim over the back edge, or use more of the marine paint?

Can't wait to see pic's of your first trip. You're getting so close now! :thumbsup: :applause:
KC
My Build: The Poet Creek Express Hybrid Foamie

Poet Creek Or Bust
Engineering the TLAR way - "That Looks About Right"
TnTTT ORIGINAL 200A LANTERN CLUB = "The 200A Gang"
Green Lantern Corpsmen
User avatar
KCStudly
Donating Member
 
Posts: 9616
Images: 8169
Joined: Mon Feb 06, 2012 10:18 pm
Location: Southeastern CT, USA
Top

Re: Lance and Becky's Sagwagon - Hatch Finally ON!!

Postby Oldragbaggers » Mon May 27, 2013 10:08 am

aggie79 wrote:Very nice Becky! I love the nautical theme and details. :applause: :thumbsup: :applause: The paint came out beautiful!

As Jon said, a rain diverter works great functionally. On my build, they are a little long to cover up some "oops" moments from construction. As far as the trim caps, I used aluminum Chicago bolts/screws. These are also called binding posts.

Take care,
Tom


Tom, I will have to check out those binding posts. Keep the suggestions coming!!

KC, thank you for the nice comments. Yes there will be aluminum L trim along the bottom of the floor. The bottom of the hatch will also have trim and then gasketing between the two. The draw down latches will be on the bottom of the hatch on the back. Whatever is left showing on the bottom will be painted black.
Life is sooooo good.........
Sail...camp....bike...repeat
Becky

Build Journal http://www.tnttt.com/viewtopic.php?f=50&t=45917
Visit our blog at http://www.oldragbaggers.com
Image Image
User avatar
Oldragbaggers
Gold Donating Member
 
Posts: 1842
Images: 331
Joined: Mon Aug 01, 2011 9:22 pm
Location: Essex, MD
Top

Re: Lance and Becky's Sagwagon - Hatch Finally ON!!

Postby cop1406 » Mon May 27, 2013 10:46 am

Thats one nice teardrop. Don't worry about the small issues, you will be the only one that notices them. The hatch is the most difficult part of a build and mine had some small issues also. Take a trip to one of the big box stores and look at the miriad of seals and you will be able to come up with a viable solution. I can tell from your build quality that you will have no problem figuring it out. Great Job!!! :thumbsup:
User avatar
cop1406
Donating Member
 
Posts: 63
Images: 14
Joined: Fri Apr 27, 2012 1:03 am
Top

Re: Lance and Becky's Sagwagon - Hatch Finally ON!!

Postby DMcCam » Tue May 28, 2013 12:02 pm

Beauuutiful work Becky!!! :applause: :applause: :applause: Would it be possible to see more detailed pictures of the hatch gap area? I've got a few ideas...

All the Best,

Dave
User avatar
DMcCam
Gold Donating Member
 
Posts: 883
Joined: Wed Jan 06, 2010 8:30 pm
Location: Reno, Nevada
Top

Re: Lance and Becky's Sagwagon - Hatch Finally ON!!

Postby Oldragbaggers » Tue May 28, 2013 9:32 pm

Dave, I'm hoping to have it all closed up this weekend, but I'll get some more pictures the next time I drag it out. Grant is sending me a short length of rain diverter and I think I am going to follow the suggestions of a couple of people and put a little of that in that area to channel rain away from it, then just fill the gap with a double layer of gasketing. We'll see where that gets me. But if you have some suggestions, I'm all ears.
Life is sooooo good.........
Sail...camp....bike...repeat
Becky

Build Journal http://www.tnttt.com/viewtopic.php?f=50&t=45917
Visit our blog at http://www.oldragbaggers.com
Image Image
User avatar
Oldragbaggers
Gold Donating Member
 
Posts: 1842
Images: 331
Joined: Mon Aug 01, 2011 9:22 pm
Location: Essex, MD
Top

Re: Lance and Becky's Sagwagon - Hatch Finally ON!!

Postby CliffinGA » Tue May 28, 2013 10:13 pm

Becky mine did same thing with the gap so I put a small piece of rubber there above it and put more edge seal there.

Looking good though, keep it up.

Cliff
In God we trust, shoot the rest and he will sort out!

My Build:

viewtopic.php?f=50&t=42628
User avatar
CliffinGA
1000 Club
1000 Club
 
Posts: 1499
Images: 207
Joined: Sat Nov 14, 2009 1:29 pm
Location: Jefferson, GA
Top

Re: Lance and Becky's Sagwagon - Hatch Finally ON!!

Postby eaglesdare » Wed May 29, 2013 6:20 am

Very nice Becky!!!!!!!!!! :wine:
Louella
May the foam be with you.
User avatar
eaglesdare
Donating Member
 
Posts: 3168
Images: 13
Joined: Tue Aug 26, 2008 7:06 pm
Top

Re: Lance and Becky's Sagwagon - Finally FINISHED

Postby Oldragbaggers » Sun Jun 02, 2013 6:48 pm

We are finally done....more or less. I am still waiting for new vinyl insert from Grant (should be here tomorrow) and the gasketing needs a little more tweaking, but for all intents and purposes we are finished and could go camping right now, even in the rain.

I decided this weekend I was going to go out to my garage, rummage around and find whatever I could that would work to deal with the last few little trim and sealing issues I had left. I didn't use conventional parts or methods, but came up with solutions that worked well enough for me. A few little pieces of closed cell cut out of an old boat cockpit cushion (and dyed black with leather dye) to plug that big gap at the top of the hatch, some neoprene rubber sheet material to fill in the gap at the top of the galley edge trim where I cut it too short (blends right in with the vinyl insert if you trim that at an angle and overlap it). A teardrop builder would notice, but to an untrained eye just taking in the "big picture," I don't think any of it would necessarily seem out of place. (Didn't take a lot of pictures this weekend, sorry.)

We hosed it down after we finished, and even drove it in the rain on the interstate, and it was dry as a bone when we got back. I just need to adjust the gasketing because there is actually too much in some areas and the hatch isn't closing as well as it should. It will be fine when my box gets here from Grant, which also has gasketing in it. I used some gasketing I had bought from Frank Bear, which seems to be a bit denser than Grants and doesn't compress quite as much. It's obvious in some areas that the hatch isn't a perfect fit, but I am very satisfied with it overall and cannot wait to start camping in it.

My hatch and floor is trimmed out in the back with aluminum (looks very nice). The draw down latches are on, cockeyed of course. I wouldn't know "straight" if it bit me in the derrière. But they work well.

We took it on its maiden voyage today to the truck plaza to have it weighed. 1120 pounds. I suspected it might be that heavy. Lance was betting it was a lot lighter. He was genuinely surprised. Because we used a CAT scale though, it was under their minimum weight to print a weight slip. I guess if we need one at some point we will take it to a metal recycler or something.

Here she is preparing to head on down the road. She sits nice and level behind the truck and towed like a dream. No skipping around or anything that would indicate that the balance is bad. We are really happy campers today. Now I finally get back to finishing my kitchen that I started remodeling 2 years ago before I started the teardrop.

Image

Image
Life is sooooo good.........
Sail...camp....bike...repeat
Becky

Build Journal http://www.tnttt.com/viewtopic.php?f=50&t=45917
Visit our blog at http://www.oldragbaggers.com
Image Image
User avatar
Oldragbaggers
Gold Donating Member
 
Posts: 1842
Images: 331
Joined: Mon Aug 01, 2011 9:22 pm
Location: Essex, MD
Top

PreviousNext

Return to Build Journals

Who is online

Users browsing this forum: No registered users and 7 guests