Green Lantern- now with awning!!!

...ask your questions in the appropriate forums BUT document your build here...preferably in a single thread...dates for updates, are appreciated....

Postby YuGun » Tue Nov 30, 2010 12:35 am

Hello,
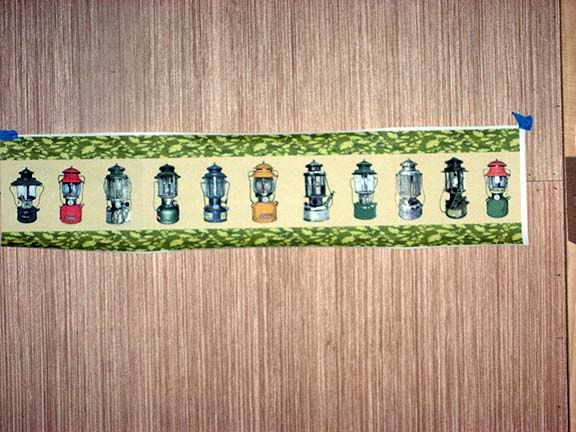
Ä°t looks good and i like the name and logo of Green Lanten,
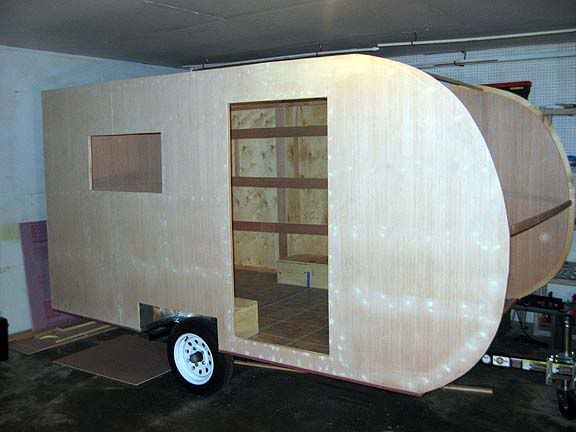
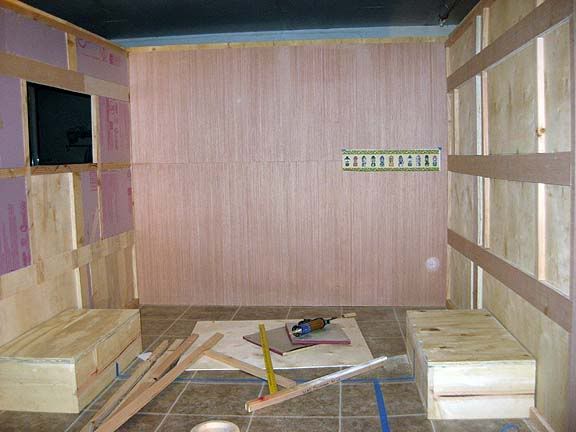
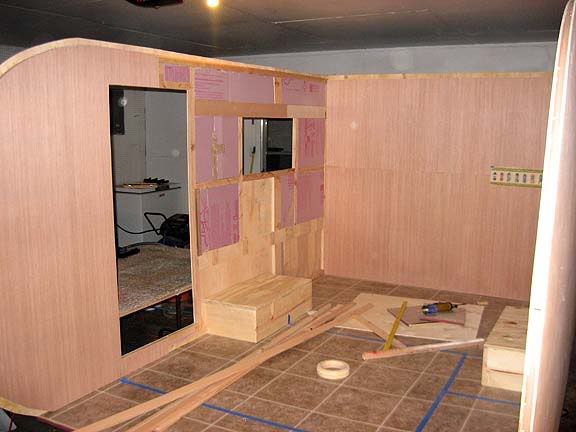
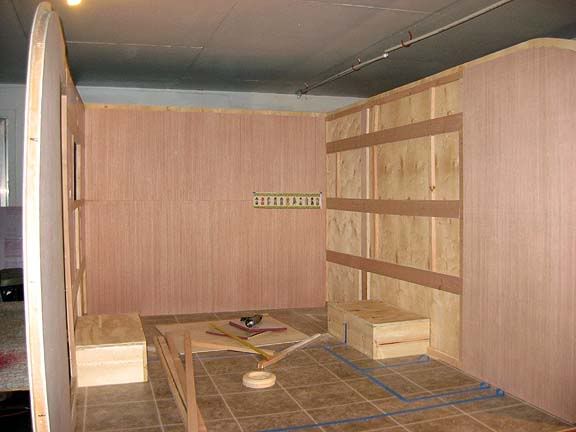
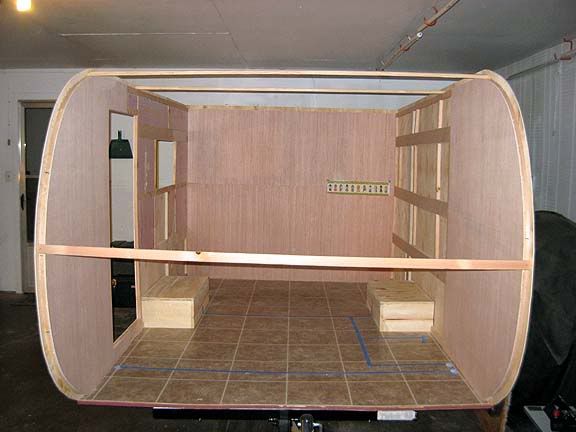
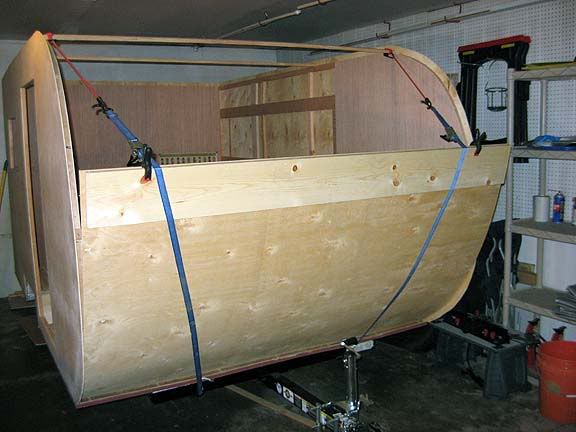
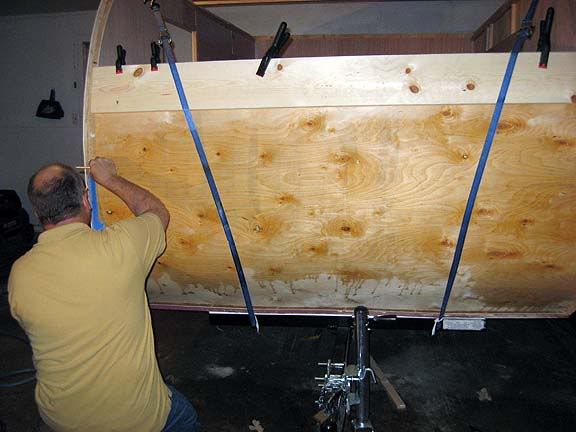
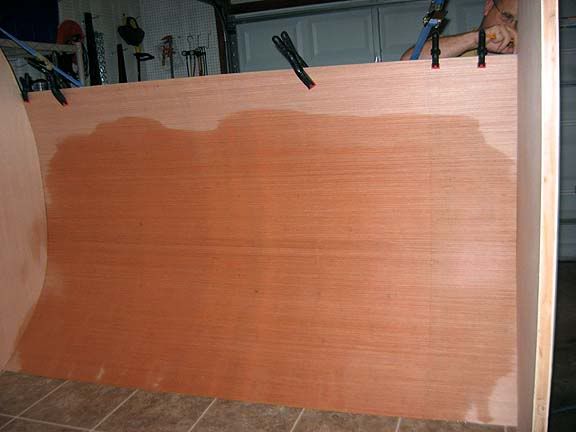
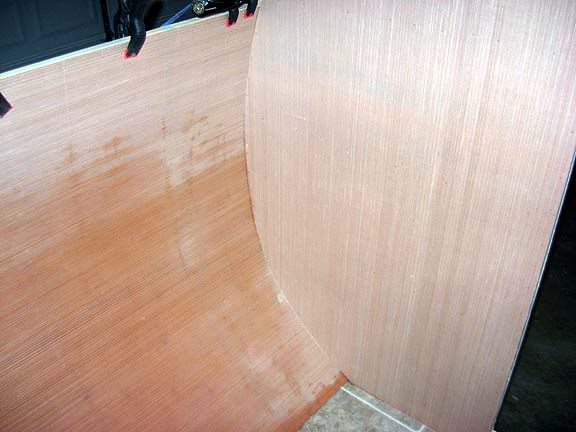
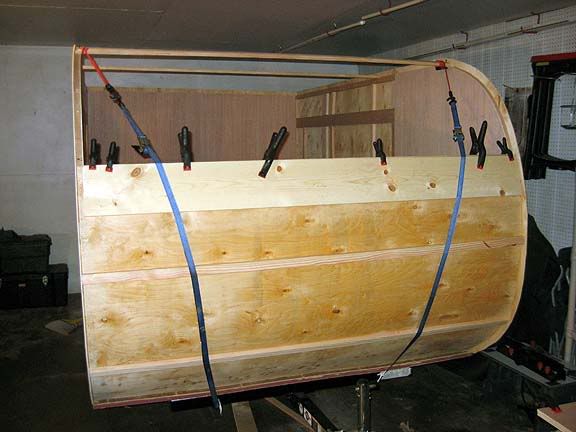
User avatar
YuGun
The 300 Club
 
Posts: 445
Joined: Sun Apr 11, 2010 1:25 pm
Location: Turkey

Postby S. Heisley » Tue Nov 30, 2010 12:49 am

Nice! Is this one gonna be the final keeper?
User avatar
S. Heisley
Super Lifetime Member
 
Posts: 8775
Images: 495
Joined: Mon Sep 17, 2007 10:02 am
Location: No. California

Postby starleen2 » Tue Nov 30, 2010 6:23 am

S. Heisley wrote:Nice! Is this one gonna be the final keeper?

Now Sharon, after #4 (the Ladybug) - I think I said the same thing about it! :lol:
User avatar
starleen2
5th Teardrop Club
 
Posts: 16272
Images: 224
Joined: Sat May 12, 2007 8:26 pm
Location: Pea Ridge ,AR
Top

Postby starleen2 » Tue Nov 30, 2010 6:27 am

2bits wrote:She's gonna be purdy! Or should I say "He" ;)

The mrs – still says “sheâ€
User avatar
starleen2
5th Teardrop Club
 
Posts: 16272
Images: 224
Joined: Sat May 12, 2007 8:26 pm
Location: Pea Ridge ,AR
Top

Postby peggyearlchris » Tue Nov 30, 2010 9:24 am

Wow! your moving right along. :thumbsup: Your doing a great job and love the fabric. Love watching your build. :applause: :applause: Peg
User avatar
peggyearlchris
500 Club
 
Posts: 984
Images: 56
Joined: Mon May 29, 2006 8:49 pm
Location: corpus christi,texas
Top

Postby Classic Finn » Tue Nov 30, 2010 1:37 pm

starleen2 wrote:Well folks had a wee bit of time to work on the green lantern. As mentioned before the floor is done.
Image
Image
Now time to attach the walls
Image
Muscling back wall into place – getting everything lined up before the glue sets. So far so good.
Image
Everything in place – I decided to have some wallpaper boarder printed up to match the Coleman fabric – you can see it in on the back wall
Image
Here is a close up – it’s only a test pattern to check for repeatability and size.
Image
Even got some insulation on the walls
Image
Other side – still have to cut out the window. The front cutouts were done with a router and trim Bit – Now that how to do it! – Just zip around the edges and you’re done. How did I ever get by without one? Now you can see the lamination strips on the side (three rows)
Image
Finally Done for the day
Image
The strips are just temporary until I get ready to close everything up. Right now I still have some big pieces that need to be installed. The blue tape is th layout for cabinets and Bed/seating spaces


Now that is some sweet work and Im really liking this thread too. Keep on Keepn On :) :applause: :applause:

Question for you. Did you use screws or nails with glue of sorts to mount the sidewalls onto the floor?
Royal Teardrop Society Scandinavian Bureau Chief of Staff

Image
User avatar
Classic Finn
Midnight Sun Voyager
 
Posts: 17488
Images: 146
Joined: Fri Apr 29, 2005 4:29 am
Location: Country of Finland
Top

Postby starleen2 » Tue Nov 30, 2010 5:33 pm

Classic Finn wrote:Question for you. Did you use screws or nails with glue of sorts to mount the sidewalls onto the floor?

I used screws and glue to attach the side walls - the screws go up from the bottom into the wood strips of the wall. You can't see it in the photos, but I stripped off about 1 inch perimeter around the vinyl flooring for the glue to bond to the plywood floor.
User avatar
starleen2
5th Teardrop Club
 
Posts: 16272
Images: 224
Joined: Sat May 12, 2007 8:26 pm
Location: Pea Ridge ,AR
Top

Postby Dusty82 » Tue Nov 30, 2010 6:39 pm

I'm watching your build closely - I really meant it when I said I loved this design. Yours looks fantastic! I love the custom touches you're putting into it like the curtain fabric and wallpaper border.

I'm kind of playing with the Green Lantern's basic profile in SketchUp (hope you don't mind,) but I've increased the height a bit to make it a standie. I'm also toying with a pull out galley in the back. Basically I raised the dinette/bed up a bit to make room for a galley cabinet to slide under it during travel, then slide out for use at the campsite. Right now in my design I'm addressing a leg/support system for the front of the galley cabinet when it's in use, and just getting the interior layout tweaked a bit here and there. So far it all works in 3D, but you how that goes.

With so many people using SketchUp to design their tears and TTTs, I wish there was a forum for sharing the SKP files for our various designs. I know I'd love to get my hands on the SKP files of a few of the designs I've seen here.

Keep up the great work! Looks like it'll be ready to camp in no time!
TV: 2004 Jeep Liberty Sport

Currently stuck in a tent.
User avatar
Dusty82
The 300 Club
 
Posts: 313
Joined: Thu Jan 28, 2010 8:15 pm
Location: Southern Oregon
Top

Postby starleen2 » Tue Nov 30, 2010 8:51 pm

Today is the day for the first of the bends. This is the most difficult part of the build since the lower bend is at a tighter radius than the top. If I can get this bend in place then everything else should go smoothly.
Preparing to bend by inserting the sheet into the tension straps and checking for fit. Applying adhesives to the edges
Image
Applying some pressure to the straps to make the bend
Image
A little bit of water sprayed on both sides helps to ease the bend – so far no cracking noises.
Image
Go the bend made and stapled down now to Measure for the spars
Image
Looking good so far
Image
First piece done – Now to let it dry overnight then release it from the straps. I still need to glue in the spars and attach them permanently. Right now they are just held in place to help bend the plywood.
Image
User avatar
starleen2
5th Teardrop Club
 
Posts: 16272
Images: 224
Joined: Sat May 12, 2007 8:26 pm
Location: Pea Ridge ,AR
Top

Postby 2bits » Tue Nov 30, 2010 8:54 pm

I like that method! ! !
Thomas

Image
User avatar
2bits
2bit Member
 
Posts: 5131
Images: 8
Joined: Thu Dec 27, 2007 6:04 pm
Location: Lake Tawakoni, TX
Top

Postby Hikerjohnd » Tue Nov 30, 2010 8:55 pm

Wow! Nice work. :thumbsup:

Bending around a curve scares me - guess that's why I'm going with angles.

Can't wait to see this finished! It's going to be amazing!
---------------
--John

So be it.
User avatar
Hikerjohnd
Teardrop Advisor
 
Posts: 65
Images: 88
Joined: Wed Sep 15, 2010 9:57 pm
Location: Savannah, GA
Top

Postby starleen2 » Tue Nov 30, 2010 9:10 pm

Dusty82 wrote:. . . With so many people using SketchUp to design their tears and TTTs, I wish there was a forum for sharing the SKP files for our various designs. I know I'd love to get my hands on the SKP files of a few of the designs I've seen here.

there are a few of us who are trying to get a repository going for sketch Up designs. I do plan on posting the design in the design library once it is finally done. I like to use SketchUp to model with because it gives me accurate dimensions so i can plan out everything before I start to build - the make fine adjustments as I go. If you are interested it should be available in the 3d warehouse
User avatar
starleen2
5th Teardrop Club
 
Posts: 16272
Images: 224
Joined: Sat May 12, 2007 8:26 pm
Location: Pea Ridge ,AR
Top

Postby danlott » Wed Dec 01, 2010 12:27 am

starleen2 wrote:
Dusty82 wrote:. . . With so many people using SketchUp to design their tears and TTTs, I wish there was a forum for sharing the SKP files for our various designs. I know I'd love to get my hands on the SKP files of a few of the designs I've seen here.

there are a few of us who are trying to get a repository going for sketch Up designs. I do plan on posting the design in the design library once it is finally done. I like to use SketchUp to model with because it gives me accurate dimensions so i can plan out everything before I start to build - the make fine adjustments as I go. If you are interested it should be available in the 3d warehouse


Here is the thread for the Teardrops & Tiny Travel Trailers collection in the Google SketchUp 3D warehouse. It would be great if more people would add their models.

http://www.tnttt.com/viewtopic.php?t=37543

Dan
Hoplite Traveler Build thread
Image Image
Life is what happens to you while you're busy making other plans.
User avatar
danlott
Donating Member
 
Posts: 874
Images: 264
Joined: Fri Mar 06, 2009 2:18 pm
Location: Winnemucca, Nevada
Top

Awesome build!

Postby Cyclicpitcher » Wed Dec 01, 2010 7:10 am

You guys are doing an awesome job on this camper!! :thumbsup:

Your experience shows with the light weight strong construction. I knew I was over building mine, kinda makes me wish I could start over! :(

Your luan strips are so much better as 3/4" wall studs and ripping them is less critical and a good wide support. I have a cheap table saw and the rip fence is horrible to cut a perfectly square stud the length of the board. I manage to do it, but I have to throw a few in the junk pile when they run out of shape during the cut. Sandwiched luan strips would solve that. :thinking:

I can see other techniques that inspire me as well and I will be a copycat in the future if you don't mind! :twisted:

Very best wishes and keep those photos coming :applause:

CP
Cyclicpitcher
Teardrop Builder
 
Posts: 37
Images: 70
Joined: Sun Sep 26, 2010 7:47 am
Location: Memphis TN
Top

Postby aggie79 » Wed Dec 01, 2010 12:14 pm

2bits wrote:I like that method! ! !


I do too, Scott. (I'll file this away for use later.)
Tom (& Linda)
For build info on our former Silver Beatle teardrop:
Build Thread

93503
User avatar
aggie79
Super Duper Lifetime Member
 
Posts: 5405
Images: 686
Joined: Tue Aug 07, 2007 5:42 pm
Location: Watauga, Texas
Top

PreviousNext

Return to Build Journals

Who is online

Users browsing this forum: No registered users and 7 guests