Dusty Mark's 5 x 10 Build

...ask your questions in the appropriate forums BUT document your build here...preferably in a single thread...dates for updates, are appreciated....

Re: Dusty Mark's 5 x 10 Build

Postby Nobes » Mon Jun 06, 2016 9:25 am

Beautiful work going on. Thanks for sharing. Appropriate that you're a teacher, as I'm going to school on your build.
Nobes
Teardrop Master
 
Posts: 214
Images: 508
Joined: Sun Dec 20, 2015 5:01 am

Re: Dusty Mark's 5 x 10 Build

Postby Dusty Mark » Mon Jun 06, 2016 9:54 am

James,

Thanks, the fan should pull enough air through the air conditioner even when the AC's not running. I wasn't too keen with installing two fans on this small roofline. If I'm wrong on that, I'll be modifying the system with some kind of bypass. :shock:
Dusty Mark
Teardrop Master
 
Posts: 210
Images: 395
Joined: Mon Feb 29, 2016 6:57 pm

Re: Dusty Mark's 5 x 10 Build

Postby Dusty Mark » Mon Jun 06, 2016 10:03 am

Nobes,

Thanks, I purchased plans from Hidden Valley to begin learning about teardrops and then launched a build that looks nothing like their plan.

The trailer chassis dimensions were from a discussion I had with Frank Bear at Vintage Technologies. I then bought the axle from him and drew my own blueprints for the welder. I used Frank's full-size template for the side profile and his technique for the floor/wall joint.

I've drawn a lot of ideas from the Oregon Trail'r web site. I liked the way they assemble their cabinets and walls. They also use the ledge method to install their ceilings.

I purchased Steve Frederick's plans about halfway through the build and that firmed my decision to use the ledge method of installing the ceiling.
Dusty Mark
Teardrop Master
 
Posts: 210
Images: 395
Joined: Mon Feb 29, 2016 6:57 pm
Top

Skinned!

Postby Dusty Mark » Thu Jun 09, 2016 11:37 pm

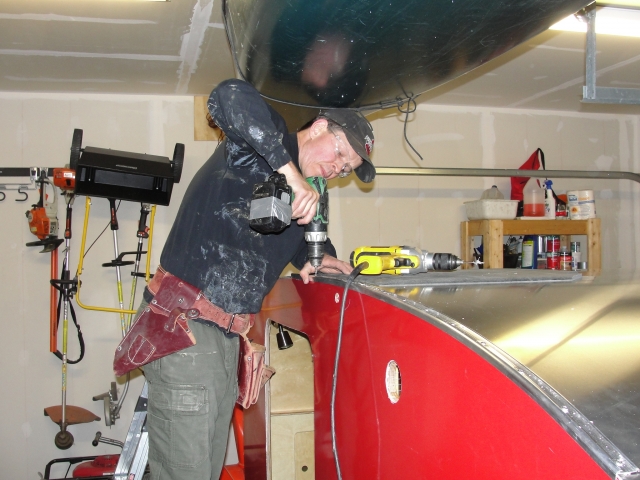
I made great progress this week at skinning and trimming the camper. My brother and nephew helped me lift and install the flexy side panels on Tuesday. Mary and I installed the roof aluminum on Wednesday. Today, Thursday, I worked on trim, fenders, and doors.

Image

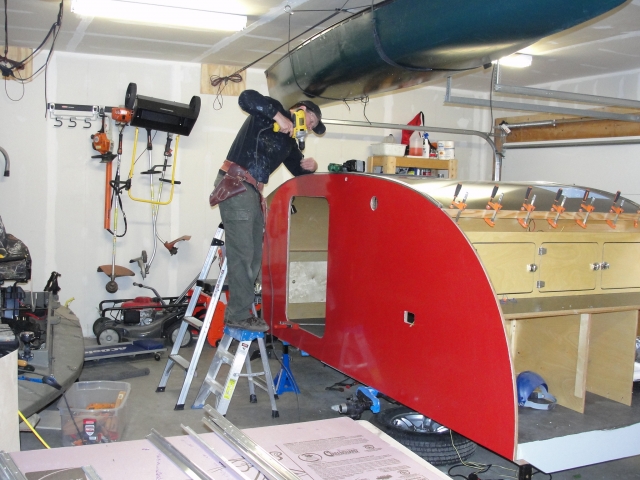
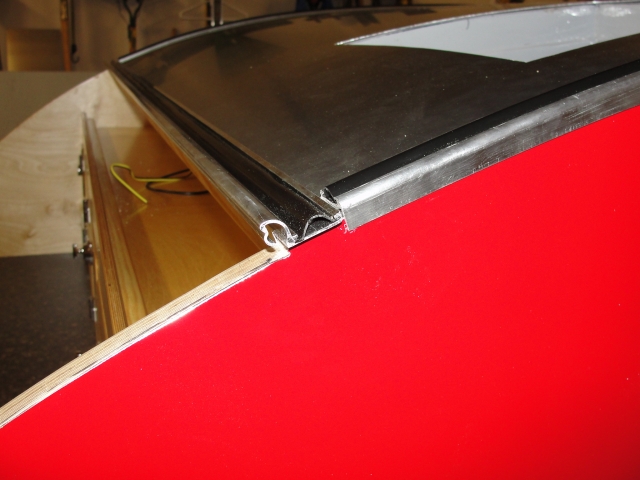
I sprayed 3M Spray 90 contact cement along the upper edge of the side panels and around the edges of any cutouts. This worked well to hold it in position until I got other parts installed later to hold more securely. I'm applying the roof trim to hold down the .060 mill finish aluminum.

Image

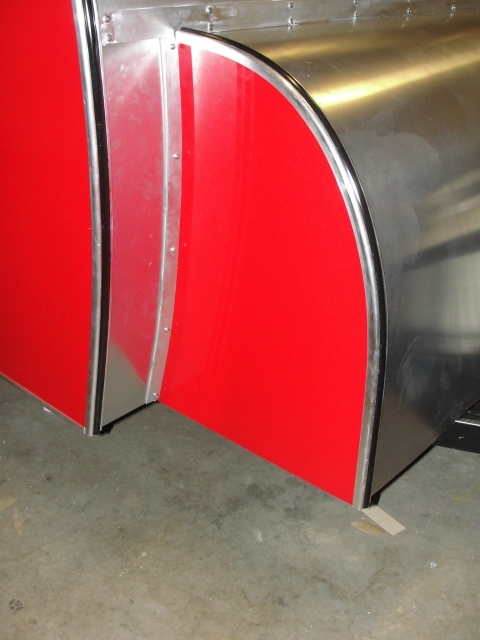
The soft trim bends nicely around curves.

Image

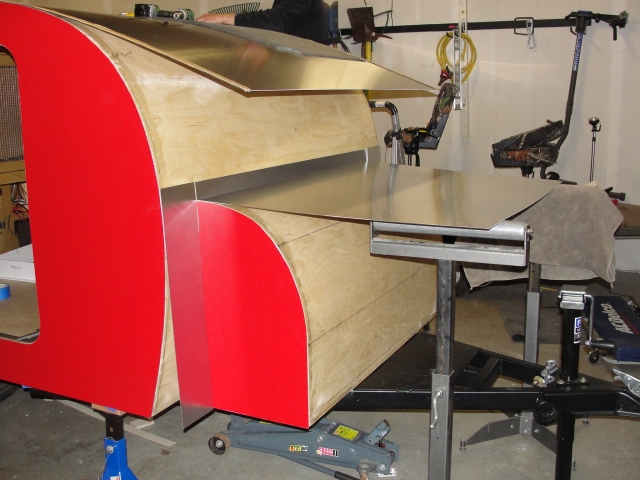
The roof is a marine grade .060 aluminum that is resistant to curving. Mary and I had an epic struggle getting the roof to bend down to the storage module. I had applied contact cement to the side panels of the storage module and the top edges of the storage module roof and the side panels adjacent to the front storage module. This saved the day as we had enough to hassle with getting that roof to bend down and drive screws through 1 1/2" trim piece that holds it down. We eventually succeeded.

Image

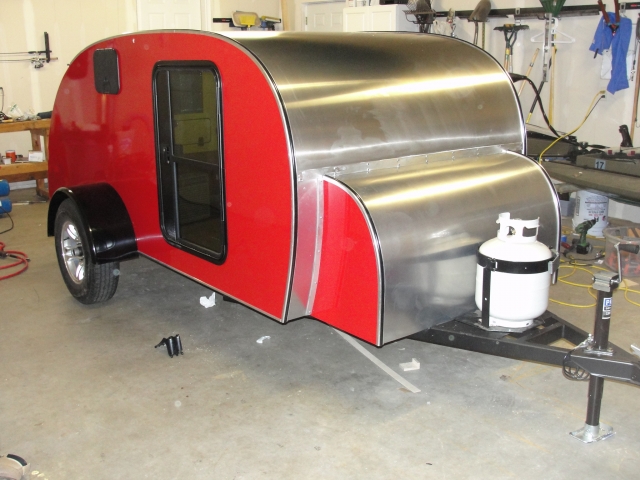
We're real happy with the way it turned out. I've got some bottom trim to install and we need to clean the top better from some caulk that got all over during our struggle with the top, but it's looking like a clean install.

Image

I'm waiting on some gray Trempro caulk since they accidentally sent me white. I'll use that to seal up the edges of the plain trim seams. There is caulk underneath these pieces though.

Image

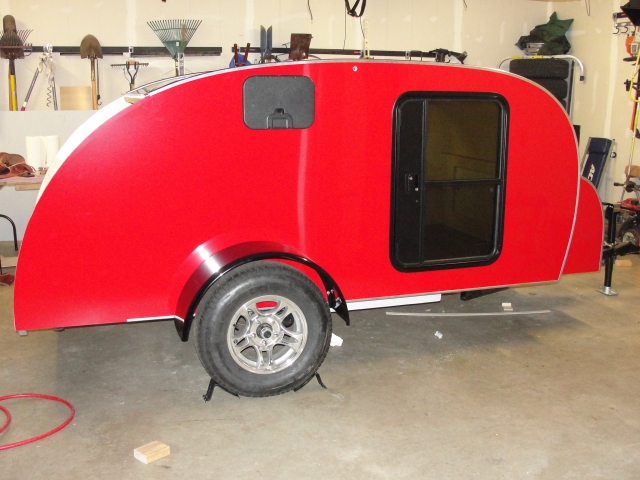
Needs bottom trim at the rear and on the storage module, rain sill above the door, and the porch light yet.

Image

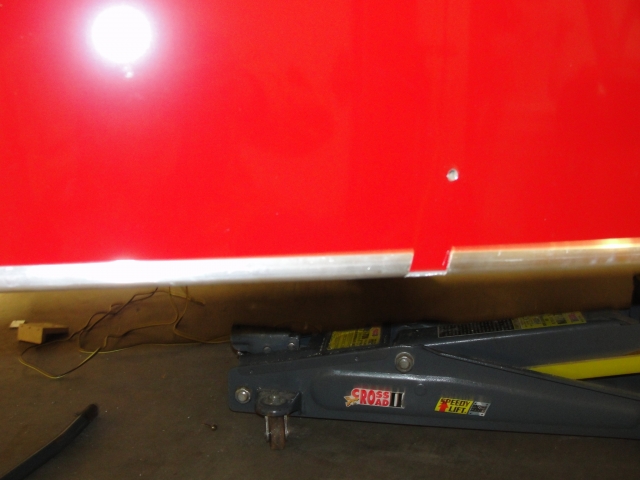
I cut notches for the fender to cross the bottom trim cleanly.

Image

The hurricane hinge is fitted, but I'm waiting on more butyl tape to seal it.

Image

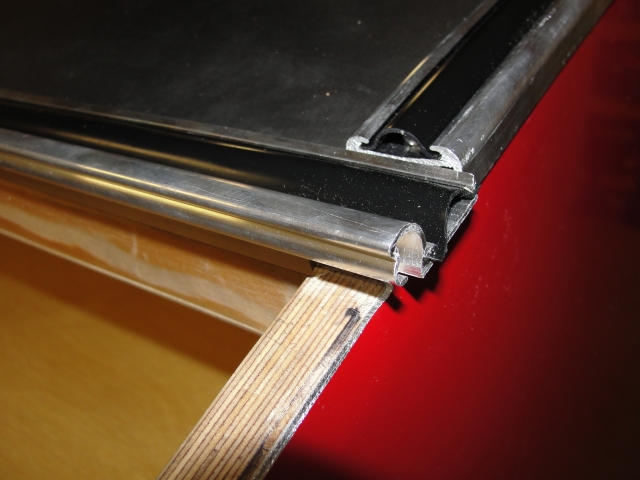
Notice the hinge sticks out from the side about 3/8". This helps deflect water from the hinge.

I'll run a 1/8" thick by 1" wide piece of aluminum down the galley wall edge to build it up to receive the roof trim and level it with the rest of the roof.

Lots of little things remain, but I estimate that I'm two weeks out from completion...
Dusty Mark
Teardrop Master
 
Posts: 210
Images: 395
Joined: Mon Feb 29, 2016 6:57 pm
Top

Re: Dusty Mark's 5 x 10 Build

Postby retep » Fri Jun 10, 2016 6:51 am

Its looking incredible Dusty!!! Love the color. Thanks for sharing your work

P
retep
Teardrop Master
 
Posts: 106
Joined: Wed Mar 16, 2016 3:55 pm
Top

Re: Dusty Mark's 5 x 10 Build

Postby noseoil » Fri Jun 10, 2016 7:34 am

Really coming together now. Fantastic!
Build log: viewtopic.php?f=50&t=60248
The time you spend planning is more important than the time you spend building.........

137905
User avatar
noseoil
1000 Club
1000 Club
 
Posts: 1820
Images: 669
Joined: Sun Apr 27, 2014 8:46 am
Location: Raton, New Mexico, living the good life!
Top

Re: Dusty Mark's 5 x 10 Build

Postby aggie79 » Fri Jun 10, 2016 8:25 am

noseoil wrote:Really coming together now. Fantastic!


+1 :applause:
Tom (& Linda)
For build info on our former Silver Beatle teardrop:
Build Thread

93503
User avatar
aggie79
Super Duper Lifetime Member
 
Posts: 5405
Images: 686
Joined: Tue Aug 07, 2007 5:42 pm
Location: Watauga, Texas
Top

Re: Dusty Mark's 5 x 10 Build

Postby Dusty Mark » Fri Jun 10, 2016 9:19 am

Thanks everybody. What a difference skin and trim make! I almost hate to put the big vent fan on the top, but it's a functional camper, not a work of art...
Dusty Mark
Teardrop Master
 
Posts: 210
Images: 395
Joined: Mon Feb 29, 2016 6:57 pm
Top

Re: Dusty Mark's 5 x 10 Build

Postby aggie79 » Fri Jun 10, 2016 10:24 am

Dusty Mark wrote:I almost hate to put the big vent fan on the top, but it's a functional camper, not a work of art...


In the "maybe I'd do things different the second time around" category, I'm not sure I'd install a vent fan again. We do use the vent "part" portion but almost never use the fan portion, but we could use just the two windows in the doors instead for ventilation. I'd probably frame and pre-wire for a vent and/or fan, but not install one.
Tom (& Linda)
For build info on our former Silver Beatle teardrop:
Build Thread

93503
User avatar
aggie79
Super Duper Lifetime Member
 
Posts: 5405
Images: 686
Joined: Tue Aug 07, 2007 5:42 pm
Location: Watauga, Texas
Top

Re: Dusty Mark's 5 x 10 Build

Postby KCStudly » Fri Jun 10, 2016 11:12 am

For everyone else reading this^ remember that Aggie/Tom has an AC unit hidden in his TB, so he only needs a small vent for fresh air. For those of us in milder climates that plan on cooling with our roof vent fans, YMMV from the above stated approach. Just saying, in case you missed that little nugget of info.
KC
My Build: The Poet Creek Express Hybrid Foamie

Poet Creek Or Bust
Engineering the TLAR way - "That Looks About Right"
TnTTT ORIGINAL 200A LANTERN CLUB = "The 200A Gang"
Green Lantern Corpsmen
User avatar
KCStudly
Donating Member
 
Posts: 9616
Images: 8169
Joined: Mon Feb 06, 2012 10:18 pm
Location: Southeastern CT, USA
Top

Working "Punch List"

Postby Dusty Mark » Sat Jun 11, 2016 10:03 pm

I've been knocking out lots of little items on the "punch list." The next big step will be to build the galley hatch after I've trimmed out the galley area.

Image

Bottom trim is done back to the galley.

Image

I painted the fan mount in preparation for final installation. I added a coat of black paint to the edge of the underfloor storage area since I didn't like how the gray "popped" from the side view. I also painted the visible parts of the bumper black.

Image

The underfloor storage cover staple holes are puttied and I'll paint them tomorrow.

Image

We hung the cellular shades last night.

Image

The color will fit in well with our scheme.

Image

Lights are full...no shadow shows for the neighbors with these babies!!!

Image

I applied a piece of mill finish scrap to the bumper with contact cement down the middle tonight. I'll apply the rest of the trim tomorrow.
Dusty Mark
Teardrop Master
 
Posts: 210
Images: 395
Joined: Mon Feb 29, 2016 6:57 pm
Top

Re: Dusty Mark's 5 x 10 Build

Postby ELM » Sun Jun 12, 2016 9:40 am

Your moving right along and it's looking great. I really like your shades.
My Build journal. viewtopic.php?f=50&t=65395
User avatar
ELM
Teardrop Master
 
Posts: 277
Images: 176
Joined: Thu Nov 26, 2015 5:49 am
Location: Sutter Creek CA
Top

Re: Dusty Mark's 5 x 10 Build

Postby Mushin » Sun Jun 12, 2016 10:00 am

Where did you get those shades!

Sent from my SM-G920V using Tapatalk
User avatar
Mushin
Teardrop Master
 
Posts: 119
Joined: Tue Dec 15, 2015 2:21 pm
Top

Comfortex Honeycomb Cellular Shades from Blinds Galore

Postby Dusty Mark » Sun Jun 12, 2016 3:20 pm

Here's a link to where we bought our shades http://www.blindsgalore.com/WindowProduct.asp?id=403301 These are the Virtuoso Pinecone color.

These are cordless and seem like they'll work well. We ordered 29" wide by 38" high and specified "outside mount" to work with the doors from Vintage Technologies. Our total cost was $210. That's not cheap, but these are nice shades.

We used the optional offset mounting brackets to clear the interior door frame. I cut the brackets shorter so they wouldn't stick out too far. I'm going to glue some camping foam (out of sight) at the top of the door frame so the shades don't bounce themselves to destruction.
Dusty Mark
Teardrop Master
 
Posts: 210
Images: 395
Joined: Mon Feb 29, 2016 6:57 pm
Top

Fan Installed and AC Modifications

Postby Dusty Mark » Mon Jun 13, 2016 11:23 pm

I installed the fan, porch lights, door stops, door holders, and a vent today. I also made a couple of modifications to the air conditioning system.

Image

View from passenger side. I sealed it with butyl tape.

Image

Another view from farther up front.

Image

View from aft driver's side.

Image

Here's a door stop and door holder.

Image

Porch light, vent and shore power plug-in. You know your close to completion when you plug your drill into the galley outlet to install the fan!

Image

Trim is fitted around the air conditioner. Notice the hole in the upper left side. Last night Mary asked me how the IR remote for the fan could send a signal through two layers of wood to reach the back of the AC compartment...DOOOOOHHHH!!! I hadn't thought of that...and sure enough it didn't work. I cut holes in the trim and a hold-down brace further back to allow the signal to pass unrestricted. I'll cover the holes with plexiglass.

Image

I removed the trim after the photo and applied the first coat of varnish.

Image

Furthest IR port viewed from cabin. I was unhappy with the restricted airflow to use the fan through the AC when the AC is not operating. The solution was to cut a larger opening in the wall above the air conditioner and make the top piece of trim removable (I used threaded inserts.) With the top trim and the top baffle removed, airflow both in and out of the cabin is great!

Image

View from outside access hatch.

Tomorrow, I'll finally work my way back to the galley trim...
Dusty Mark
Teardrop Master
 
Posts: 210
Images: 395
Joined: Mon Feb 29, 2016 6:57 pm
Top

PreviousNext

Return to Build Journals

Who is online

Users browsing this forum: No registered users and 21 guests