Red Dragons - The Build (Updated 3/17/10)

...ask your questions in the appropriate forums BUT document your build here...preferably in a single thread...dates for updates, are appreciated....

Red Dragons - The Build (Updated 3/17/10)

Postby dmckruit » Sat Nov 01, 2008 7:18 pm

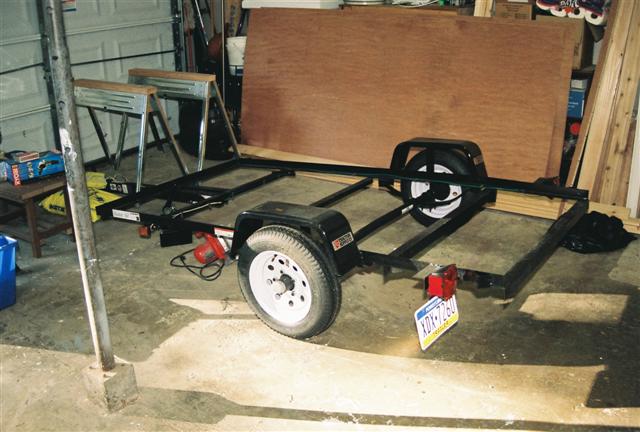
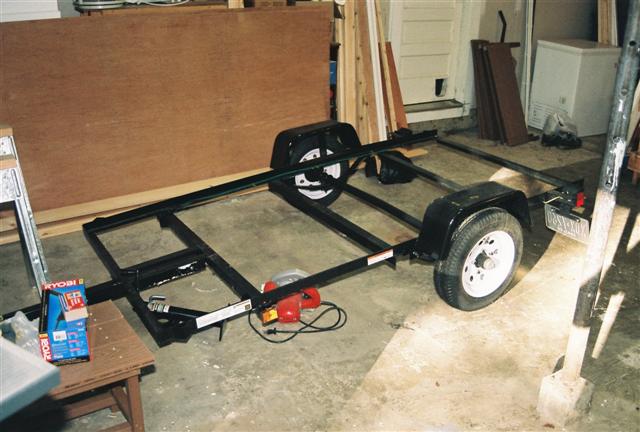
I started my build a few weeks ago. I got a good deal on a Tractor Supply 4'X8' Trailer. The regular price was $299.00, but there was rust on the fenders (I was planning on removing them anyway, but they didn't know that). So they ended up charging me $250.00. I got sent to the the notary down the street for plate and title (Pennsylvania).

These are what I had to start out with:

Image

Image
Last edited by dmckruit on Wed Mar 17, 2010 8:02 am, edited 1 time in total.
User avatar
dmckruit
The 300 Club
 
Posts: 385
Images: 212
Joined: Thu Jul 10, 2008 1:44 pm
Location: Sarver, PA

Postby toypusher » Sat Nov 01, 2008 7:20 pm

Congrats on the trailer. What profile are you using?

And where in PA are ya from?
User avatar
toypusher
Site Admin
 
Posts: 43040
Images: 324
Joined: Fri Jan 28, 2005 12:21 pm
Location: York, PA Area

Postby dmckruit » Sat Nov 01, 2008 7:41 pm

I want to build a Grumman 2 type Teardrop, so I had to do some modifications:

First I had to cut off the fenders. The saws-all that I was using didn't cut the mustard. So I had to make a trek into Home Depot to get a rotary cutting tool. It sliced through the steel like butter. Of course I had to remove the wheels first, which entailed yet another trip into town to the Tractor Supply to get a lug wrench to remove the wheels.

The Tractor Supply Trailer comes with 12 inch wheels. I was able to purchase 15 inch wheels with the tires on them at Tractor Supply for $109.00 each. My fingers were crossed to see if I had enough clearance between the frame and the wheel. The 12 inch wheels on the trailer had 5x4-1/2 lugs and so did the the 15 inch wheels. No problem, the new wheels fit perfectly with plenty of room to spare. :D

Since I can't weld, nor do I have the equipment, the guys in the maintenance department at my work offered to weld some modifications on my trailer. I made a trip to Jeannette Steel Supply in Jeannette, PA and purchased and 8 foot and a 5 foot section of 2x3" steel rectangular tubing, plus I got another 2x2x6 piece of angle iron to match the one I got at Home Depot. (Note the angle iron was $23.50 at Home Depot and $13.50 at the steel yard). I also got a 6 foot piece of 2 inch flat steel. The total bill at the steel yard was $110.00.

The guys at work did a great job. They extended the tongue 18" and added braces on the sides. They also welded reinforcements to where the tongue attaches to the frame. They added another 8 inches to the front of the trailer with the angle iron, and I had them add the flat pieces of steel diagonally across the back of the frame so that I could use leveling jacks. I did have to buy a new hitch for the trailer as we repurposed the original tongue piece and used it for one of the side braces, and the original hitch had to be cut off. I also added a tongue jack. New hitch $12 and tongue jack $45 at Tractor Supply.

Image

Image

Image

Image
User avatar
dmckruit
The 300 Club
 
Posts: 385
Images: 212
Joined: Thu Jul 10, 2008 1:44 pm
Location: Sarver, PA
Top

Postby toypusher » Sat Nov 01, 2008 7:46 pm

Looking good so far. You might want to put your 12" wheels in the 'For Sale' section here and see you can sell them (if you still have them and want to get rid of them) because the trailers don't come with spares.
User avatar
toypusher
Site Admin
 
Posts: 43040
Images: 324
Joined: Fri Jan 28, 2005 12:21 pm
Location: York, PA Area
Top

Postby dmckruit » Sat Nov 01, 2008 7:57 pm

Today I cleaned up the frame a bit and sanded any rust spots. I touched up the old paint and primed and painted the new steel additions.

I made a trip to Tractor Supply this morning and picked up some jacks for the rear ($4 a piece) and some wheel chocks. I also stopped at Lowes and picked up 5 treated 2x4 boards and some nuts and bolts and plenty of washers.

I am going to cut the 2x4's in half lengthwise and use them as a subframe which I will attach to the steel frame on top of washers. I need to come up above the 2 inch angle iron so that I can build out.

The wood I picked up was a little on the wet side, so I am going to let it dry out some before I coat it with something. I might cut my pieces if I get a chance tomorrow.


Image

Image

Image
User avatar
dmckruit
The 300 Club
 
Posts: 385
Images: 212
Joined: Thu Jul 10, 2008 1:44 pm
Location: Sarver, PA
Top

Postby dmckruit » Sun Nov 02, 2008 6:42 pm

And where in PA are ya from?


I am in Sarver, about 25 miles north of Pittsburgh.
User avatar
dmckruit
The 300 Club
 
Posts: 385
Images: 212
Joined: Thu Jul 10, 2008 1:44 pm
Location: Sarver, PA
Top

Postby toypusher » Sun Nov 02, 2008 6:47 pm

dmckruit wrote:
And where in PA are ya from?


I am in Sarver, about 25 miles north of Pittsburgh.


Ok, I'm over in the York area. If you need some help/advise (besides all of it here) you should be able to get ahold of Rich (Nitetimes) as he should not be far from you (Butler).

Keep the pictures coming!!! :)
User avatar
toypusher
Site Admin
 
Posts: 43040
Images: 324
Joined: Fri Jan 28, 2005 12:21 pm
Location: York, PA Area
Top

Postby bobhenry » Sun Nov 02, 2008 7:43 pm

When you rip your treated lumber you will experience "Grain release"
This curious malady is tantamount to a piece of lumber going crazy if the grain so chooses. Rip it now while it is damp and bolt it down right away. This is no guarantee it will stay straight but it will help to minimize the curving and bowing that it will try and do if left to simply dry. If your treat is ACG ( look at the tag stapled on the ends) You may not want to trap the water in the lumber with a sealer just leave it raw. It good for 10 years in the elements on a deck and your lumber is hideing under a trailer roof. You can always coat the underbelly 6 month or so down the road.

When I ripped 2x12 southern yellow pine lumber for my spars I cut 3 extra just in case, within a week in the sunshine I had to replace 2 of them because of the excessive bowing so I have been there and done that and treated is worse. Just some food for thought :thinking:
Growing older but not up !
User avatar
bobhenry
Ten Grand Club
Ten Grand Club
 
Posts: 10355
Images: 2614
Joined: Fri Feb 09, 2007 7:49 am
Location: INDIANA, LINDEN
Top

Postby dmckruit » Thu Nov 13, 2008 5:55 pm

After reading the threads about the "five wides" I decided at the last minute to change my trailer frame before I start my floor. My original plan was the Grumman 2 build which would have most of the trailer five feet wide but be only four feet wide at the wheel wells (which I would have to build around). Also, I like the idea of putting a queen size mattress in and not having to cut around the wheel wells, plus sleeping at night and not having to worry about banging my shins.

So I ran out to Tractor Supply again and bought an axle that will fit a 5x8 trailer. I spent today switching out the axle. I also cut treated 2 x 4's for my subframe. At this point, I found I didn't have a 5/16th drill bit for the wood (have one for the steel) to drill my anchor holes and attach the wood to the frame. I will make another trip to town tomorrow to get my bits and 3 more sheets of plywood before I will not be able to use my trailer to haul materials anymore.

Image
User avatar
dmckruit
The 300 Club
 
Posts: 385
Images: 212
Joined: Thu Jul 10, 2008 1:44 pm
Location: Sarver, PA
Top

Axle placement

Postby Ken B. » Tue Nov 25, 2008 9:03 pm

Did you have to relocate the axle more to the rear of the trailer or was it good where it was? Ken
Ken B.
Teardrop Inspector
 
Posts: 10
Joined: Mon Nov 24, 2008 5:31 pm
Location: Danbury, CT
Top

Postby dmckruit » Wed Nov 26, 2008 8:52 am

It was pretty much good where it was. The distance from the axle to the rear of the frame is 37" (see sticky for Tractor Supply 4x8 trailer in the "Trailer and Chassis" section). The distance on the Grumman 2 design (See design library) is 39". Because I added a little to the front of the frame, and made the tongue length longer, plus I will be building a little overhang on the floor of the back, the two inches shouldn't make too much of a difference.

I am hoping to get more done on my subfloor this coming weekend. I was taken out of commission for the last couple of weeks with a bad sinus infection.
User avatar
dmckruit
The 300 Club
 
Posts: 385
Images: 212
Joined: Thu Jul 10, 2008 1:44 pm
Location: Sarver, PA
Top

Postby GregB » Wed Nov 26, 2008 11:16 am

Aack! You have done something I considered and rejected by putting a longer axle on existing spring perches. I frankly don't know enough to tell how dangerous (if even at all) it is to extend the weight of the wheel assembly farther away from the pivot point at the perch, but you may want to get some feedback from someone who does. Torsion axles, in particular, don't like to do that, but I'm not sure whether or not solid axles have a problem with it.

GB
I'm not dead, yet. I'm feeling better.
User avatar
GregB
500 Club
 
Posts: 528
Images: 108
Joined: Thu Sep 29, 2005 2:22 pm
Location: UT, Lehi
Top

Postby bve » Thu Nov 27, 2008 9:20 am

GregB wrote:Aack! You have done something I considered and rejected by putting a longer axle on existing spring perches. I frankly don't know enough to tell how dangerous (if even at all) it is to extend the weight of the wheel assembly farther away from the pivot point at the perch, but you may want to get some feedback from someone who does. Torsion axles, in particular, don't like to do that, but I'm not sure whether or not solid axles have a problem with it.

GB


I've been told the perches should not be more than 7" from the FACE of the hub, I'm with Greg get some feedback from the axle manufacturer. It will be a lot easier to deal with it now rather than later.
Burke

KISS > COMPLEX
Image
Image

Build threads converted to PDFs.
As of 2008-08-08 I have added more build threads to the pdf collection
User avatar
bve
500 Club
 
Posts: 694
Images: 98
Joined: Sat Aug 25, 2007 1:44 am
Location: Edmonton, Alberta, Canada
Top

Postby dmckruit » Sat Nov 29, 2008 6:02 pm

Thanks for the heads up guys. I wasn't sure if the extra 6 inches on each side of the axle would make a difference. After thinking about it for a few days and researching the web (which I couldn't find much information) I decided to put the old axle back on. I felt it was better to be safe than sorry and have to do major mods to the frame after the tear was built if it didn't work out right.

No worries, Tractor Supply took the axle back and I was able to get a jack and some other tools. Still trying to level up the subframe before I can put the subfloor down. Didn't get a chance to work on it today. Hope to have more pics posted soon.

Thanks again for watching my back on the axle. :)
User avatar
dmckruit
The 300 Club
 
Posts: 385
Images: 212
Joined: Thu Jul 10, 2008 1:44 pm
Location: Sarver, PA
Top

Postby dmckruit » Wed Dec 10, 2008 4:32 pm

Spent the last few days making the subfloor. The Tractor Supply frame was far from being perfectly level. The back right hand side was also about an inch lower than the rest of the frame. I ripped treated 2x4's to about 2 inches in thickness and used extra shims as needed to level off above the metal angle irons. I placed metal washers between the wood and the frame and bolted with 2-1/2 - 3 inch 5/16 hex bolts.

You can see from the pictures the extra spacers I needed for the back of the trailer. She is all level now! I am going to build a sandwich floor using treated lumber for the bottom and regular plywood for the top. I will wait until spring before I apply the undercoat to the treated lumber as I want it to completely dry out.

Image

Image

Image
User avatar
dmckruit
The 300 Club
 
Posts: 385
Images: 212
Joined: Thu Jul 10, 2008 1:44 pm
Location: Sarver, PA
Top

Next

Return to Build Journals

Who is online

Users browsing this forum: No registered users and 47 guests