Red Dragons - The Build (Updated 3/17/10)

...ask your questions in the appropriate forums BUT document your build here...preferably in a single thread...dates for updates, are appreciated....

Postby Miriam C. » Thu Jan 29, 2009 5:52 pm

Nitetimes wrote:I would highly recommend sitting all 4 corners of your trailer on stands or something else solid before you go any further. If it's not sitting solid you will have a very hard time getting it all squared up. If you level it side to side in the front and back you will know everything's going to go together the way it should. :thumbsup:


+1 and be sure you are level across the diagonal while you are leveling.
“Forgiveness means giving up all hope for a better past.â€
User avatar
Miriam C.
our Aunti M
 
Posts: 19675
Images: 148
Joined: Wed Feb 15, 2006 3:14 pm
Location: Southwest MO

Postby Nitetimes » Thu Jan 29, 2009 6:05 pm

Miriam C. wrote:
Nitetimes wrote:I would highly recommend sitting all 4 corners of your trailer on stands or something else solid before you go any further. If it's not sitting solid you will have a very hard time getting it all squared up. If you level it side to side in the front and back you will know everything's going to go together the way it should. :thumbsup:


+1 and be sure you are level across the diagonal while you are leveling.


I never do that, it's extra work and can be frustrating. If the front and back are level the frame is setting fine to square everything. ;) 8)
Rich


Image
ImageImage
-
The strongest reason for the people to retain the right to
keep and bear arms is, as a last resort, to protect themselves
against tyranny in government.
- Thomas Jefferson -
Personally, I carry a gun because I'm too young to die and too old to take a butt kickin'.
User avatar
Nitetimes
7000 Club
7000 Club
 
Posts: 7909
Images: 194
Joined: Sat Feb 12, 2005 12:44 am
Location: Butler,PA

Postby dmckruit » Fri Jan 30, 2009 1:14 pm

Nitetimes wrote:I would highly recommend sitting all 4 corners of your trailer on stands or something else solid before you go any further. If it's not sitting solid you will have a very hard time getting it all squared up. If you level it side to side in the front and back you will know everything's going to go together the way it should. :thumbsup:


Will, do. Someone was telling me that drywall screws may work better with the masonite and fall flush. I have some of those at home I can try first, but I would need nothing longer than 3/4" in length.
User avatar
dmckruit
The 300 Club
 
Posts: 385
Images: 212
Joined: Thu Jul 10, 2008 1:44 pm
Location: Sarver, PA
Top

Postby Nitetimes » Fri Jan 30, 2009 1:52 pm

dmckruit wrote:
Nitetimes wrote:I would highly recommend sitting all 4 corners of your trailer on stands or something else solid before you go any further. If it's not sitting solid you will have a very hard time getting it all squared up. If you level it side to side in the front and back you will know everything's going to go together the way it should. :thumbsup:


Will, do. Someone was telling me that drywall screws may work better with the masonite and fall flush. I have some of those at home I can try first, but I would need nothing longer than 3/4" in length.


Not sure about that. Masonite has very little give to it so you would probably still need a countersink bit. All you can do is try it I guess??
Rich


Image
ImageImage
-
The strongest reason for the people to retain the right to
keep and bear arms is, as a last resort, to protect themselves
against tyranny in government.
- Thomas Jefferson -
Personally, I carry a gun because I'm too young to die and too old to take a butt kickin'.
User avatar
Nitetimes
7000 Club
7000 Club
 
Posts: 7909
Images: 194
Joined: Sat Feb 12, 2005 12:44 am
Location: Butler,PA
Top

Postby dmckruit » Sun Feb 01, 2009 6:31 pm

Got some more work done on my tear over the weekend.

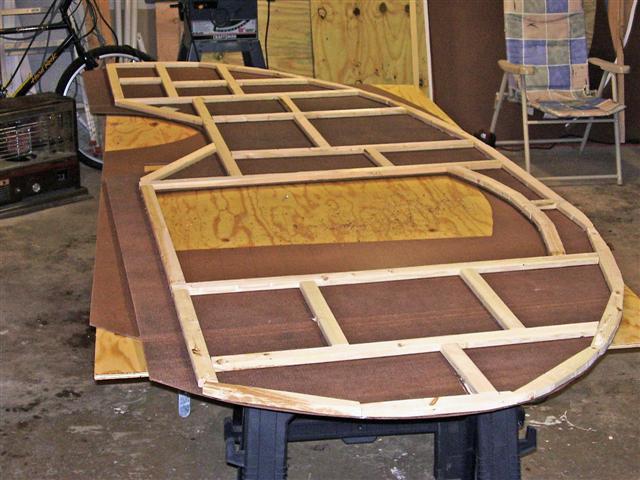
I finished placing the studs on the first wall.

Image

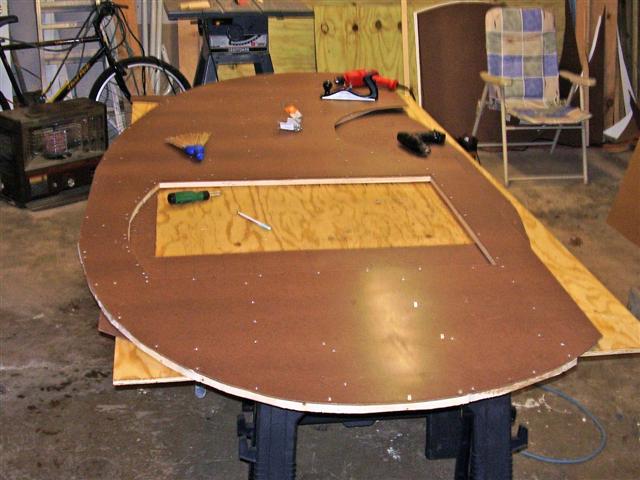
Then I bought a 1/4" countersink drill bit this weekend. I flipped the wall over, removed the screws and redrilled the holes with the countersink bit. Once the screws were back in, I found that they were pretty flush with the masonite. :thumbsup:

Image

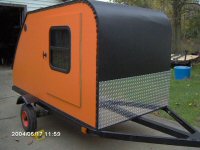
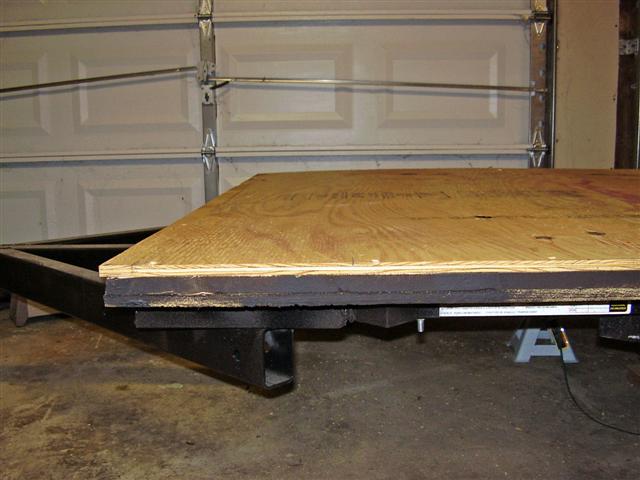
Then I put the trailer on jacks, removed the wheels and leveled her off. The trailer sits pretty level both across the length and width. I found I didn't need any extra shims to level it off.

Image

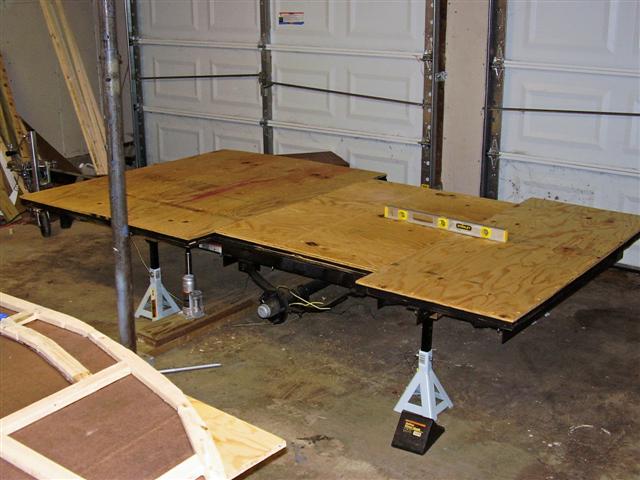
The wood in the front of the trailer bows down a little so that a board laying flat has a gap underneath. I will cut out a furring strip to adjust for the irregularity so that when I attach the walls everything will be leveled up.

Image

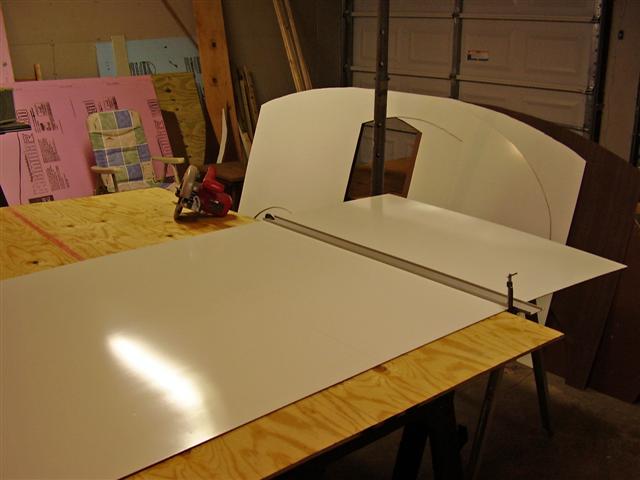
Then I had to cut the hind end parts of the interior paneling so that I can attach them to the studded/insulated walls.

Image

Now all I have to do is stud the other side. :thumbsup:

GO STEELERS!!!! :applause:
User avatar
dmckruit
The 300 Club
 
Posts: 385
Images: 212
Joined: Thu Jul 10, 2008 1:44 pm
Location: Sarver, PA
Top

Postby Nitetimes » Sun Feb 01, 2009 10:49 pm

Lookin' good! :thumbsup:
Rich


Image
ImageImage
-
The strongest reason for the people to retain the right to
keep and bear arms is, as a last resort, to protect themselves
against tyranny in government.
- Thomas Jefferson -
Personally, I carry a gun because I'm too young to die and too old to take a butt kickin'.
User avatar
Nitetimes
7000 Club
7000 Club
 
Posts: 7909
Images: 194
Joined: Sat Feb 12, 2005 12:44 am
Location: Butler,PA
Top

Postby dmckruit » Sun Feb 15, 2009 5:37 pm

Got some more work done on my tear this weekend. I finished placing the wall studs on wall #2. Then I cut out openings for A/C intake and exhaust vents. I also drilled a pilot hole for the porch lights, and drilled the opening for the electrical service.

Image

Image

Then I got the first wall insulated.

Image

I decided to stop there and get the trailer ready for hauling. I figured it would be prudent to make a run for my aluminum this week. Watson Metals in Pittsburghs North Side has 3003-H14 (0.032 thick) in 4x10 sheets for $44 a sheet which they package on a skid. So I thought that before I put the walls up I should make a run for more supplies.

So I had to make temporary fenders and reattach all of the lights. One of the side lights isn't working, so I have to pick up a bulb for it tomorrow before I can take it out.

Image
User avatar
dmckruit
The 300 Club
 
Posts: 385
Images: 212
Joined: Thu Jul 10, 2008 1:44 pm
Location: Sarver, PA
Top

Postby dmckruit » Sat Mar 07, 2009 5:49 pm

Finally got some time for new pics.

A couple weeks ago, I went and picked up my aluminum for my trailer. I had a heck of a time getting the lights to work. Finally I figured out that the tail lights are grounded through the bolt that attaches to the frame. Since I had temporarily attached the lights to masonite, nothing would work. I had some extra wire and attached all the bolts to the wire and ran the ground through to the ground on the power supply. Everything then lit up like a christmas tree.

I got my aluminum and then had to come home and remove the lights, the wheels and then level her up again. Because of the road spray from the recent snow storm, I had to wipe her down and clean her up.

I then cut a notch in the side profile so that the hatch seal can be accomodated, then I shored up the wall studs by putting screws through the joints. It stiffened up the sides pretty well.

Today, I finally was able to attach one of the sides to the frame. I still need to insert the inside wall before I start framing the roof.

Image

Image

Image
User avatar
dmckruit
The 300 Club
 
Posts: 385
Images: 212
Joined: Thu Jul 10, 2008 1:44 pm
Location: Sarver, PA
Top

Postby aggie79 » Sat Mar 07, 2009 7:33 pm

:applause: Looking great!
Tom (& Linda)
For build info on our former Silver Beatle teardrop:
Build Thread

93503
User avatar
aggie79
Super Duper Lifetime Member
 
Posts: 5405
Images: 686
Joined: Tue Aug 07, 2007 5:42 pm
Location: Watauga, Texas
Top

Postby dmckruit » Wed Mar 11, 2009 7:12 pm

Got the outside vent covers and electrical cover painted at work today. We have a paint booth there so it is less messy. They came out pretty good. I want to paint the porchlights tomorrow.

Image

Then my brother came over and helped me get the second side up, and we made sure everything was level and square. Then I finally got to attach the side with screws.

Image

I want to get the inside walls attached, the ceiling studs in, and the wheel wells done by the end of the weekend.
User avatar
dmckruit
The 300 Club
 
Posts: 385
Images: 212
Joined: Thu Jul 10, 2008 1:44 pm
Location: Sarver, PA
Top

Postby Miriam C. » Wed Mar 11, 2009 7:42 pm

:applause: :thumbsup: :thumbsup: You have the makings of a great TD now. :thumbsup: Painting the vents at this stage sounds good. Are they in there permanently or will you paint first?

Image
“Forgiveness means giving up all hope for a better past.â€
User avatar
Miriam C.
our Aunti M
 
Posts: 19675
Images: 148
Joined: Wed Feb 15, 2006 3:14 pm
Location: Southwest MO
Top

Postby dmckruit » Thu Mar 12, 2009 7:44 am

I just stuffed the vent in for the photo. I plan on skinning the outside with aluminum. The white vent and electrical covers just wouldn't look as good as the black does.

I want to use these vents for the intake and exhaust of my air conditioner. I will use a bathroom fan for the exhaust.
User avatar
dmckruit
The 300 Club
 
Posts: 385
Images: 212
Joined: Thu Jul 10, 2008 1:44 pm
Location: Sarver, PA
Top

Postby dmckruit » Sat Mar 14, 2009 7:30 pm

Got the lights painted earlier this week.

Image

Then I filled in the gaps around the wheel well, so that I can install the inside wall.

Image

Then I was able to get one of the inside walls installed. I will have to do the same with the wheel well on the other side.

Image

The screws on the inside will be covered with trim molding.

Image

It's actually looking like its starting to take shape! :thumbsup:
User avatar
dmckruit
The 300 Club
 
Posts: 385
Images: 212
Joined: Thu Jul 10, 2008 1:44 pm
Location: Sarver, PA
Top

Postby bdosborn » Sat Mar 14, 2009 9:06 pm

Is that FRP you're using for the inside skin?

Bruce
2009 6.5'X11' TTT - Boxcar
All it takes is a speck of faith and a few kilowatts of sweat and grace.
Image
Boxcar Build
aVANger Build
User avatar
bdosborn
Donating Member
 
Posts: 5498
Images: 776
Joined: Wed May 05, 2004 11:10 pm
Location: CO, Littleton
Top

Postby dmckruit » Sun Mar 15, 2009 12:37 pm

No. It isn't fiberglass plastic. It's a painted type of masonite panelling pretty much like "dry erase board". I had a few sheets left over from another project that I wanted to use up.

I figured if I didn't like the final look, I could always cover it with grass-weave wallpaper, or bamboo. I think it will look okay though with the trim and cabinetry.
User avatar
dmckruit
The 300 Club
 
Posts: 385
Images: 212
Joined: Thu Jul 10, 2008 1:44 pm
Location: Sarver, PA
Top

PreviousNext

Return to Build Journals

Who is online

Users browsing this forum: Google [Bot] and 7 guests