Standie! or Another Puffin Clone

...ask your questions in the appropriate forums BUT document your build here...preferably in a single thread...dates for updates, are appreciated....

trailers

Postby cappy208 » Sun Nov 15, 2009 9:36 pm

i called northern. they said i had to go to the nearest store (Va.) and its not worth it to drive 20 hrs rt to go get one.

tractor supply says they dont carry a 5x8 carryon nf trailer. harumph!

i have a design for a conventional modified scotty, but having settled on a 5' x 5' x 10' long it will just overhang the 4x8 frame. so i'm settling for that!

I sort of dont want a 5' wide trailer anyway, since it will be wider than the tow vehicle. Having the trailer the same width as the suv is in my overall plans.

After looking at your pics for the umteenth time, how did you support the cantilevers over the frame side? I didnt see any specific supports. is the plywood floor itself the side wall support and the side walls screwed to a 2x4 from the side and bottom? How is long term support for the side walls made?

it appears the 2x3 you have for floor stringers (to bring the ply up to the top of the angle iron) dont extend beyond the sides of the frame. is this so? and seeing the 'notch' you made in the stringer to fill the difference between side and cross angles is just the ticket to fill in, and not increase the height unnecessarily.

Thanks for the helpful info.

John
User avatar
cappy208
Teardrop Builder
 
Posts: 36
Images: 1
Joined: Sun Sep 20, 2009 6:16 pm
Location: Cape Cod Ma.

Postby shopfabricator » Mon Nov 16, 2009 6:44 am

Hey John. Sorry, I didn't know that all NT stores do not carry the same inventory. Is it a State Regulation Thing? Seems they could order the thing for there next trailer delivery if the handle the Carry-On Line.
You are right about the floor being cantilevered over the sides over the sides of the frame. About 8" on each side. The framing under is ripped 2x4 to support the floor to the top of the 2x2 angle iron of the frame. The sides and floor are framed together with 1x2.
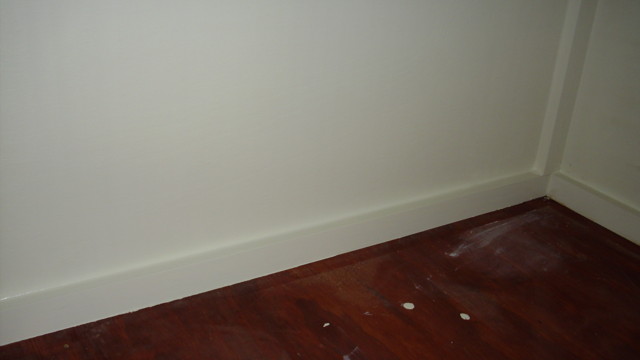
This is a shot of the side wall to floor frame in the porta-potty closet. Sloppy Painter! :lol:

Image

I seem to remember this being discussed before, be it some time ago. Since the cantilever is so small and the chance of standing weight on the edges of the floor is minimal, all works well.
This size and style of Camper has been built on a 4x8 Harbor Freight 8" wheels Trailer with 12" (or more!) overhang and no under floor support. In fact it was the original "Puffin" by Steve Wolverton! (Thanks Steve, your middle name must be TTT!)

Now, having said all that, my last trailer was a 10' long standie with insulated walls and aluminum clad. On that 5x8 nf I did add "outriggers" to carry the weight outside the frame. I believe that was overkill. Page 10 of my album has pics of that trailer prep.

So what ever you decide, Good Luck with your build and Take Lots Of Pictures!
Gary
Last edited by shopfabricator on Thu Nov 26, 2009 11:10 am, edited 1 time in total.
...materials can no longer be purchaced at quite those prices mentioned here!
User avatar
shopfabricator
Donating Member
 
Posts: 189
Images: 138
Joined: Fri Aug 24, 2007 9:51 pm
Location: Mooresville, NC

Postby shopfabricator » Thu Nov 26, 2009 11:04 am

Been a while since last update. I have been working on the build, weather and Puppy will slow things down.
Short list to finish:
Install Windows
Paint Accent Trim Design (have not decided on that yet, Any Ideas?)
Go Under and Seal Sides below Floor and Wheel Wells (More Black Gunk)
Run Trailer Light Wire and Install Lights
Trim Door and Install Lock Set and Dead Bolt
Add Mattress, Blanket and Blender.... Go Camping!

Image

Some Interior Pics using the interior lights and no flash to see actual wood finish color. I used the Window Openings to take these shots.

Image

Image

Gary
...materials can no longer be purchaced at quite those prices mentioned here!
User avatar
shopfabricator
Donating Member
 
Posts: 189
Images: 138
Joined: Fri Aug 24, 2007 9:51 pm
Location: Mooresville, NC
Top

Postby S. Heisley » Thu Nov 26, 2009 11:12 am

This is a BIG step up from the Puffin! It really does look bigger. It's nice looking. It appears to be well thought out, and well engineered. You're doing a beautiful job! :thumbsup:
User avatar
S. Heisley
Super Lifetime Member
 
Posts: 8774
Images: 495
Joined: Mon Sep 17, 2007 10:02 am
Location: No. California
Top

Postby shopfabricator » Thu Nov 26, 2009 11:19 am

Thanks Sharon and Happy Thanksgiving!
...materials can no longer be purchaced at quite those prices mentioned here!
User avatar
shopfabricator
Donating Member
 
Posts: 189
Images: 138
Joined: Fri Aug 24, 2007 9:51 pm
Location: Mooresville, NC
Top

Clone TTT

Postby Chris D » Thu Nov 26, 2009 11:50 am

Man SF,

That looks sweet!! Nice workmanship. What brand of enamel are ya using it looks like fiberglass :thumbsup: Happy Thanksgiving.

Chris D
Chris D
Teardrop Master
 
Posts: 158
Joined: Wed Nov 26, 2008 8:39 pm
Location: Down Jersey
Top

Postby shopfabricator » Fri Nov 27, 2009 12:31 pm

Thanks Chris!
I am far from an expert on painting, just see some recent posts! :oops:
The paint I am using is Valspar Professional Industrial Maintenance Enamel. I picked this stuff up at Northern Tool when I bought the trailer.
After I sealed the camper in epoxy, I power sanded with 120 grit. I then mixed up body filler to fill the screw holes, gouges, knots, anything that looked deep. First two coats were enamel thinned about 20% with paint thinner and applied with a foam roller. Then I sanded by hand Lightly just to knock off any high spots and smooth out all the little BUG FEET! Then two more coats straight from the can. Found that this stuff is pretty thick, and drys overnight without sags and runs. It also doesn't care which direction it is rolled. I rolled mostly in the direction of the grain and it did a pretty good job of filling it. Hope this helps!
Gary
...materials can no longer be purchaced at quite those prices mentioned here!
User avatar
shopfabricator
Donating Member
 
Posts: 189
Images: 138
Joined: Fri Aug 24, 2007 9:51 pm
Location: Mooresville, NC
Top

Postby shopfabricator » Fri Nov 27, 2009 1:50 pm

Wow, Just read the can of paint. Little late! Can states "NOT FOR RESIDENIAL USE". Huh, what, no..... Reading further down in the directions (the what?) it says "Do no thin" and "Clean tools in mineral spirits". Can't see a problem with thinning.
Oh Well........
Gary
...materials can no longer be purchaced at quite those prices mentioned here!
User avatar
shopfabricator
Donating Member
 
Posts: 189
Images: 138
Joined: Fri Aug 24, 2007 9:51 pm
Location: Mooresville, NC
Top

Paint

Postby Chris D » Sat Nov 28, 2009 4:50 am

Thanks Gary,

I know this paint, I is very good enamel and I also do not see any problem with thinning it at all.

Chris D
Chris D
Teardrop Master
 
Posts: 158
Joined: Wed Nov 26, 2008 8:39 pm
Location: Down Jersey
Top

Postby grizz » Sat Nov 28, 2009 10:33 am

I think instructions are often aimed at protecting the manufacturer, and also their profit line.
When I used to be a nurse 18 years ago, we used to sit on night shift and cut all the blood glucose test strips in half, to double the use per pack for the pensioners we nursed.

:)
Greetings from England.

Rian.


Hoping to get it all done in time.
User avatar
grizz
1000 Club
1000 Club
 
Posts: 1210
Images: 29
Joined: Mon Sep 21, 2009 2:37 pm
Location: Rochester, Kent, UK
Top

Postby shopfabricator » Tue Dec 01, 2009 10:50 am

Soooo Close to Done. Needs Door Trim, A/C Intake Grill and Lights!

Image

Image

I put the camper up on jack stands and rolled under her with my can of Black Goop to get a nice heavy coat on all the seams and to make sure everything was sealed good. I turned over and found Samantha was underneath with me to inspect my work. Of course her big floppy puppy ears were in the goop! :o

Image

I cleaned all I could off, but the rest will just have to wear off. :(
...materials can no longer be purchaced at quite those prices mentioned here!
User avatar
shopfabricator
Donating Member
 
Posts: 189
Images: 138
Joined: Fri Aug 24, 2007 9:51 pm
Location: Mooresville, NC
Top

Sam And Da Goop

Postby Chris D » Tue Dec 01, 2009 11:16 am

:lol: :lol: :lol: :lol: :lol: :lol: :lol: :lol:

Dem Dawgs are like that Gary. Sam just wants to be by her dad.

The trailer looks really nice. I like the black and red with the white perfect balance. :applause:

Chris D
Chris D
Teardrop Master
 
Posts: 158
Joined: Wed Nov 26, 2008 8:39 pm
Location: Down Jersey
Top

Postby grizz » Tue Dec 01, 2009 12:44 pm

Happy dog at your feet. NICE !
Greetings from England.

Rian.


Hoping to get it all done in time.
User avatar
grizz
1000 Club
1000 Club
 
Posts: 1210
Images: 29
Joined: Mon Sep 21, 2009 2:37 pm
Location: Rochester, Kent, UK
Top

Postby Ageless » Tue Dec 01, 2009 2:45 pm

Man; gotta love that interior! Nice finished wood has a major drool factor
Strangers on this road we are on; we are not two, we are one - Raymond Douglas Davies
User avatar
Ageless
Platinum Donating Member
 
Posts: 1603
Images: 8
Joined: Tue Aug 04, 2009 8:34 am
Location: Pt. Orchard, WA
Top

Postby Miriam C. » Tue Dec 01, 2009 8:53 pm

:applause: :thumbsup: :thumbsup: Nice Job SF. You should be completely done in time for camping season. :thumbsup:
“Forgiveness means giving up all hope for a better past.â€
User avatar
Miriam C.
our Aunti M
 
Posts: 19675
Images: 148
Joined: Wed Feb 15, 2006 3:14 pm
Location: Southwest MO
Top

PreviousNext

Return to Build Journals

Who is online

Users browsing this forum: No registered users and 36 guests