Starting my 2nd Cargo Tear tomorrow!

...ask your questions in the appropriate forums BUT document your build here...preferably in a single thread...dates for updates, are appreciated....

hatch mounted with shocks

Postby greglaw » Thu Jul 08, 2010 1:02 pm

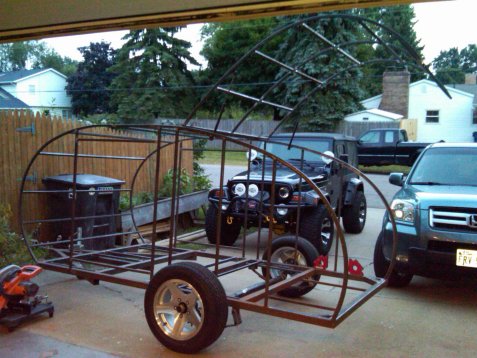
Finished up with the last of the tie down supports and mounted the hatch on some temporary hinges so I could mount the gas shocks last night.
Image
Image
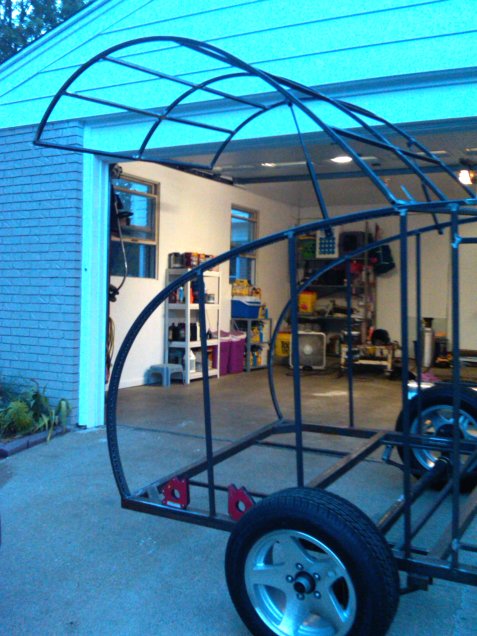
The chassis will be bead blasted this weekend and painted next week and then I will skin it.
greglaw
Teardrop Builder
 
Posts: 31
Images: 65
Joined: Wed Dec 13, 2006 9:14 am
Location: Flower Mound TX

Postby greglaw » Mon Jul 19, 2010 10:12 am

Got some more done, time is getting close for us to be heading back down to Texas for good.
Image
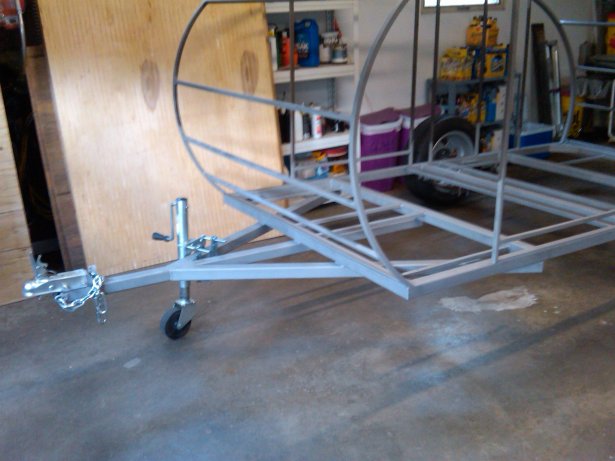
blasted the chassis last weekend and sent it off to my painter to seal her up.
Image
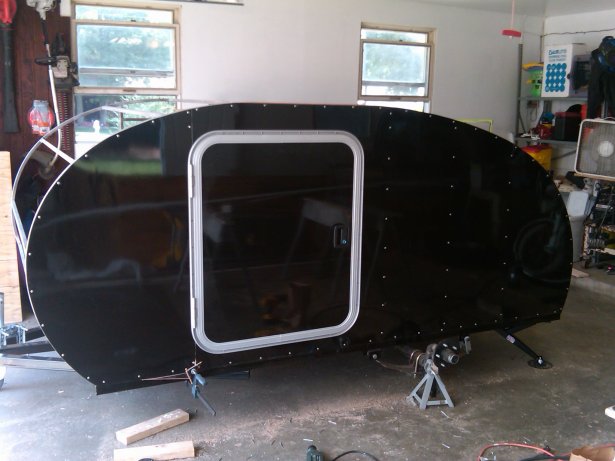
Back from paint with all the parts that will be exposed to the elements painted.
Image
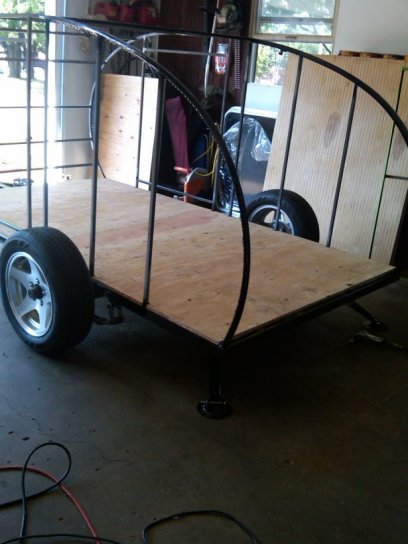
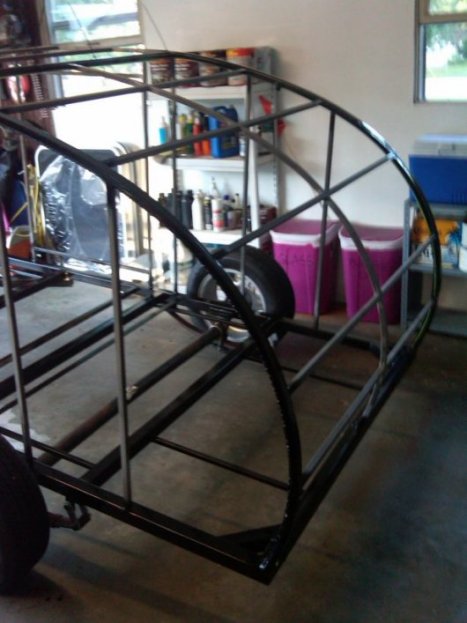
got the floor in, glued and screwed and leveling jacks mounted.
Image
First side on and side door mounted.
Image
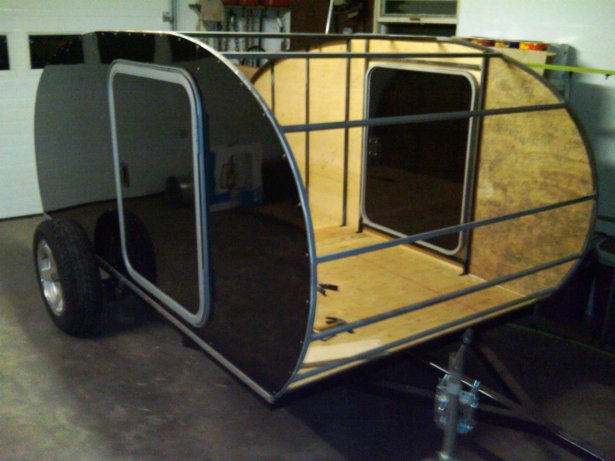
Both sides done and doors in.
Image
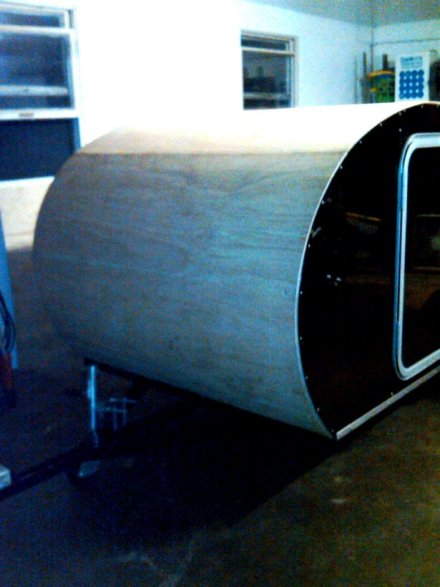
Decking for the roof is in place, should be cutting Al to skin it tomorrow.
:)
greglaw
Teardrop Builder
 
Posts: 31
Images: 65
Joined: Wed Dec 13, 2006 9:14 am
Location: Flower Mound TX

Postby aggie79 » Mon Jul 19, 2010 11:07 am

Very nice! The frame cage is a work of art. And, I really like the idea of an internal gutter.

What part of Texas are you heading to?
Tom (& Linda)
For build info on our former Silver Beatle teardrop:
Build Thread

93503
User avatar
aggie79
Super Duper Lifetime Member
 
Posts: 5405
Images: 686
Joined: Tue Aug 07, 2007 5:42 pm
Location: Watauga, Texas
Top

Postby greglaw » Mon Jul 19, 2010 12:12 pm

Thanks for the kind words, its a lot of fun making stuff especially if youve never done it before.
We are heading to Friso just north of you, I will be working in Flower Mound.
Greg~
greglaw
Teardrop Builder
 
Posts: 31
Images: 65
Joined: Wed Dec 13, 2006 9:14 am
Location: Flower Mound TX
Top

Postby Rigsby » Mon Jul 19, 2010 5:17 pm

Im liking this build :applause: , will deffo keep an eye on it


steve
DOOIN IT THE YAARKSHA WAY--FA NOWT, THA NUS !!
User avatar
Rigsby
500 Club
 
Posts: 587
Joined: Sun Aug 31, 2008 12:21 pm
Location: Doncaster, England
Top

more done tonight

Postby greglaw » Mon Jul 19, 2010 9:15 pm

got the hatch deck put on tonight and fitted.
Image
Image
Image
greglaw
Teardrop Builder
 
Posts: 31
Images: 65
Joined: Wed Dec 13, 2006 9:14 am
Location: Flower Mound TX
Top

more progress last night but not where I wanted to be.

Postby greglaw » Wed Jul 21, 2010 8:09 am

Started working on the skin for the roof and hatch last night. Wow that was a PITA, nothing like trying to manhandle a 20'x103" piece of aluminum by yourself. I got the two pieces cut that I need for the roof and hatch and trimmed them to fit. I will hopefully get them attach tonight.
Image
Image
Image
I also got the roof edge trim cut to length and bent around the profile.
greglaw
Teardrop Builder
 
Posts: 31
Images: 65
Joined: Wed Dec 13, 2006 9:14 am
Location: Flower Mound TX
Top

Re: more progress last night but not where I wanted to be.

Postby vtx1029 » Fri Jul 23, 2010 12:23 am

greglaw wrote:Started working on the skin for the roof and hatch last night. Wow that was a PITA, nothing like trying to manhandle a 20'x103" piece of aluminum by yourself.


Where did you find metal that wide? I've been looking for some...
User avatar
vtx1029
Teardrop Master
 
Posts: 251
Images: 70
Joined: Fri Apr 23, 2010 11:42 pm
Location: MN
Top

Postby greglaw » Fri Jul 23, 2010 6:09 am

greglaw
Teardrop Builder
 
Posts: 31
Images: 65
Joined: Wed Dec 13, 2006 9:14 am
Location: Flower Mound TX
Top

Roof skin on and trimmed

Postby greglaw » Fri Jul 23, 2010 6:23 am

Got the roof skin on and trimmed, hatch is mounted and Al fitted but not attached. Started trying to fit the flush mount RV door latches but it got way to complicated and I do not have time for that right now so I ordered 2 latches and 2 L handles won't be as slick looking but will work for now.
Image
Here is a close up of the edge.
Image
[/url]
greglaw
Teardrop Builder
 
Posts: 31
Images: 65
Joined: Wed Dec 13, 2006 9:14 am
Location: Flower Mound TX
Top

Postby aggie79 » Fri Jul 23, 2010 8:13 am

Fantastic looking teardrop. The black and aluminum combination really looks good!

greglaw wrote:Thanks for the kind words, its a lot of fun making stuff especially if youve never done it before.
We are heading to Friso just north of you, I will be working in Flower Mound.
Greg~


You'll be CD's and Planovet's neighborhood. Check out the South Central section if you haven't already. There is an outing at Loyd Park in September just southwest of Dallas (but still in the Metroplex) if y'all have moved by then.
Tom (& Linda)
For build info on our former Silver Beatle teardrop:
Build Thread

93503
User avatar
aggie79
Super Duper Lifetime Member
 
Posts: 5405
Images: 686
Joined: Tue Aug 07, 2007 5:42 pm
Location: Watauga, Texas
Top

done

Postby greglaw » Wed Jul 28, 2010 9:29 pm

All the major stuff is done ready for her maden voyage south.
Image
Image
Image
:D
greglaw
Teardrop Builder
 
Posts: 31
Images: 65
Joined: Wed Dec 13, 2006 9:14 am
Location: Flower Mound TX
Top

Wow!

Postby mark6mueller » Thu Jul 29, 2010 12:24 am

Very nice build! I like the bender. Can you give us some details about that. Also what thickness is the aluminum and where did you get it?
Best Regards,

Mark.
User avatar
mark6mueller
Donating Member
 
Posts: 58
Images: 51
Joined: Thu Mar 25, 2010 11:50 pm
Location: Eureka, California
Top

Postby greglaw » Mon Aug 02, 2010 2:01 pm

Mark
I believe all the answers to your questions are in this thread "grasshopper"
What would you like to know about the bender?
Greg~
greglaw
Teardrop Builder
 
Posts: 31
Images: 65
Joined: Wed Dec 13, 2006 9:14 am
Location: Flower Mound TX
Top

Previous

Return to Build Journals

Who is online

Users browsing this forum: No registered users and 15 guests