Starting my 2nd Cargo Tear tomorrow!

...ask your questions in the appropriate forums BUT document your build here...preferably in a single thread...dates for updates, are appreciated....

Starting my 2nd Cargo Tear tomorrow!

Postby greglaw » Thu Nov 05, 2009 10:45 pm

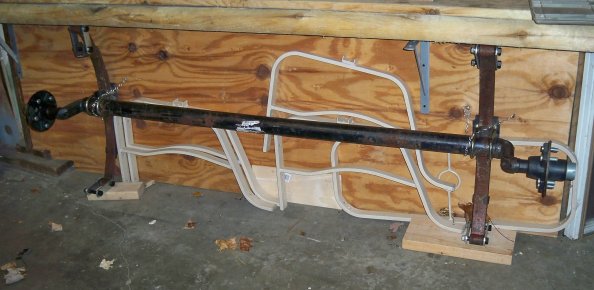
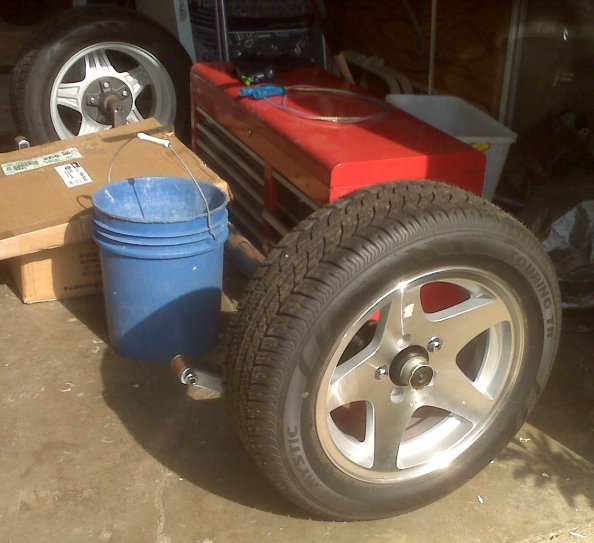
Picked up all the steel for the new cargo tear today. All steel frame, 2x2 0.125 wall for the chasis and 3/4x3/4 0.083 wall for the super structure. Will be a 5'X9' Grumman.
8)
Image
Image
Image
Image
greglaw
Teardrop Builder
 
Posts: 31
Images: 65
Joined: Wed Dec 13, 2006 9:14 am
Location: Flower Mound TX

Postby green_eyed_diablito » Fri Nov 06, 2009 11:25 am

nice. do you have any sketched of what it will look like?

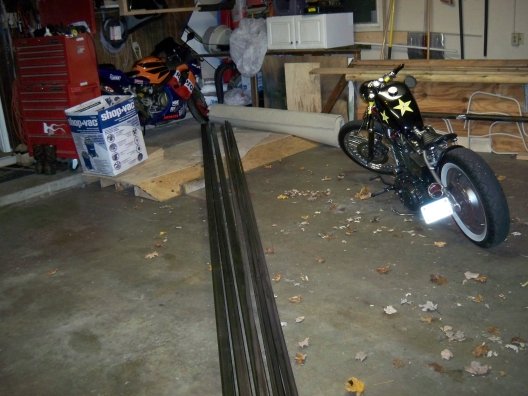
i dig the bikes. is the Repsol replica a street or track bike? did you build the bobber?
Since this life here and now is all we can know, our most reasonable option is to live it fully.
ImageImage
User avatar
green_eyed_diablito
Teardrop Master
 
Posts: 226
Joined: Tue May 12, 2009 1:17 pm
Location: Los Angeles, CA

Postby greglaw » Fri Nov 06, 2009 5:14 pm

Paul
I am using the shape (Grumman2) from the designs section of this great forum.
Repsol is road use but has been on the track, wish I had more time for that. As for the DiggerI built parts of it, not all. See my gallery for some pics.
Greg~
Image
greglaw
Teardrop Builder
 
Posts: 31
Images: 65
Joined: Wed Dec 13, 2006 9:14 am
Location: Flower Mound TX
Top

Postby grizz » Sat Nov 07, 2009 1:42 am

Serial builder ?

Love the Bobber too.
Greetings from England.

Rian.


Hoping to get it all done in time.
User avatar
grizz
1000 Club
1000 Club
 
Posts: 1210
Images: 29
Joined: Mon Sep 21, 2009 2:37 pm
Location: Rochester, Kent, UK
Top

Postby green_eyed_diablito » Sat Nov 07, 2009 2:43 pm

very nice work, greg. i like how you used a mish-mash of parts to style the bike. in my opinion, that's where an eye for style comes into play and you pulled it together perfectly. i especially like the model a tail light.

i see three fittings coming out of the tank. are all three functional?

-miguel
Since this life here and now is all we can know, our most reasonable option is to live it fully.
ImageImage
User avatar
green_eyed_diablito
Teardrop Master
 
Posts: 226
Joined: Tue May 12, 2009 1:17 pm
Location: Los Angeles, CA
Top

Postby greglaw » Sat Nov 07, 2009 5:53 pm

Thanks for the complements folks love to build stuff!
Split the gas tank and made a 1 gal oil tank in it.
Got the chasis frame built this morning will attach the axle tomorrow and post some pics.
Greg
greglaw
Teardrop Builder
 
Posts: 31
Images: 65
Joined: Wed Dec 13, 2006 9:14 am
Location: Flower Mound TX
Top

Postby greglaw » Sat Nov 07, 2009 6:14 pm

couple of pics from today. Got a half day of work in today.
Image
Image
greglaw
Teardrop Builder
 
Posts: 31
Images: 65
Joined: Wed Dec 13, 2006 9:14 am
Location: Flower Mound TX
Top

Postby greglaw » Sun Nov 08, 2009 6:35 pm

Made some more progress today, have a complete rolling chasis! Happy day!


Image

Image

Image

Image
greglaw
Teardrop Builder
 
Posts: 31
Images: 65
Joined: Wed Dec 13, 2006 9:14 am
Location: Flower Mound TX
Top

made some more progress

Postby greglaw » Sun Nov 15, 2009 9:02 pm

Drew the outline on some cardboard today and started bending some tubing for the superstructure.

Image

Image

Image

Welded in the front cross spars.

Image

Bent the first of the rear hoops, quite challenging with a combination of radius and ellipse.

Image

Built a stand for the tubing bender as well.

Image

:)
greglaw
Teardrop Builder
 
Posts: 31
Images: 65
Joined: Wed Dec 13, 2006 9:14 am
Location: Flower Mound TX
Top

got more done today!

Postby greglaw » Sat Nov 21, 2009 8:20 pm

Got the back end done today and some of the framing. I also frame out the door.

Image

Image

Image
greglaw
Teardrop Builder
 
Posts: 31
Images: 65
Joined: Wed Dec 13, 2006 9:14 am
Location: Flower Mound TX
Top

Postby Mike_La » Sun Nov 22, 2009 12:26 pm

Very good metal work, Greg. :thumbsup:

I'll be following your build. I can see now the outcome will be nice.


Mike
Mike


"Believe you can and you're halfway there."
Theodore Roosevelt
Mike_La
Silver Donating Member
 
Posts: 600
Images: 71
Joined: Thu Jun 01, 2006 7:31 pm
Location: Louisiana
Top

Postby greglaw » Sun Nov 22, 2009 2:01 pm

Thanks Mike
I really enjoy doing this stuff. First time bending tubing for me, went well.
Greg
greglaw
Teardrop Builder
 
Posts: 31
Images: 65
Joined: Wed Dec 13, 2006 9:14 am
Location: Flower Mound TX
Top

Postby Mike_La » Sun Nov 22, 2009 2:22 pm

Question.
Where did you get the tubing bender?
Mike


"Believe you can and you're halfway there."
Theodore Roosevelt
Mike_La
Silver Donating Member
 
Posts: 600
Images: 71
Joined: Thu Jun 01, 2006 7:31 pm
Location: Louisiana
Top

Postby greglaw » Sun Nov 22, 2009 2:38 pm

I got it at Harbor Freight, also picked up a set of their 0.5" square dies and a friend turned them out to 0.75" for me. Works like a charm.
Greg
greglaw
Teardrop Builder
 
Posts: 31
Images: 65
Joined: Wed Dec 13, 2006 9:14 am
Location: Flower Mound TX
Top

Postby greglaw » Wed Jul 07, 2010 8:31 am

Well I am back at it again. Went down to Bontrager's in White Pigeon and then on to RV Surplus in Elkhart last Friday with my girls to pick up the rest of the stuff to finish the trailer. It's great to have both of those resources that close.
I got the Hatch tubes bent and welded up. This was quite a challenge to get 5 hoops relatively the same.
Image

I also got the hatch seal channel or gutter as I like to call it constructed. Welded a 1/4" square stock to the inside of the hoop then welded a 1"x1/8" continuous strip to that. D seal will be stuck to that so any water that enters will "theoretically" run down the gutter and exit at the bottom.
Image
Image
Image
greglaw
Teardrop Builder
 
Posts: 31
Images: 65
Joined: Wed Dec 13, 2006 9:14 am
Location: Flower Mound TX
Top

Next

Return to Build Journals

Who is online

Users browsing this forum: smeerkees and 55 guests