Lawnjockies Build

...ask your questions in the appropriate forums BUT document your build here...preferably in a single thread...dates for updates, are appreciated....

Postby Lawnjockey » Tue Dec 08, 2009 3:38 pm

Thank you. Above is the extended trailer getting decked in my messy shop.

Below is the ATV trailer I started the project with:

Image

If this works I will post a bunch more later.

Jocko
Lawnjockey
Teardrop Master
 
Posts: 166
Images: 43
Joined: Fri Nov 20, 2009 10:08 am
Location: front yard

Postby Lawnjockey » Tue Dec 08, 2009 6:16 pm

Here are some more pics:

Atv trailer sans deck:

Image


The bad weld:

Image

Bad weld giving way during cutting:

Image

Starting to put it back together:

Image

Alligning the forward extension:

Image

Profile template and checking the layout:

Image

STINKY (don't ask) the cat checks the layout:

Image

Aside from learning how to post pictures today, I bolted the deck down and purchased the plywood for the sides and top.

Jocko
Lawnjockey
Teardrop Master
 
Posts: 166
Images: 43
Joined: Fri Nov 20, 2009 10:08 am
Location: front yard

Postby Lawnjockey » Wed Dec 09, 2009 5:58 pm

I got some more work done today:

Cutting sides:

Image


Cleaning up the edge with belt sander:

Image


Cutting the door:

Image

Installing side cleats:

Image

Sides and spars installed:

Image

Image

Image

It's Miller time.

Jocko
Lawnjockey
Teardrop Master
 
Posts: 166
Images: 43
Joined: Fri Nov 20, 2009 10:08 am
Location: front yard
Top

Postby S. Heisley » Thu Dec 10, 2009 1:16 am

You're moving right along! :thumbsup:

What are the dimensions of your teardrop? Will you have any kind of chuck box or galley or will you make meals on the picnic table in the campground?
User avatar
S. Heisley
Super Lifetime Member
 
Posts: 8774
Images: 495
Joined: Mon Sep 17, 2007 10:02 am
Location: No. California
Top

Postby Lawnjockey » Thu Dec 10, 2009 10:03 am

It is small but I just wanted something for the dog and I to sleep in:

Image

As you can see, Casper has higher standards than I do. I still have to figure out secure storage for the doggy bon bons.

The trailer is 4' x 7' 8". I wanted something that is no wider than the Jeep that I can navigate narrow arroyos with.

I didn't do the traditional galley because if it is nice enough to cook outside then I'll cook outside. If it isn't then I want all the space possible in a small package. I am still thinking about a mini wood stove but I will also have a portable stove for my morning coffee.

I only have about 4 weeks until my next road trip so I gotta get it done.

Jocko
Lawnjockey
Teardrop Master
 
Posts: 166
Images: 43
Joined: Fri Nov 20, 2009 10:08 am
Location: front yard
Top

Postby S. Heisley » Thu Dec 10, 2009 10:13 am

Love the dog bed! :lol: :thumbsup: :applause:

Good luck on your build!
User avatar
S. Heisley
Super Lifetime Member
 
Posts: 8774
Images: 495
Joined: Mon Sep 17, 2007 10:02 am
Location: No. California
Top

Postby Lawnjockey » Thu Dec 10, 2009 10:24 am

Casper is very particular and can be outright demanding at times. What he sees in me I don't know. Gotta go, he is looking at me and I am sure he knows I'm talking about him.

Jocko
Lawnjockey
Teardrop Master
 
Posts: 166
Images: 43
Joined: Fri Nov 20, 2009 10:08 am
Location: front yard
Top

Postby Lawnjockey » Thu Dec 10, 2009 5:51 pm

I only had a couple of hours to work on the TD today so I installed the first layer of 1/4 ply for the top:

Image


Image

So I am starting to get an idea how this thing is going to look.

Weight wise it is still easy to lift off the jack stand and put on the dolly so I think I am doing fine there.

Did anyone else think it was cold today? I may have to put a heat lamp inside the TD to get the adhesive to set for laminating the second layer on the top.

Jocko
Lawnjockey
Teardrop Master
 
Posts: 166
Images: 43
Joined: Fri Nov 20, 2009 10:08 am
Location: front yard
Top

Postby Lawnjockey » Thu Dec 10, 2009 5:55 pm

Sorry about that, I intended the second picture to be the following:

Image

Jocko
Lawnjockey
Teardrop Master
 
Posts: 166
Images: 43
Joined: Fri Nov 20, 2009 10:08 am
Location: front yard
Top

Postby Lawnjockey » Fri Dec 11, 2009 6:24 pm

It was so cold I found excuses to do just about anything but work on the TD. I finally got of my behind and installed the second 1/4" roof layer. I was climbing around on to setting screws, the TD is stronger than the proverbial brick restroom.

Second layer installed, joint staggered so as to avoid a kink:

Image

I was glad to get to the end:

Image

I set a heat lamp inside and covered the door with a tarp so that the adhesive would kick, it is really really cold:

Image


This week end I'll trim, bondo, and seal.

Jocko
Lawnjockey
Teardrop Master
 
Posts: 166
Images: 43
Joined: Fri Nov 20, 2009 10:08 am
Location: front yard
Top

Postby Lawnjockey » Sun Dec 13, 2009 7:02 pm

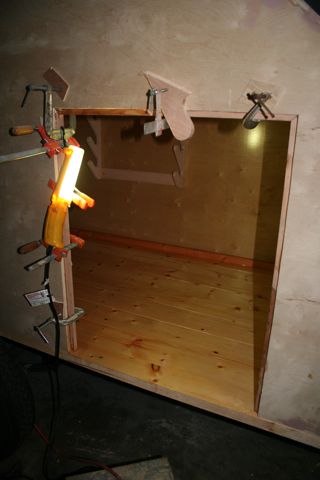
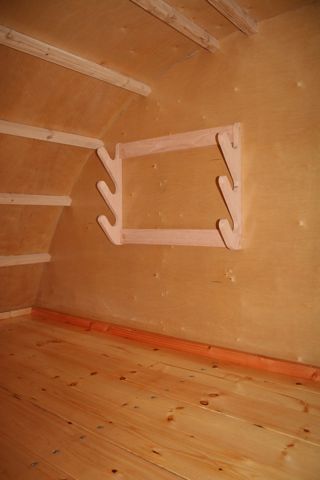
I put in a few hours today, the weather is still wet and cold so I worked inside. I built and installed an oak gun rack (this is a hunting rig and man cave), I cut plugs and plugged the screws in the cleat, and I got one of the uprights in for the door jamb. Actually it is a 1 x 4 oak door stop. It goes floor to ceiling so the layout was tricky due to the curve and a spar. Not much but a step in the right direction.

Jocko
Lawnjockey
Teardrop Master
 
Posts: 166
Images: 43
Joined: Fri Nov 20, 2009 10:08 am
Location: front yard
Top

Looks great!

Postby Alfred » Sun Dec 13, 2009 8:31 pm

Looks great, Jocko! - And you're really coming along with it, too.

AL in Asheville :thumbsup:
4 minute video of our build - A 5x8 Camper for a family of 5 - http://youtu.be/CYGTlkfpIhY
How we built a 5x8 camper for a family of 5, using a utility trailer with an incorporated bunk bed for the kids.
From plain trailer to campground!

ImageImageImage
Also - More pictures here: http://flic.kr/ps/225piC
User avatar
Alfred
Silver Donating Member
 
Posts: 1633
Images: 368
Joined: Sun Jun 03, 2007 9:18 pm
Location: NC, Asheville
Top

Postby Lawnjockey » Mon Dec 14, 2009 6:06 pm

I got some time this afternoon so I did a bunch of small stuff.

I finished installing an oak door stop:
Image


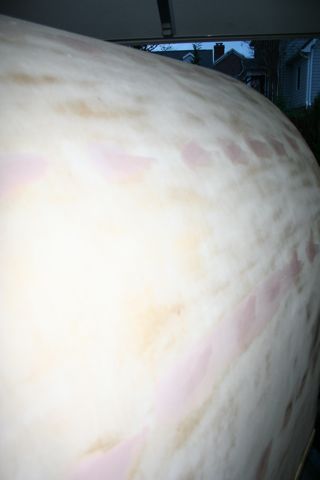
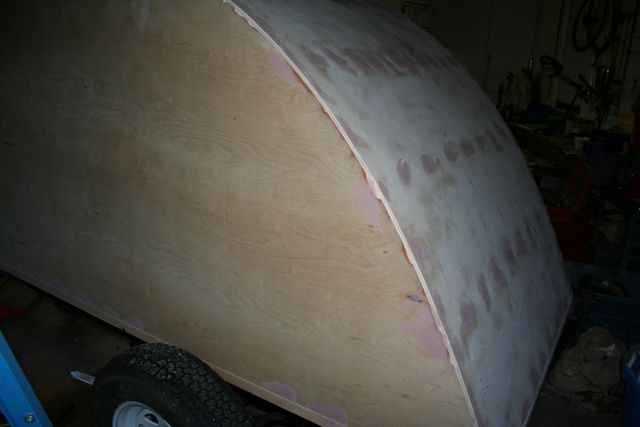
I trimmed the roof edge using the minigrinder with a #80 sanding disk. Very fast and neat. I then sanded the entire exterior using a DA sander. Then, my favorite part, first coat of Bondo:
Image


Image

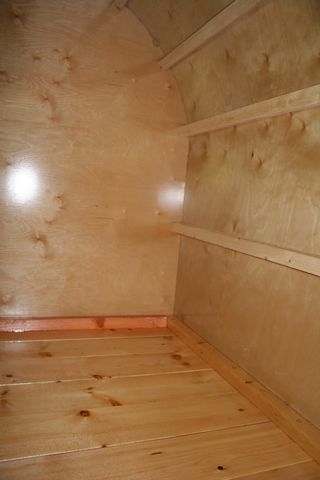
Then I sanded the floor and gave it a coat of varnish. I wanted to get a few coats on it so I am not grinding fecal material into it as I work.
Image

Image

I will be varnishing the rest of the interior trim later, for now it is about protecting the floor.

I am thinking about installing a 1 1/2" curb around my cot to stop it from sliding around. I may do that tomorrow as well as sanding the bondo and doing a second bondo coat. I located my aluminum today but my trim won't be here until next week. I am thinking about using the time to finish the interior with some book shelves and the wood stove. On the wood stove I will probably just make one up rather than wait to get my old tiny tot from my brother.

Jocko
Lawnjockey
Teardrop Master
 
Posts: 166
Images: 43
Joined: Fri Nov 20, 2009 10:08 am
Location: front yard
Top

Postby chorizon » Mon Dec 14, 2009 6:23 pm

Wow...that looks freakin' awesome. You are doing some excellent work and fast!

Concerning Bondo application in confined areas, Towelie was wondering if he could help...
Image
User avatar
chorizon
Platinum Donating Member
 
Posts: 871
Images: 94
Joined: Tue Feb 26, 2008 12:44 pm
Location: Austin, Texas
Top

Postby S. Heisley » Mon Dec 14, 2009 9:05 pm

Lookin' good, Jocko.

Is the wood stove for the tear or the shop?
User avatar
S. Heisley
Super Lifetime Member
 
Posts: 8774
Images: 495
Joined: Mon Sep 17, 2007 10:02 am
Location: No. California
Top

PreviousNext

Return to Build Journals

Who is online

Users browsing this forum: No registered users and 22 guests