A little "Scotty" Diversion...."Finished"

...ask your questions in the appropriate forums BUT document your build here...preferably in a single thread...dates for updates, are appreciated....

A little "Scotty" Diversion...."Finished"

Postby len19070 » Thu Apr 01, 2010 3:23 pm

A Little Diversion;

In amongst all my other projects I Found a 73 Serro Scotty Sportsman.

Image

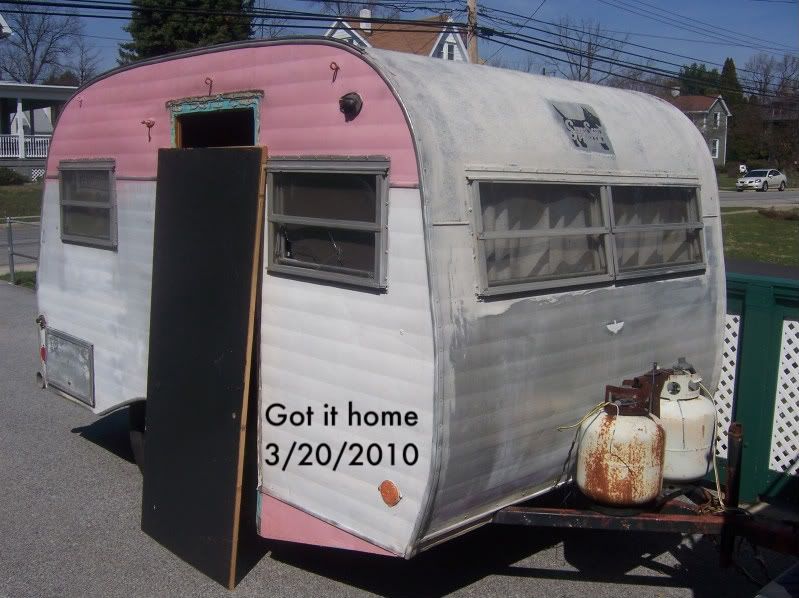
I was going to strip it and use all the accessories, windows, door, emblems etc on the 13' HiLander.

BUT

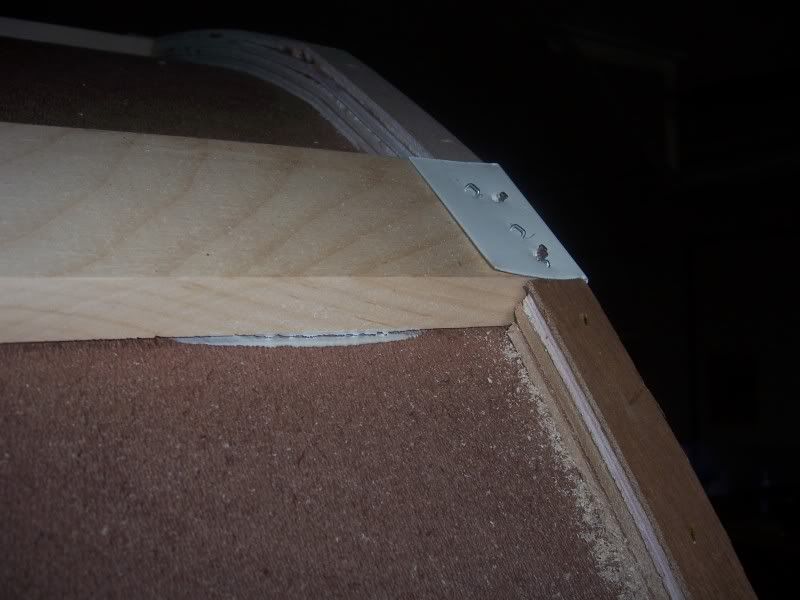
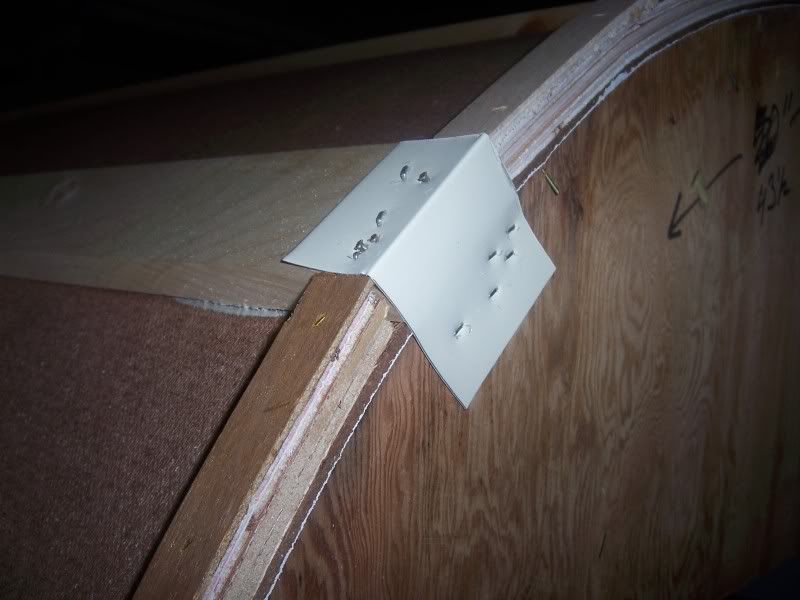
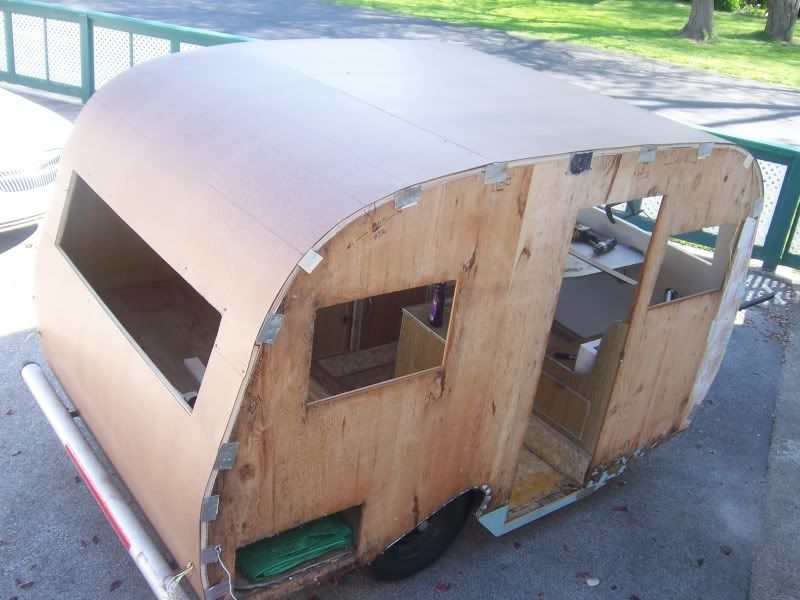
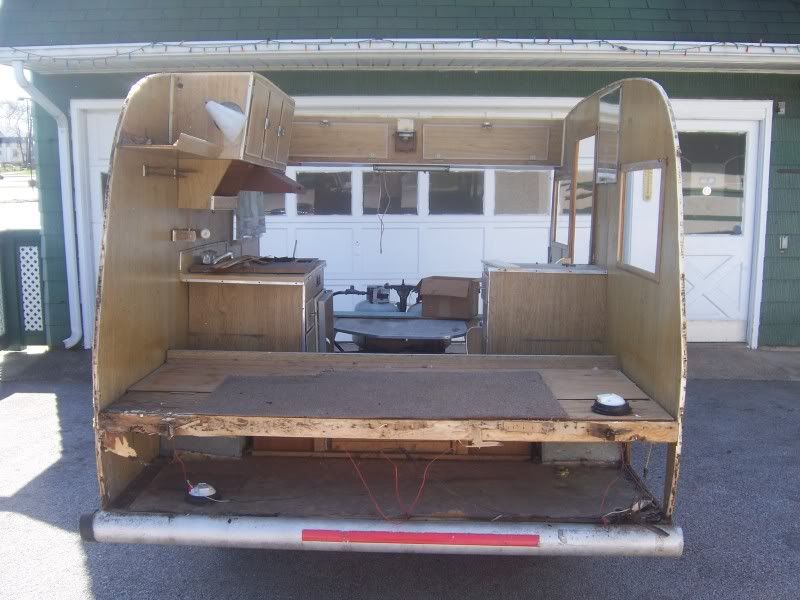
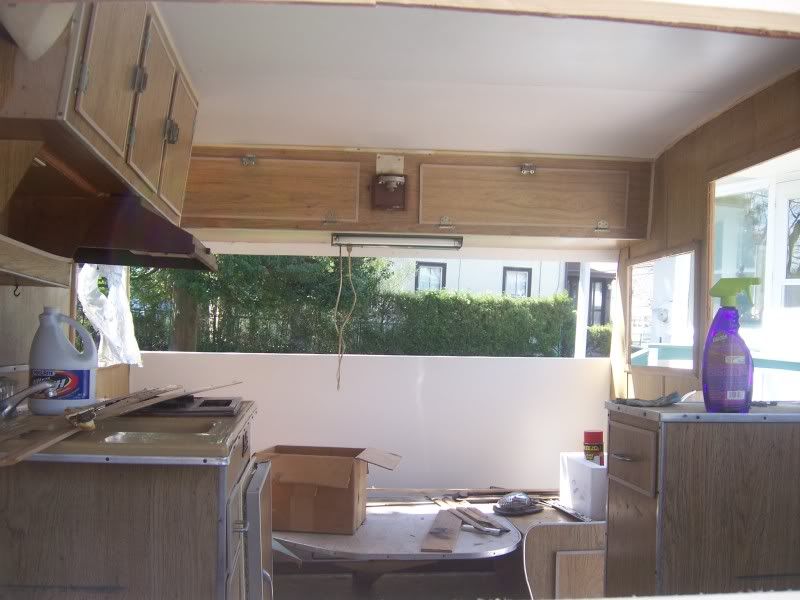
After stripping the roof and skins off of it, it didn't look that bad. So I have decided to rebuild it.

Image

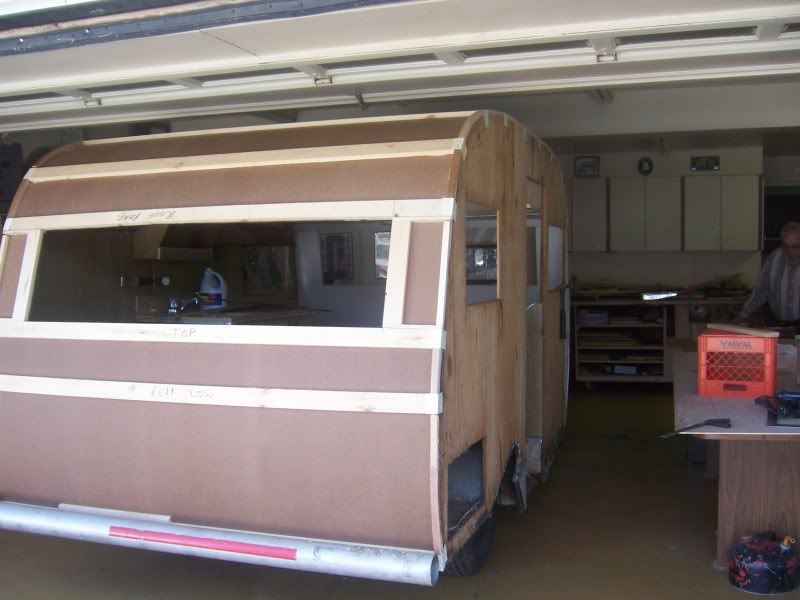
I'll be installing a new roof with a brighter ceiling material than the original wood grain paneling, to much wood makes you feel like a termite. A rubber roof and totally new skins.

This one will be up for sale for about $3500.

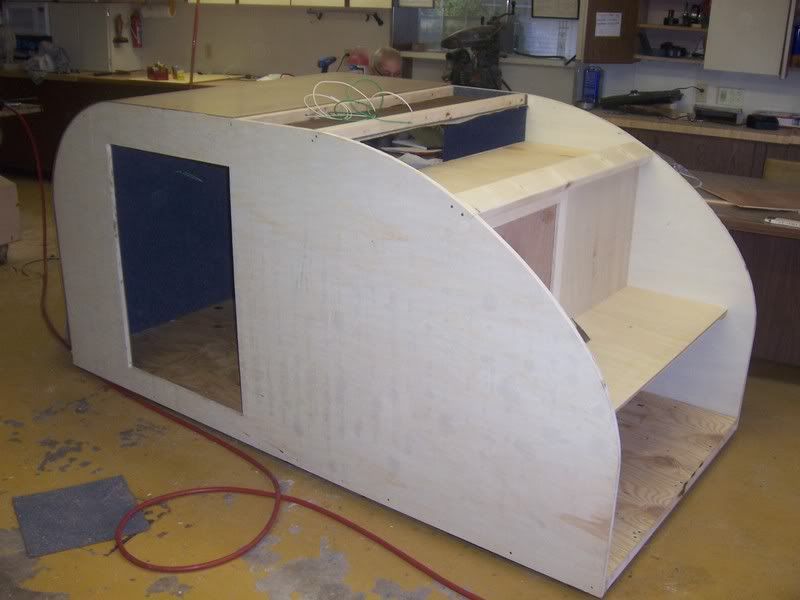
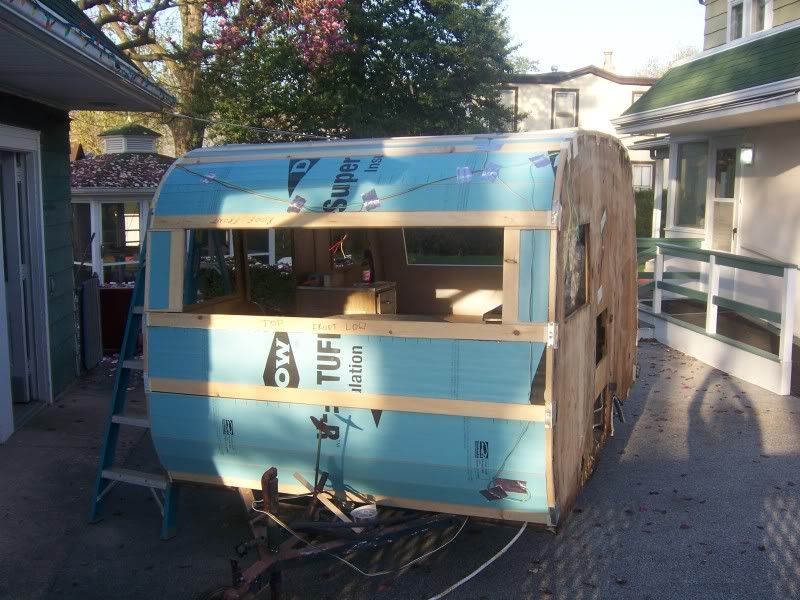
With an almost total rebuild this should be a great deal for somebody..

http://s26.photobucket.com/albums/c106/ ... %20Scotty/

I'll be updating photos as things progress.

Happy Trails

Len
Last edited by len19070 on Sun Feb 27, 2011 6:42 pm, edited 2 times in total.
:peace: :peace: :peace: :peace: :peace:
http://s26.photobucket.com/user/len1907 ... 20trailers

"If you do good things, good things will happen to you"..... Earl Hickey
User avatar
len19070
3000 Club
3000 Club
 
Posts: 3054
Images: 24
Joined: Tue Aug 17, 2004 7:44 pm
Location: S.E Pa. Morton

Postby len19070 » Thu Apr 01, 2010 3:30 pm

Just about got all the carpentry work done.

I really hate the way they built these things but that's what you have to do on a "Restore".

Image

Image

I'll spend tomorrow finishing up a few carpentry issues, clean up the windows and get ready to start making & installing the siding & roof next week.

Happy Trails

Len
:peace: :peace: :peace: :peace: :peace:
http://s26.photobucket.com/user/len1907 ... 20trailers

"If you do good things, good things will happen to you"..... Earl Hickey
User avatar
len19070
3000 Club
3000 Club
 
Posts: 3054
Images: 24
Joined: Tue Aug 17, 2004 7:44 pm
Location: S.E Pa. Morton

Postby mandy » Thu Apr 01, 2010 3:41 pm

len19070 wrote:Just about got all the carpentry work done.

I really hate the way they built these things but that's what you have to do on a "Restore".

Image

Image

I'll spend tomorrow finishing up a few carpentry issues, clean up the windows and get ready to start making & installing the siding & roof next week.

Happy Trails

Len


Hi Len,
What did you use for the interior skin?
The greatest wealth is to live content with little.
~Plato~
User avatar
mandy
Donating Member
 
Posts: 14160
Images: 86
Joined: Wed Jul 25, 2007 3:47 pm
Location: Albuquerque, NM
Top

Postby len19070 » Thu Apr 01, 2010 4:01 pm

mandy wrote:
Hi Len,
What did you use for the interior skin?


I Tried to get white vinyl covered paneling but that's a thing of the past I guess.

So...

I used 1/8" Masonite, 1 coat Parks sealer and 2 coats latex Semi-Gloss enamel.

Happy Trails

Len
:peace: :peace: :peace: :peace: :peace:
http://s26.photobucket.com/user/len1907 ... 20trailers

"If you do good things, good things will happen to you"..... Earl Hickey
User avatar
len19070
3000 Club
3000 Club
 
Posts: 3054
Images: 24
Joined: Tue Aug 17, 2004 7:44 pm
Location: S.E Pa. Morton
Top

Postby mandy » Thu Apr 01, 2010 4:39 pm

len19070 wrote:
mandy wrote:
Hi Len,
What did you use for the interior skin?


I Tried to get white vinyl covered paneling but that's a thing of the past I guess.

So...

I used 1/8" Masonite, 1 coat Parks sealer and 2 coats latex Semi-Gloss enamel.

Happy Trails

Len


Thanks Len. :thumbsup: I'm gonna have to remember that for the future.
The greatest wealth is to live content with little.
~Plato~
User avatar
mandy
Donating Member
 
Posts: 14160
Images: 86
Joined: Wed Jul 25, 2007 3:47 pm
Location: Albuquerque, NM
Top

Postby regis101 » Thu Apr 01, 2010 6:57 pm

Were/are the original walls made from 3/4 ply? What was/is the original inside finish. veneer, contact paper, 1/8" ply??
Peace, Regis
Livermore, Ca
Working on Build #2
regis101
Teardrop Master
 
Posts: 226
Joined: Sat Jul 25, 2009 5:21 pm
Location: Livermore, Ca
Top

Postby len19070 » Thu Apr 01, 2010 7:33 pm

regis101 wrote:Were/are the original walls made from 3/4 ply? What was/is the original inside finish. veneer, contact paper, 1/8" ply??


The outside walls were only made of 1/2" Paneling. That is 1/2" plywood with a one side finished with I believe a vinyl (I'm guessing).

I'll take some photos of the original construction technique....Real Crap.

John Serro was inducted into the RV Hall of Fame for designing and building an economical, Garage able Trailer.

I really think that is why most of these trailers have survived...Most of there life was spent indoors.

They'd have never made it on the outside.

Happy Trails

Len
:peace: :peace: :peace: :peace: :peace:
http://s26.photobucket.com/user/len1907 ... 20trailers

"If you do good things, good things will happen to you"..... Earl Hickey
User avatar
len19070
3000 Club
3000 Club
 
Posts: 3054
Images: 24
Joined: Tue Aug 17, 2004 7:44 pm
Location: S.E Pa. Morton
Top

Postby Miriam C. » Thu Apr 01, 2010 9:40 pm

Image

Len is that tape on the spars/sides or a metal piece? you really are moving on this!
“Forgiveness means giving up all hope for a better past.â€
User avatar
Miriam C.
our Aunti M
 
Posts: 19675
Images: 148
Joined: Wed Feb 15, 2006 3:14 pm
Location: Southwest MO
Top

Postby TheresaD » Thu Apr 01, 2010 11:55 pm

:shock: Holy cow Len You work fast!! What a difference it makes when you have experience with these things..I'm panicking because I don't know if I'll make my May deadline and you have all this done in a matter of a day or two... :cry: Would you consider coming to live with me for a week or two to push my slow a$$ along?? It might inspire my building assistant a bit too. We're not making anywhere near the amount of progress I'd like to be making. Hopefully with good weather this weekend some decent strides can be made. Keep posting pics of your progress. It's very helpful to us rookies.

Oh and ditto to Auntie M's question.. I was wondering the same thing about the ends of the spars.
All The Best,

Theresa D.
Tearjerkers Great North Woods Chapter Director
68 Sprite 400
47 KIT Companion
146633
User avatar
TheresaD
Silver Donating Member
 
Posts: 484
Images: 54
Joined: Thu May 07, 2009 1:54 pm
Location: East Hartford, Connecticut
Top

Postby len19070 » Fri Apr 02, 2010 12:06 am

Miriam C. wrote:Image

Len is that tape on the spars/sides or a metal piece? you really are moving on this!


There metal straps, I really don't trust the way they originally built these things.

They would staple the ceiling, face down on to the edge of the 1/2" sidewall edge. Then just staple the 1X3 into the edge of the 1/2" plywood. and fill in between the 1X3's with 3 strips of 1/4" plywood to build it up to the height of the 1X3.

They had a lot more faith in that 1/2" plywood edge than I do.

Happy Trails

Len
:peace: :peace: :peace: :peace: :peace:
http://s26.photobucket.com/user/len1907 ... 20trailers

"If you do good things, good things will happen to you"..... Earl Hickey
User avatar
len19070
3000 Club
3000 Club
 
Posts: 3054
Images: 24
Joined: Tue Aug 17, 2004 7:44 pm
Location: S.E Pa. Morton
Top

Postby len19070 » Fri Apr 02, 2010 7:08 am

len19070 wrote:I'll take some photos of the original construction technique....Real Crap.


This is the way these things were put together.

Image

Image

The aluminum band holding the 1X4..BTW they originally used 1X3s, to the side was my idea.

This is the first Scotty I've ever done the original way, and its scary!

Usually on a single panel sidewall I'll run the rafters (at least a 2X2) in between the sidewalls and screw them in through the sides.

At least I know that the aluminum angles won't let the 1X4's lift off.

Happy Trails

Len
:peace: :peace: :peace: :peace: :peace:
http://s26.photobucket.com/user/len1907 ... 20trailers

"If you do good things, good things will happen to you"..... Earl Hickey
User avatar
len19070
3000 Club
3000 Club
 
Posts: 3054
Images: 24
Joined: Tue Aug 17, 2004 7:44 pm
Location: S.E Pa. Morton
Top

Postby G-MAN 88 » Tue Apr 06, 2010 12:40 am

I will be undertaking a similar project soon. My trailer also has 1x's
laying flat to support the roof. Do you have any ideas about how to
keep them from sagging?

Thanks,
Gordon
G-MAN 88
Teardrop Inspector
 
Posts: 15
Images: 8
Joined: Sun Oct 11, 2009 9:29 am
Location: Virginia
Top

Postby len19070 » Tue Apr 06, 2010 1:01 am

G-MAN 88 wrote:I will be undertaking a similar project soon. My trailer also has 1x's
laying flat to support the roof. Do you have any ideas about how to
keep them from sagging?

Thanks,
Gordon


The original Scottys had very few (2) cross members at all. But the fact that the roof is not straight/flat does a lot for keeping it from sagging.

You can't just look at it as a 1X3, even though I don't think a 1X3 is enough when you couple it with the fact that you have 2 sheets of curved plywood glued & fastened in place it becomes a totally different animal.

That curve in the roof is really what keeps it from "Smiling" at you.

As I mentioned earlier the way I normally build a single sheet Plywood side is to use a 2X and screw it in from the side of the plywood wall

Image

as opposed to attaching the rafter to the top of the plywood wall.

Image

With glue on everything.

Happy Trails

Len
:peace: :peace: :peace: :peace: :peace:
http://s26.photobucket.com/user/len1907 ... 20trailers

"If you do good things, good things will happen to you"..... Earl Hickey
User avatar
len19070
3000 Club
3000 Club
 
Posts: 3054
Images: 24
Joined: Tue Aug 17, 2004 7:44 pm
Location: S.E Pa. Morton
Top

Postby synaps3 » Tue Apr 06, 2010 11:47 am

G-MAN 88 wrote:I will be undertaking a similar project soon. My trailer also has 1x's
laying flat to support the roof. Do you have any ideas about how to
keep them from sagging?

Thanks,
Gordon


Gordon --

Like Len said, all the stability comes from "sandwiched" construction. I'm using 1x3's across a 6'6" span for the roof, and they're solid once you have a board on either side. The key is keeping some sort of curvature. Without that, you lose a lot of strength.

Since you're planning your build construction that way, make sure there are no flat spots! 8)
-- Dave

Build log: here
User avatar
synaps3
The 300 Club
 
Posts: 433
Images: 254
Joined: Sun Nov 08, 2009 1:09 am
Location: Marietta, GA
Top

Postby len19070 » Wed Apr 07, 2010 10:17 am

Got a good days work done on the Scotty yesterday.

I insulated, rough wiring and Got the outside sheathing on.

I'm waiting on a few things before I start the siding next week...mostly the Aqua/Jade Paint.

Image

Image

http://s26.photobucket.com/albums/c106/ ... ?start=all

Happy Trails

Len
:peace: :peace: :peace: :peace: :peace:
http://s26.photobucket.com/user/len1907 ... 20trailers

"If you do good things, good things will happen to you"..... Earl Hickey
User avatar
len19070
3000 Club
3000 Club
 
Posts: 3054
Images: 24
Joined: Tue Aug 17, 2004 7:44 pm
Location: S.E Pa. Morton
Top

Next

Return to Build Journals

Who is online

Users browsing this forum: No registered users and 7 guests

cron