Trails in the Sand new updates 9-28-11

...ask your questions in the appropriate forums BUT document your build here...preferably in a single thread...dates for updates, are appreciated....

Trails in the Sand new updates 9-28-11

Postby Alan and Lianna » Mon May 17, 2010 8:48 pm

Well after 4 weeks of work, the teardrop is taking shape. I decided it was time to post some pictures. The rest are in the album.

Alan

Image
Last edited by Alan and Lianna on Wed Sep 28, 2011 5:52 pm, edited 13 times in total.
Don't just dream about it!
Wake up and make it happen...
User avatar
Alan and Lianna
Teardrop Master
 
Posts: 120
Images: 389
Joined: Mon May 17, 2010 5:55 pm
Location: Pearland Tx

welcome

Postby danlott » Mon May 17, 2010 8:54 pm

Welcome to the forum. Looks like your are well on your way. Post lots of pictures.

Dan
Hoplite Traveler Build thread
Image Image
Life is what happens to you while you're busy making other plans.
User avatar
danlott
Donating Member
 
Posts: 874
Images: 264
Joined: Fri Mar 06, 2009 2:18 pm
Location: Winnemucca, Nevada

Postby grizz » Tue May 18, 2010 1:15 am

Welcome, and very tidy build you have there.
Greetings from England.

Rian.


Hoping to get it all done in time.
User avatar
grizz
1000 Club
1000 Club
 
Posts: 1210
Images: 29
Joined: Mon Sep 21, 2009 2:37 pm
Location: Rochester, Kent, UK
Top

Postby Rigsby » Tue May 18, 2010 5:21 pm

Very neat, looks like quality wood too. :thumbsup:
DOOIN IT THE YAARKSHA WAY--FA NOWT, THA NUS !!
User avatar
Rigsby
500 Club
 
Posts: 587
Joined: Sun Aug 31, 2008 12:21 pm
Location: Doncaster, England
Top

Postby starleen2 » Tue May 18, 2010 5:58 pm

I see ya' hooked by a rental - way to go! Now it will inspire you to get yours finished :thumbsup:
User avatar
starleen2
5th Teardrop Club
 
Posts: 16272
Images: 224
Joined: Sat May 12, 2007 8:26 pm
Location: Pea Ridge ,AR
Top

Postby greekspeedoman » Tue May 18, 2010 9:28 pm

What a strong start. I look forward to more additions to your build.
User avatar
greekspeedoman
Donating Member
 
Posts: 312
Images: 12
Joined: Fri Jul 11, 2008 9:35 am
Location: Coeur d'Alene, ID
Top

Lower Galley Cabinet Facing

Postby Alan and Lianna » Wed May 19, 2010 3:43 pm

I worked on the lower Galley Cabinet Facing today, we drew it up last night
Image
And I cut out the openings this morning
Image
And test fitted it in place. I know it looks like it is in backwards, but when we set it up we put the bulkhead in backwards, we will correct upon final assembly.
Image

Alan
Don't just dream about it!
Wake up and make it happen...
User avatar
Alan and Lianna
Teardrop Master
 
Posts: 120
Images: 389
Joined: Mon May 17, 2010 5:55 pm
Location: Pearland Tx
Top

Postby YuGun » Wed May 19, 2010 4:03 pm

Very beautiful trailer.
ı like it. Take it easy.
User avatar
YuGun
The 300 Club
 
Posts: 445
Joined: Sun Apr 11, 2010 1:25 pm
Location: Turkey
Top

Postby Alan and Lianna » Fri May 21, 2010 3:50 pm

After some practice cuts with my wobble dado blade
Image
I cut out the sliding door channels
Image
then I cut the doors to fit
Image
and added some finger holes.
Image
I placed the doors on another piece, hoping to reduce tearout on the back side, but still had some. I think next time I will drill half way through, flip it over and finish drilling from the other side.
Image

Alan
Don't just dream about it!
Wake up and make it happen...
User avatar
Alan and Lianna
Teardrop Master
 
Posts: 120
Images: 389
Joined: Mon May 17, 2010 5:55 pm
Location: Pearland Tx
Top

Postby teardrop_focus » Fri May 21, 2010 5:16 pm

Nice work on the galley!


Good-looking build. :thumbsup:
.
Image

"There is something about these little trailers that brings out the best in people." - BigAl, Scotland, 2010

"Climb the mountains and get their good tidings. Nature's peace will flow into you as sunshine flows into the trees...
The winds will blow their own freshness into you and the storms their energy, while cares will drop away like autumn leaves..." - John Muir, 1898


Chris Squier / teardrop_focus :-)~
User avatar
teardrop_focus
Donating Member
 
Posts: 5975
Images: 127
Joined: Sat Apr 11, 2009 3:18 pm
Location: SoCal
Top

Postby grizz » Sat May 22, 2010 1:15 am

That is seriously neat.

I have miles of tearout, but fortunately I was able to camouflage most of it 8)

You seem to have maximised the galley cabinet space. Well done.
Greetings from England.

Rian.


Hoping to get it all done in time.
User avatar
grizz
1000 Club
1000 Club
 
Posts: 1210
Images: 29
Joined: Mon Sep 21, 2009 2:37 pm
Location: Rochester, Kent, UK
Top

Postby Alan and Lianna » Sat May 22, 2010 11:38 pm

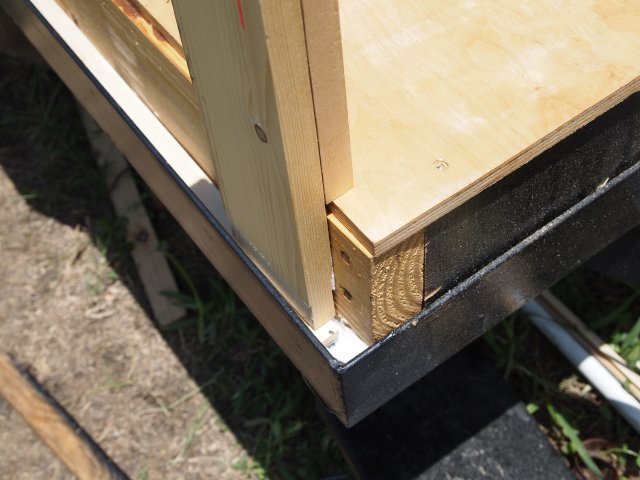
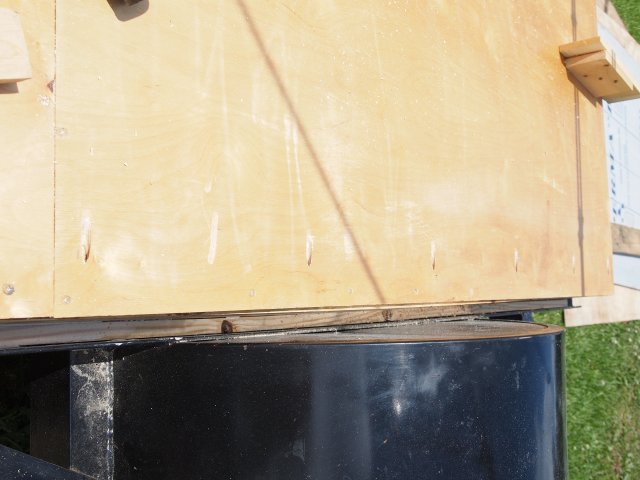
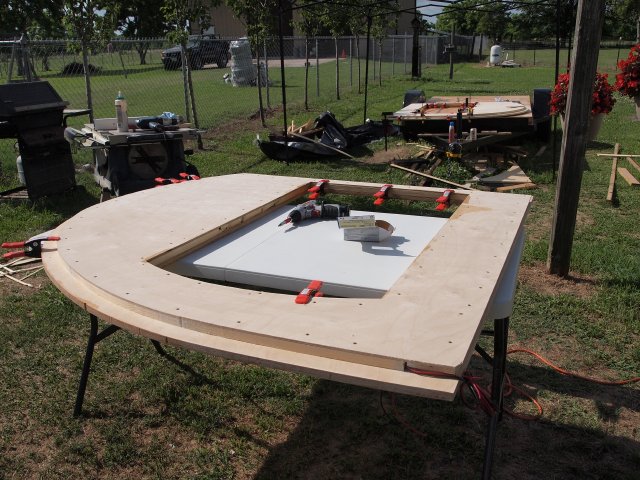
We had too much of a gap where the side wall fits into the trailer so we cut 3/4" pieces of wood and filled in with liquid nails. We made a piece that was 1/16" deeper to push the wood down to the correct depth.
Image
We drilled pocket holes every 12" along the edge of the floor.

Image
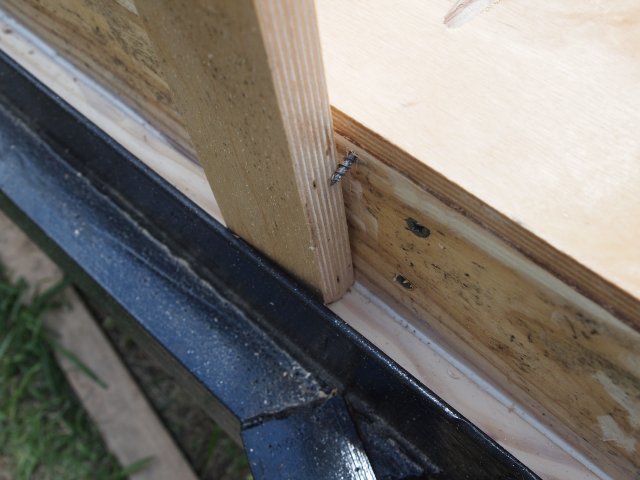
Checked pocket hole screw length and decided that 1 1/2" worked best.

Image
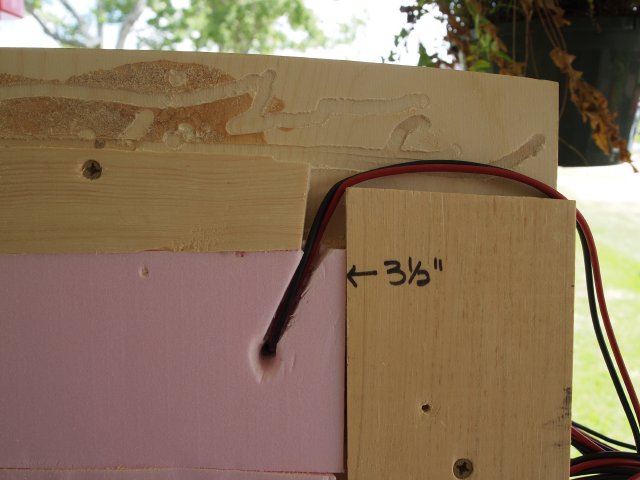
We had to run the wiring for the exterior lights before gluing the interior skin
Image
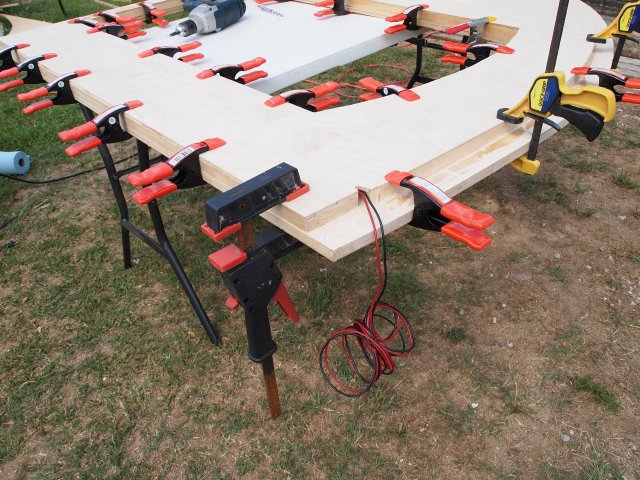
Now we glued the interior skin onto the side wall, using NTPPW (new technology- potted plant weights)
Image
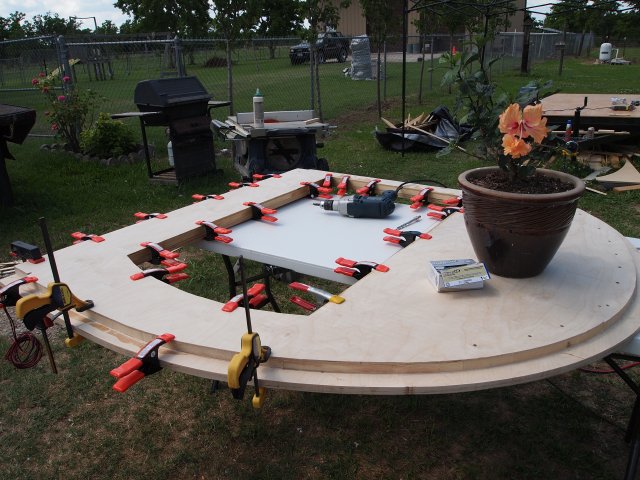
We added few more clamps. Can you really ever have too many of these?
Image
We removed the bondo from this gap and added a trough for the wiring.
Image
Decided to use screws to hold the skin on since we are going to paint the walls. Oh, and apparently we did NOT have too many clamps-actually ran out
Image
We are using spline joints to join the 2 side walls. After using the router to cut 1/8" spine joints, we are testing the fit-perfect.
Image
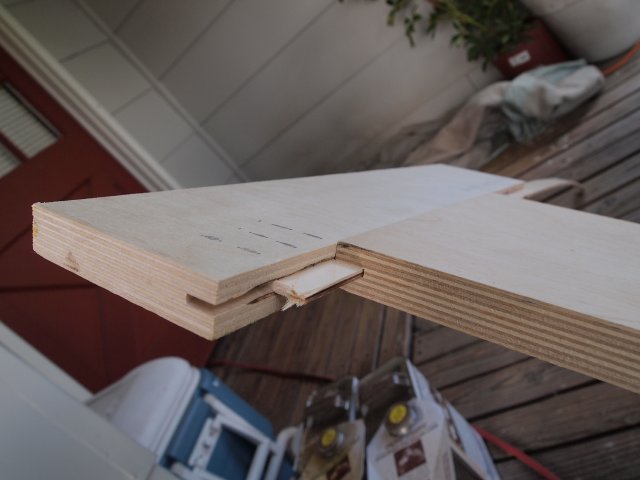
We cut 1/8" by 15/16" splines to fit into spline joints.
Image
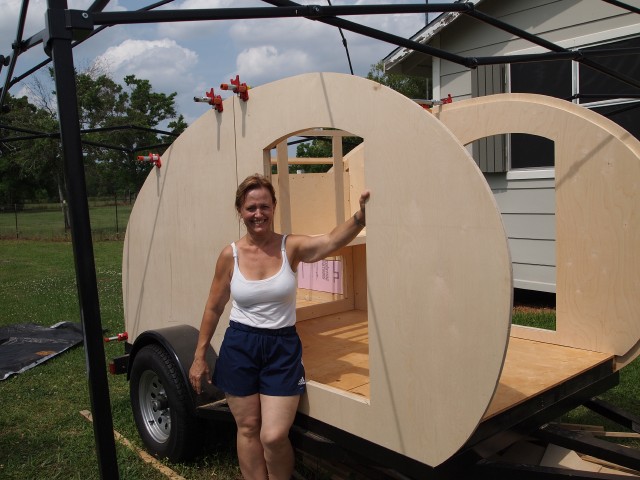
After 4 weeks of working in the hot, south TX sun, fellow teardroppers, Big-D, Brandi, Richard & Diane offered us a huge garage space to finish our build, so we are packed up and ready to move.
Image
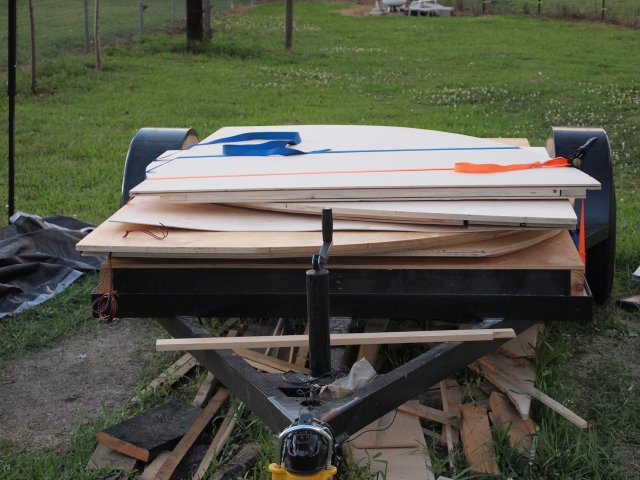
We are so appreciative for this gracious gesture. Without proper shelter, we have been building and storing all our work and supplies in our living room, kitchen, hall & bedrooms (as you can see from previous pics)

Lianna & Alan :)
Don't just dream about it!
Wake up and make it happen...
User avatar
Alan and Lianna
Teardrop Master
 
Posts: 120
Images: 389
Joined: Mon May 17, 2010 5:55 pm
Location: Pearland Tx
Top

Postby Alan and Lianna » Mon May 24, 2010 3:07 am

What a day! We got up early and got dressed for work.
Image
We skinned the galley walls, cut the hatch sides, ran some wires, glued some spars, recut and refit some pieces, lost a piece?, epoxied some wood, drilled, screwed, counter sunk, routered, glued, clamped, hammered, and finally assembled the walls on the trailer for good.. Image
Image
Image

We worked up till midnight, so needless to say we are a too whooped to give a really good update, but posted some more pictures in the album

Alan and Lianna
Don't just dream about it!
Wake up and make it happen...
User avatar
Alan and Lianna
Teardrop Master
 
Posts: 120
Images: 389
Joined: Mon May 17, 2010 5:55 pm
Location: Pearland Tx
Top

Postby stomperxj » Mon May 24, 2010 9:35 am

Lookin great guys. Awesome progress!
User avatar
stomperxj
The 300 Club
 
Posts: 395
Images: 1
Joined: Tue Jul 29, 2008 12:25 am
Location: Kuna ID
Top

Postby Alan and Lianna » Thu May 27, 2010 4:15 pm

After coating all the walls with epoxy, we filled in the voids, sanded smooth and applied a coat of KILZ primer.
Image
We framed the hatch.
Image
Then we skinned the hatch interior.
Image
And on my sliding doors, the lower track was bowed in, so I cut a spacer that once wedged in place would hold it straight.
Image

Alan and Lianna
Don't just dream about it!
Wake up and make it happen...
User avatar
Alan and Lianna
Teardrop Master
 
Posts: 120
Images: 389
Joined: Mon May 17, 2010 5:55 pm
Location: Pearland Tx
Top

Next

Return to Build Journals

Who is online

Users browsing this forum: No registered users and 23 guests