Un-named Travel Trailer Build - 99% Done! April 18

...ask your questions in the appropriate forums BUT document your build here...preferably in a single thread...dates for updates, are appreciated....

Un-named Travel Trailer Build - 99% Done! April 18

Postby fromeo » Wed May 19, 2010 11:23 am

Some of you may have caught my introductory post in the Newbie section. Been reading here for a long time now. This forum and it's members really turned me onto the idea of building some kind of RV.

About a year after I found the forum here, my then girlfriend (now wife) and I bought a used travel trailer, a 2002 Sunline 2363, 24' long. We bought it about 6 months before we were married with the intention of using it for our honeymoon and other traveling. About two weeks after we bought it, I discovered a old, slow leak in the rear wall. Tore it apart to get it fixed and was shocked as to how simple the construction was.. the immediate thought was "I could build one of these!" :)

For now, we're happy with what we have, but wouldn't mind having a second, smaller rig for short trips. That project will have to wait until we get into a bigger house with more trailer storage room. But I'm sure many of you know about that building itch that must be scratched. What's a guy to do? In my case, I offered to build one for my brother. :twisted:

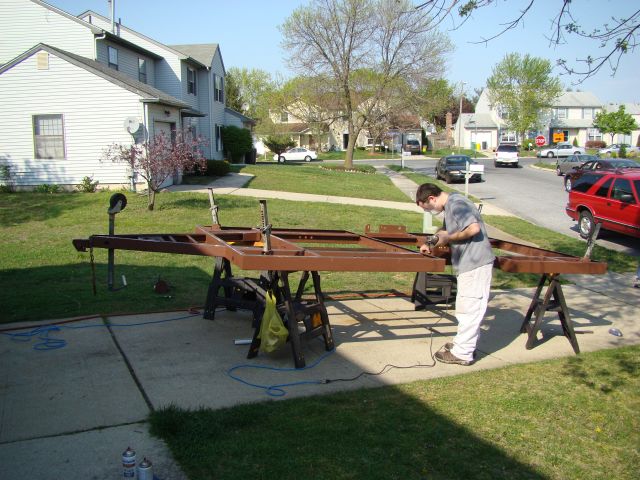
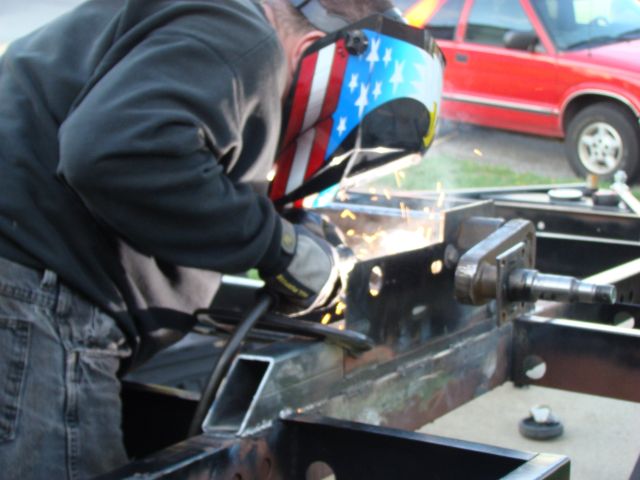
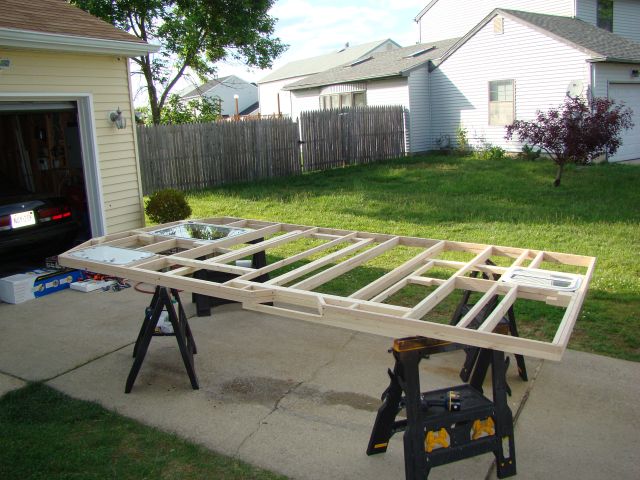
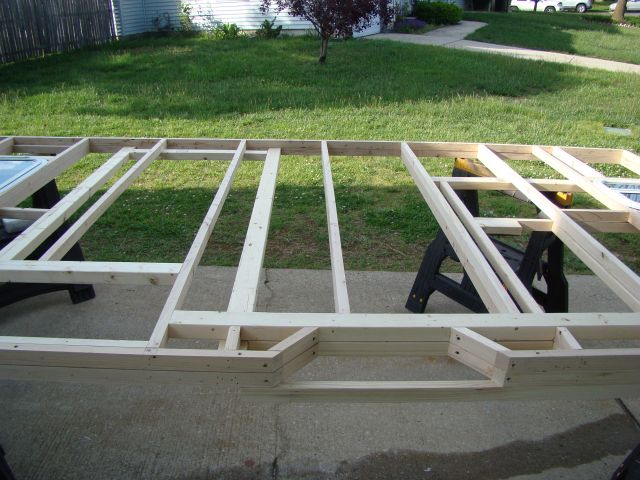
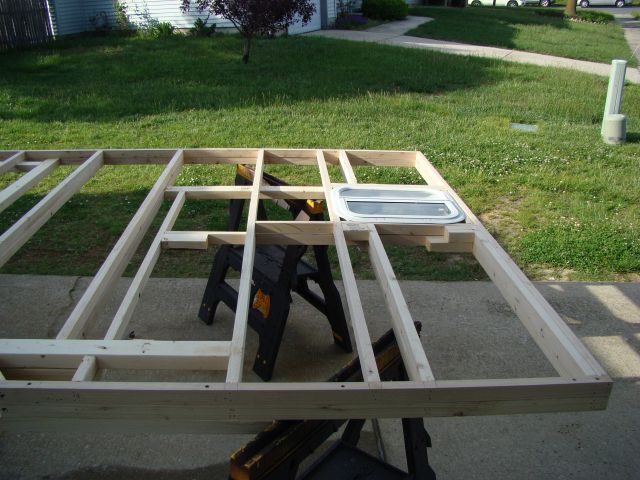
We got started about 6 weeks ago, so I have some catching up to do. I'll break it into a couple of posts to get everybody caught up with a bunch of pictures. That said, here's the story so far..


My brother and I started talking about building him a small travel trailer about a year and a half ago. He likes to get out fishing, and having something to stay in for a few days would make for better trips. The initial idea was something along the lines of the Generic Benroy on a HF frame we had available. Then came the scope creep.. he wanted more cargo capacity, so it grew to the HF 1700# model. Then we saw Steve Cox's vardo on the stretched HF frame and the plan grew further to a small standy. And so the story goes, until he went to an RV show. That pushed him over the edge, he wanted something complete, with "amenities", and it could not be big. He also received a serious case of sticker shock when he saw the prices of new units.

That was back in March, and after that show he declared he was ready for us to start building.

He had some goals laid out for the project:

- Small enough and light enough to be towed with his Nissan Xterra
- Hopefully not requiring weight distribution, just perhaps a friction anti-sway bar.
- Comfortable for two people
- Bath facilities
- Small cooking facilities for those rainy days or late nights
- Self contained, no hauling water totes
- Climate controlled, with A/C for those hot summer nights
- Very affordable (say $3000 or less)

All along as we were discussing this, I had my eyes open hoping to find an old pop-up that we could use for parts. I found several over the past year, and no matter how quickly I called they were always already sold. Finally, the stars aligned for us and I found this for sale on craigslist:


Image


Image


Image


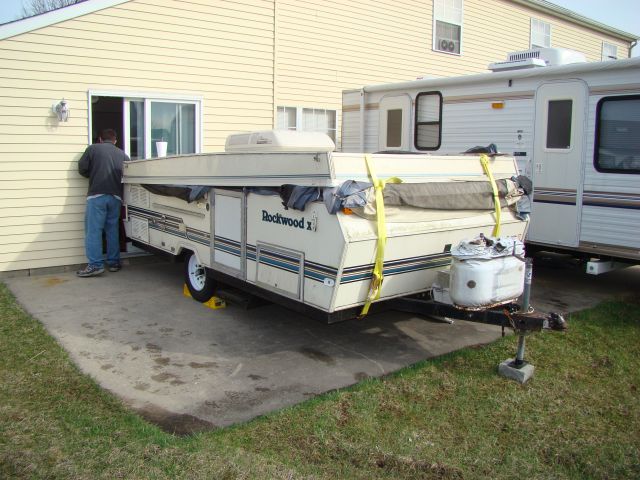
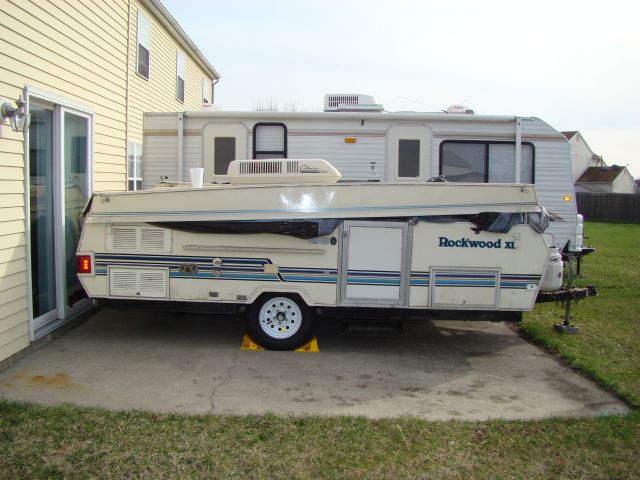
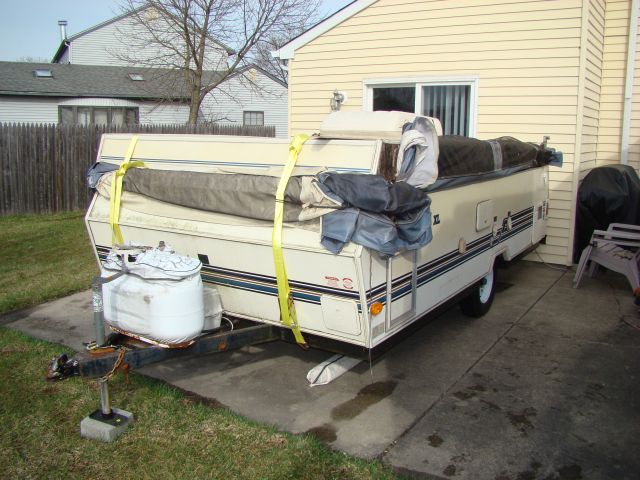
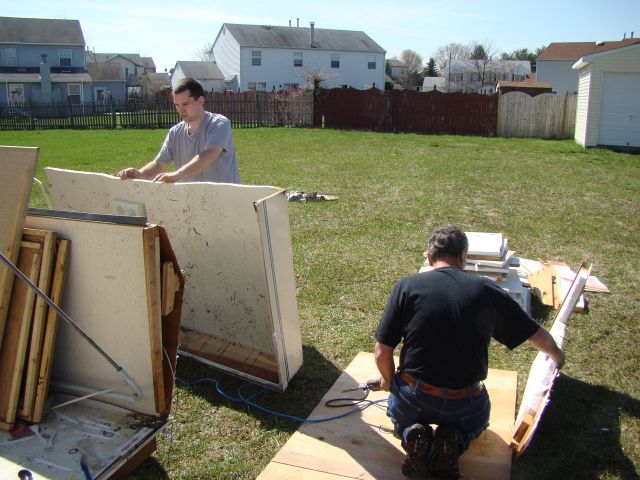
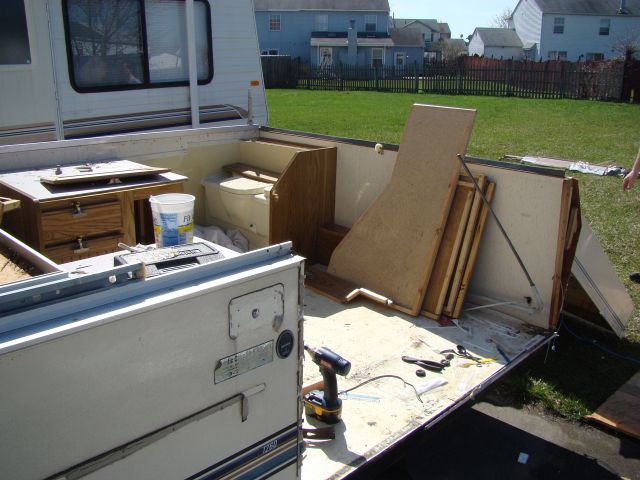
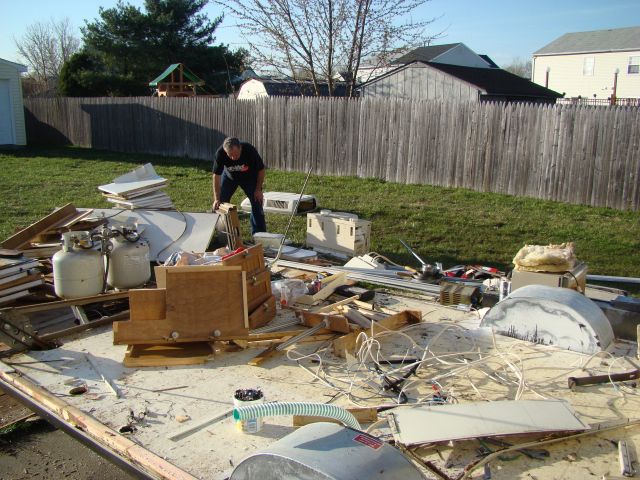
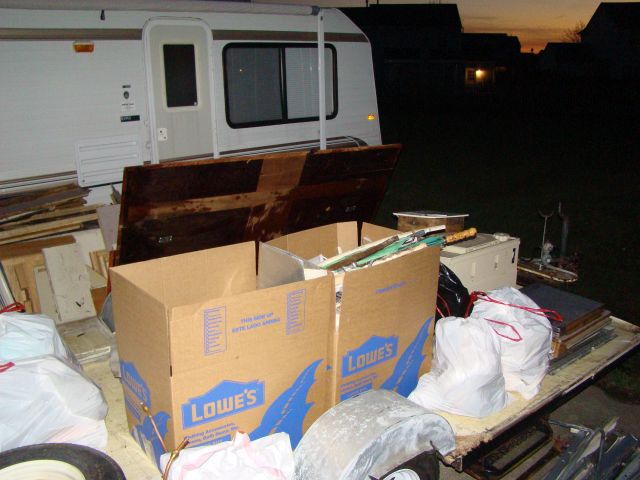
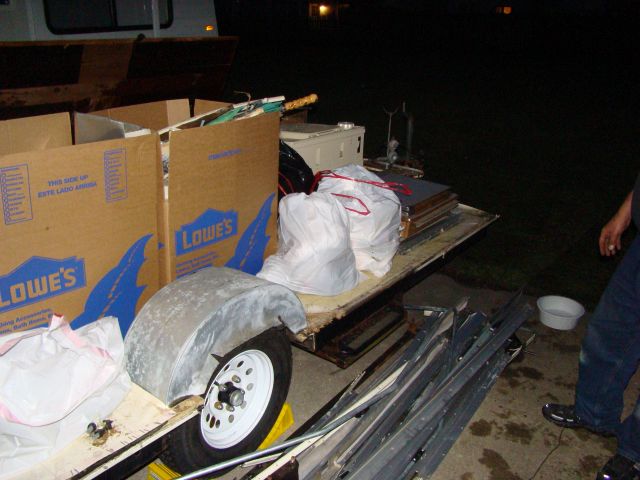
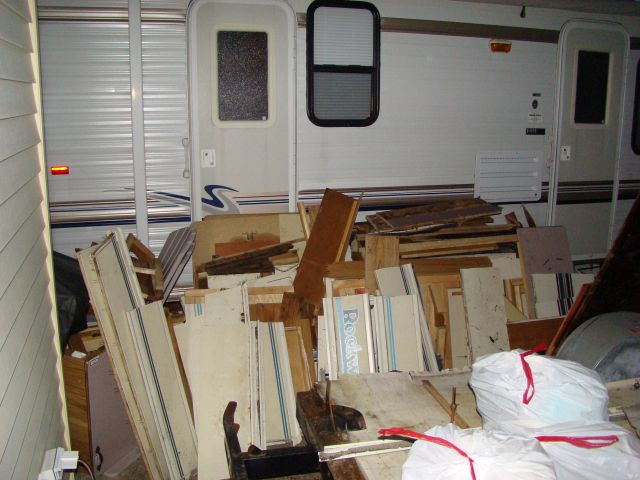
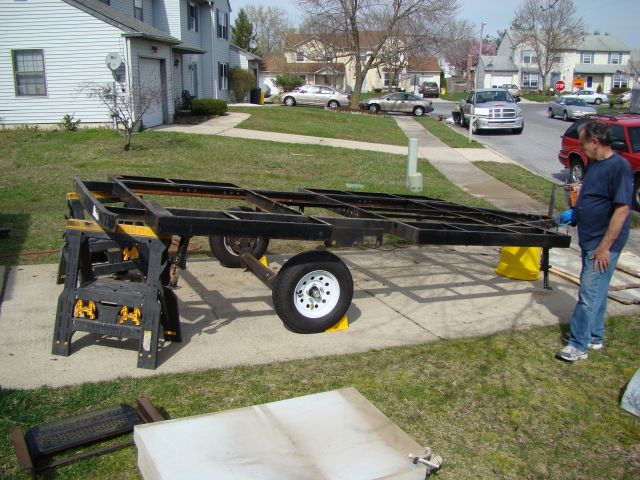
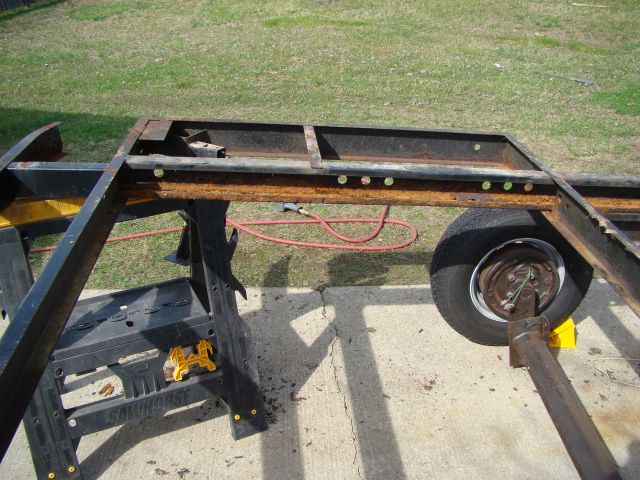
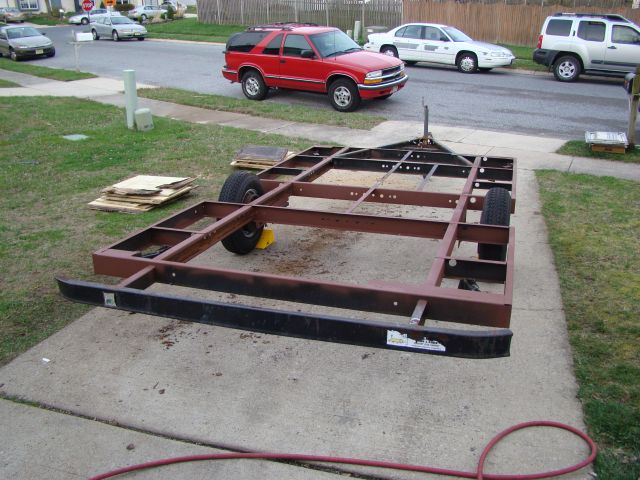
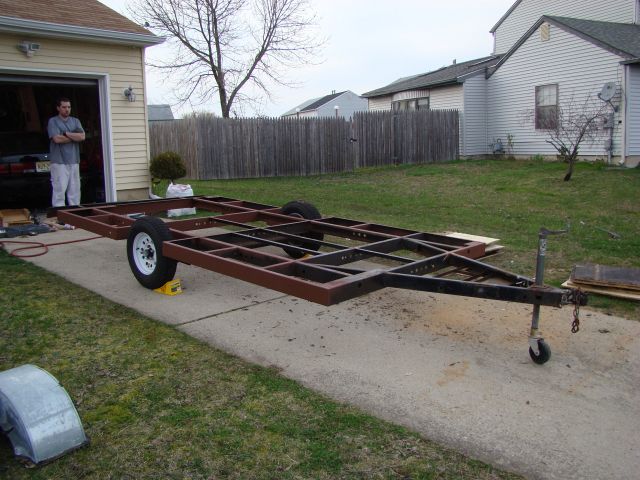
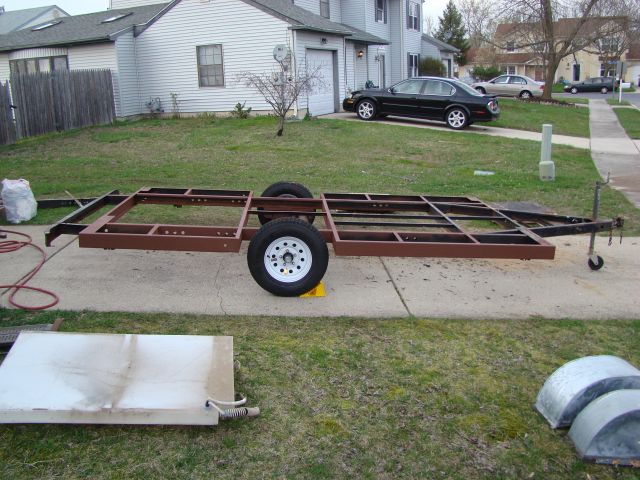
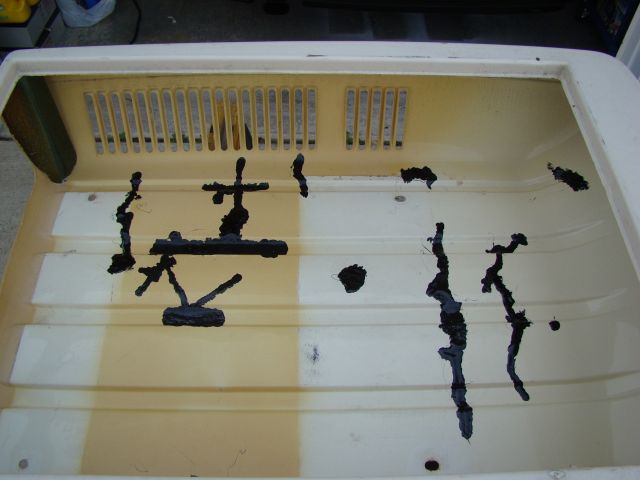
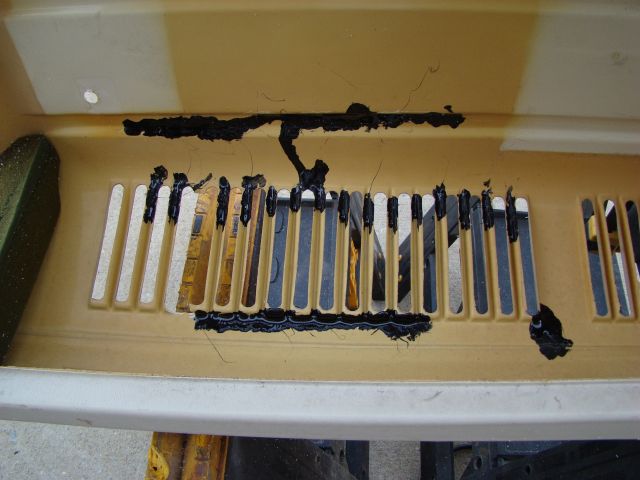
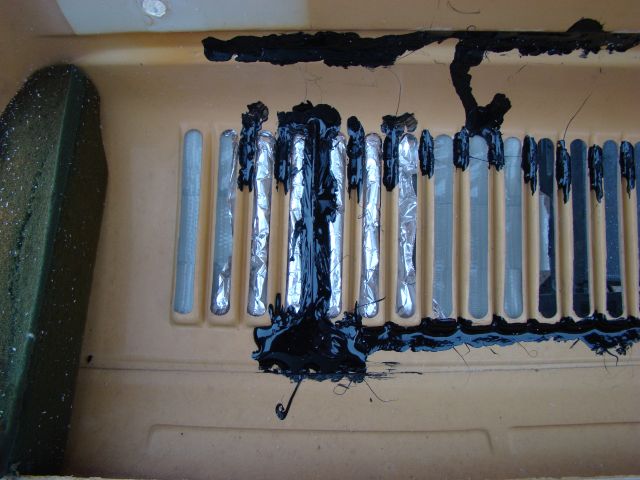
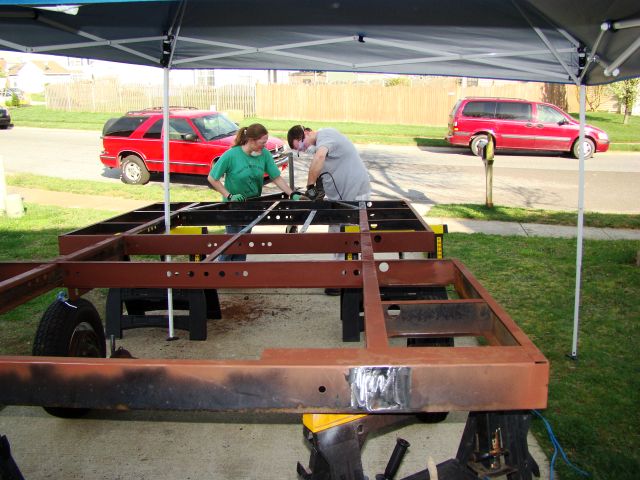
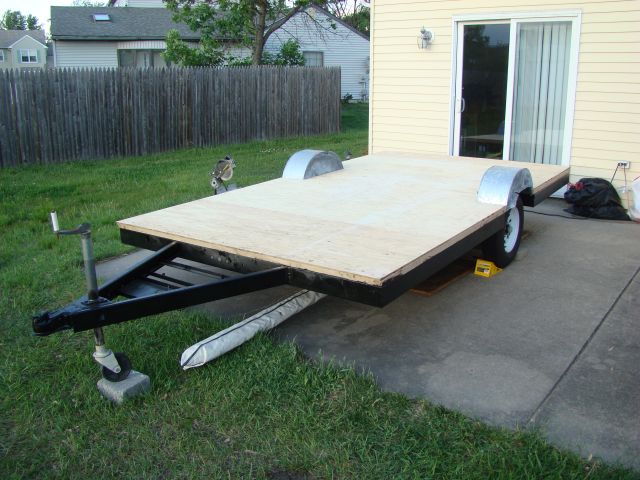
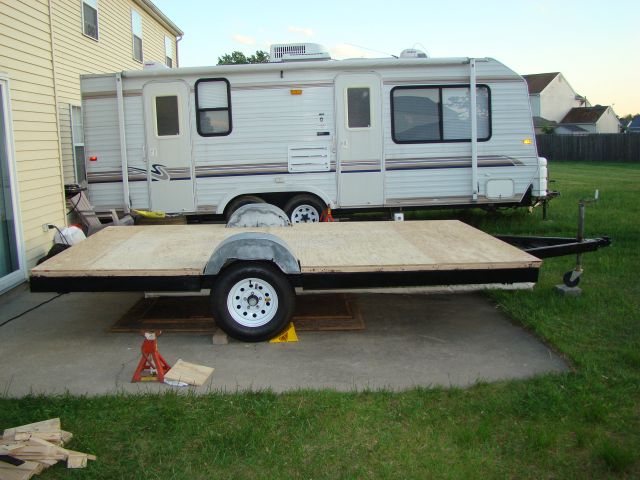
It is (or more appropriately was) a 1993 Rockwood XL pop-up, fully loaded. We paid $200 for the unit and picked it up the last weekend of March. As you might guess from the pictures, the roof was completely rotten and the lift mechanism had failed. We also had to pick up a pair of wheels and tires to get it home safely, as the existing tires were completely rotten.

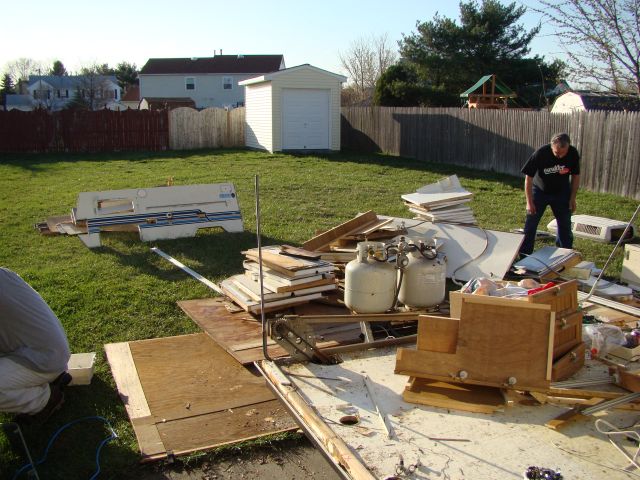
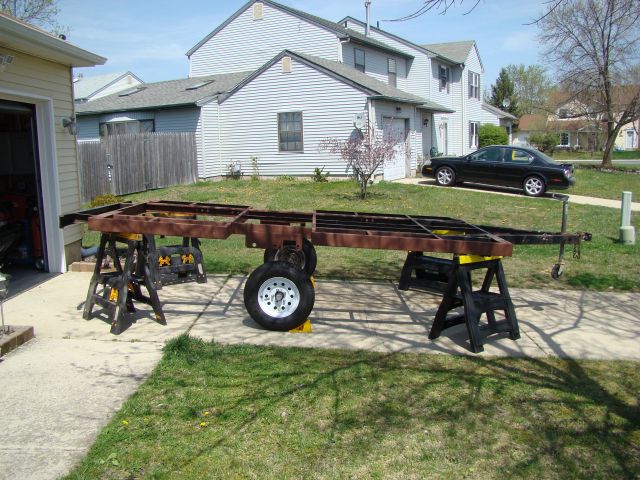
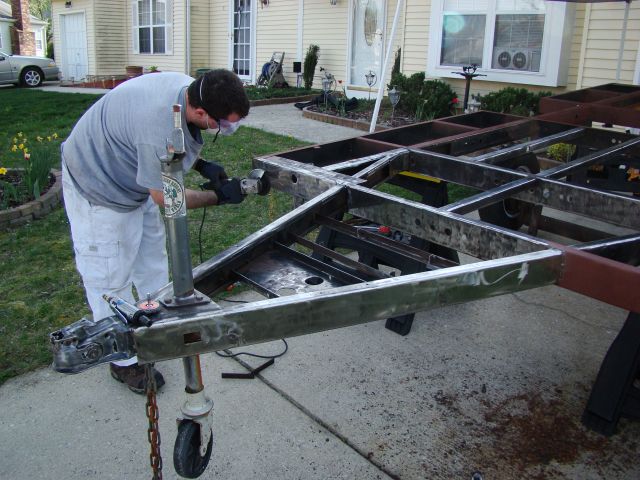
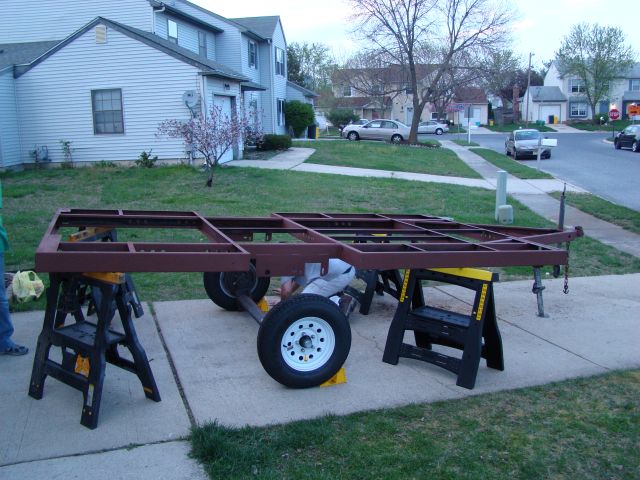
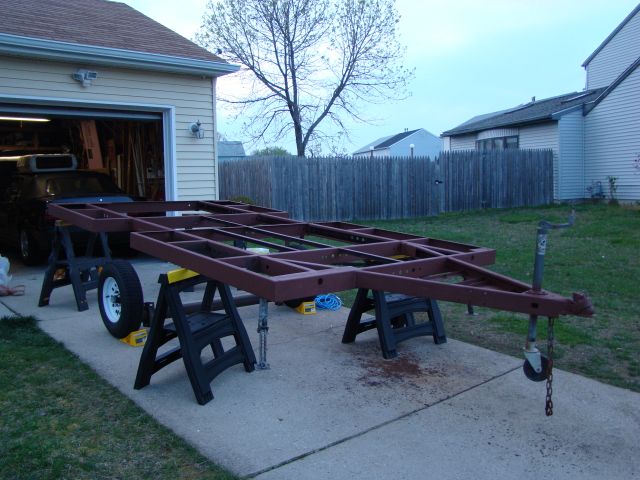
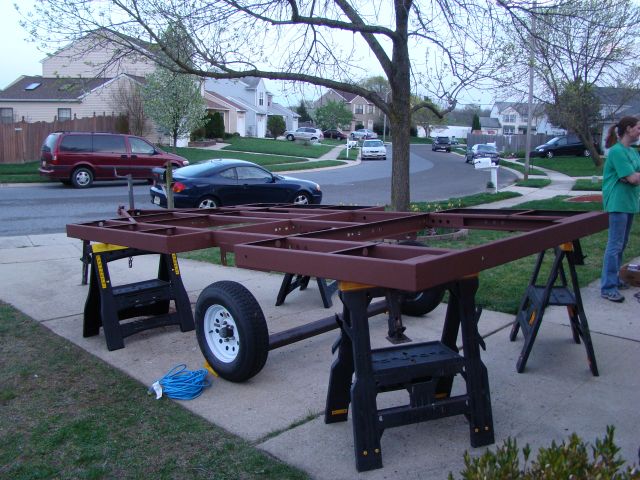
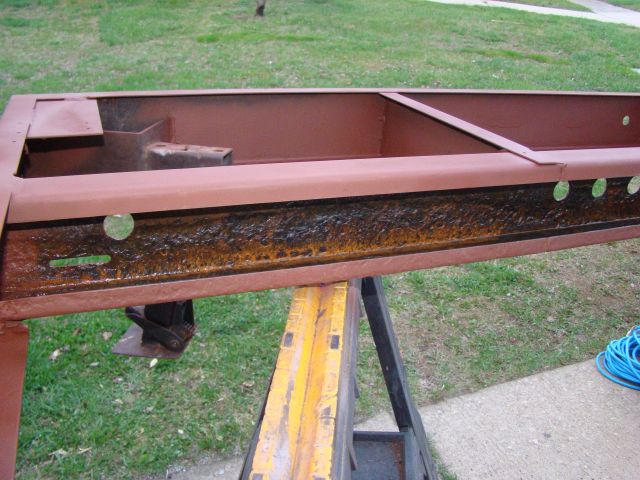
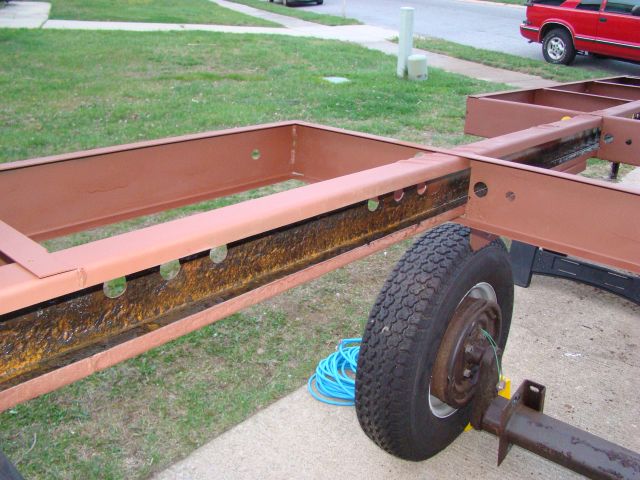
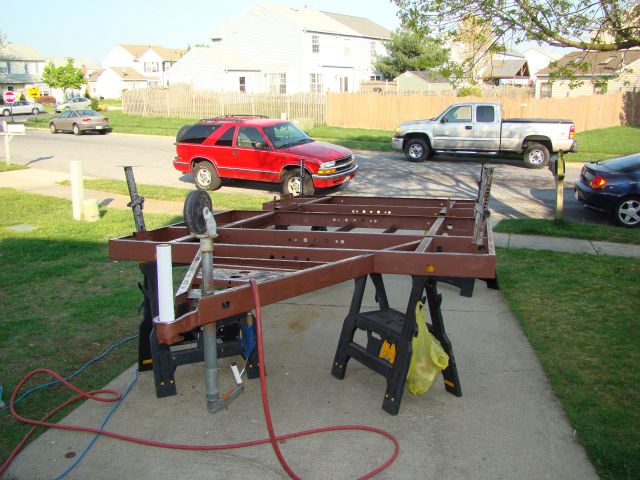
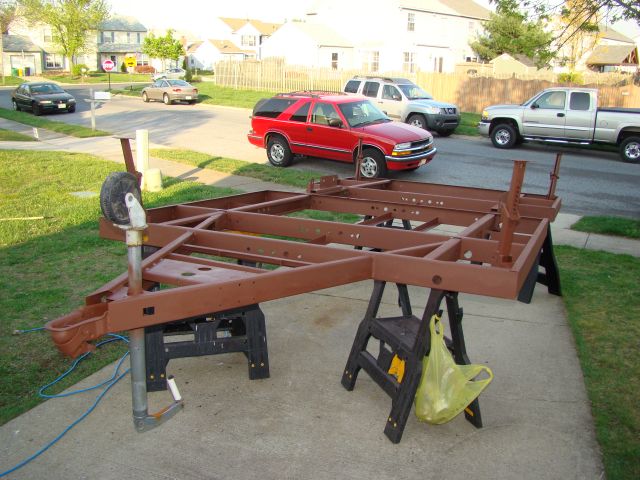
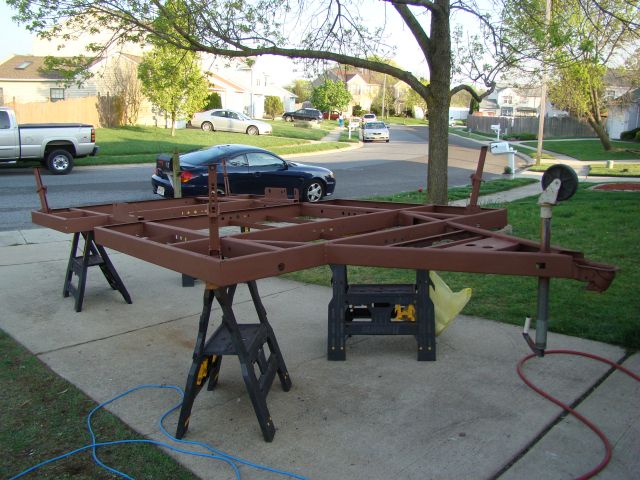
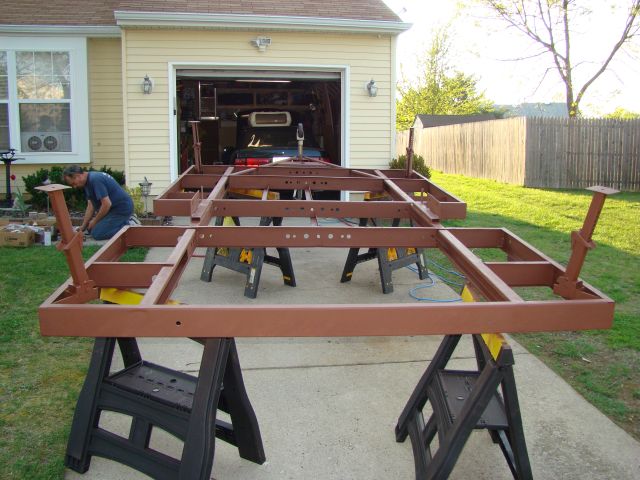
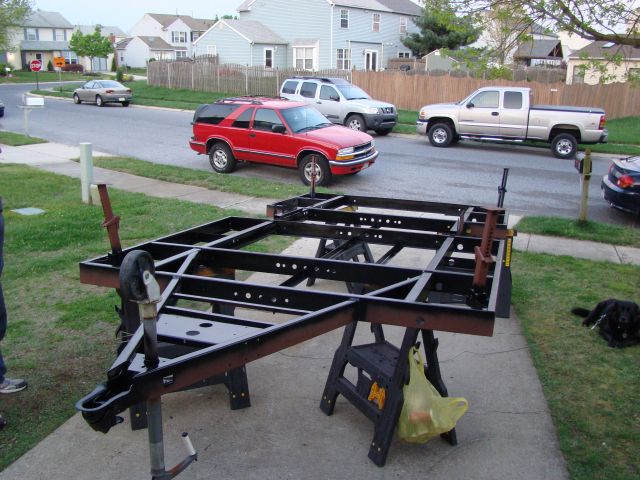
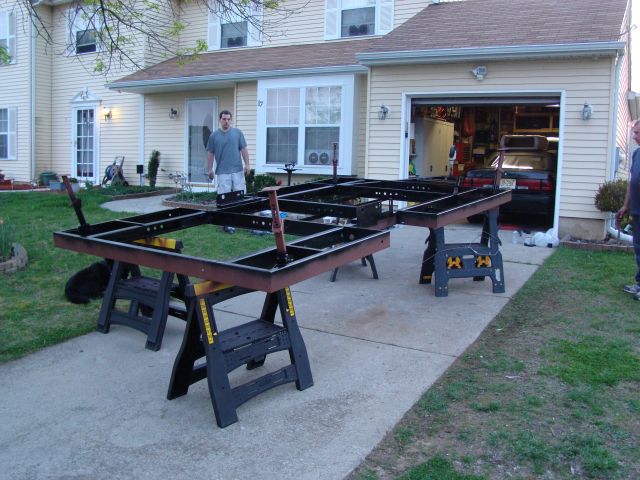
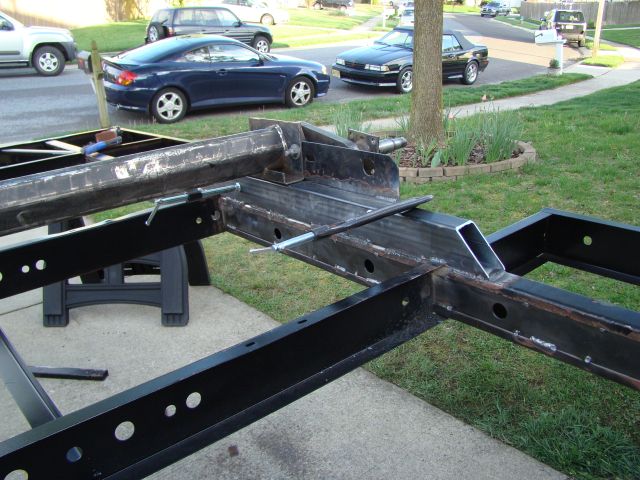
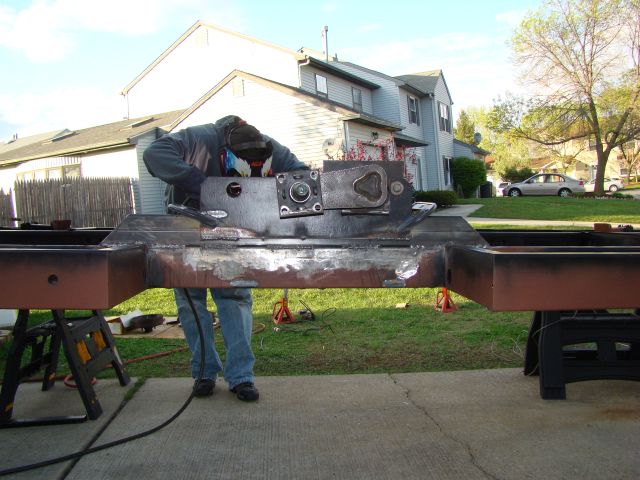
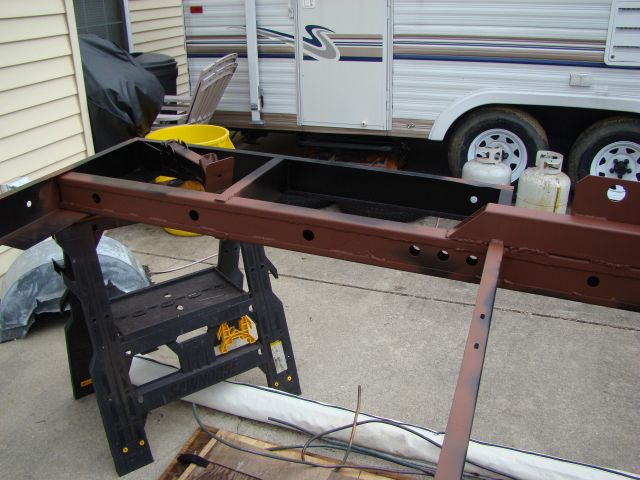
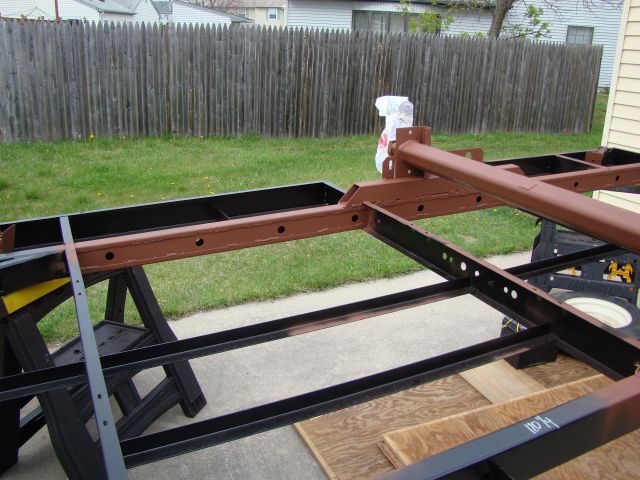
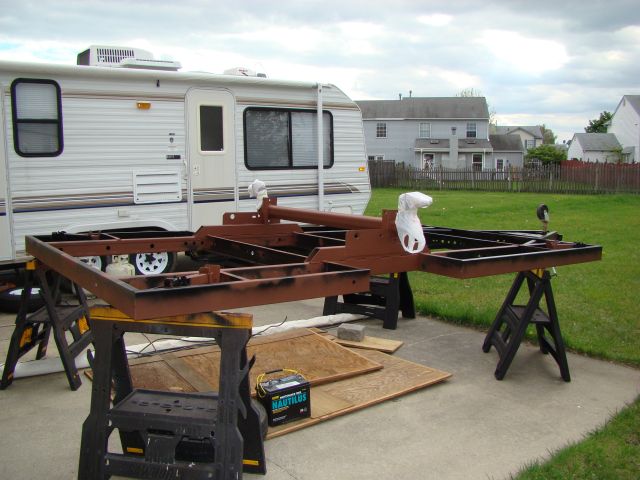
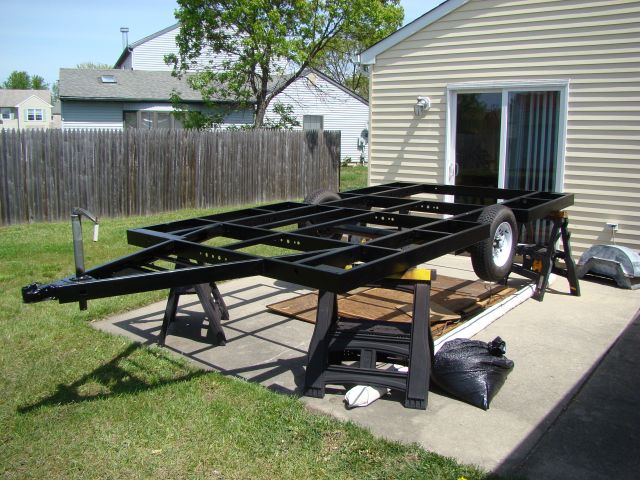
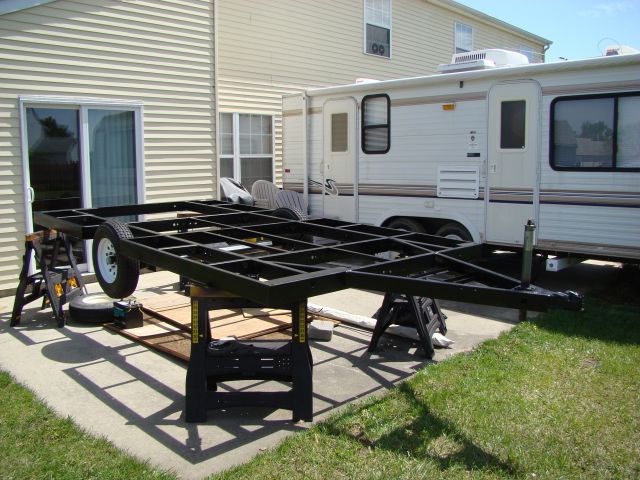
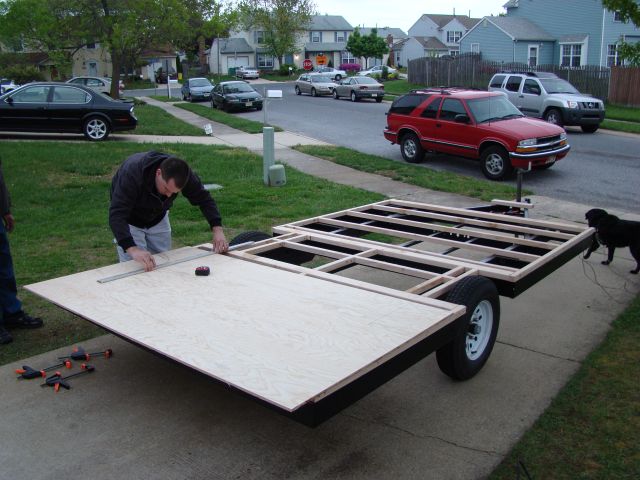
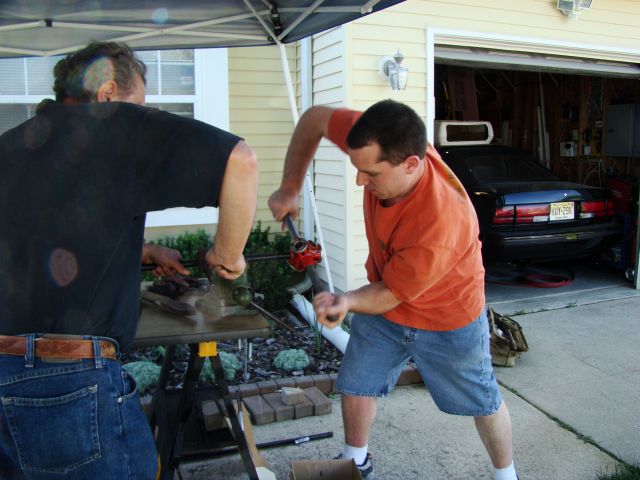
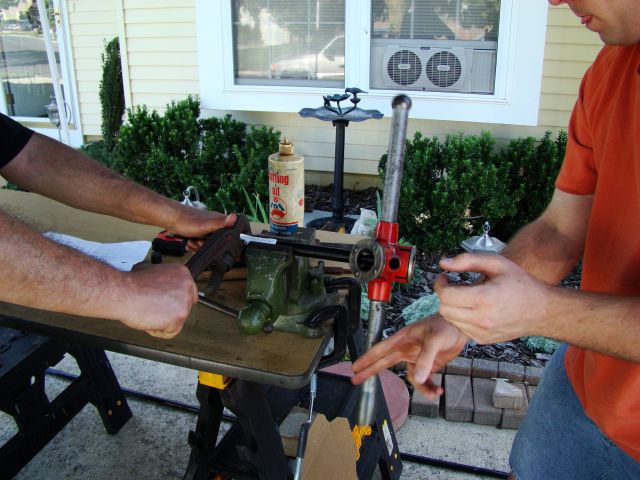
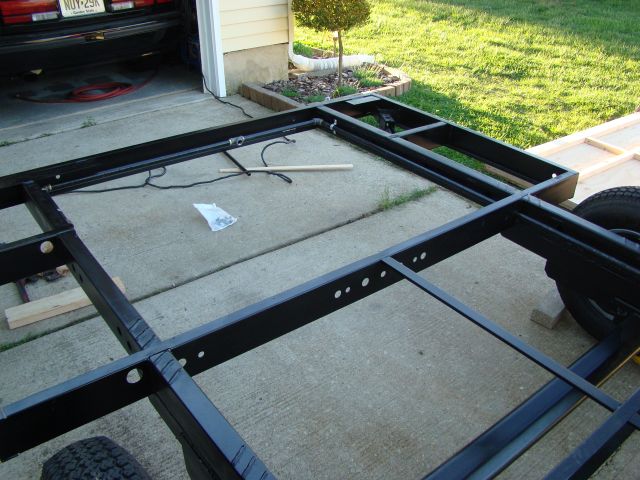
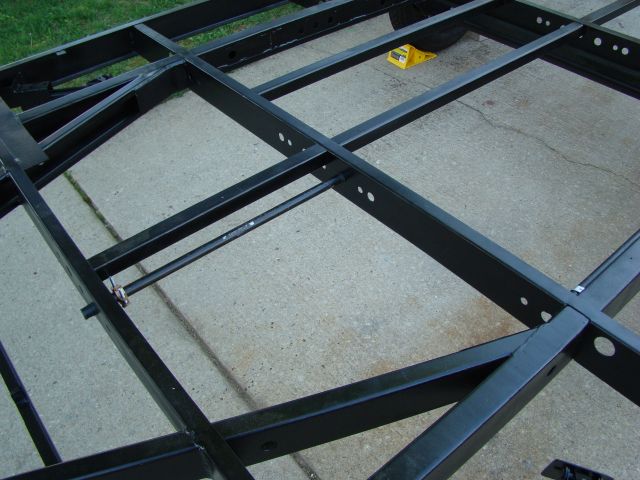
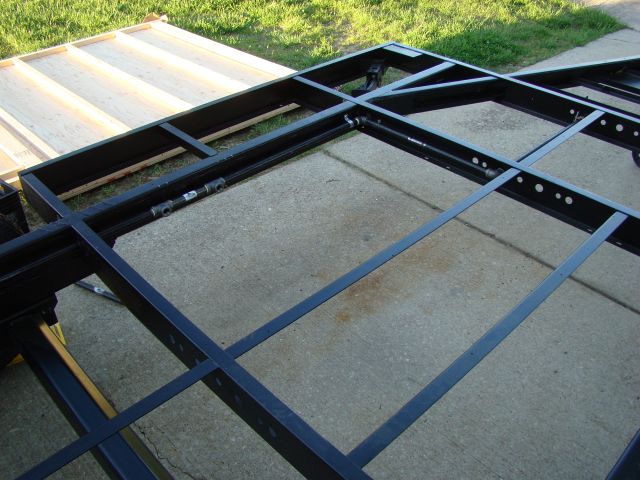
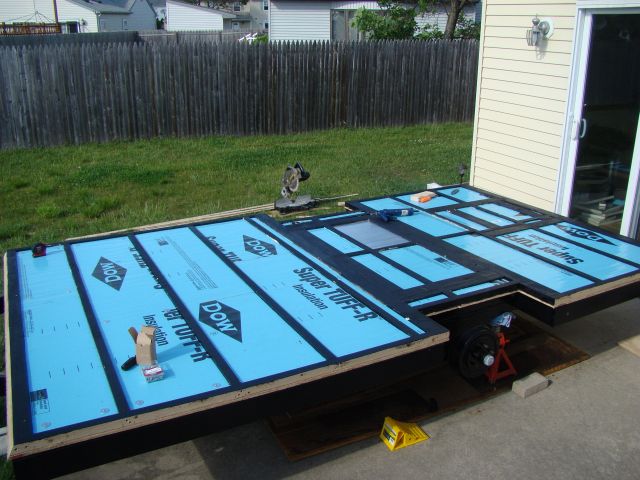
It has a roughly 7' wide by 16.5' long frame (bumper to tongue), with stabilizing jacks in each corner and an Alko Torsion Axle with 3500# running gear and 10" brakes. Dual LP rack up front with an auto-changeover regulator.

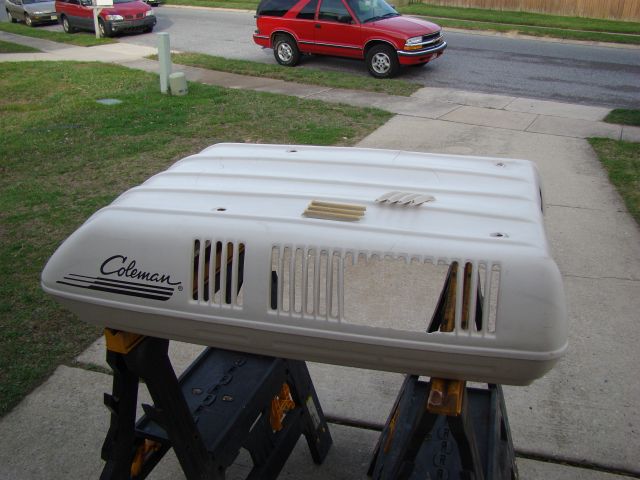
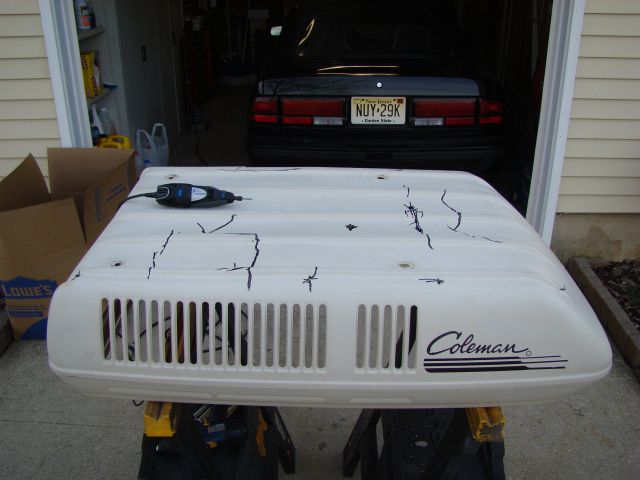
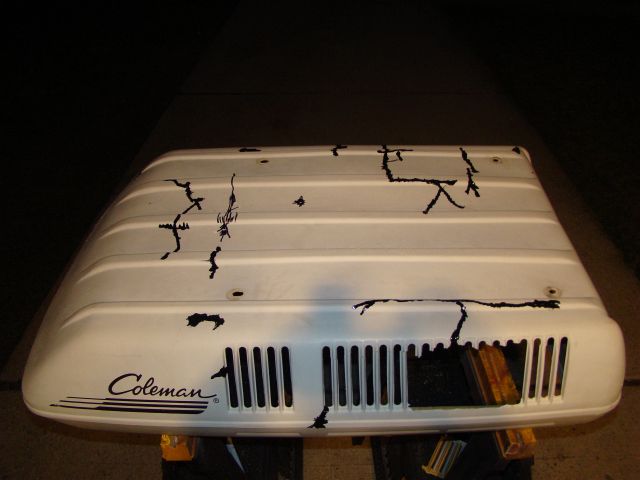
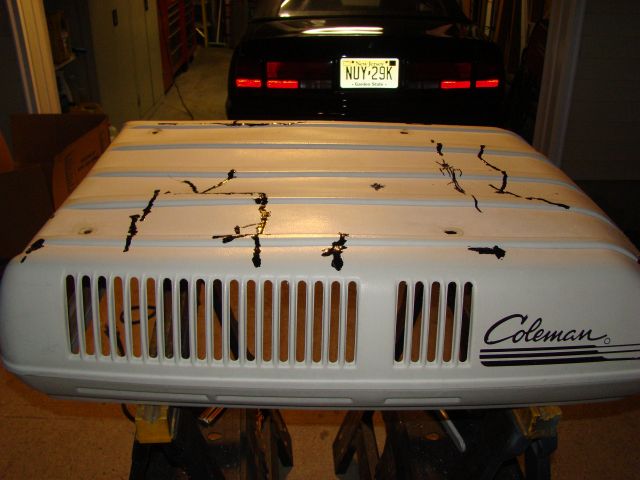
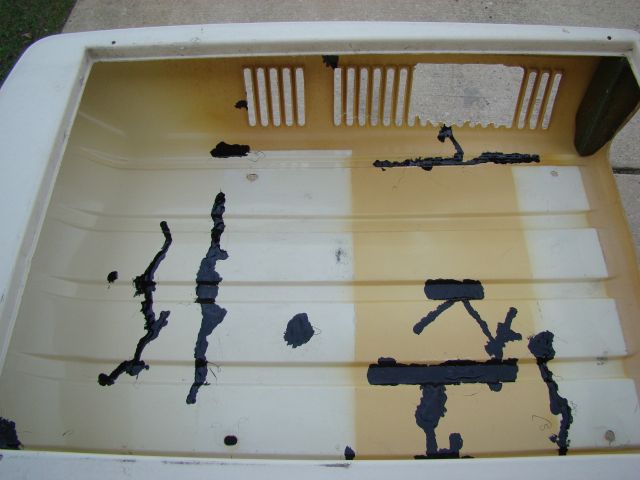
The "appliances" were dirty but appeared to be in good mechanical condition, I don't believe this unit was used much. Since we picked it up I have tested and verified of the components we intended to keep:

- Coleman 13,500 BTU roof mounted A/C
- Dometic 3-Way Fridge/Freezer
- Hydro Flame Furnace
- Suburban Water Heater
- Water Pump

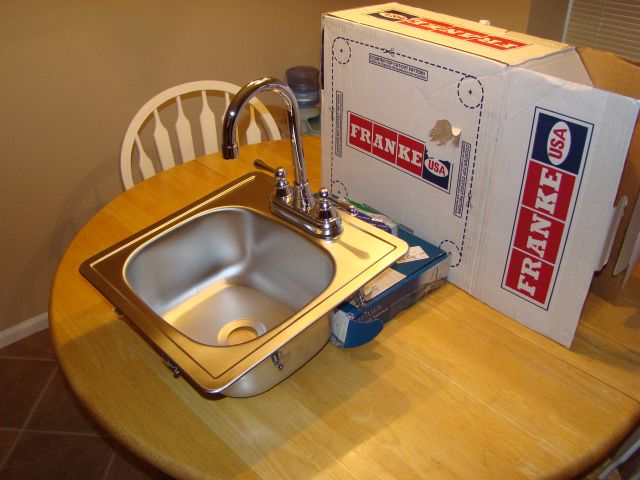
The unit also had a cooktop, small sink, shower pan, cassette toilet and converter which we will not be using in the new build. Of course, right after I got rid of the cassette toilet, I saw several posts on here from people looking for one. Sorry guys, I would have gladly passed it on if I had known they were going to become a hot commodity. :(


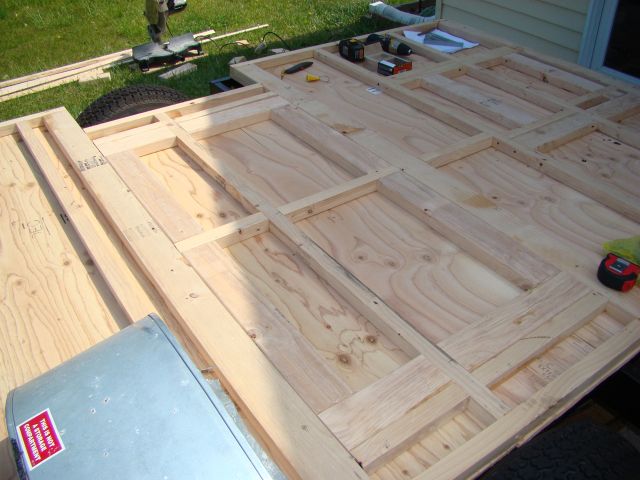
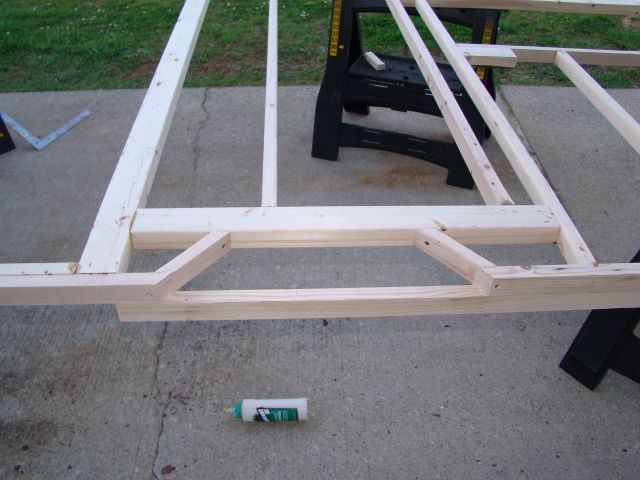
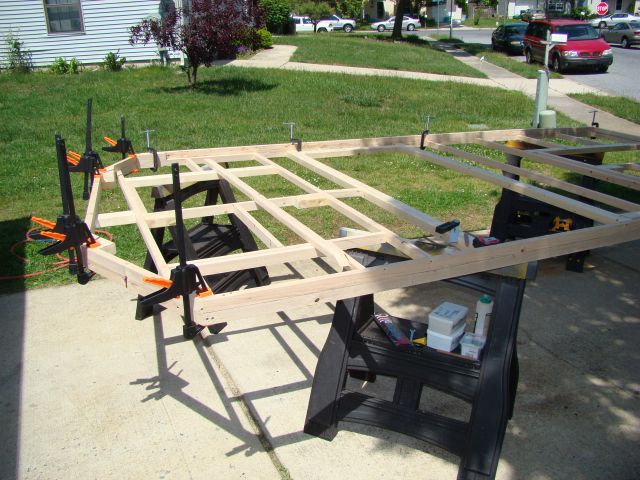
As we worked on the build, I worked on several versions of floor plans, profiles and weight and balance sheets. Big thanks to Andrew (angib) for his excellent write-ups on trailer balance. Between his information and help from another engineer named John on a Sunline forum I frequent I've been able to work up pretty accurate weight and balance information.

The current working floorplan is heavily influenced by the Que, a small travel trailer made by Sunline in 2007 before they closed their doors (for those interested, a brochure is at http://www.sunlineclub.com/docs/QueBrochurePages_02.pdf). Here's the floorplan we are working from:

Image

The bed will pull out from a L-shaped couch, and there should be enough room for it to grow to near queen size. The full size bed was a minimum requirement.

And the profile:

Image


The balance sheets and floorplan are living documents. As we've progressed, I've updated the balance sheets and have made some minor floorplan changes to help with the balance. I've tried to leave some wiggle room in the design to accomodate future weight shifts as parts are built and real world weights are obtained. Here's an example of my balance sheets, shown with full black & gray tanks:

Image


Our weight goal is to come in right around 2,000 lbs with water on board, but no gear. That will leave him about 700 lbs for clothes, food, etc. We have a hard stop around 2700 lbs, since that is what the torsion axle was de-rated to.
Last edited by fromeo on Mon Apr 18, 2011 9:01 pm, edited 17 times in total.
fromeo
Teardrop Master
 
Posts: 157
Joined: Tue Feb 27, 2007 2:01 pm
Location: Sicklerville, NJ

Postby fromeo » Wed May 19, 2010 11:24 am

With the donor in hand we were ready to get started. Most of the parts and materials seemed pretty easy to source. Paneling is the one big exception. Three hours of non-stop phone calls chasing leads and I finally found a surplus building materials store (2 hours away in Maryland) with some paneling in stock. Took a ride there one night after work and was pleasantly surprised to find a large pile of this 1/8" luann based stuff at $9.99/sheet:

Image

That should cover us for the walls, I still need to locate something decent in white for the ceiling.


Then it was time to get down to real work. The week after we picked it up, my brother and my father came down and we started disassembly.

Image

Image


..and a few hours later

Image

Image


By nightfall, we had it down to the floor and quite the pile of junk stacked up

Image

Image

Image

The scrappers must have loved me that week for the big pile of metal we wound up with..


A few days later, it was time for more work. Rolled the carcass around front into the driveway where I have access to compressed air and more outlets. First we removed the floor and the under-floor fresh water tank, then dropped the axle and put the frame up on saw horses

Image

The water was leaking into the body a lot more than it had appeared. Apparently it worked it's way through some holes in the floor and was accumulating in the left side frame rail. Found some nasty rust going on there. In this picture you can also see where the rearmost cross-member has been removed to make room for a grey water tank.

Image


Three guys, three angle grinders plus six hours of grinding, sanding and wire wheeling gets a little less than half of the frame cleaned up and primered:

Image

Image

Image

Image

Getting inside those frame rails is a real bear and chews up a lot of time.
fromeo
Teardrop Master
 
Posts: 157
Joined: Tue Feb 27, 2007 2:01 pm
Location: Sicklerville, NJ

Postby fromeo » Wed May 19, 2010 11:24 am

April 4 - April 7:

I spent a couple evening hours starting to repair the A/C shroud. Apparently the previous owner's kids used the pop-up as a skateboard ramp. The shroud took a serious beating:

Image

Image

Image


As you can see, it had some louvers broken out and it was generally pretty much busted up. These shrouds are a little expensive to replace, so I'm trying to stretch the budget a bit by repairing it.

First I stop drill the ends of all the cracks, then go to work with a dremel to bevel along those cracks. Once it's beveled, it is cleaned and the "liquid plastic" is put into place. The "liquid plastic" is shavings of ABS plastic dissolved into common black ABS plumbing cement.

Image

Image

Image


The inside sees the same action:

Image

Image


With the cracks taken care of, it's time to deal with those louvers. For this I started with CA clue (krazy glue) and a CA accelerator. The accelerator is very cool stuff. You put the CA glue on your parts, position them in place and give a little spritz of the accelerator. This makes the bond instantaneous.

Here's the stuff I used:

Image


Once the louvers were CA glued into place, I beveled the areas where they broke from the inside and added more liquid plastic stuff:

Image


At that point, we're looking OK, but I'm missing one louver. Time to try something new. I pressed a piece of aluminum foil into the good louvers, then carefully removed it and placed it over the missing spot. Secured with some tape, this gives me a very simple "mold" to work with. I placed a small plastic ABS rod into the mold cavity for some support and then filled the mold depression with the liquid plastic:

Image


It took about a week to cure since it was so thick, but the initial results are promising. There was some shrinkage during drying, and the edges are a little jagged, but it has a louver in the spot now. I think some careful application of additional plastic and then some work with the dremel tool will make it quite passable, especially when it's 8' overhead. More pictures of the shroud when I get back to working on it.
fromeo
Teardrop Master
 
Posts: 157
Joined: Tue Feb 27, 2007 2:01 pm
Location: Sicklerville, NJ
Top

Postby fromeo » Wed May 19, 2010 11:25 am

April 8th was day #2 of frame cleanup. Back up on the sawhorses:

Image


I removed the very bent rear bumper. This doubles as an action shot of my brother (Chris) and his girlfriend (at least, I think that's what she is) working:

Image


A little later, Chris attacking the header and the A Frame:

Image


Getting dark out, primer covering the day's work:

Image

Image

Image


As I had mentioned earlier, the left side frame rail held a lot of water and was heavily rusted internally. Here's a close-up shot of the worst section. This is after a lot of serious wire brush action, and is in the middle of the application of acid based rust converter:

Image


One more angle to show the extent:

Image


Jumping ahead to April 15. This is now day #3 of frame cleanup, and boy is it getting old. At least we're finally flipped over and working on the underside:

Image


A few hours later:

Image


And yet a few more hours later, we finally are 100% in primer!!!

Image

Image

Image


Now some black on the underside:

Image

Image


The rust converter did a very good job at neutralizing the rust and turning it into some form of black oxide, although it did take 5 applications to fully get all the rust converted. After some careful measuring, I decided it would be a good idea to reinforce the left side main frame rail. I made a trip to the local steel supplier and had 30 linear feet of 12ga sheared to fit inside the rails. While I was there I also picked up a 6' length of 2x3x1/8" wall steel tubing to facilitate a lift.
fromeo
Teardrop Master
 
Posts: 157
Joined: Tue Feb 27, 2007 2:01 pm
Location: Sicklerville, NJ
Top

Postby fromeo » Wed May 19, 2010 11:25 am

This brings us to Saturday, April 17. Big plans for the day - Reinforce the left side frame rail, fully box both frame rails, remove the axle and reinstall with a 2" "lift." For this I enlisted the help of an old buddy of mine, Max. Max and I have been building and fixing all sorts of weird things together since we were teenagers. It turned out to be one of those days where everything was going to fight, but we finally got it all done after about 12 hours. I was too busy to grab pictures all along, so we're going to have to make do with the shots I do have.

Here's that left side frame rail after it's been fully boxed. The right side rail was boxed by the original builder for about 6 or 7 feet above the axle. I'm not sure why they did it, and that was certainly the lighter side of the pop-up, but I liked the idea. We added the plate that is seen with all the holes. The factory boxed section had holes, so we added them as well. Not sure of the original builder's reason for the holes, but they sure came in handy to clamp the pieces in place to be stitch welded.

Image

and another angle:

Image


Here's a close-up of the 2x3 we added to act as a spacer for the 2" lift.

Image


The plates seen on the side of the axle were the only things holding the axle in place on the original configuration. We carefully cut these plates off the frame rails and moved them to the 2x3 box.

Image

Image


Action shots! Max laying a bead

Image

and yours truely welding the other side

Image


Once we were done with the modifications, we got some primer on whatever was ground or welded. It was pitch black at that point, so these shots are from the next morning.

The right side frame boxing. The careful eye will notice the factory box vs. what we added by the spacing of the holes:

Image


And the left side fully boxed:

Image


And finally an overall shot with my (very dirty) 2363 in the background:

Image


With the modifications, I'm now much more confident in the frame. The 2" lift will allow him to run a bigger wheel and tire which should add up to a 3" increase in ground clearance over "stock".


In the next few days after the frame modifications, I was able to get the frame completely painted and the axle re-mounted. Also cleaned up the brakes and re-packed the bearings.

Image

Image


Then we let it down on it's wheels for the first time in several weeks and got it weighed. The complete rolling chassis tips the scales at 509 lbs (220/wheel & 69 tongue).

Next was a trip for some lumber. Picked up 3 sheets of 1/2" ACX and a small pile of 2x4s. Ripped the 2x4s down to 2x2s and got a floor structure together:

Image

Image

Image

Image

Image

Image


The complete floor weighed in at 145 lbs, which was in the ballpark with the estimate I had made off my plan. That's good news to me, as it indicates the rest of the estimates should be as close.
fromeo
Teardrop Master
 
Posts: 157
Joined: Tue Feb 27, 2007 2:01 pm
Location: Sicklerville, NJ
Top

Postby fromeo » Wed May 19, 2010 11:26 am

Meanwhile, parts are arriving every couple of days as I find good deals. I need to take some pictures of the parts pile soon, it's getting pretty big. Scored what I think is an incredible deal on the kitchen sink and faucet. Brand new Franke brand stainless bar sink and a Pegasus bar faucet. Retail around $175 for the pair, $40 on ebay. I think it'll look nice in there :)

Image


Mow we're into the first week of May. Drug the trailer out front and took some measurements to get the LP trunk in place. A quick trip to Home Cheapo for some black pipe and fittings and then we got to work.

Cutting and tapping some pipe:

Image

Image


Got the pipe routed through the frame and secured:

Image

Image

Image

Image


That was about it for that day. A few days later, we were back to work, fighting crazy 50 MPH winds.

First we flipped the floor and added some blocking to support the waste tanks. First the black:

Image


Then the grey:

Image


Next up is the evil smelling black goo. 2/3's of the gallon did the job.

Brush the corners and edges:

Image


Then use a squeegee for the large, flat areas. All coated it looks like this:

Image

Image


A close-up:

Image


With that done, it's time for some floor insulation. We went with Tuff-R foam, 1" thick. Cut a tiny bit oversized for a press fit, and used flashing cement for a belt-and-suspenders approach:

Image


Next, we attached the wheelhouses. These were sealed with flashing cement, and sheet metal screws every 2" or so.

Image

Image


For me, getting those wheelhouses installed was a major milestone, as those are the first parts to be re-used from the original pop-up.

Image


Finally flip the floor over for the last time, line it up and bolt it down:

Image

Image

Image


An underside shot, because I think it looks neat :)

Image
fromeo
Teardrop Master
 
Posts: 157
Joined: Tue Feb 27, 2007 2:01 pm
Location: Sicklerville, NJ
Top

Postby fromeo » Wed May 19, 2010 11:27 am

Last Monday I pulled out the table saw and ripped a large pile of framing members from Fir 2x6s. Then on Thursday we got back to work. First we spent a few hours filling the screw and bolt holes in the floor, then we moved onto some framing work. We got the square sections of the door side wall framed before we ran out of daylight. The garage is a bit full, so the wall spent the night in my hallway:

Image

Image

Yes, I have a very understanding wife! :lol:


Saturday we finished up the door side wall. Wound up building the front section twice, since I made a big mistake the first time and didn't leave enough room for the front window. Was very frustrated and didn't grab the camera until we were almost done.

Here's the wall with a test fit of the door, windows and cargo door:

Image

Image


And the wall standing up for the first time:

Image

Image


Then we just added the last of the clearance for the wheel wells:

Image


Sunday I was by myself but really wanted to get the street side wall framed. Put the door side wall up on the sawhorses, and started framing the street side wall on top of it. This was to get the two as identical as possible. No, you can never have too many clamps :)

Knocking out the front angles first:

Image

Image


A little while later with more framing members in place:

Image

Image

Image


And finally all framed up and test fitting windows and the cargo door:

Image

Image

Image

Image

Image


The framing members are 1" x 1.5", from a 2x6 ripped into 5 equal pieces. The headers are 2x3. The walls are pretty light, will get them on the scale once they are skinned.


The next step is to get the linoleum down, panel the side walls and get them in place. Then the interior bath walls can be built, and finally the front and rear walls. Hope to get some time in on it tomorrow.


- Frank
fromeo
Teardrop Master
 
Posts: 157
Joined: Tue Feb 27, 2007 2:01 pm
Location: Sicklerville, NJ
Top

Postby grizz » Wed May 19, 2010 12:11 pm

WOW !!

What more can I say ?

Well done.

The timber in the house made me grin madly.

Watching this build.
Greetings from England.

Rian.


Hoping to get it all done in time.
User avatar
grizz
1000 Club
1000 Club
 
Posts: 1210
Images: 29
Joined: Mon Sep 21, 2009 2:37 pm
Location: Rochester, Kent, UK
Top

Postby parnold » Wed May 19, 2010 12:19 pm

Wow!

Excellent progress!

:thumbsup: :thumbsup:

I can't wait to see how this turns out.
User avatar
parnold
Donating Member
 
Posts: 2344
Images: 302
Joined: Mon Feb 08, 2010 4:49 pm
Location: Northwest New Jersey
Top

Postby J.Heyboer » Thu May 20, 2010 11:26 am

Nice job on refinishing the trailer frame! That looks like it took some serious determination to make lemonade from that lemon.

Keep it up.
User avatar
J.Heyboer
Teardrop Advisor
 
Posts: 93
Images: 84
Joined: Mon Apr 19, 2010 12:00 pm
Location: Zeeland, MI
Top

Postby Emaxx3 » Thu May 20, 2010 1:08 pm

awesome! what a build... and heck of a score on the donor.

Jon
Emaxx3
Teardrop Inspector
 
Posts: 19
Joined: Sun Apr 18, 2010 3:41 pm
Location: Chandler, AZ
Top

Postby StPatron » Thu May 20, 2010 1:12 pm

Very enjoyable read, Frank. :applause:

I like how you repaired the a/c shroud. I also started with an old pop-up and am now working on the interior. It seemed to take forever to get the chassis ready and I didn't have near the amt. of rust you had to contend with. Lotta hard work. I'll be watching this thread for sure.
User avatar
StPatron
Donating Member
 
Posts: 748
Images: 297
Joined: Tue Dec 15, 2009 8:38 pm
Location: OK
Top

Postby YuGun » Thu May 20, 2010 2:50 pm

Very beautiful built.
Keep it easy
User avatar
YuGun
The 300 Club
 
Posts: 445
Joined: Sun Apr 11, 2010 1:25 pm
Location: Turkey
Top

Postby Justin & Katy » Thu May 20, 2010 4:39 pm

You guys are doing a great job!
Image
User avatar
Justin & Katy
Teardrop Master
 
Posts: 247
Images: 81
Joined: Tue Jan 05, 2010 3:26 pm
Location: Amarillo, Tx
Top

Postby mikeschn » Thu May 20, 2010 4:58 pm

Good job on the photo essay too. I feel like I am there watching you guys work.

Need another beer? ;)

Mike...
The quality is remembered long after the price is forgotten, so build your teardrop with the best materials...
User avatar
mikeschn
Site Admin
 
Posts: 19202
Images: 479
Joined: Tue Apr 13, 2004 11:01 am
Location: MI
Top

Next

Return to Build Journals

Who is online

Users browsing this forum: No registered users and 16 guests