Un-named Travel Trailer Build - 99% Done! April 18

...ask your questions in the appropriate forums BUT document your build here...preferably in a single thread...dates for updates, are appreciated....

Postby fromeo » Wed Nov 24, 2010 11:33 am

Cliffmeister2000 wrote:The 80 inch rule seems to be well adhered to. I have heard that the 80 inch width is calculated from the widest points of the trailer, which may be the door handles.


Cliff, that's my understanding as well. We're 84" wide on the body, well over the limit, so it was a no-brainer to add the "ID bar" and the additional clearance lights.

With most tear builds being 6' or less, the lighting requirements are pretty easy to meet.
fromeo
Teardrop Master
 
Posts: 157
Joined: Tue Feb 27, 2007 2:01 pm
Location: Sicklerville, NJ

Postby fromeo » Wed Nov 24, 2010 11:38 am

Whtknight, here's your next "fix" :D

A quick update with what we got done this past weekend..

My brother and father came down on Saturday so we could get everything mounted up on the roof. My father and I worked on the roof stuff, and my brother worked on installing a few more of the exterior doors.

A shot down the road side. Up front is a standard 14" crank-up vent, then the radio antenna, the grey tank vent, the skylight dome over the shower, a fan-tastic fan in the bathroom, and hiding behind that is the black tank vent.

Image


Over on the door side is the crank-up TV antenna, and obviously the big thing in the center is the A/C.

Image


Another door side shot, this one from the rear, better shows the black tank vent towards the back.

Image


The A/C shroud is the same one I posted many months back that was all busted up and in need of some repair. A refresher:

Image


Image


The A/C install itself was very easy with the exception of removing the now almost 20 year old gasket from the base. I think it took 2 hours to change the gasket and 20 minutes to install the rest of the A/C. :lol:


The repair came out pretty good. The replacement louver I had molded up isn't perfect, but it looks just fine from the ground. The black repair material was a little tricky to get covered with white paint, but it worked out in the end. After a thorough cleaning, the shroud was scuffed good with a grey scotch brite bad, then cleaned again and shot with a coat of Bulldog adhesion promoter. Once that dried, it got two coats of white primer and two coats of white paint, all Krylon rattle cans.


My brother got the rear cargo door installed and the outdoor "entertainment" panel next to the entry door. The rear cargo door was a tough one, apparently we made the opening just a tiny bit too small, so it took a while to get that one fit:

Image


Then we headed inside and cut the interior shrouds to fit and got those installed. The front vent:

Image


The A/C shroud. This was also cleaned up, scuffed and painted bright white. The "output" grilles are not yet installed in this pic. Right next to it there is the crank for the TV antenna:

Image


And back in the bathroom is the fan-tastic fan:

Image


Right after that, as it started to get dark, somebody smacked a pole around the corner, knocking out the power. We fired up a couple of lanterns, cleaned up and called it a day.


Sunday I got out and eternabonded the front roof seam. White on white is kind of hard to see, but it's there. I also installed Maxx-Air II covers over the vent and fan-tastic fan, and finally finished up with the lap sealant across the rear trim:

Image


The new front trim I ordered came in yesterday, so I'll be picking that up this afternoon along with some more butyl tape. The plan is to finish the front trim and the gutters this weekend and get the last three exterior light fixtures installed so the trailer is weathertight. Time permitting we will hopefully get a few windows in as well.

We're finally at the point where a punch list is feasible. For a long time it was just easier to have it say "To Do: EVERYTHING!" but now we're down to maybe 20 or so tasks, a lot of which are interior and can be done in any weather with the heat running.


- Frank
fromeo
Teardrop Master
 
Posts: 157
Joined: Tue Feb 27, 2007 2:01 pm
Location: Sicklerville, NJ

Postby whtknight » Wed Nov 24, 2010 12:18 pm

Frank,

Thanks for the "fix"... :o :)

Awesome work.... You have no idea how this build has affected me personally.. in a good way of course... :lol: I show this build to my wife and she is game for a new, much better build and your build is a great premise to work from. Lots and lots of great idea's and I'll be referring to it over and over.

Since our weather here isn't as extreme (most of the time) in the winter, I'm hoping by Feb. to start the new build and get moving forward. This time, I won't be so "easy" on myself and just go for the basic "its campable" mindset.

Thanks again for the great documentation and keep up the great work and inspiration.
User avatar
whtknight
Teardrop Builder
 
Posts: 27
Joined: Wed Jun 16, 2010 9:14 pm
Location: Irving, Texas
Top

Postby S. Heisley » Wed Nov 24, 2010 7:00 pm

Frank,

Your build and build thread are amazing. I don't know how you learned to do so much and do it so well! I look forward to your next update and I'm certain you look forward to finishing it! Unlike an ocean going ship, though, I don't think you'll be cracking a bottle of bubbly over it when it is done! Maybe you'll pour a little of the fizzy stuff on it? :lol:
User avatar
S. Heisley
Super Lifetime Member
 
Posts: 8772
Images: 495
Joined: Mon Sep 17, 2007 10:02 am
Location: No. California
Top

Postby fromeo » Fri Jan 07, 2011 5:05 pm

Short days, cold weather, snow, and the holidays have slowed us down considerably, but we're still plugging along as much as possible.

Right around Thanksgiving time, the new front corner trim I ordered came in. We got that installed along with the gutters and awning rail right away. The new trim was much more cooperative around the bends. The top bend was still a tough one to do, but at least with the shorter side leg of this stuff it was actually possible. I also installed the last remaining trim strip across the front of the roof and got that all sealed up with dicor.

Once that was done, I had my brother working on getting the windows and other through the siding stuff in place. While he was doing that, I was able to get the remainder of the outside lighting complete, and then my father and I finished the LP plumbing from the trunk up to the appliances. Here's some pics!


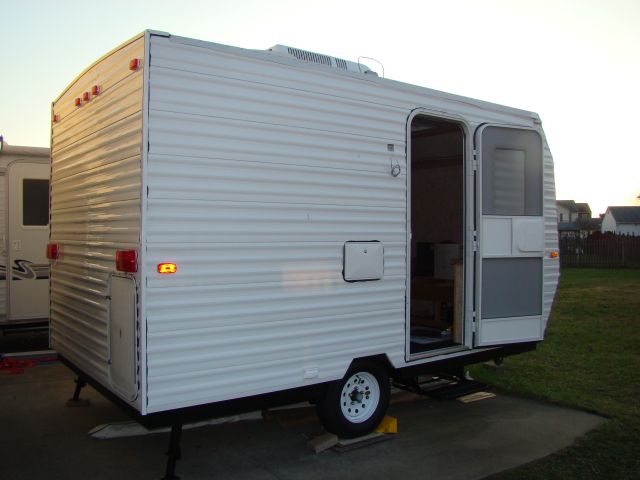
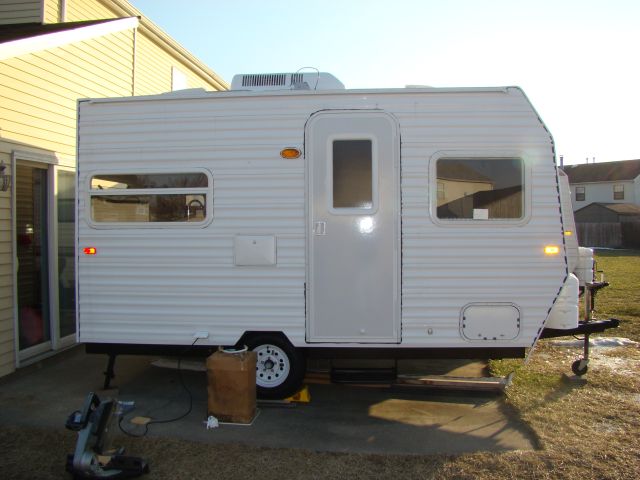
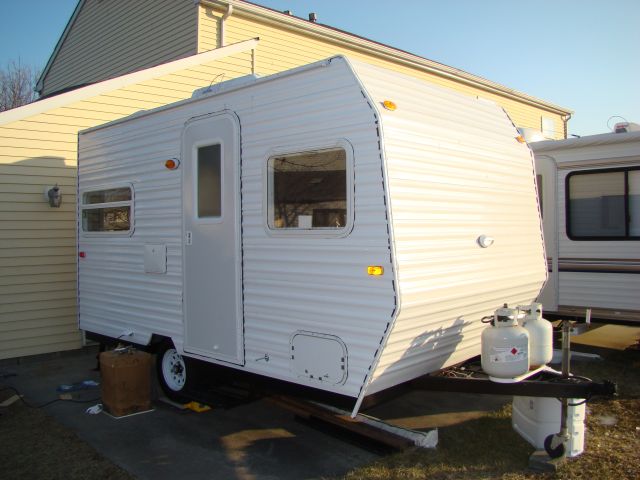
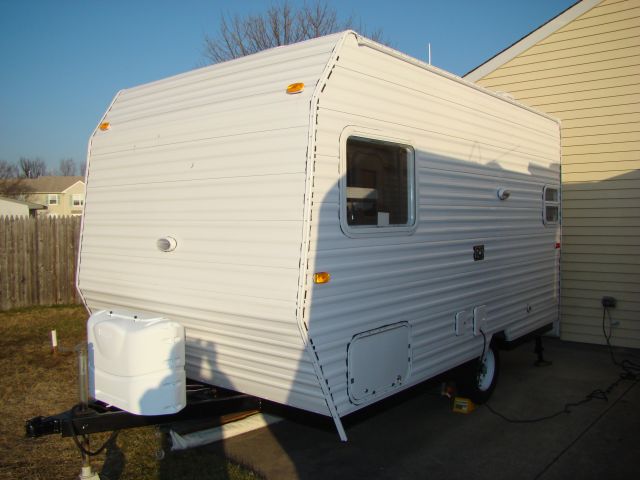
From the door side, now with windows and a porch light:

Image


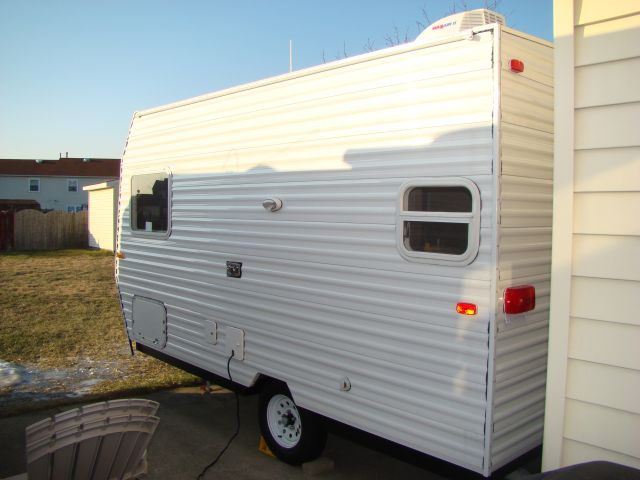
The rear, with the window and the door/vent for the refrigerator:

Image


The street side, with the windows, furnace vent and side light fixture:

Image


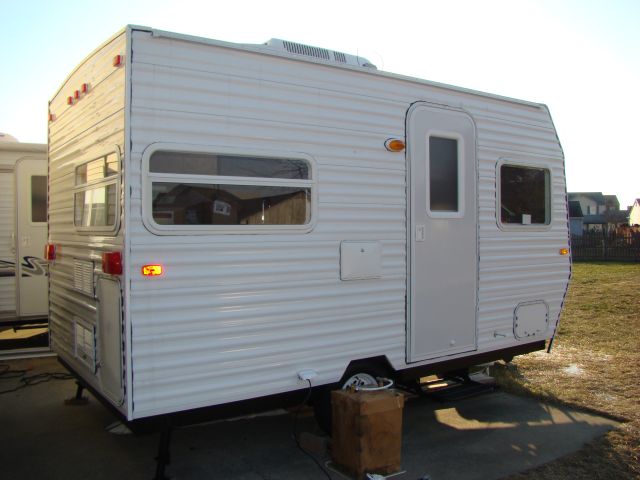
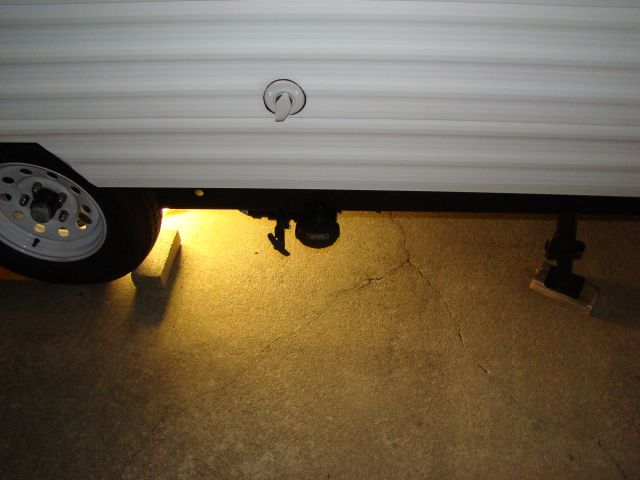
The front with the dual LP rack installed and covered, plus a light up front to make nighttime hitch/lp work easier:

Image


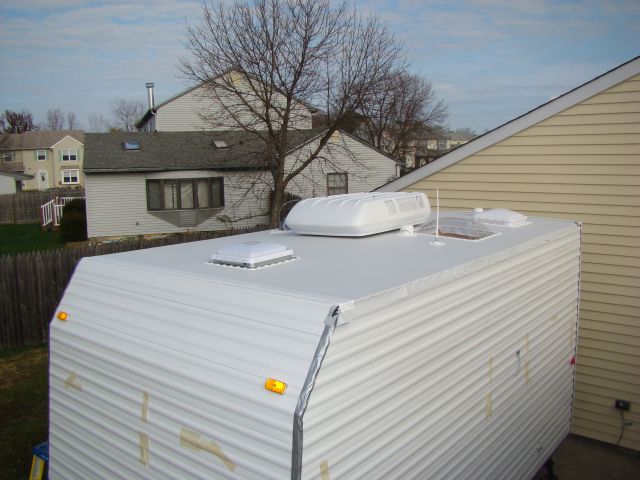
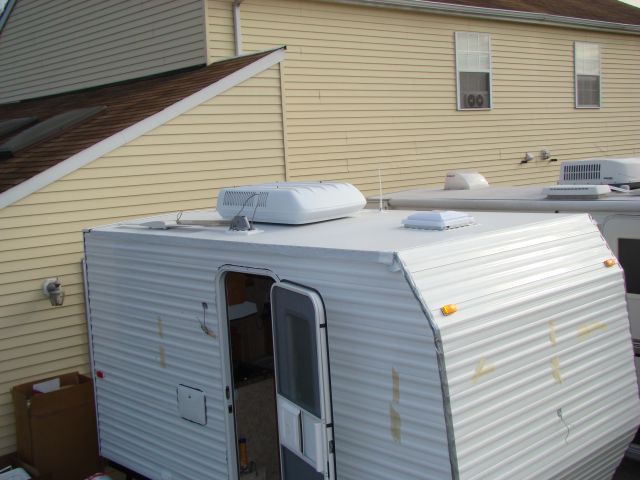
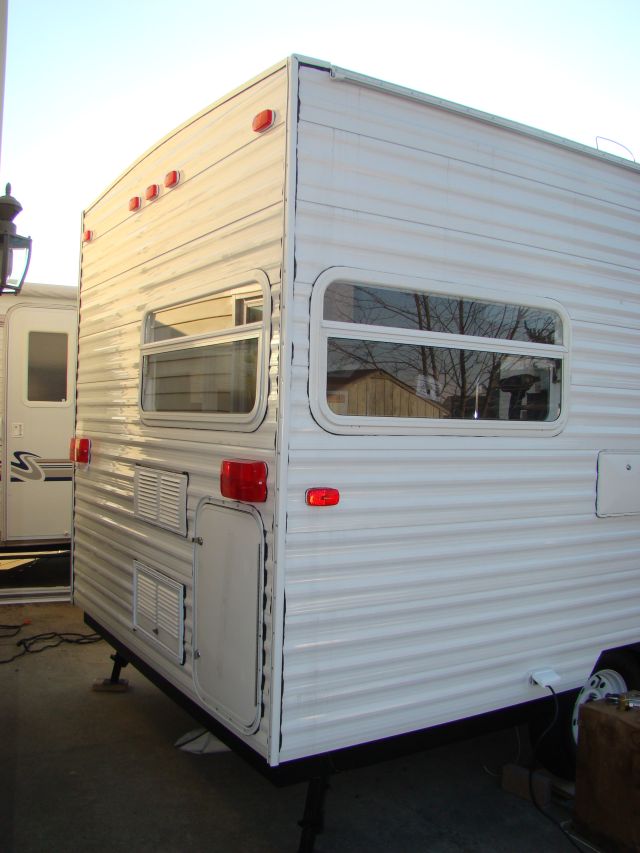
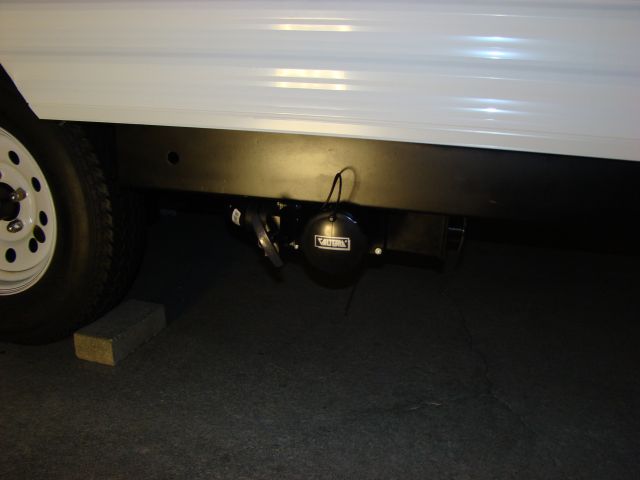
A few other angles of the trailer, still a ton of butyl tape to trim when it warms up a little. The front trim is still hanging long and needs to be trimmed. Also one of the pictures shows the LP rack uncovered:

Image


Image


Image


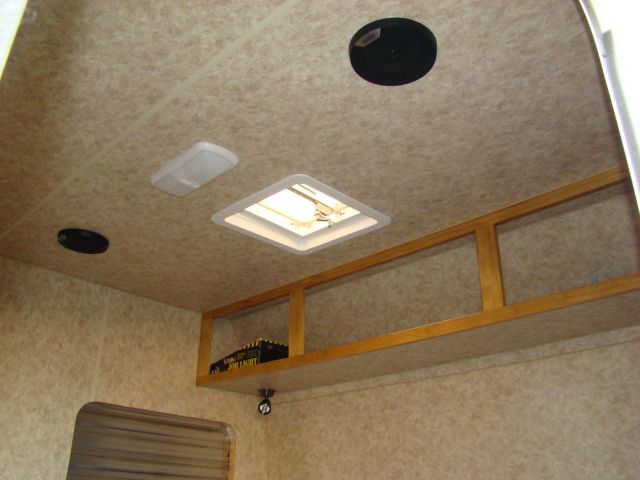
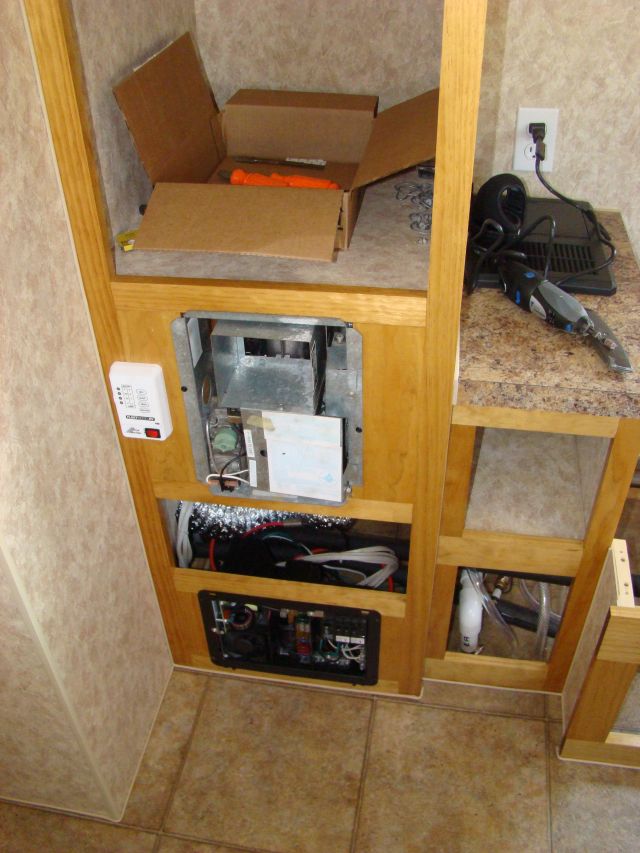
All the appliances have been plumbed into the LP with the exception of the water heater. That needs to be installed after the inserts are installed on the couch, and those still need polyurethane. For now, the line is run and plugged. The furnace works just fine and does a great job of heating the trailer. 70F inside is no problem at all with the outside temperature in the low 20's. Even in those conditions, the furnace does not run excessively, so I guess we did OK with the insulation. I have started adding a small run of flex duct off the furnace into the bathroom so we have no issues keeping it warm in there with the door closed, you can see some of the flex duct in this shot, I'll get a better one once I bend up the rest of the ductwork:

Image


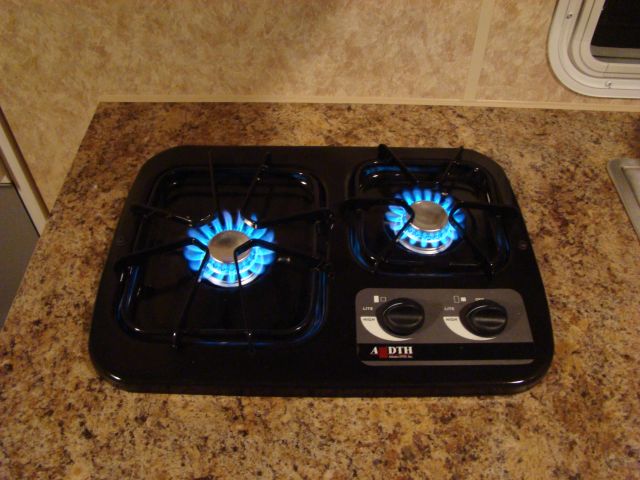
Since you can't see the furnace making heat in a picture, this one will have to do - cooking with gas!

Image


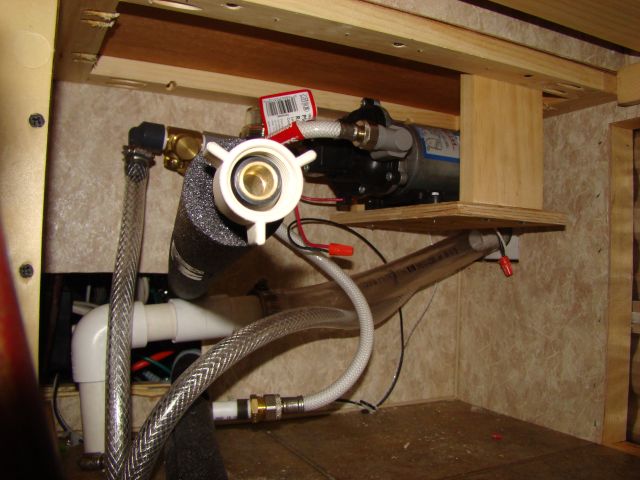
A couple of weeks back we got the fresh tank mounted back up underneath and started running the hoses to it. Yesterday we finished that up, mounted the pump and got it all connected. The pump and these hoses are all located under the table between the couch and the closet, so this is all hidden and will be accessible through a small door. If you look closely you can see a 3-way valve to add antifreeze for winterizing and behind the price tag is a pump inlet strainer. The section of rigid PVC was used to make the relatively tight bends required to get through the floor and down to the tank as 1.25" hose is not very flexible. The pump wiring still needs cleaned up:

Image


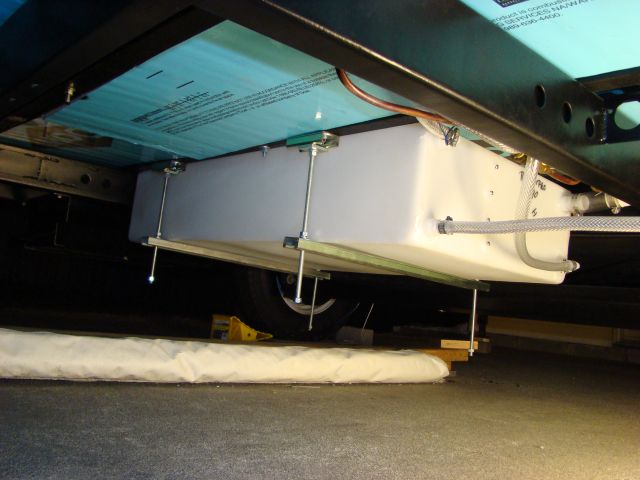
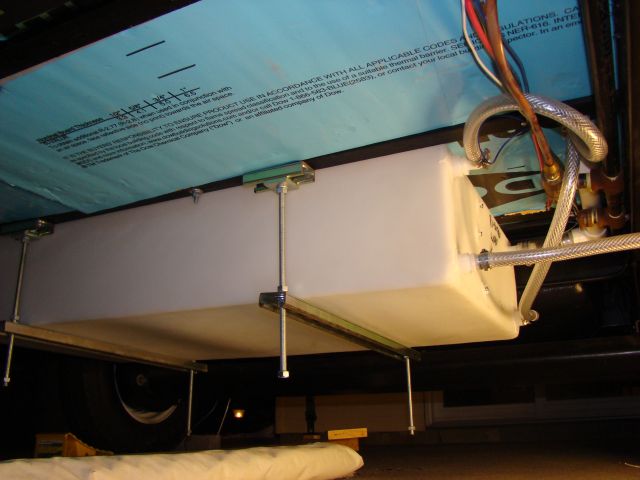
Here's the fresh tank underneath. It is supported by a couple of lengths of unistrut suspended on threaded rod. Everything is to be lockwashered and double-nutted to make sure it stays where I put it. I still need to install a cross brace between the two pieces of unistrut, tighten it all down and cut the rods to length.

Image


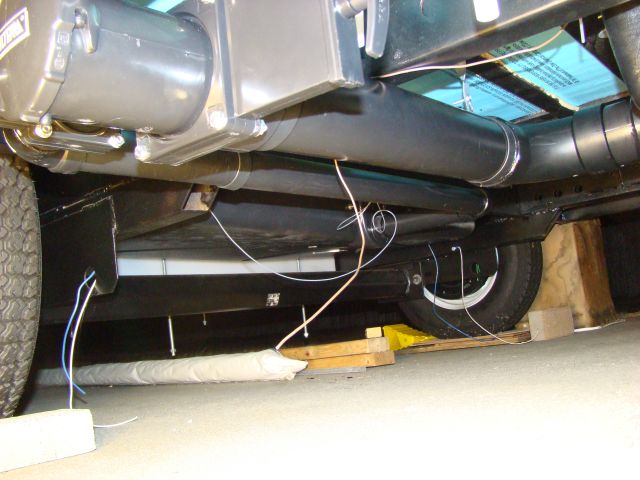
This picture attempts to show the connections, it's tough to get a picture under there. You can see the LP trunk with the copper tubing running up through the floor to the appliances. The smaller clear hoses off the tank are vent, drain, and pump feed. The tank fill is kind of hidden in the back there. The hoses are a little long and need to be cut down a bit and secured so everything isn't rubbing into everything else.

Image


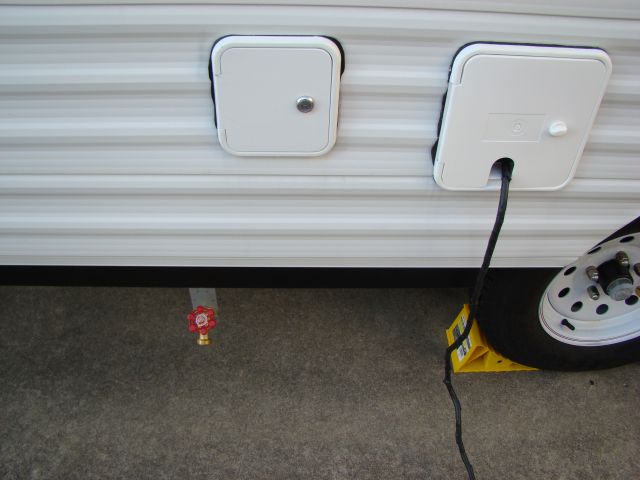
This hose bibb is the fresh water tank drain:

Image


Late yesterday we did the dump valves and piping. Sorry for the dark pictures, it was quite a bit past sunset and a drop light doesnt make for good photography. Here's the valve:

Image

Image


And the dump plumbing from the tanks underneath. Both pipes have approximately 1/4" per foot slope. The smaller pipe for the grey tank still needs an additional hanger installed, I was one short. The hanging wires are for the tank level sensors and the brakes, finishing both of those are on my list for next time.

Image


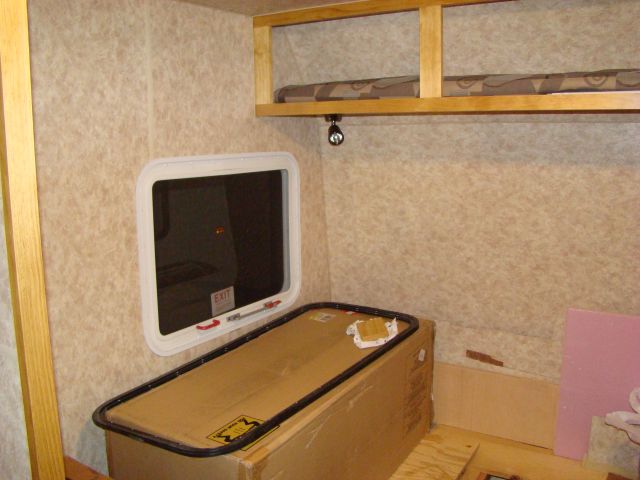
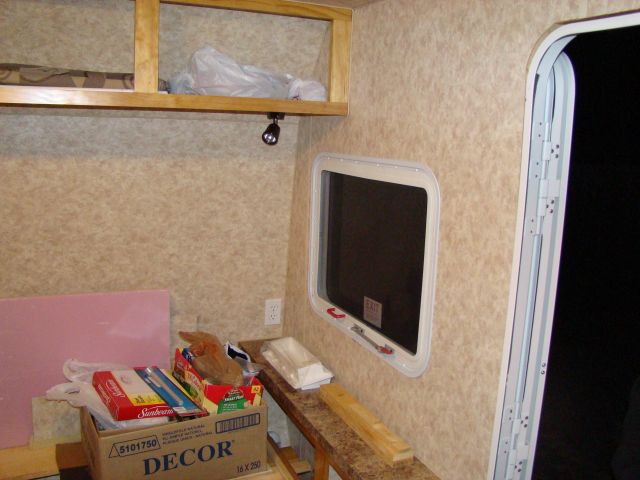
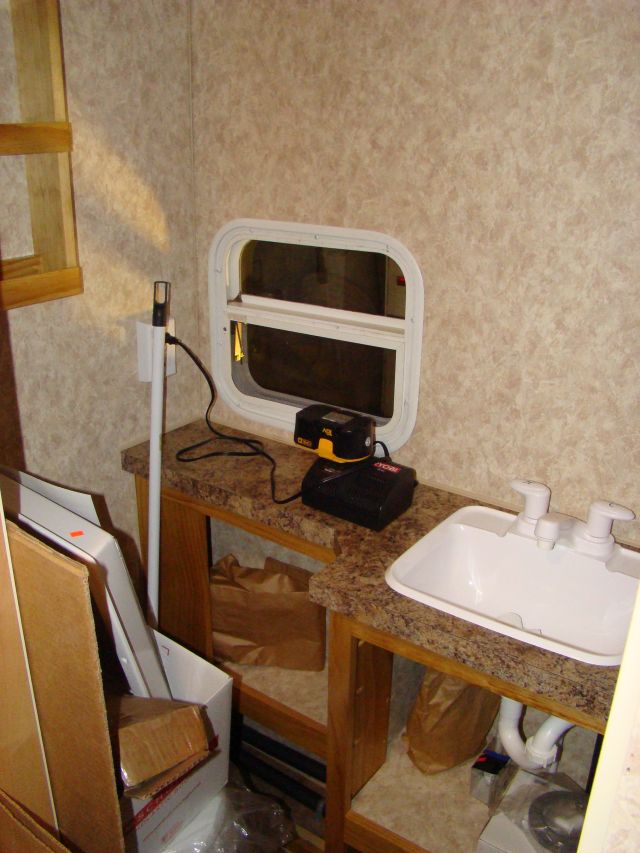
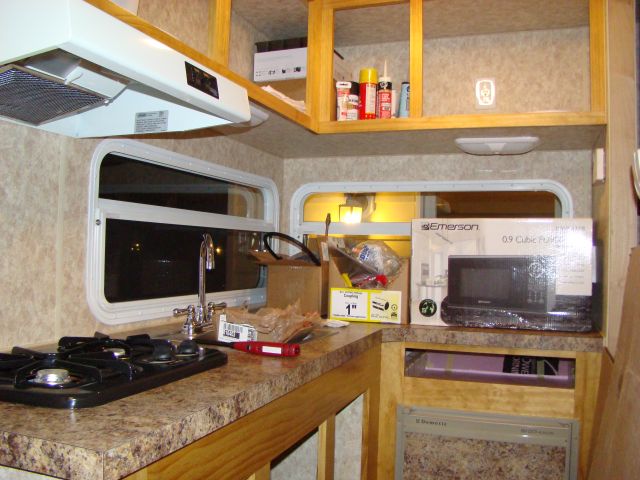
Finally, here's a few pictures inside with the windows installed. Sorry about the clutter, a lot of this stuff had been stored in the house and had to move out here for the holidays.


Image


Image


Image


Image


More soon as long as the weather cooperates!


- Frank
fromeo
Teardrop Master
 
Posts: 157
Joined: Tue Feb 27, 2007 2:01 pm
Location: Sicklerville, NJ
Top

Postby Cliffmeister2000 » Fri Jan 07, 2011 5:16 pm

It still looks great! :thumbsup:
God Bless

Cliff

♥God. ♥People.
1 John 4:9-11

My Teardrop build pictures
User avatar
Cliffmeister2000
Titanium Donating Member
 
Posts: 3622
Images: 157
Joined: Thu Jul 26, 2007 10:18 pm
Location: Phoenix, AZ
Top

Postby bve » Fri Jan 07, 2011 5:57 pm

Wow very nice and again a greatly detailed and picture filled update.

You had better keep a photo album/build journal in the trailer, because when you tell people it is a home build they aren't going to believe it - it looks too pro.


Burke
Burke

KISS > COMPLEX
Image
Image

Build threads converted to PDFs.
As of 2008-08-08 I have added more build threads to the pdf collection
User avatar
bve
500 Club
 
Posts: 694
Images: 98
Joined: Sat Aug 25, 2007 1:44 am
Location: Edmonton, Alberta, Canada
Top

Postby Cliffmeister2000 » Fri Jan 07, 2011 6:03 pm

Now that it's almost done, are you going to name it? :thinking:
God Bless

Cliff

♥God. ♥People.
1 John 4:9-11

My Teardrop build pictures
User avatar
Cliffmeister2000
Titanium Donating Member
 
Posts: 3622
Images: 157
Joined: Thu Jul 26, 2007 10:18 pm
Location: Phoenix, AZ
Top

Postby YuGun » Sat Jan 08, 2011 12:45 am

:applause: :applause: :applause:
Wow, Ä°t is very impressive trailer, Very good.
User avatar
YuGun
The 300 Club
 
Posts: 445
Joined: Sun Apr 11, 2010 1:25 pm
Location: Turkey
Top

Postby S. Heisley » Sat Jan 08, 2011 1:53 pm

You're almost done now! I can hardly wait to see the next set of pictures. Do you expect to camp in it this spring? Don't forget to post the first trip pictures! :thumbsup: :applause:
User avatar
S. Heisley
Super Lifetime Member
 
Posts: 8772
Images: 495
Joined: Mon Sep 17, 2007 10:02 am
Location: No. California
Top

Postby RockyMountainTeardrops » Sun Jan 09, 2011 7:57 pm

Frank,
Looooove your build, you & your brother are WARRIORS!
Working the kind of hours you have....I'm in awe.
:bowdown: :bowdown: :bowdown:


This thing is sweet. I gotta have one!
Can I ask where you got it?
fromeo wrote:The little door opens up and holds your MP3 Player. Also has a 12V lighter socket and a USB connector on the face for charging:
Image


Lee
User avatar
RockyMountainTeardrops
Super Teardrop Manufacturer
 
Posts: 99
Images: 233
Joined: Fri Oct 22, 2010 1:28 pm
Location: 4,000 above Denver, CO
Top

Postby fromeo » Sun Jan 09, 2011 9:58 pm

Cliffmeister2000 wrote:It still looks great! :thumbsup:


Cliffmeister2000 wrote:Now that it's almost done, are you going to name it? :thinking:


Thanks Cliff!

For a name, I'm not sure what he wants to do. I offered up "Solstice" as a name - a play on the name of the trailer the floorplan was inspired from, but I don't think he likes it too much. Hopefully he comes up with something soon..


bve wrote:Wow very nice and again a greatly detailed and picture filled update.

You had better keep a photo album/build journal in the trailer, because when you tell people it is a home build they aren't going to believe it - it looks too pro.


Burke


Thanks Burke!

I actually ran off a batch of around 30 pictures to start an album for him. I took them down to the local RV dealer since those guys had been asking to see some. I wound up giving them the pictures because they wanted to hang them on the wall. :lol: I thought the guy was kidding, but low and behold they have them plastered up on the wall to show other customers. Funny, yet flattering.


YuGun wrote::applause: :applause: :applause:
Wow, Ä°t is very impressive trailer, Very good.


Thanks YuGun! Been keeping an eye on your build as well, it is coming along quite nicely!


S. Heisley wrote:You're almost done now! I can hardly wait to see the next set of pictures. Do you expect to camp in it this spring? Don't forget to post the first trip pictures! :thumbsup: :applause:


Thanks Sharon! There's still a bunch of little things to do, but there is certainly light at the end of the tunnel.

Unless the weather throws us a bad curve ball, I figure we should have it finished up for him no problem in time for camping season. It would be great to get it out for a weekend in say mid to late March. I figure we'll pick a somewhat local state park, and he can get a site next to my wife and I. He's never towed anything before, so a 20 mile trip should be a good primer. I'll also need to give him a quick lowdown on how certain things work and how to dump the tanks and such. Plenty of pictures for sure!

- Frank
fromeo
Teardrop Master
 
Posts: 157
Joined: Tue Feb 27, 2007 2:01 pm
Location: Sicklerville, NJ
Top

Postby fromeo » Sun Jan 09, 2011 10:05 pm

RockyMountainTeardrops wrote:Frank,
Looooove your build, you & your brother are WARRIORS!
Working the kind of hours you have....I'm in awe.
:bowdown: :bowdown: :bowdown:


This thing is sweet. I gotta have one!
Can I ask where you got it?
fromeo wrote:The little door opens up and holds your MP3 Player. Also has a 12V lighter socket and a USB connector on the face for charging:
Image


Lee


Thanks Lee! I appreciate it!

I got the little MP3 dock through the local RV dealer, he ordered it out of their catalog. The price was right around $30 or so. The catalog # is 22-8300, the manufacturer part number is 52478, and the manufacturers name is "Diamond." Catalog price is $34.59.

I'm not sure if the local guy will do a mail order sale or not. You are welcome to try if you'd like, their number is 856-767-5422, ask for Ted Webster (he's the parts manager).

Otherwise, I googled the part number and here's the first hit I got http://www.rvbargainpartsoutlet.com/servlet/the-4704/MP3-fdsh-iPod-Docking-Station/Detail

Hope this helps.

- Frank
fromeo
Teardrop Master
 
Posts: 157
Joined: Tue Feb 27, 2007 2:01 pm
Location: Sicklerville, NJ
Top

Postby whtknight » Mon Jan 17, 2011 12:09 pm

Everytime I go back through this build, I'm just amazed at how good it came out. I'll say it again, great job... let us know what name you decide and let us see the first camping pictures too... :D
User avatar
whtknight
Teardrop Builder
 
Posts: 27
Joined: Wed Jun 16, 2010 9:14 pm
Location: Irving, Texas
Top

Postby kevingb » Tue Jan 18, 2011 12:02 pm

very very nice... :thumbsup:
User avatar
kevingb
Donating Member
 
Posts: 73
Images: 97
Joined: Tue Mar 10, 2009 7:10 pm
Location: Granbury, Texas
Top

PreviousNext

Return to Build Journals

Who is online

Users browsing this forum: reaver and 49 guests