No name yet. The build begins. Update July 5th

...ask your questions in the appropriate forums BUT document your build here...preferably in a single thread...dates for updates, are appreciated....

No name yet. The build begins. Update July 5th

Postby BillZ » Fri May 21, 2010 1:29 pm

It finally begins!

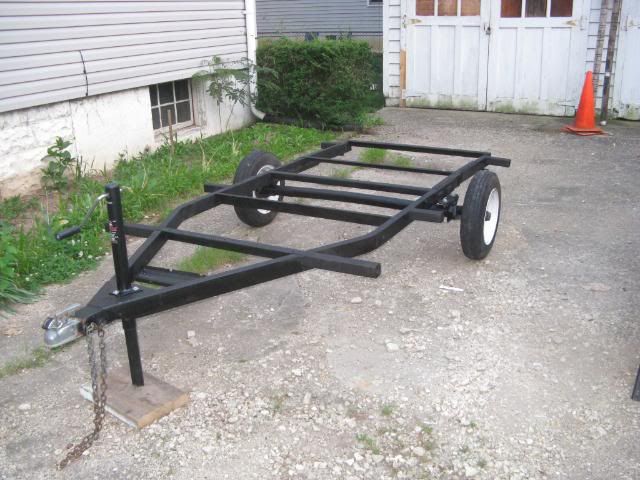
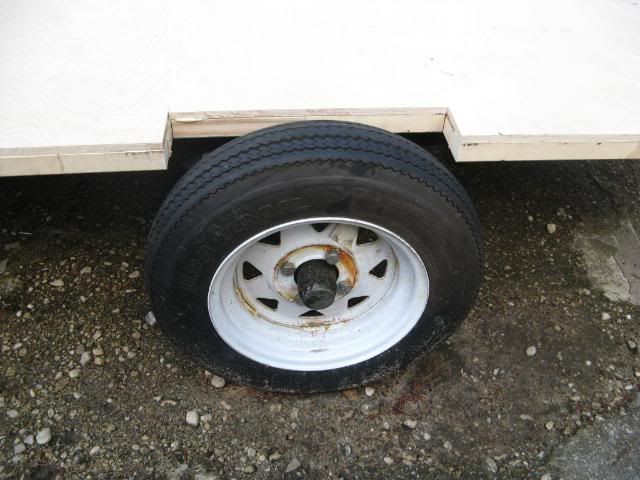
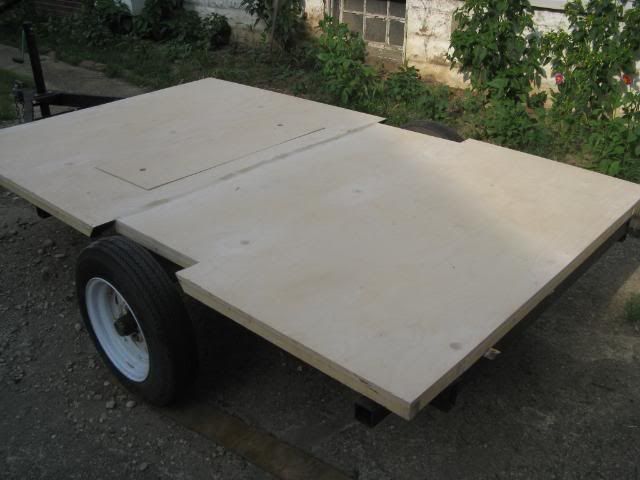
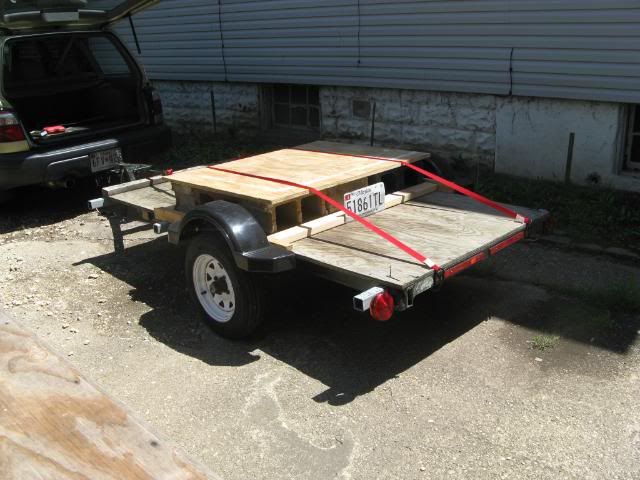
Had to take the frame I bought to the welder to have the axle moved back. With no weight, the torsion axle made the trailer bounce all over the place. A few cinder blocks made for a much smoother ride. The fenders and lights are temporary and were needed to get the plates and pass inspection.
Image

Image

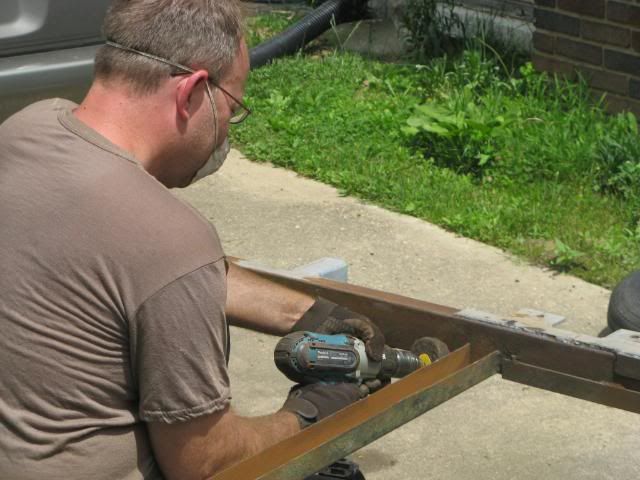
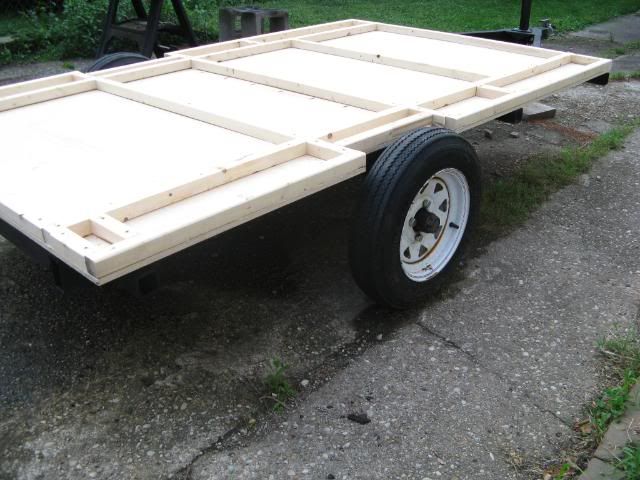
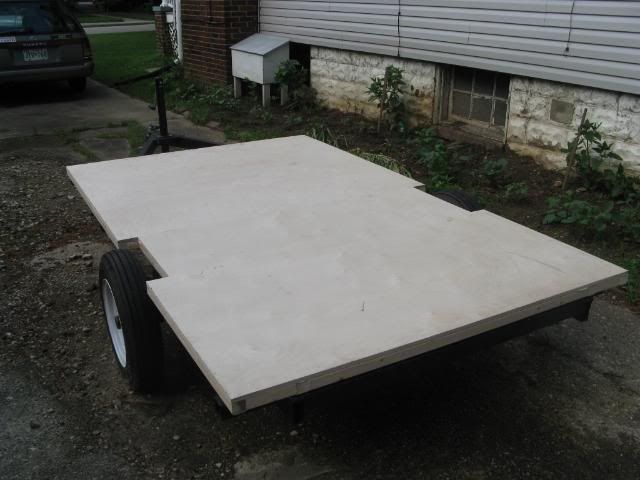
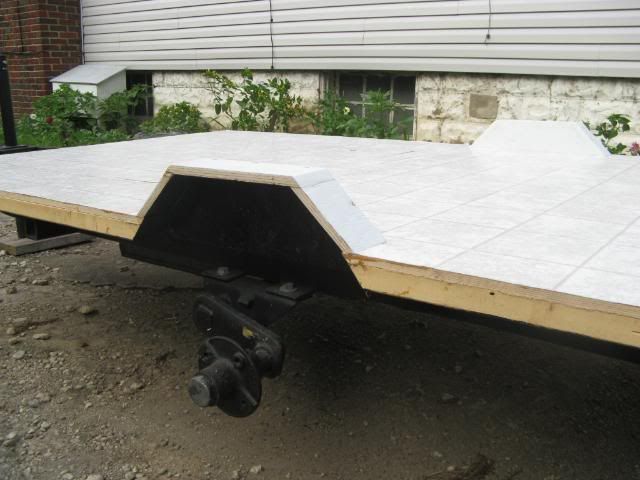
Since I am doing a 5 wide on a 4 wide trailer, the welder added some extensions for extra floor support. Additionally, I plan to use the extensions as receivers for my canopy frame and possibly an add-on table.

Image

Image

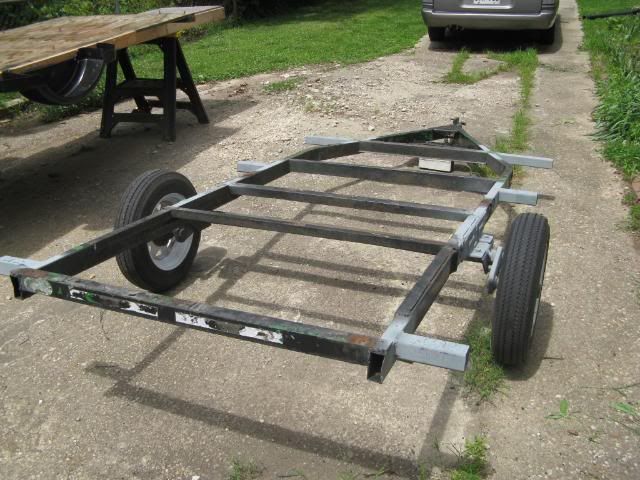
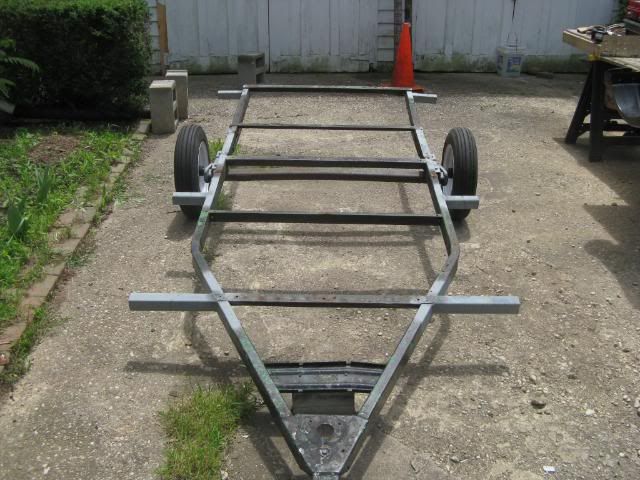
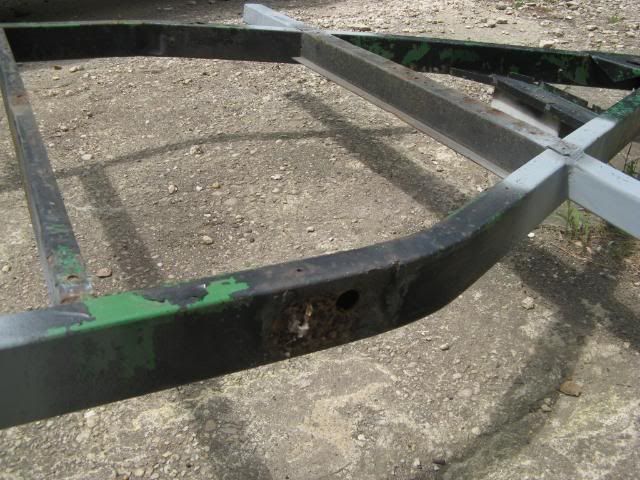
As you may have noticed, the frame behind the wheels is not very straight. Since everything from the wheels on forward seems to be OK, I decided that it wasn't worth worrying about.

Need to go to HD next and get some sandpaper, primer, and paint but the University down the street is having graduation right now and that means that the 3 mile drive will take approx 1 hour. Looks like I will have to wait until traffic calms down.

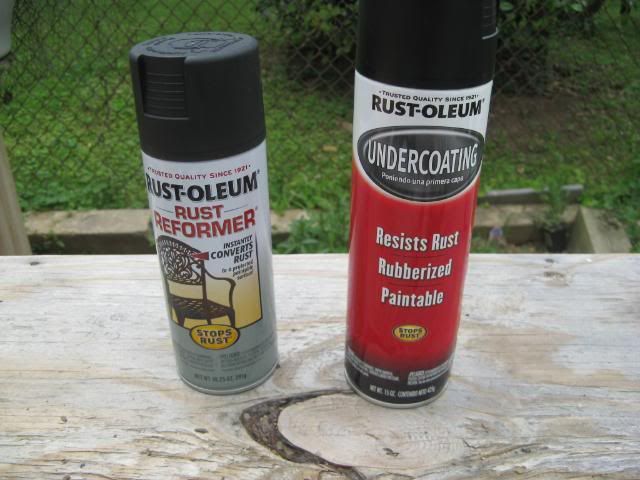
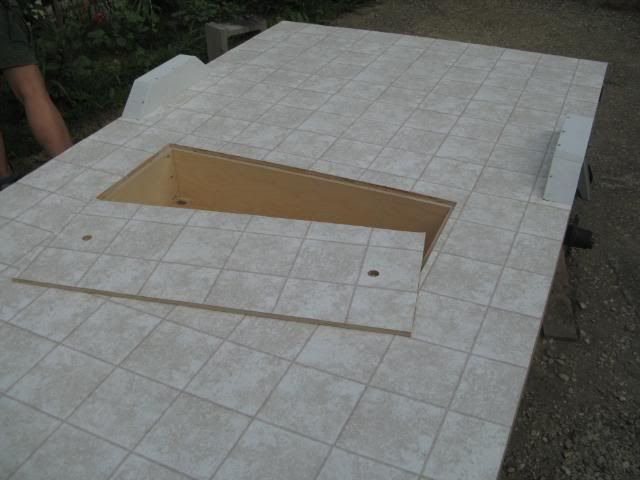
Not sure yet what I want to do about all of the miscellanious holes here and there. Should I fill them in with something to prevent it from rusting from the inside out or will a little added roofing tar work to fill them in?


Image
Last edited by BillZ on Mon Jul 05, 2010 7:11 pm, edited 4 times in total.
User avatar
BillZ
The 300 Club
 
Posts: 308
Images: 0
Joined: Tue Feb 16, 2010 7:39 pm
Location: College Park, Maryland

Postby grizz » Fri May 21, 2010 3:32 pm

I love square peg into round hole design and builds.

Good luck, and do keep us updated here.
Greetings from England.

Rian.


Hoping to get it all done in time.
User avatar
grizz
1000 Club
1000 Club
 
Posts: 1210
Images: 29
Joined: Mon Sep 21, 2009 2:37 pm
Location: Rochester, Kent, UK

Postby BillZ » Sun Jun 06, 2010 8:21 pm

Update:
Had a couple of days over the last couple of weeks to work on it. Many of you may have seen my post in the trailers and chassis section chronicling my trials with pulling the hubs for inspection and discovering a frozen bearing. Well, that issue is not done yet but I managed to strip and paint the trailer and get the floor started.

Here I am stripping the rust and old paint. Messy job!

Image

I used these 2 products on the frame.

Image

Much better! Also installed a new tongue jack.


Image


Today I worked on the floor. I attached the 2 floor pieces. Glued with Gorilla glue and screwed with the pocket jig.

Image

cutting and attaching 2x2's to fit the frame.


Image

Floor framing done.

Image

This looks a little close to the tire. I may decide to widen the wheel well a bit to allow for the suspension.

Image

Finished the basic floor. Next I will be building an underfloor storage compartment, boxing out the wheel wells, and may need to do some trimming underneath to fit because a couple of the cross members are not quite level with the rest of the frame.

Image
User avatar
BillZ
The 300 Club
 
Posts: 308
Images: 0
Joined: Tue Feb 16, 2010 7:39 pm
Location: College Park, Maryland
Top

Heck of a start !

Postby Chuckles2153 » Mon Jun 07, 2010 4:02 pm

Kinda makes you feel good to get started huh?

And keep up with the pics, we all like to see em. :thumbsup:
Chuckles2153
Teardrop Master
 
Posts: 154
Images: 74
Joined: Wed Mar 24, 2010 2:00 pm
Location: Franklin. Indiana
Top

Postby Miriam C. » Mon Jun 07, 2010 8:05 pm

:thumbsup: How is the bent framing looking now? I ignored mine and just shimmed the body. You might make sure you get a level surface. It will compound as you add stuff to it. Nothing like getting down to that last side up and being unable to do a fix. :oops:
“Forgiveness means giving up all hope for a better past.â€
User avatar
Miriam C.
our Aunti M
 
Posts: 19675
Images: 148
Joined: Wed Feb 15, 2006 3:14 pm
Location: Southwest MO
Top

Postby BillZ » Mon Jun 07, 2010 8:46 pm

Miriam C. wrote::thumbsup: How is the bent framing looking now? I ignored mine and just shimmed the body. You might make sure you get a level surface. It will compound as you add stuff to it. Nothing like getting down to that last side up and being unable to do a fix. :oops:


Thanks for the advice Miriam. I am trying to figure out the best way to level the floor. Probably will be a combination of trimming some of the floor framing and adding some shims.

Did a little more today:

First I built the underfloor storage compartment. It is 36" x 14" and 7 1/2" deep. The bottom of it sits level with the bottom of the axle so it shouldn't have any clearance issues.

It is true what they say, making a square box isn't easy. I took my time and was pleased to only have to make it once.


After that I glued 2 sheets of the 1/2" insulation that I got real cheap to insulate the floor. At first I wasn't sure what to cut it with but spotted my drywall saw in the toolbox. I almost forgot I had that thing and it worked like a charm.


Image

Then I cut and dry fitted it to the underside of the floor. It was quick and easy and only cost me about $10.

Image


Next is the tar. If anyone know what to get please let me know. I was at Home Depot today and looked at the roofing materials but was unsure what would work.

EDIT: I just did a search on the undercoating and decided to use either Henry's 107 or asphalt fence post paint.
User avatar
BillZ
The 300 Club
 
Posts: 308
Images: 0
Joined: Tue Feb 16, 2010 7:39 pm
Location: College Park, Maryland
Top

Postby BillZ » Sat Jun 26, 2010 6:52 pm

Spent some time here and there the past few weeks working on the floor.

Applied the tar and screwed in the insulation:

Image

I sawed the edges of the fender cutouts at an angle to allow more room for upward tire movement. Now I have almost 4" of clearance which is more than the suspension can travel.

Yesterday I drilled holes for the carriage bolts and counter sunk them using a forstner bit. Then I made a paste with sawdust and glue and filled in the holes. today I sanded the patches down and am ready for the vinyl.

Image

Oh, and The floor is level. I had to do a little shimming in a few spots but it wasn't as bad as I feared it might be.
User avatar
BillZ
The 300 Club
 
Posts: 308
Images: 0
Joined: Tue Feb 16, 2010 7:39 pm
Location: College Park, Maryland
Top

Postby Cliffmeister2000 » Sat Jun 26, 2010 7:46 pm

BillZ wrote:

This looks a little close to the tire. I may decide to widen the wheel well a bit to allow for the suspension.

Image


I would take care of this now! I made mine a little tight, and when the fully built trailer was on, the clearance dropped to an unacceptable level. I had to put smaller tires and stiffen the suspension to cure the problem. It doesn't look like a smaller tire size will be an option for you. :thinking:
God Bless

Cliff

♥God. ♥People.
1 John 4:9-11

My Teardrop build pictures
User avatar
Cliffmeister2000
Titanium Donating Member
 
Posts: 3622
Images: 157
Joined: Thu Jul 26, 2007 10:18 pm
Location: Phoenix, AZ
Top

Postby BillZ » Sat Jun 26, 2010 9:13 pm

Cliffmeister2000 wrote:
BillZ wrote:

This looks a little close to the tire. I may decide to widen the wheel well a bit to allow for the suspension.

Image


I would take care of this now! I made mine a little tight, and when the fully built trailer was on, the clearance dropped to an unacceptable level. I had to put smaller tires and stiffen the suspension to cure the problem. It doesn't look like a smaller tire size will be an option for you. :thinking:


If you look closely at my last pic, you can see that I cut the edges of the well at an angle, that gave me a couple more inches of clearance. The axle has a built in stop that allows only so much travel. I measured and it should be fine.

It's a little hard to see so I used the old pic with yellow lines showing where I made the cuts.

Image
User avatar
BillZ
The 300 Club
 
Posts: 308
Images: 0
Joined: Tue Feb 16, 2010 7:39 pm
Location: College Park, Maryland
Top

Postby BillZ » Mon Jul 05, 2010 7:09 pm

Did some more this weekend.
Here's a pic showing the cuts I made at the edges of the wheel well. The tire can only travel less than 2 inches up before the suspension hits the stop on the axle. After cutting the edges of the well I have almost 4 inches of clearance.

Image

As you can see, I applied vinyl flooring. It turned out to be an easier job than I thought. Per recommendations on this board, I positioned the flooring, rolled it half way back and applied glue to that half. After pressing it down and working out the air bubbles with a rolling pin, I rolled back the other half and repeated the process. After it was glued down, I trimmed the edges with a utility knife.

Image

Next was building the wheel wells. I made enough room so that I could upgrade to a 13" wheel in the future. It was a good project for gaining experience with the mitre saw. They were simple 45 degree angles but afterwards I felt more comfortable using it.

Then I sanded the wells down and gave them a quick brush with some exterior paint to protect against condensation and the occasional spill.

Image

Wells attached to the frame with gorilla glue and deck screws. Tar applied underneath.

Image

Done for today!

Image
User avatar
BillZ
The 300 Club
 
Posts: 308
Images: 0
Joined: Tue Feb 16, 2010 7:39 pm
Location: College Park, Maryland
Top

Postby Cliffmeister2000 » Mon Jul 05, 2010 7:18 pm

A very nice start! :thumbsup:
God Bless

Cliff

♥God. ♥People.
1 John 4:9-11

My Teardrop build pictures
User avatar
Cliffmeister2000
Titanium Donating Member
 
Posts: 3622
Images: 157
Joined: Thu Jul 26, 2007 10:18 pm
Location: Phoenix, AZ
Top

Postby parnold » Mon Jul 05, 2010 7:24 pm

A very nice start!


Agreed! Good fix for the wheel clearance too!

:applause: :applause:
User avatar
parnold
Donating Member
 
Posts: 2344
Images: 302
Joined: Mon Feb 08, 2010 4:49 pm
Location: Northwest New Jersey
Top


Return to Build Journals

Who is online

Users browsing this forum: Bing [Bot] and 24 guests