Canned Ham Toy Hauler Camper

...ask your questions in the appropriate forums BUT document your build here...preferably in a single thread...dates for updates, are appreciated....

Birch Ceiling panel glue up

Postby Cyclicpitcher » Mon Nov 15, 2010 12:38 am

Image

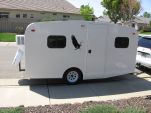
The Birch ceiling panel is up and the window is cut out. Now to glue each spar. Note: there are tempory spars pressure fitted to provide pressure on the birch panel to the wall spar on the other side currently being glued.

Image

This next image should help to expain my process.

A - A small piece of wire is pressed between the wall and the panel on each side to help to locate the spar from the inside and to place the temporary pressure fitted spars.
B - Shows an extra bit of pressure using a clamp to hold down the spar that is being glued.

Image

C - Is another view of the three temp spars that are applying pressure to the single spar being glued. Each spar all the way up will be glued this way and each one is allowed to dry over night.

D - This shows a sample of the plastic welt that I will use to create a nice finish to the ceiling panel. Note the scratches, these will be sanded out as they are caused by the tempory spars and they're on a single coat of spar urethane. Once sanded and another coat is applied, the scratches will be invisible.

A slow process but when finished there will be no nails or staples to fill. I will also coat front and back with a single coat of urethane to protect from moisture and warping. :D

Best Regards!
CP
Cyclicpitcher
Teardrop Builder
 
Posts: 37
Images: 70
Joined: Sun Sep 26, 2010 7:47 am
Location: Memphis TN

Postby BC Dave » Mon Nov 15, 2010 12:58 am

moving right along there;

good to see the scooter fits and the kids are intrested in helping;

I can see your really into it now a-b-c-d lol...

Looks like you haveing fun too; nice to see the progress and pics.
User avatar
BC Dave
Teardrop Master
 
Posts: 247
Images: 13
Joined: Sat Oct 31, 2009 12:32 am
Location: BC, Canada

Thanks!

Postby Cyclicpitcher » Mon Nov 15, 2010 11:06 am

Thanks BC Dave! Yes! I am having fun with this build, so far so good. I like to make the ABCD type pictures because they show a lot of boring stuff. Details without having to scroll through a lot of large boring images.

Cheers!
CP :beer:
Cyclicpitcher
Teardrop Builder
 
Posts: 37
Images: 70
Joined: Sun Sep 26, 2010 7:47 am
Location: Memphis TN
Top

Postby bdosborn » Mon Nov 15, 2010 8:17 pm

You might consider gluing the spars to the skin while its flat on the ground. Then you can bend the roof skin to the walls and the spars are already in place.
Bruce
2009 6.5'X11' TTT - Boxcar
All it takes is a speck of faith and a few kilowatts of sweat and grace.
Image
Boxcar Build
aVANger Build
User avatar
bdosborn
Donating Member
 
Posts: 5494
Images: 772
Joined: Wed May 05, 2004 11:10 pm
Location: CO, Littleton
Top

Re: Thanks!

Postby BC Dave » Tue Nov 16, 2010 1:30 am

Cyclicpitcher wrote:.... Yes! I am having fun .....

Cheers!
CP :beer:


cheers BC D
User avatar
BC Dave
Teardrop Master
 
Posts: 247
Images: 13
Joined: Sat Oct 31, 2009 12:32 am
Location: BC, Canada
Top

Hmmm...

Postby Cyclicpitcher » Tue Nov 16, 2010 3:41 am

You might consider gluing the spars to the skin while its flat on the ground. Then you can bend the roof skin to the walls and the spars are already in place.
Bruce


Bruce - I don't have that much confidence! :) I like to make every cut and trial fit before I secure it, plus it would take at least two people to hold it while the spars are squared to the outer edge and screwed into place. That would be the best way to do it in a Jayco Factory setting where you have plently of skilled hands and some professional cutting tools.
Cyclicpitcher
Teardrop Builder
 
Posts: 37
Images: 70
Joined: Sun Sep 26, 2010 7:47 am
Location: Memphis TN
Top

Re: Hmmm...

Postby bdosborn » Tue Nov 16, 2010 8:57 pm

Cyclicpitcher wrote:That would be the best way to do it in a Jayco Factory setting where you have plently of skilled hands and some professional cutting tools.


Its not as hard as you think. I did it that way and it was a snap. And I have a far from skilled hand. :R

Bruce
2009 6.5'X11' TTT - Boxcar
All it takes is a speck of faith and a few kilowatts of sweat and grace.
Image
Boxcar Build
aVANger Build
User avatar
bdosborn
Donating Member
 
Posts: 5494
Images: 772
Joined: Wed May 05, 2004 11:10 pm
Location: CO, Littleton
Top

can do

Postby Cyclicpitcher » Wed Nov 17, 2010 7:07 am

After gluing up some of those higher spars that are hard to reach, I think it would be easier to pre glue the whole panel. I may try that on the next 4 foot section.
Cyclicpitcher
Teardrop Builder
 
Posts: 37
Images: 70
Joined: Sun Sep 26, 2010 7:47 am
Location: Memphis TN
Top

Postby starleen2 » Wed Nov 17, 2010 8:11 am

:scratchthinking: I might have to try that as well
User avatar
starleen2
5th Teardrop Club
 
Posts: 16272
Images: 224
Joined: Sat May 12, 2007 8:26 pm
Location: Pea Ridge ,AR
Top

Postby wlivesey » Sat Nov 20, 2010 2:01 pm

That's how I did it, from the inside out. I pocket drilled and permanently attached the spars to the ceiling panel and let it dry. Then I started attaching the ceiling between the walls. I just started at one end and worked my way to the other. I ended up with a perfect fit between the ceiling panel and the walls with no gaps. I didn't even install a trim piece over the seam.
User avatar
wlivesey
The 300 Club
 
Posts: 469
Images: 283
Joined: Sun Aug 12, 2007 1:22 pm
Location: DFW, Texas
Top

Postby HIPPYHUNTER » Tue Nov 23, 2010 1:24 am

New Guy here just speaking up from lurking: totally happy reading about your trailer and all you other guys trailers too. I have looked long and hard all over the internet for a site like this. Bravo! Thank you and please carry on......... :applause:
HIPPYHUNTER
Teardrop Inspector
 
Posts: 9
Joined: Mon Nov 15, 2010 12:10 pm
Location: Where the wind comes sweeping down the plains
Top

Thanks for the replies!

Postby Cyclicpitcher » Sat Nov 27, 2010 12:55 am

Thanks for the feedback to my build thread. It has been slow here with the holidays and all the weather changes and a bit of flu around the house.

Here is a couple of pictures showing my cushions and dinette table I purchased on ebay. This configuration is going to work out perfectly!

This picture shows how the dinette will fit into the forward space.
Image

This picture shows how it will change into a two person bunk!
Image

One more spar to glue and I am ready to build the dinette seat bases.

Happy Thanksgiving!! :coffee:
Cyclicpitcher
Teardrop Builder
 
Posts: 37
Images: 70
Joined: Sun Sep 26, 2010 7:47 am
Location: Memphis TN
Top

too cold to work

Postby Cyclicpitcher » Tue Feb 08, 2011 7:09 pm

It's been too cold for me to get much done but I have all the parts I need to continue, if we will just have a good day I can get out and rip some lumber!

Best wishes!

:D
Cyclicpitcher
Cyclicpitcher
Teardrop Builder
 
Posts: 37
Images: 70
Joined: Sun Sep 26, 2010 7:47 am
Location: Memphis TN
Top

Postby terryjones1 » Sun Feb 13, 2011 7:52 am

bdosborn wrote:You might consider gluing the spars to the skin while its flat on the ground. Then you can bend the roof skin to the walls and the spars are already in place.
Bruce


Question: Do you mean to glue the spars to the bottom side of the outside plywood skin and then, you install? Then, I assume that you insulate, and then install the ceiling plywood?
My TTT Garageable Standy Build Journal: viewtopic.php?f=50&t=40591
User avatar
terryjones1
Gold Donating Member
 
Posts: 266
Images: 1
Joined: Wed Aug 25, 2010 2:09 pm
Location: Lincoln, Ca
Top

Previous

Return to Build Journals

Who is online

Users browsing this forum: No registered users and 19 guests