Canned Ham Toy Hauler Camper

...ask your questions in the appropriate forums BUT document your build here...preferably in a single thread...dates for updates, are appreciated....

Canned Ham Toy Hauler Camper

Postby Cyclicpitcher » Tue Sep 28, 2010 7:35 pm

Image

I am starting a build of a tiny canned ham style trailer I will call my bugout box. It will be based on a Tractor Supply 4x8 trailer frame.

The Trailer is rated at 1500lbs and so I have started weighing my lumber.

I wanted the floor to be 6 x 9 and I was planning to insulate the floor by building it as a box.

1 - 2x4 weighs 9.5 to 10 lbs
1 - 4x8 3/8 inch plywood weighed 63 lbs
1 - 4x8 1/8 luan style ply weight 18 lbs , I expected to use 10 sheets

I will include pictures in my build journal once I get more done in the build.


Thanks for taking a look!
CP
Image
Last edited by Cyclicpitcher on Thu Feb 21, 2013 9:52 am, edited 14 times in total.
Cyclicpitcher
Teardrop Builder
 
Posts: 37
Images: 70
Joined: Sun Sep 26, 2010 7:47 am
Location: Memphis TN

Postby Miriam C. » Tue Sep 28, 2010 8:31 pm

:thumbsup: Good ideas. But please leave out most of the 2x4's. They really aren't needed very often...Look at Mike's Escape hatch. No 2x4s ;)

http://www.mikenchell.com/WWEH_Photo_Album/

The build is here somewhere... :oops:

Do please take lots of pictures. We live for them.. :twisted:

umm not sure where you got the weights but my 1/8" is only 11 pounds. http://wiki.answers.com/Q/Weight_of_Plywood
“Forgiveness means giving up all hope for a better past.â€
User avatar
Miriam C.
our Aunti M
 
Posts: 19675
Images: 148
Joined: Wed Feb 15, 2006 3:14 pm
Location: Southwest MO

Postby Cyclicpitcher » Tue Sep 28, 2010 9:17 pm

I used 2x4s because I am trying to build 6 foot wide on a 4 foot frame. The tsc frame is angle only and is very flexible. I didnt want the walls which I am hoping to build 6 foot tall to sit only on plywood overlap.

I weighed my wood on a doctors balance scale.

Image

I hope to have a couple hundred pounds in the floor and the rest up to 900 lbs in the body.

Thanks So much for the replies!!! more to follow
Cyclicpitcher
Teardrop Builder
 
Posts: 37
Images: 70
Joined: Sun Sep 26, 2010 7:47 am
Location: Memphis TN
Top

Update on project

Postby Cyclicpitcher » Sun Oct 03, 2010 7:27 pm

Here is a walkthrough of where I am to date with my Bugout Box project.

Started with TSC Trailer Frame, added front leveler and wheel.

Image

Cut off stake bracket so as not to interfere with wooden floor deck. Removed lights and fenders, ground smooth and repainted exposed metal.


Image

Image

Layout floor joists and glue to 4x8 ply base.
Image

Clamp and glue outboard flooring and add a one foot expansion off the back of the frame. Plans are to build from a 6x9 foot floor.

Image

Flooring is removed and put on saw horses and painted with fence paint sealer. At this point the whole assembly was weighed in at 142 pounds!


Image

Rough cut the top decking and then to insulate the cavity before the top deck is glued and screw shut.

Image

Then to edge route the top panels and off to the hardware store to pick out vinyl flooring! Hopefully next weekend!

Thanks for viewing my build pics!

CP
Cyclicpitcher
Teardrop Builder
 
Posts: 37
Images: 70
Joined: Sun Sep 26, 2010 7:47 am
Location: Memphis TN
Top

Postby Weirdnerd » Sun Oct 03, 2010 9:40 pm

Wouldn't be better to use styrofoam insulation?, it occupies the whole space, does't absorb moisture ( easily) and there is no space for bugs to roost ( spiders/wasps, etc), just a friendly opinion.
This is my build thread...
Weirdnerd's teardrop
User avatar
Weirdnerd
The 300 Club
 
Posts: 318
Joined: Thu Sep 23, 2010 3:03 pm
Location: Denver, Co ( USofA)
Top

Styrofoam

Postby Cyclicpitcher » Sun Oct 03, 2010 10:23 pm

Styrofoam would be better. I planned to use it in the walls.

I bought the fiberglass because it was cheap, 8 dollars for R-13 value and it is designed to fill a 3.5 inch space.

My local hardware doesnt sell the thick stuff. I really need to locate a real builders supply in my area.

I will do some looking around this week to see if I can source some thick styrofoam.

Thanks for the feedback!

CP
:thumbsup:
Cyclicpitcher
Teardrop Builder
 
Posts: 37
Images: 70
Joined: Sun Sep 26, 2010 7:47 am
Location: Memphis TN
Top

Postby Weirdnerd » Sun Oct 03, 2010 10:48 pm

No problem, I found out my "big box" store carried several thicknesses of styrofoam, because my neighbour was doing some remodeling, otherwise I was planning on using minimal expanding canned foam, I wanted "good insulation" because I am planning on doing camping at some hot springs over here in deep winter, and sleeping at night in ten degree weather was not going to be fun without some serious heating solutions.... :thumbsup:

( Mine is 1.5 inch thick walls and 2 inch floor insulation)
This is my build thread...
Weirdnerd's teardrop
User avatar
Weirdnerd
The 300 Club
 
Posts: 318
Joined: Thu Sep 23, 2010 3:03 pm
Location: Denver, Co ( USofA)
Top

Postby tinksdad » Mon Oct 04, 2010 7:54 am

Have you checked Mid-South Distributors on S. Parkway near 55? If they don't carry it, they may be able to tell you where.
User avatar
tinksdad
500 Club
 
Posts: 966
Images: 155
Joined: Mon May 05, 2008 9:20 pm
Location: Olive Branch, MS
Top

insulation

Postby Cyclicpitcher » Mon Oct 04, 2010 9:45 pm

I will call Midsouth and see what they say,

I did some checking today, I found out 2 inch 4 x 8 sheet R-7 Ownings Corning was $25 a sheet.

That's way to much to spend on this project, I dont plan on camping in really cold weather. We like the fall when there is no bugs but once it gets bitter cold, even the kids dont wanna go.

The R-13 glass wool is cheap and is 3.5 inches thick. I don't like the itch but the price is right to fill the cavity. I guess it's better than putting nothing in there. I weighed the bundle and it's 9 pounds.

So far I am leaning towards the wool for the base but I been dreading the itch and cutting that mess.

Cheers!
CP
Cyclicpitcher
Teardrop Builder
 
Posts: 37
Images: 70
Joined: Sun Sep 26, 2010 7:47 am
Location: Memphis TN
Top

Re: insulation

Postby tinksdad » Tue Oct 05, 2010 8:33 am

Cyclicpitcher wrote:.... I dont plan on camping in really cold weather. We like the fall when there is no bugs but once it gets bitter cold, even the kids dont wanna go.

Cheers!
CP


LOL!! This is the Mid-south. It don't get bitterly cold. At least not to somebody who spent and camped the first 53 years in Buffalo, NY.

You will get lots of opinions (pro and con) over your choice; but ultimately, it's your trailer.... do what you feel most comfortable with. And that's all I got to say on that.

We're so close, if you need help standing up a wall or anything... give me a shout. If I'm free, I'll gladly help.

And just a side note.... mine is just 3/8" ply over 1 by stock framing... no insulation. Just the foam mattress on the floor. Last December woke up with 4" of snow on top o the trailer. $16 Wally World ceramic heater on the lowest setting kept the trailer cozy warm.
User avatar
tinksdad
500 Club
 
Posts: 966
Images: 155
Joined: Mon May 05, 2008 9:20 pm
Location: Olive Branch, MS
Top

Born and raised

Postby Cyclicpitcher » Tue Oct 05, 2010 9:35 pm

Bitter cold to a southerner is freezing! :lol:

We camped for a couple of years in a jayco popup and it had a nice little furnace and heated matresses. Our current camper has a nice furnace with vents under the floor. We discovered one of those small cube ceramic heaters was all we needed.

My family makes fun of the way I build, I will sit in the garage an hour just staring at the project, then get up and cut a piece of wood, glue it and staple it and then sit back down for a while... I don't get in a hurry, I aready have a nice camper. I like my garage and problem solving.

I want to build this camper 6 foot inside but my garage door opening is 7 foot, I am going to have to remove the wheels to build it once the floor is completed. One idea is to use fresbees to place under the axel U-bolts, then I can slide the frame around or just build it like a playhouse by taking the floor off completely.
Cyclicpitcher
Teardrop Builder
 
Posts: 37
Images: 70
Joined: Sun Sep 26, 2010 7:47 am
Location: Memphis TN
Top

Quick Update

Postby Cyclicpitcher » Fri Oct 08, 2010 2:18 am

Here the kids apply the top side of the Fence and Post Sealer (asphalt paint)

Image

Fully Sealed top and bottom

bImage

Install the Glass Wool insulation.

Image

Belt Sanding the tops of the frame to level and remove asphalt paint for better bond with Liquid Nails.

Image

Decking is now glued and screwed down and once the glue has dried its on with the edge routing.

Image

Thanks for taking a look!
CP
Cyclicpitcher
Teardrop Builder
 
Posts: 37
Images: 70
Joined: Sun Sep 26, 2010 7:47 am
Location: Memphis TN
Top

Postby grizz » Sat Oct 09, 2010 2:27 am

That is one serious construction you have going there.

Love it when kids muck in as well.
Greetings from England.

Rian.


Hoping to get it all done in time.
User avatar
grizz
1000 Club
1000 Club
 
Posts: 1210
Images: 29
Joined: Mon Sep 21, 2009 2:37 pm
Location: Rochester, Kent, UK
Top

Re: Born and raised

Postby tinksdad » Sat Oct 09, 2010 11:07 am

Cyclicpitcher wrote:I want to build this camper 6 foot inside but my garage door opening is 7 foot, I am going to have to remove the wheels to build it once the floor is completed. One idea is to use fresbees to place under the axel U-bolts, then I can slide the frame around or just build it like a playhouse by taking the floor off completely.


:thumbsup: Improvised furniture guides!!! If I might add a suggestion. Frisbees are relatively soft. The concentrated pressure of the u-bolts may wear through the plastic quickly. Maybe a thin circle of plywood inside the frisbee to distribute the weight over a bigger area.

Also something else to consider. Noticed in your pics, we are using the same tongue jack. Might have been just mine; but lost the cap on the top of the post while towing it on a trip to Birmingham. A small threaded hole and set screw could save some aggravation down the line. It's just a suggestion.
User avatar
tinksdad
500 Club
 
Posts: 966
Images: 155
Joined: Mon May 05, 2008 9:20 pm
Location: Olive Branch, MS
Top

Moving forward

Postby Cyclicpitcher » Sat Oct 09, 2010 9:30 pm

Grizz, I am having a great time with this build. Being a first timer I am sure I am over building but if it comes out a little heavy then it will pull good. As long as I dont exceed the axle rating. So Far my 2 x 4 box frame weighs about 250 pounds.

Tinksdad, I think your right, if I added some ply to the fresbees, Right now just using 1x4 scrap but once I have to pull it out into the driveway that has a pebble finish I need something slick. The U-bolts are alreading digging into the scraps. Walmart sells a cheap generic fresbee for a buck or two. Hope to pick some up soon.

Here is an update to the build this week.

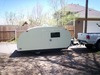
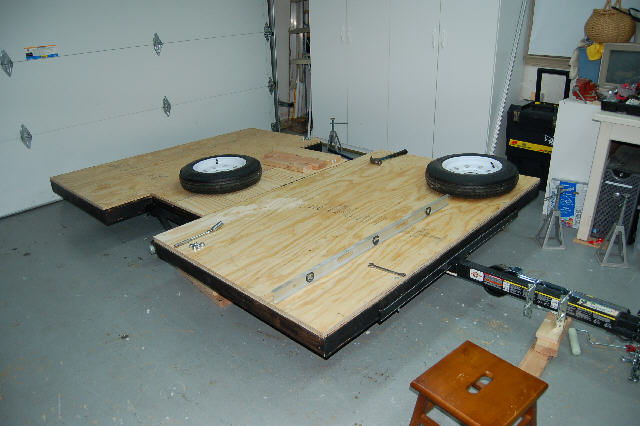
Removing the wheels to allow a 5'9" interior height to the build inside the garage.

Image

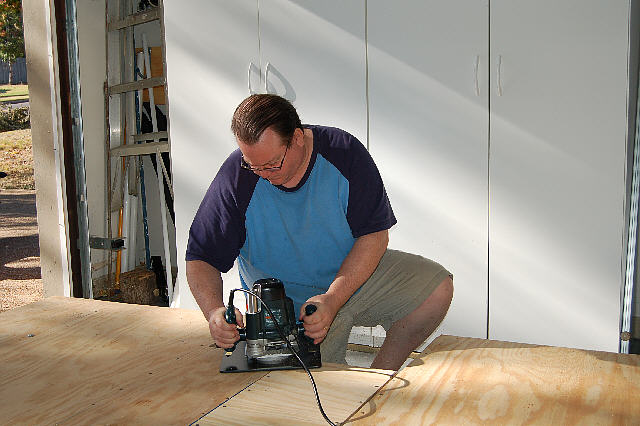
Edge Routing the top ply.

Image

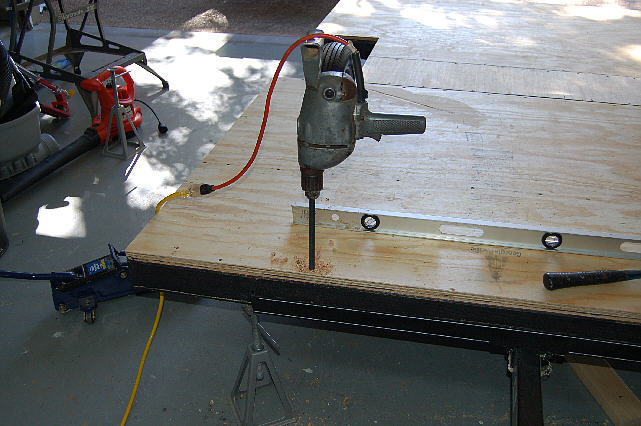
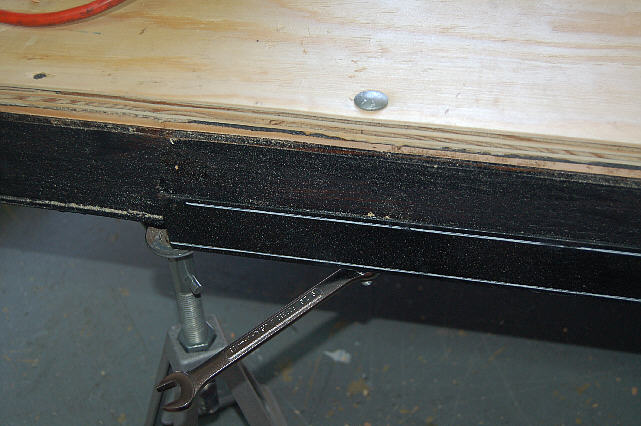
Drilling through the frame for the bolt down.

Image

Installing carrage head bolts.

Image

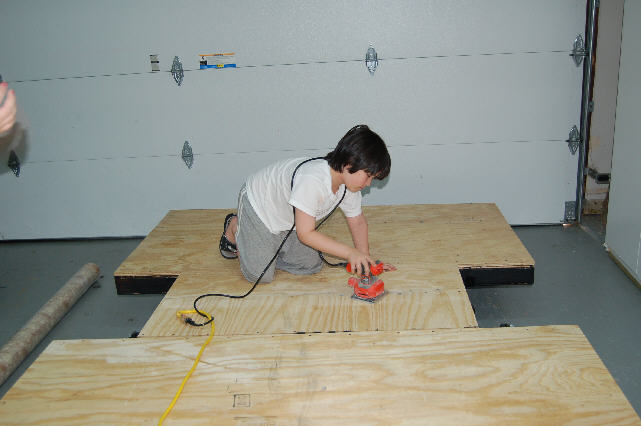
Sanding and filling to prep for the vinyl flooring glue down. Got some help from the chairman of the board!

Image

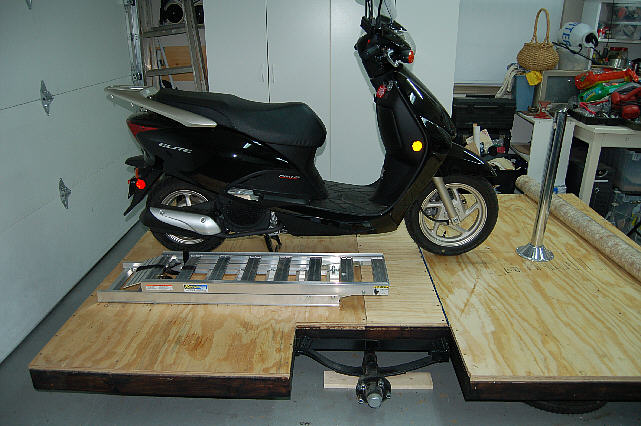
Now for a little test fit of the main cargo of the bugout box! Yes, it will be a tiny trailer with a dinette that makes into a bed and it should be able to have some tiedowns on the floor to act as a toy hauler.

Image

Front view shows room to have all the side cabinets. I will have a full door in the rear using a plastic piano hinge I purchased on ebay. I want rear to double as a galley but will have a cooler and small gas stove to remove to an external table.

Image

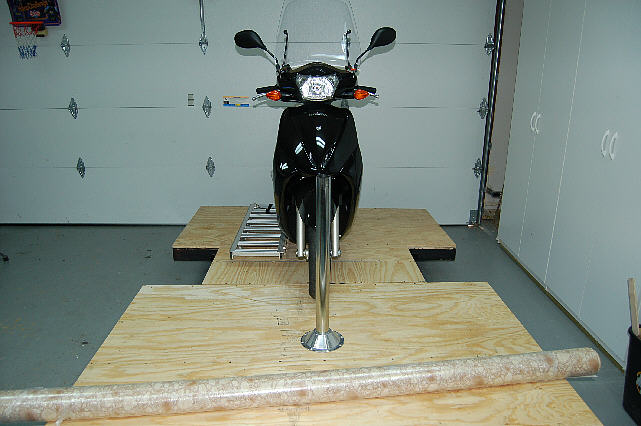
Next stop vinyl flooring!

Thanks for the comments guys!

Best wishes,
CP
Cyclicpitcher
Teardrop Builder
 
Posts: 37
Images: 70
Joined: Sun Sep 26, 2010 7:47 am
Location: Memphis TN
Top

Next

Return to Build Journals

Who is online

Users browsing this forum: No registered users and 31 guests