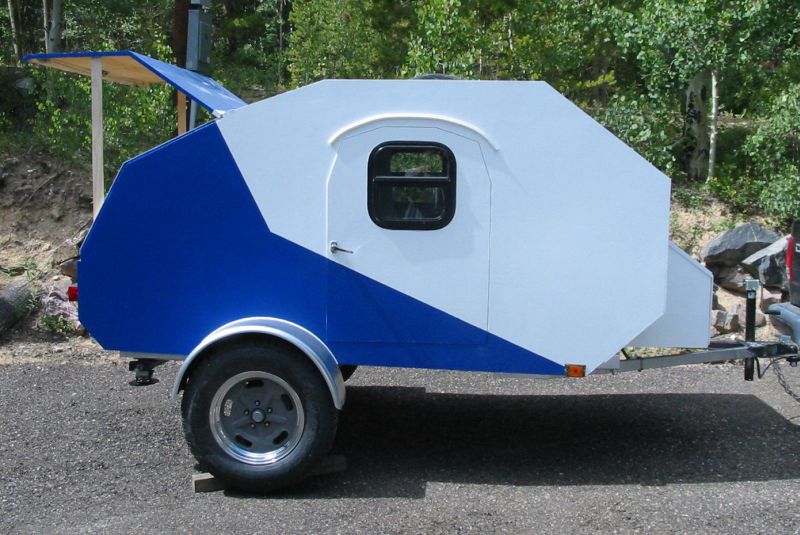
The Justintime: 6/21/11 update *interior finishing*

...ask your questions in the appropriate forums BUT document your build here...preferably in a single thread...dates for updates, are appreciated....

Postby RockyMountainTeardrops » Sat Jan 01, 2011 9:07 pm

YuGun wrote::applause: :applause: :applause:
Ä° like your teardrop and very good work,
Ä° wish for you have a good change of your build.

SaÄŸ olun :EXP
Thank you for your kind words.
I'm enjoying watching your build also.
Very creative! :thumbsup: :thumbsup:

Lee
User avatar
RockyMountainTeardrops
Super Teardrop Manufacturer
 
Posts: 99
Images: 233
Joined: Fri Oct 22, 2010 1:28 pm
Location: 4,000 above Denver, CO

Postby RockyMountainTeardrops » Mon Jan 10, 2011 5:51 pm

Okay, where were we?

Galley's about as done as it will be for right now, so it's time to shift to interior cabinets and roof.
This is the front headboard panel, looking from the tongue, toward the front of the camper.
Image
You can see the liberal use of Gorilla glue throughout.

This picture is through the curb side door, looking at the upper / forward cabinets.
Everything is just 1/4" A/C plywood.
As you can see, no roof yet.
Image

Here's the front cabinets with the roof on.
This also shows the hole in the front wall / headboard for a cubby shelf. (Water, flashlight and book shelf).
It's also using up some of the wasted space that you can see in the first picture today.
Image
You can also see the epoxy and fiberglass cloth used to reinforce the bottom corner of the cabinet.
This allowed us to not use any kind of wooden cleat or blocking.
I could have dovetailed these, but due to time constraints.....epoxy seemed like a quicker solution. (especially since everything will be covered with carpet.)

Here's the rear overhead cabinets....same construction as the front.
Just holes for access, no doors....trying to keep the weight as low as possible.
These will get a rubber / plastic trim ring around the openings to clean them up.
Image

Again, using expoy and fiberglass to reinforce the corner.
Image

Looking at the bottom of the rear overheads. The second step is the galley shelf. Using epoxy and fiberglass again for reinforcement.
This also shows the inside of the removable panel for bed access.
Image


So by this time it was getting to be mid July......vacation is scheduled for late August...8) ....Time for a decision.

Next post: "FULL SPEED AHEAD"

More later,
Lee
User avatar
RockyMountainTeardrops
Super Teardrop Manufacturer
 
Posts: 99
Images: 233
Joined: Fri Oct 22, 2010 1:28 pm
Location: 4,000 above Denver, CO

Postby RockyMountainTeardrops » Thu Jan 27, 2011 11:36 am

Okay, now it was getting to be early/mid July and we're still a long way from done.

I had designed a minimal frame (1-1/2 x 1-1/2 x 1/4 angle around the perimeter with two cross members, and a 2"x2" square tube for the tongue)
NOT STARTED

I had also planned on a trick suspension based on horizontally mounted shocks and springs (like an Indy car) with a panhard rod to locate everything.......
NOT STARTED

Electrical
NOT STARTED

Hatch
NOT STARTED

Painting
NOT STARTED

Interior carpet.
NOT STARTED

It is clear that I will be lucky to get the body done by August 21, 2010 (vacation time).

So a new plan had to be implemented.

An the answer was.....?
Enlist the wife as a full partner (she was Design Consultant before, but now she's Electrical and Paint) and buy a HFT heavy duty trailer.

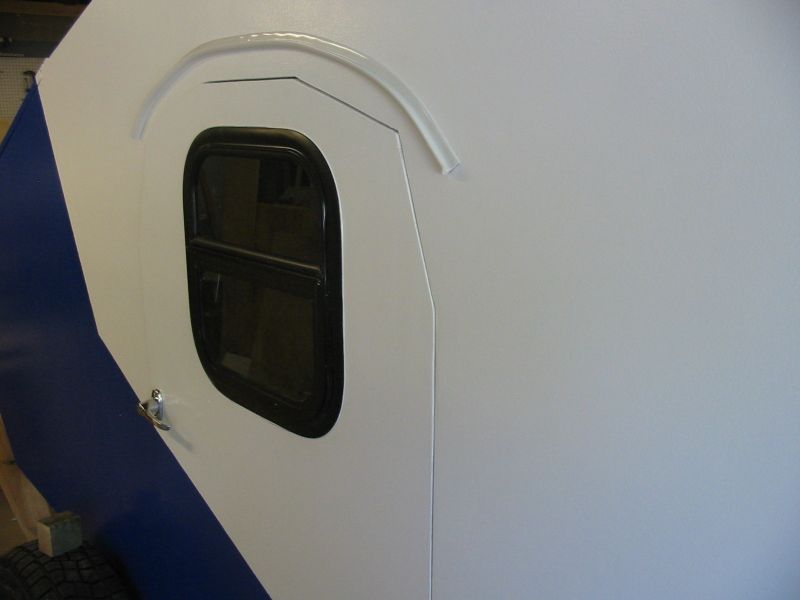
Here's a couple pictures of a side door, with the edges painted.
Image
Image

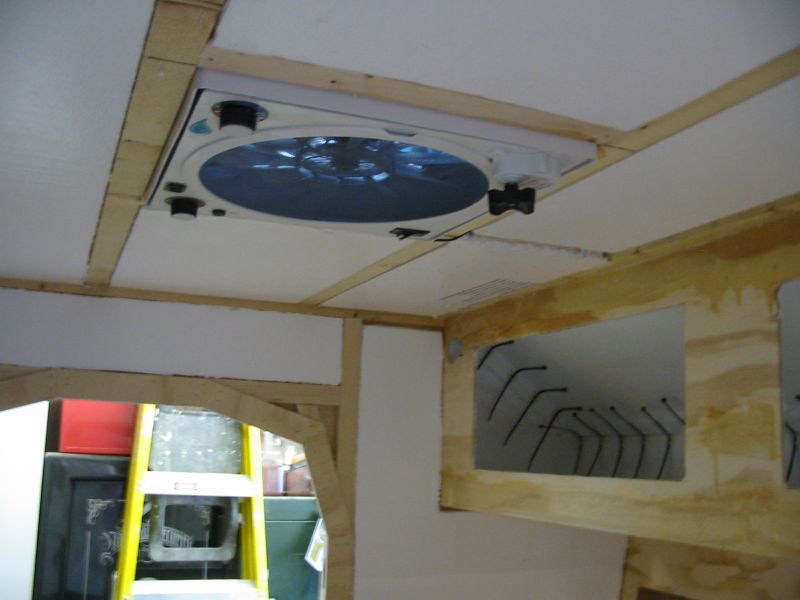
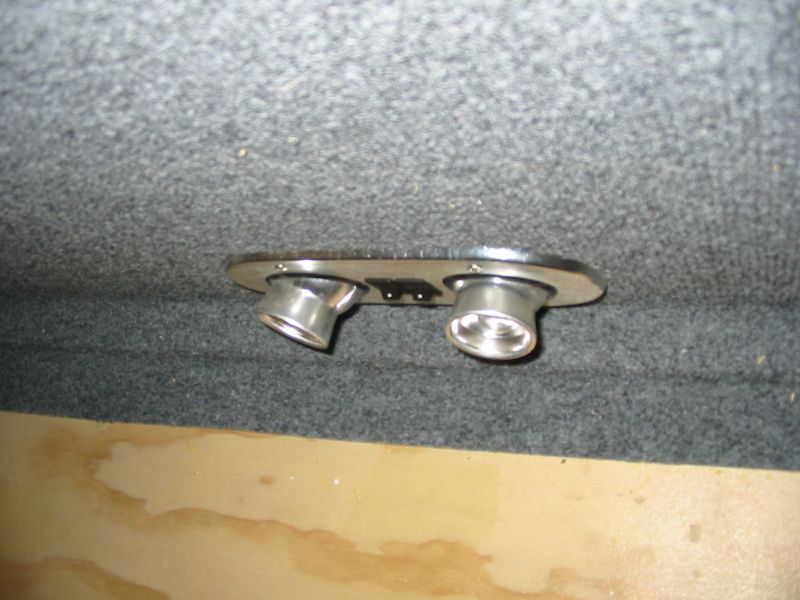
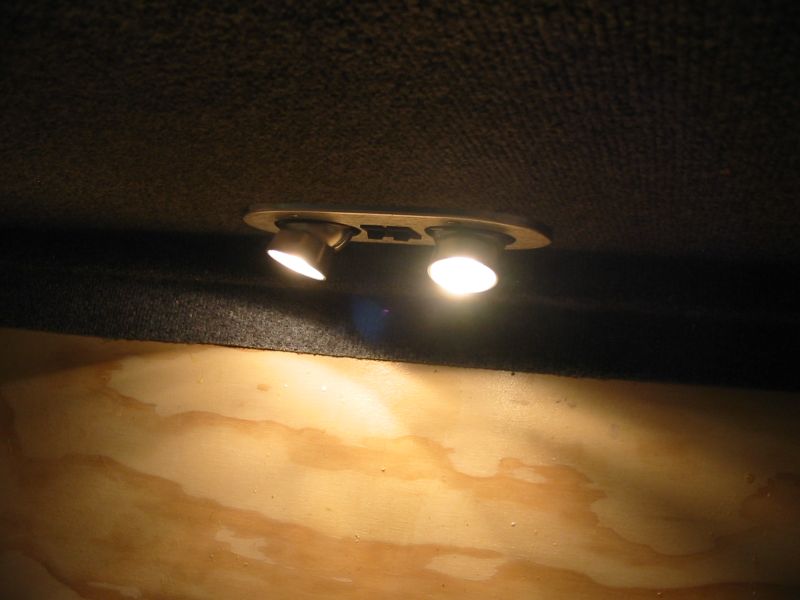
While the wife is working on the E & P (three interior lights and a fantastic fan) I was working on the hatch skin.
For construction, I only used one layer of 1/4" A/C sanded, the joints reinforced with epoxy and fiberglass tape. This made a nice light hatch, but caused problems that I'll talk about later.

Foil tape to keep the joint together until the epoxy hardens.
Image
Image

You can kind of see how I covered the joint here. I used one strip of roving down the middle, then one on the top 1/3 and one on the bottom 1/3. This made for three layers on the joint without a huge bulge.
Image

I spent a ton of time working on "car trunk" hinges to get away from the surface mounted hinge (hurricane, piano).
However the hatch, only being made out of 1/4" ply, was not stiff enough to allow this to work, so this idea was also scrapped (for now). You can see the gap in the structure to allow the gutter to run through....this has since been patched.

Hinge gap.
Image

This is the bottom of the hatch where it comes to the body....not sure what happened here....this was supposed to be 5/16" to allow 1/4" for the hatch and 1/16" for weatherstripping. I had to add another piece of wood to this to make it even with the body. (thank goodness for surface planers).
Image

Another idea that fell victim to time was a hot water heater (with pump and shower faucet) and water tank.
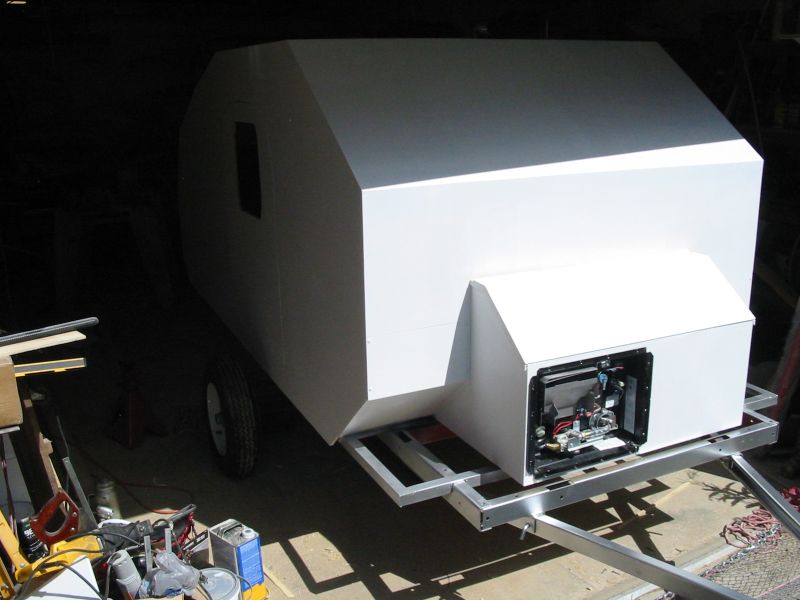
Here's the tongue box with the heater in mock-up.
Image

This is a nice picture of the front, showing the tongue box and the little cubby shelves.
I had planned to use the areas below the cubby shelves for battery and propane, but not enough time to allow this to happen.
Image

This was taken after prime painting. We were pulling the 1-1/2 angle frame out to put the HFT frame under (that will be another post).
I also used the "extreme environment" solid hinge from McMaster-Carr.
Not shown was the three coats of CPS for a base sealant.
Image
Image

Next up: New Frame.

More later,
Lee
User avatar
RockyMountainTeardrops
Super Teardrop Manufacturer
 
Posts: 99
Images: 233
Joined: Fri Oct 22, 2010 1:28 pm
Location: 4,000 above Denver, CO
Top

Postby Miriam C. » Thu Jan 27, 2011 5:45 pm

:applause: :thumbsup: :thumbsup: :beautiful:

I really like the tongue box area! Very nice!
Image
“Forgiveness means giving up all hope for a better past.â€
User avatar
Miriam C.
our Aunti M
 
Posts: 19675
Images: 148
Joined: Wed Feb 15, 2006 3:14 pm
Location: Southwest MO
Top

Postby 2bits » Thu Jan 27, 2011 11:15 pm

As I was reading, I was about to suggest the CPES base coat and the McMaster hinge! I love the door frame too! It is looking great~ Hopefully the wifey will feel the same amount of pride having put her own sweat into it too!

:applause:
Thomas

Image
User avatar
2bits
2bit Member
 
Posts: 5130
Images: 8
Joined: Thu Dec 27, 2007 6:04 pm
Location: Lake Tawakoni, TX
Top

Postby RockyMountainTeardrops » Tue Feb 08, 2011 6:46 pm

Miriam C. wrote:I really like the tongue box area! Very nice!

Thank you!

2bits wrote:As I was reading, I was about to suggest the CPES base coat and the McMaster hinge! I love the door frame too! It is looking great~ Hopefully the wifey will feel the same amount of pride having put her own sweat into it too!

She did enjoy helping, but she is more of a "napper" than a "get the hands dirty" kind of person.


Buy the time of the last post, we were about 2 weeks from camping.....still needed to finish painting, wiring, and get the trailer frame under it.

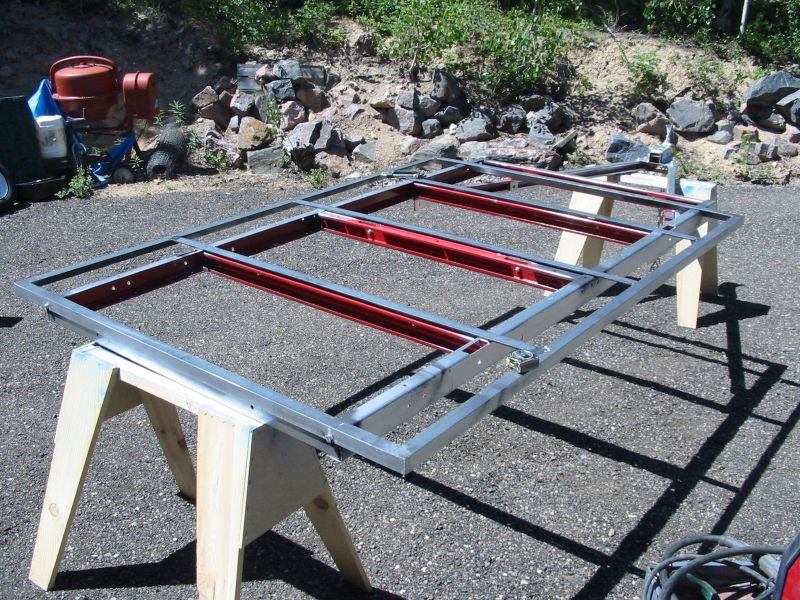
First step, modify the HTF frame to work.
Attached the 1-1/2 x 1-1/2 x 1/4 angle frame.
Image

Pushing the frame under the body.
Image

I had ordered an axle from Southwest Trailer Parts a while ago.
3,500 with electric brakes.
My Dakota is factory wired with a 7 pin plug...so there was no reason not to get the upgrade. (in hindsight.....we could have skipped the brakes)

After the frame was pushed under, I realized that the axle I had ordered was about 2" too wide.....the tires were sticking out from under the fenders...
I had to cut 2" out and weld it back together. (no pictures)
Moved the spring perches on the trailer back about 12" or so to allow the door to clear the fenders. (no pictures of that either).

Now that the frame in under, I can get it bolted down and work on the trailer wiring while the wife paints and starts putting the interior carpet in.

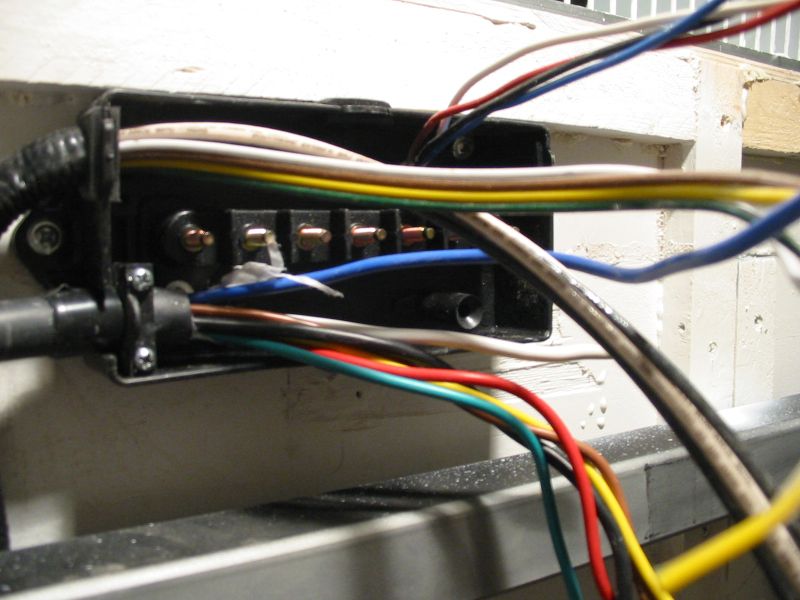
7 pin harness box.
I was wiring this up at about 8:00pm the night before we were going to leave.
Image

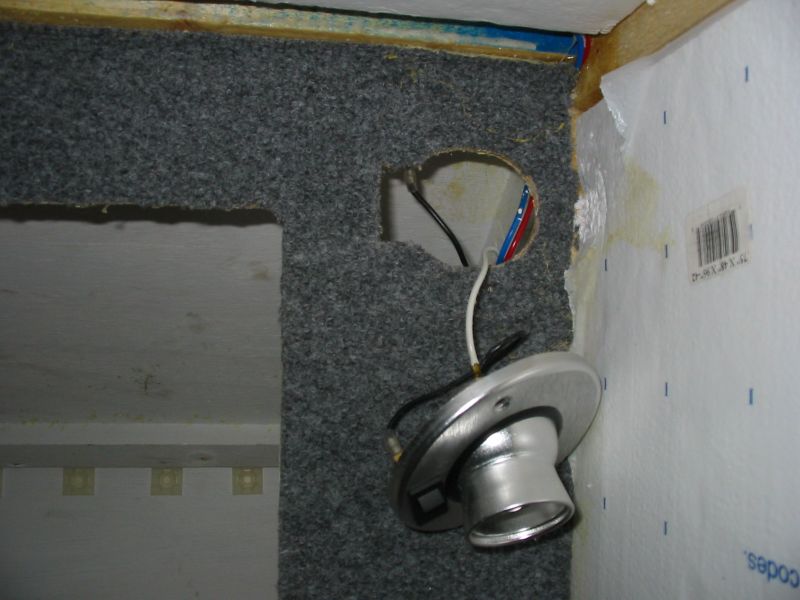
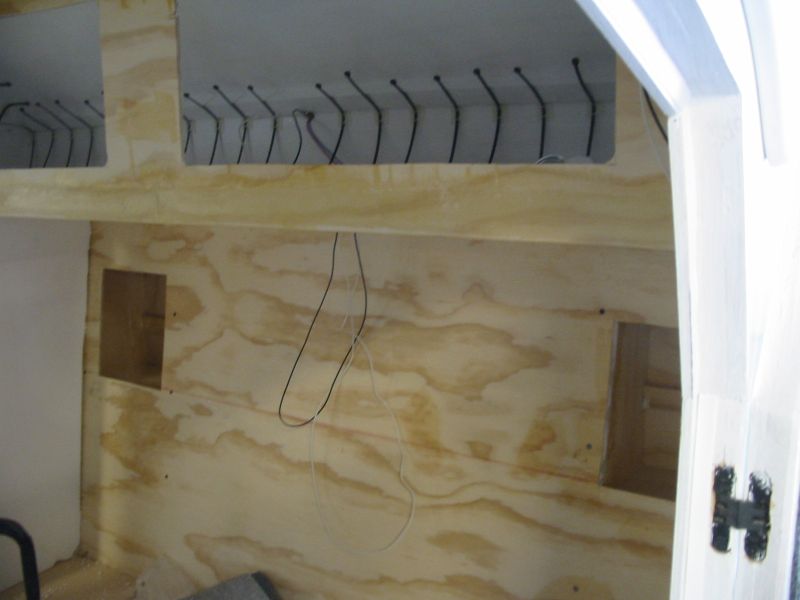
Interior electrical. (the wife looooooves zip ties)
Image
Image
Image
Image


LIGHT!:applause:
Image


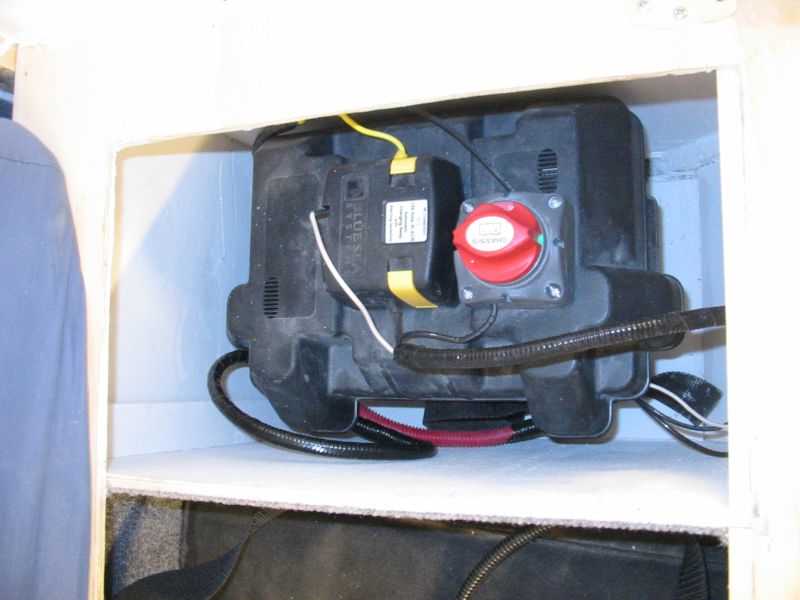
Battery box with disconnect and automatic switch.
Image


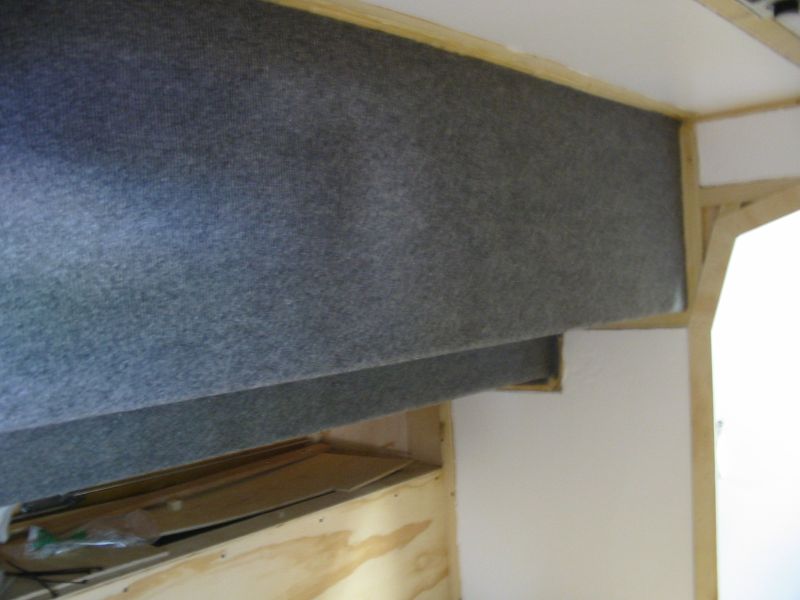
Carpet (rear cabinets before cutting out the holes)
Image


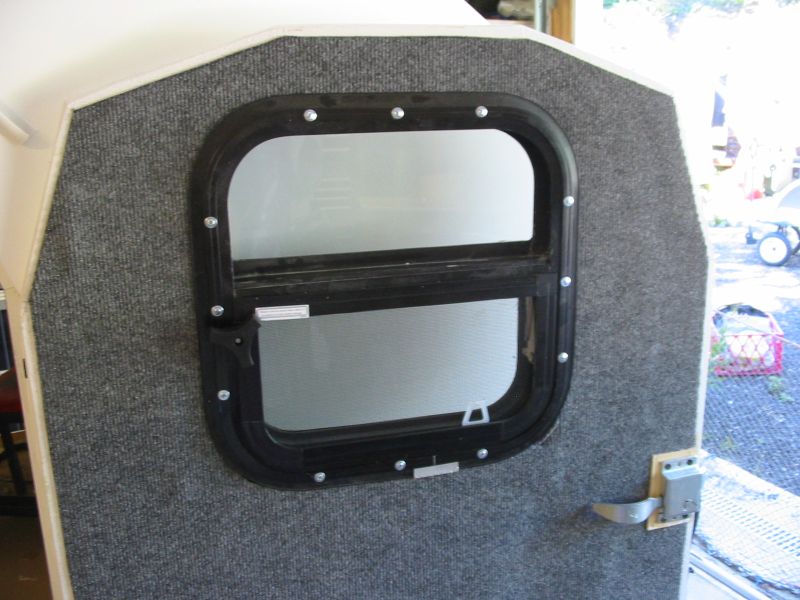
Door with window.
Image


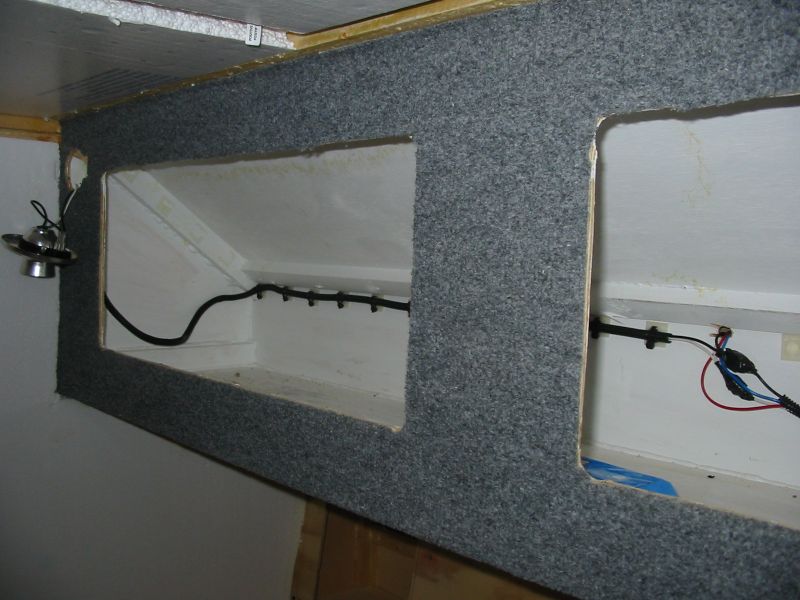
Front cabinets with carpet and wiring.
Image


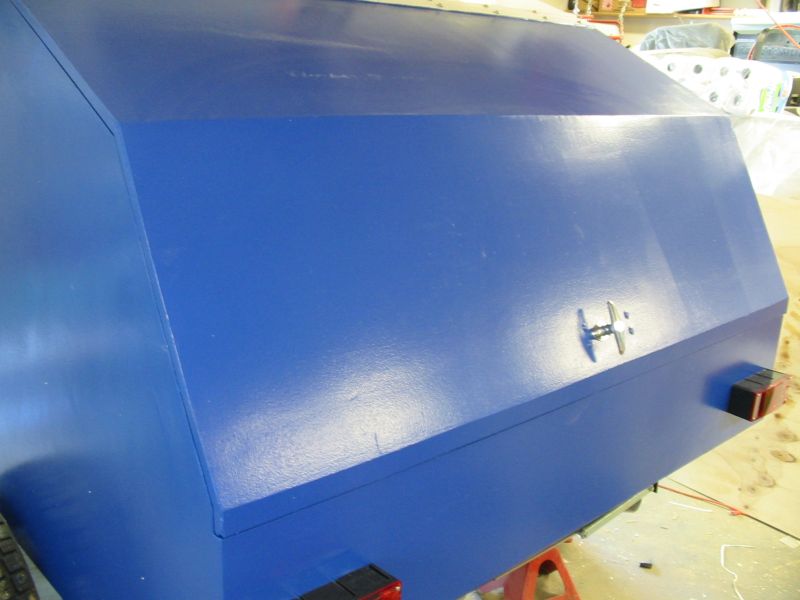
PAINT! :D
Rear hatch showing the carpy Autozone taillights (they got changed after the first trip)
Image
Image
Image


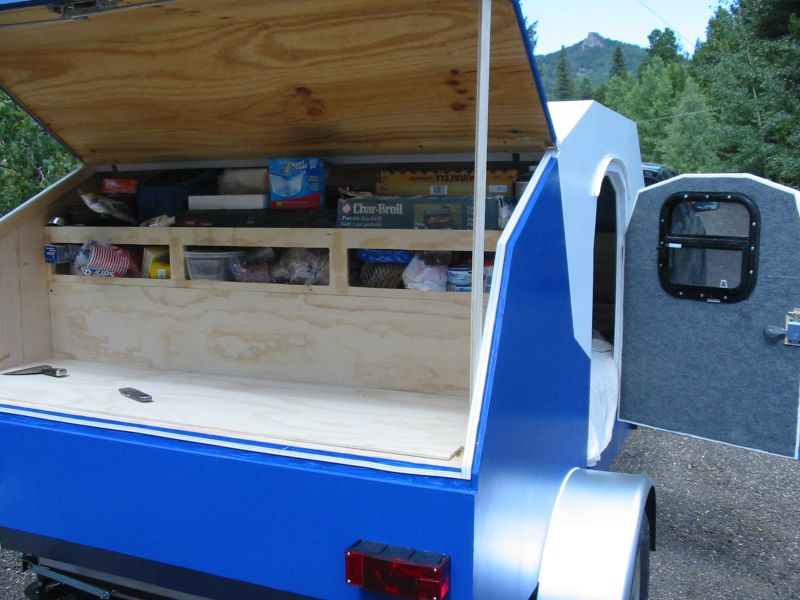
I started packing the galley and the cabinets while the wife is still getting the some of the interior carpet installed and the lights attached.
These last few pictures were taken the morning we were leaving for camping.
As you can see....we didn't get any finishing done in the galley....this is all raw wood still.
Image


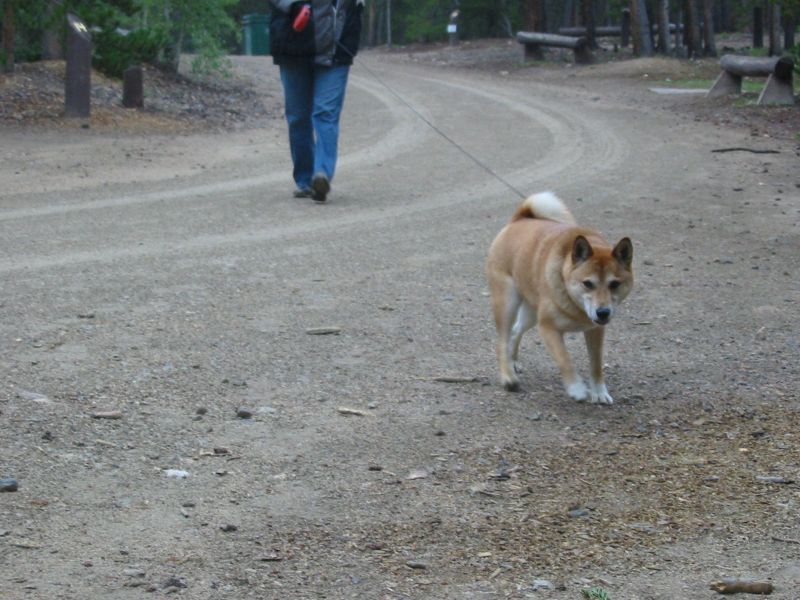
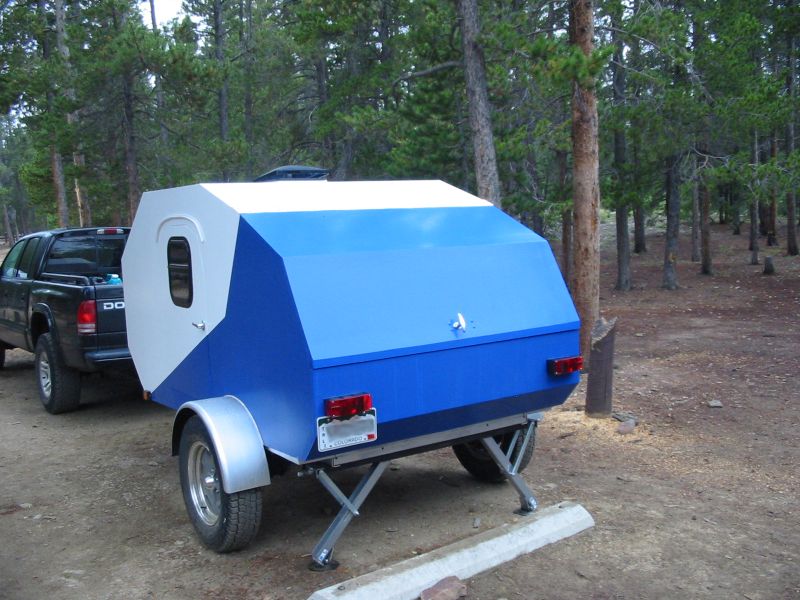
Since we hadn't even taken this thing for a test drive....we went to a close campground outside of Central City / Blackhawk Co.
Image
Image


While I'm talking about camping....I have a major gripe.
Let me set the stage....
We were in a site about 25 yards from the bathroom. (one site in between us and the potty). Granted, it was a typical National Forest outhouse :frightened:....but the "ladies" that were camping before us decided that they didn't like the outhouse, so they just went behind every tree in the vicinity...and left the dirty paper on the ground! :x

REALLY? You couldn't at least pick up your dirty TP ??????


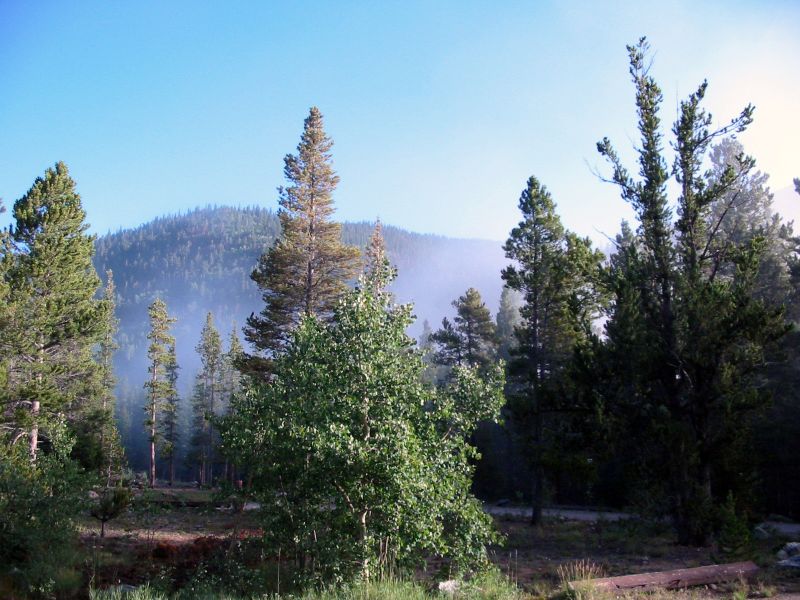
We left that campground the next morning and drove through Breckenridge, went over Hooiser Pass, down into South Park, then back toward Denver.
We camped for the next three days at Jefferson Lake.
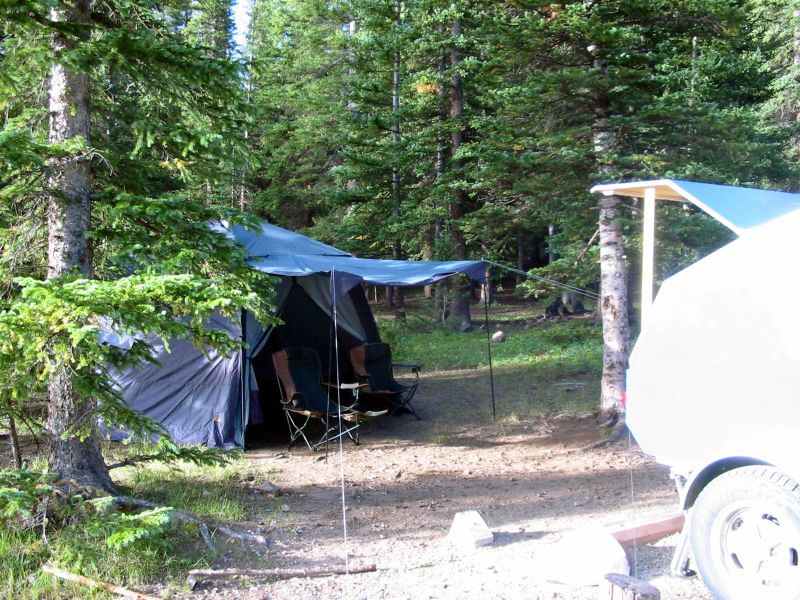
Image
Image

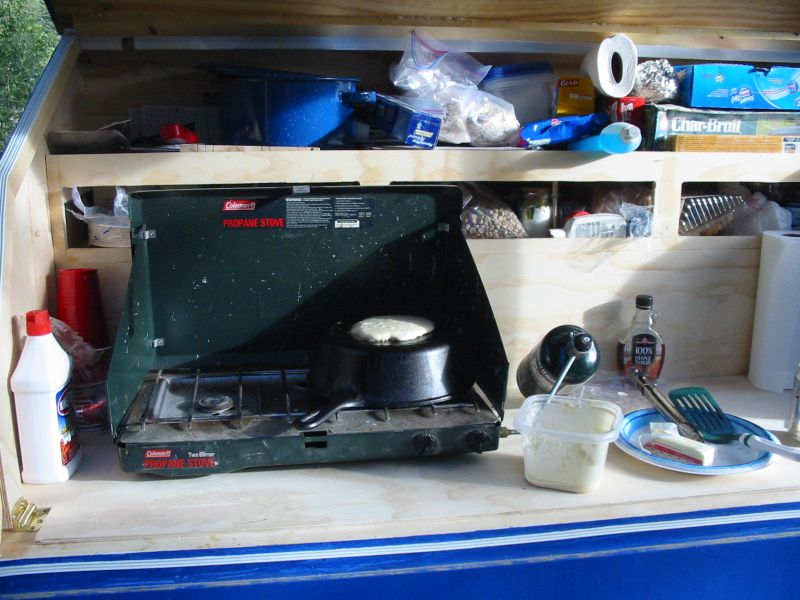
Pancake Breakfast!
Image


I have to admit.....that was the best vacation we've had in about 10 years.
Camping in a tent is for people too :? to get a teardrop!


But wait....there's more!
We decided that there was a couple of things we didn't like about the layout (cooler box under the counter top for one thing).
And there is still a new frame to build...


So this build is not done yet. More updates still to come!

More later,
Lee
User avatar
RockyMountainTeardrops
Super Teardrop Manufacturer
 
Posts: 99
Images: 233
Joined: Fri Oct 22, 2010 1:28 pm
Location: 4,000 above Denver, CO
Top

Postby Ratkity » Tue Feb 08, 2011 9:00 pm

:applause: :applause:

Beautiful job and I love the colors!

Hugs,
Ratkity
Ratkity
Gold Donating Member
 
Posts: 1065
Images: 0
Joined: Wed May 26, 2010 1:01 pm
Top

Postby S. Heisley » Tue Feb 08, 2011 10:21 pm

Glad you had a good time on your trip. Thanks for sharing!

The blue and white paint is very pretty and, actually, you are smart to wait to finish the galley as there seems to quite often be a 'shoulda-coulda-woulda' thought for that area. :thumbsup: :applause:
User avatar
S. Heisley
Super Lifetime Member
 
Posts: 8774
Images: 495
Joined: Mon Sep 17, 2007 10:02 am
Location: No. California
Top

Postby Miriam C. » Wed Feb 09, 2011 12:35 am

:applause: :thumbsup: Beautiful place to camp...now about those "ladies" bet they don't make fires either...

Really maybe we all need to carry an extra bucket to leave as a gift for folks like that... 8) :lol:
“Forgiveness means giving up all hope for a better past.â€
User avatar
Miriam C.
our Aunti M
 
Posts: 19675
Images: 148
Joined: Wed Feb 15, 2006 3:14 pm
Location: Southwest MO
Top

Postby Shadow Catcher » Wed Feb 09, 2011 6:27 am

Thanks for sharing your build and first trip, and the tp story reminds me to bring a shovel in future to deal with potential pigs.
User avatar
Shadow Catcher
Donating Member
 
Posts: 5993
Images: 234
Joined: Sat Apr 11, 2009 8:26 pm
Location: Metamora, OH
Top

Postby aggie79 » Wed Feb 09, 2011 9:13 am

:applause: :thumbsup: :applause:

Very nice teardrop and wonderful camping pictures! You can't beat that combination.

You ought to be very proud of yourself. Y'all have done a fine job!

Take care, Tom
Tom (& Linda)
For build info on our former Silver Beatle teardrop:
Build Thread

93503
User avatar
aggie79
Super Duper Lifetime Member
 
Posts: 5405
Images: 686
Joined: Tue Aug 07, 2007 5:42 pm
Location: Watauga, Texas
Top

Postby RockyMountainTeardrops » Wed Feb 09, 2011 7:52 pm

Thank you all for your kind words!:thumbsup: :thumbsup:

The worse thing is waiting for spring to use it again!

We were putting in some long hours the last few weeks getting it finished. Nothing is more frustrating than laying underneath the trailer at 8 o'clock the night before you are leaving and having the color codes of the pigtail not match the "universal" trailer wiring code!

I've continued work on the Justintime, and here's a picture of the next step.
New frame!
Image

The net across the garage is to keep the dog inside....she chases cars. :x

More later,
Lee
User avatar
RockyMountainTeardrops
Super Teardrop Manufacturer
 
Posts: 99
Images: 233
Joined: Fri Oct 22, 2010 1:28 pm
Location: 4,000 above Denver, CO
Top

Postby bdosborn » Wed Feb 09, 2011 9:20 pm

How is it there isn't any snow in your pictures?
:o

Bruce
2009 6.5'X11' TTT - Boxcar
All it takes is a speck of faith and a few kilowatts of sweat and grace.
Image
Boxcar Build
aVANger Build
User avatar
bdosborn
Donating Member
 
Posts: 5495
Images: 772
Joined: Wed May 05, 2004 11:10 pm
Location: CO, Littleton
Top

Postby RockyMountainTeardrops » Wed Feb 09, 2011 10:19 pm

bdosborn wrote:How is it there isn't any snow in your pictures?
:o

Bruce


This was all last August / September.
Somebody's just looking at the pictures!

:lol: :D :D :lol:

I only finished the final modifications a few weeks ago.
User avatar
RockyMountainTeardrops
Super Teardrop Manufacturer
 
Posts: 99
Images: 233
Joined: Fri Oct 22, 2010 1:28 pm
Location: 4,000 above Denver, CO
Top

Postby RockyMountainTeardrops » Wed Mar 02, 2011 12:08 pm

Boy!
Been ignoring this thread for a while.

:(

Starting to build the new frame
1-1/2" x 11ga square tube
1-1/2" x 1/4" angle for the cross members
1" x 3" x 11ga rectangular tube for the tongue.

Took me a while to get the tongue the correct length and centered.
Image

Welded coupler.
Image

Cross-member with spring perches.
Image

Not a bad weld...if I do say so myself.
8)
Image

New frame under.
51-1/2" from the front of the camper to the cross member.
Make sure it's the same on both sides!!!
Image

Since I knew that the HFT trailer was temporary, I didn't weld the spring perches to the axle.
Good thing we didn't go very far on the first trip!!
Axle shifted and the tire rubbed *just* a wee bit.
(this is the inside of the fender)
Image

Bolted down, six 3/8" elevator bolts.
Image

Building a spare tire carrier.
I bought these tires/rims to try to get them as close to 30" (same size as my jeep) as possible.
But I also wanted a narrow tread. (approx 7.5" width)
American Racing Salt Flat Special rims
Pirelli tires
The wheels and tires were the single most expensive part to this build.
The three rims & tires together accounted for approx 25% of the cost of this build.
Image
Image

Mounted with four 1/2" bolts.
Take two out of one side, and lower the carrier down and pull the tire out of the rack.
This method allows the tire carrier to add strength to the structure.
It is carrying part of the floor load.
Image
Image

More later,

Lee
User avatar
RockyMountainTeardrops
Super Teardrop Manufacturer
 
Posts: 99
Images: 233
Joined: Fri Oct 22, 2010 1:28 pm
Location: 4,000 above Denver, CO
Top

PreviousNext

Return to Build Journals

Who is online

Users browsing this forum: No registered users and 54 guests