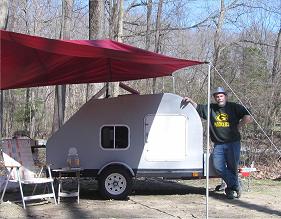
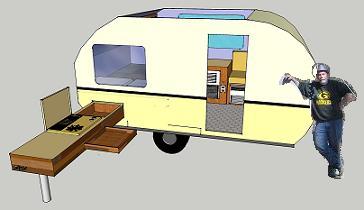
SDave's Build

...ask your questions in the appropriate forums BUT document your build here...preferably in a single thread...dates for updates, are appreciated....

Postby parnold » Fri Feb 11, 2011 10:27 pm

I had a similar problem with my brain when I installed my rear hatch door. I had to build up the corners. Now that it is painted, only I know of my mistake... well, and now anyone reading this thread.
User avatar
parnold
Donating Member
 
Posts: 2344
Images: 302
Joined: Mon Feb 08, 2010 4:49 pm
Location: Northwest New Jersey

Postby sdave209 » Fri Feb 11, 2011 10:32 pm

Hahaha, Ya if it was a manual transmission I might have taken a crack at it but an auto with overdrive...no way. It was worth it for me, plus we upgraded it quite a bit so it should be real reliable now.
Paul-
Like a guy from work said "if your not making any mistakes, your not working hard enough". Nice to know Im not the only one though.
There is nothing that I can build that I cannot unbuild. <or> Mistakes will be made, action will be taken.
sdave209
Teardrop Advisor
 
Posts: 52
Images: 148
Joined: Sat Aug 28, 2010 7:45 pm
Location: Edmonton, Ab. Canada

Postby droid_ca » Fri Feb 11, 2011 11:06 pm

looking really good glad to see you fixed your window problem your heater is looking good there ar some candles that you might be interested i
http://www.survivalunlimited.com/candles.htm
There is a world, just beyond now,
where reality runs a razor thin seam between fact and possibility;

Anywhere I roam where I lay my head is home....
Image
“Fide Canem”
Please check out my build thread
viewtopic.php?f=5&t=52816
User avatar
droid_ca
Donating Member
 
Posts: 1981
Images: 176
Joined: Thu Sep 30, 2010 5:08 am
Location: Prince George BC Canada
Top

Postby sdave209 » Sat Feb 12, 2011 9:03 pm

That is a very serious looking candle, but there is no way it will fit in the furnace. I was looking at those pics of the furnace today, and I think Ill try to make it smaller. I know, its not even done and Im gonna tinker with it. Its just that I think it might be a little big for the limited space I have.
There is nothing that I can build that I cannot unbuild. <or> Mistakes will be made, action will be taken.
sdave209
Teardrop Advisor
 
Posts: 52
Images: 148
Joined: Sat Aug 28, 2010 7:45 pm
Location: Edmonton, Ab. Canada
Top

Postby sdave209 » Sat Feb 12, 2011 9:11 pm

This is my window.
Image
and the fix
Image
Fits real good now.
:lol:
There is nothing that I can build that I cannot unbuild. <or> Mistakes will be made, action will be taken.
sdave209
Teardrop Advisor
 
Posts: 52
Images: 148
Joined: Sat Aug 28, 2010 7:45 pm
Location: Edmonton, Ab. Canada
Top

Postby sdave209 » Sat Feb 12, 2011 9:14 pm

Did some door work today
Hinges:
Image
Image
Image
Image
There is nothing that I can build that I cannot unbuild. <or> Mistakes will be made, action will be taken.
sdave209
Teardrop Advisor
 
Posts: 52
Images: 148
Joined: Sat Aug 28, 2010 7:45 pm
Location: Edmonton, Ab. Canada
Top

Postby sdave209 » Sat Feb 12, 2011 9:19 pm

Door knob
Image
Dead bolt
Image


Tomorrow Ill put the hinges in the door and then take all the hardware out and get ready for fiberglass. Im running out of stuff to do that does not require money, not sure what to do next. Window shopping and ice fishing for a few weeks I guess.
There is nothing that I can build that I cannot unbuild. <or> Mistakes will be made, action will be taken.
sdave209
Teardrop Advisor
 
Posts: 52
Images: 148
Joined: Sat Aug 28, 2010 7:45 pm
Location: Edmonton, Ab. Canada
Top

Postby Cliffmeister2000 » Sun Feb 13, 2011 1:29 am

sdave209 wrote:Dead bolt
Image


Never saw a deadbolt on a teardrop before! At least one that wasn't integrated into the door handle mechanism. That should keep the riff raff out! :thumbsup:
God Bless

Cliff

♥God. ♥People.
1 John 4:9-11

My Teardrop build pictures
User avatar
Cliffmeister2000
Titanium Donating Member
 
Posts: 3622
Images: 157
Joined: Thu Jul 26, 2007 10:18 pm
Location: Phoenix, AZ
Top

Postby droid_ca » Sun Feb 13, 2011 10:18 am

awesome job hope full you can tinker around some more to keep busy but then again a break could be helpful and let you think of things and figure out different solutions best luck :applause: :applause: :applause: :applause:
There is a world, just beyond now,
where reality runs a razor thin seam between fact and possibility;

Anywhere I roam where I lay my head is home....
Image
“Fide Canem”
Please check out my build thread
viewtopic.php?f=5&t=52816
User avatar
droid_ca
Donating Member
 
Posts: 1981
Images: 176
Joined: Thu Sep 30, 2010 5:08 am
Location: Prince George BC Canada
Top

Postby Chuckles2153 » Sun Feb 13, 2011 6:57 pm

sdave209 wrote:Here is how I fixed my window problem, turns out it was my fault. Im kinda stunned sometimes, I cut my corners at 3-1/2" dia and my window has 3-1/2" rad corners. First of all I should not have cut out the wall until I got the window, and secondly I know the difference between rad and dia, I guess I was not paying attention.
Image
:?


I did the same thing myself with my doors, ounld'nt wait until thay came in and PRESTO!!! toooo big.
On another note your furnace idea is 1 of a kind and very cool :thumbsup: . I haven't seen anything like it before so i give you 3 bumps for that and 2 :applause: :applause: .
Have you tried it out yet to see if it's going to do the job good enough?
Chuck.
Chuckles2153
Teardrop Master
 
Posts: 154
Images: 74
Joined: Wed Mar 24, 2010 2:00 pm
Location: Franklin. Indiana
Top

Postby sdave209 » Sun Feb 13, 2011 9:12 pm

Cliff- if you had friends like mine you would have a dead bolt too. The last thing I need in the middle of the nite is one of there "funny" jokes. Keeps the bears out too, the see that its locked and move onto easier prey. :lol:

Chuck- thanks for the props, I have not tried it out yet in a "real life" situation, but it felt pretty hot in my living room. Maybe after I do some tweeking, Ill see how good it heats up my truck.

Speaking of my truck, it has to go back to my mechanic on Monday. Its running kinda funny when I put it in gear, but runs fine in park.
There is nothing that I can build that I cannot unbuild. <or> Mistakes will be made, action will be taken.
sdave209
Teardrop Advisor
 
Posts: 52
Images: 148
Joined: Sat Aug 28, 2010 7:45 pm
Location: Edmonton, Ab. Canada
Top

Postby sdave209 » Sat Feb 19, 2011 8:21 pm

Here is the new and improved forced air candle furnace. It is about 1/3 the size of the original.
Image
This is the expanded metal I will use for the front grill on the mini.
Image
The paint I used to paint the mini.
Image
There is nothing that I can build that I cannot unbuild. <or> Mistakes will be made, action will be taken.
sdave209
Teardrop Advisor
 
Posts: 52
Images: 148
Joined: Sat Aug 28, 2010 7:45 pm
Location: Edmonton, Ab. Canada
Top

Postby sdave209 » Sat Feb 19, 2011 8:26 pm

The mini all painted and pretty. The unpainted part is the 1/2" aluminum plate.
Image
"9 hour" candles inside.
Image
All lit up and throwing heat.
Image
There is nothing that I can build that I cannot unbuild. <or> Mistakes will be made, action will be taken.
sdave209
Teardrop Advisor
 
Posts: 52
Images: 148
Joined: Sat Aug 28, 2010 7:45 pm
Location: Edmonton, Ab. Canada
Top

Postby droid_ca » Sat Feb 19, 2011 8:34 pm

those furnaces do work in cooler climates but not so great when windy cause you still need to crack a window to keep oxygen in the trailer
There is a world, just beyond now,
where reality runs a razor thin seam between fact and possibility;

Anywhere I roam where I lay my head is home....
Image
“Fide Canem”
Please check out my build thread
viewtopic.php?f=5&t=52816
User avatar
droid_ca
Donating Member
 
Posts: 1981
Images: 176
Joined: Thu Sep 30, 2010 5:08 am
Location: Prince George BC Canada
Top

Postby sdave209 » Sat Feb 19, 2011 8:42 pm

Image
Ok, so here is the review:
Lite the 3 candles first, let them heat the top plate for a half hour or so.
Then turn on the fan and it will blow all that heat around the TD.
Does a good job, you can feel the heat coming off it quite well. The fan is very quiet, but does move air.
Now the problems; the candles are not dripless. The front candle can drip wax out side of the holder. I will be making a small tray to catch any stray wax. I seem to have discovered cowl induction; the fan blowing from the back swirls over the front edge and cuts down on the effectiveness of the candles. It makes the flames dance and swirl. Any Ideas on how to fix this? I have a feeling that if I put the grill on the front all the way to the top of the mini (my original plan) that the fan will blow the candles out, so I will only go as high as the 1/2" plate. But how will I fix the "cowl induction"?
There is nothing that I can build that I cannot unbuild. <or> Mistakes will be made, action will be taken.
sdave209
Teardrop Advisor
 
Posts: 52
Images: 148
Joined: Sat Aug 28, 2010 7:45 pm
Location: Edmonton, Ab. Canada
Top

Previous

Return to Build Journals

Who is online

Users browsing this forum: No registered users and 6 guests