Here we go! CARS first tear!

...ask your questions in the appropriate forums BUT document your build here...preferably in a single thread...dates for updates, are appreciated....

Here we go! CARS first tear!

Postby CARS » Mon Apr 11, 2011 10:08 pm

Well, we're off!!

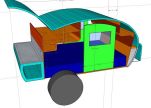
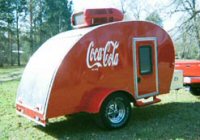
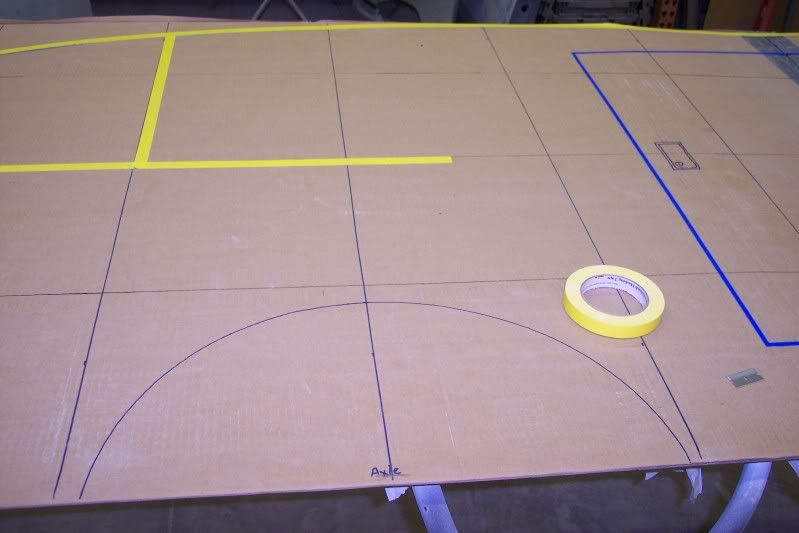
I started off with some prints of my favorite profile found here (thank you) and transferred it to cardboard.

Image

Image

Image

Image

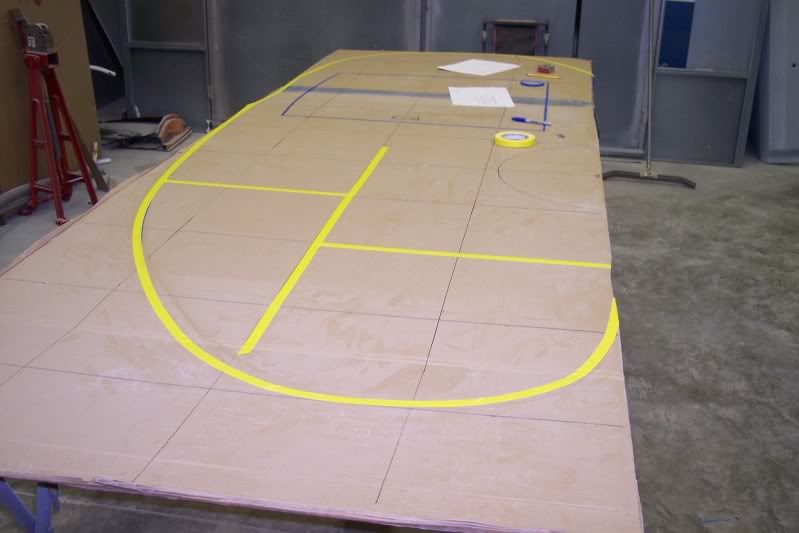
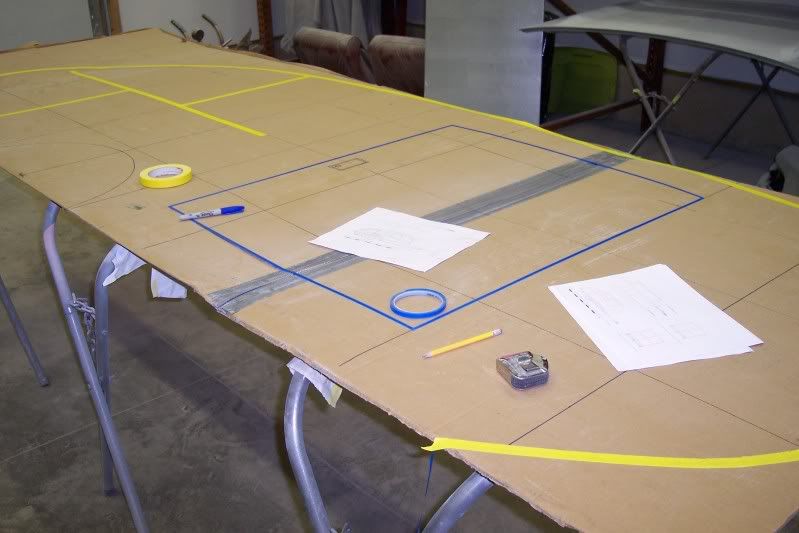
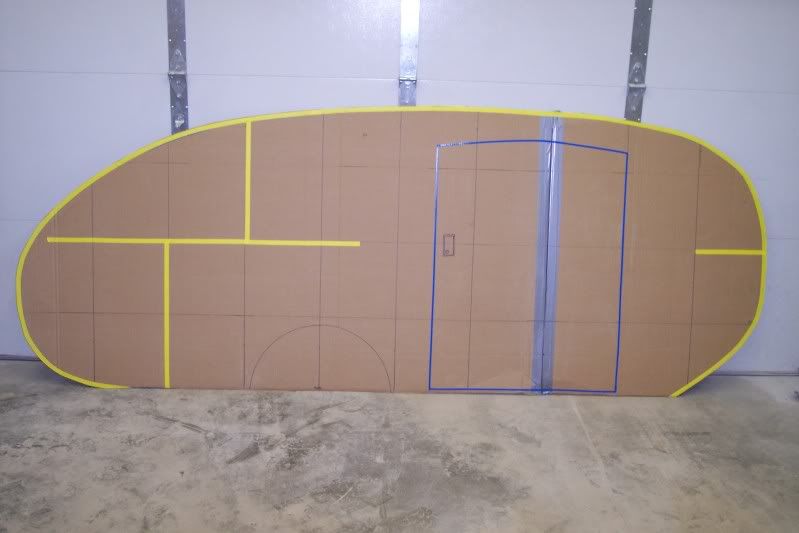
After some adjustment to the tape, Becky and I agreed it was what we wanted (Our first tear, we don't know any better!)

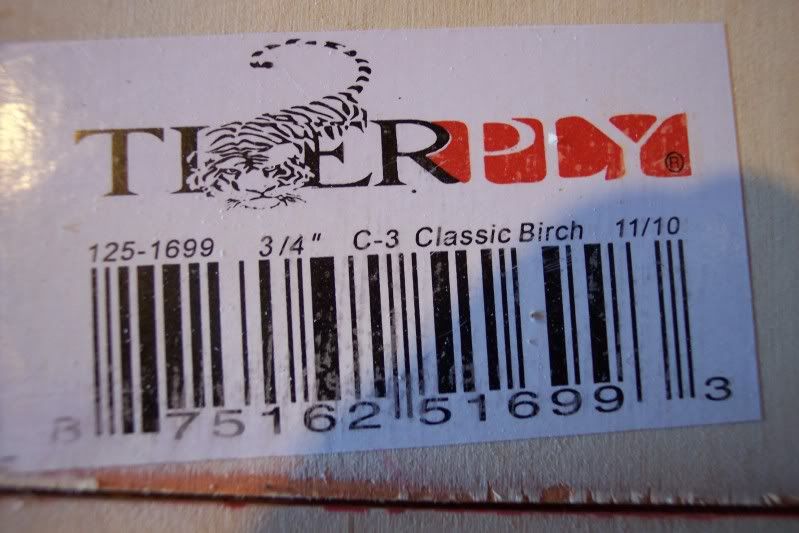
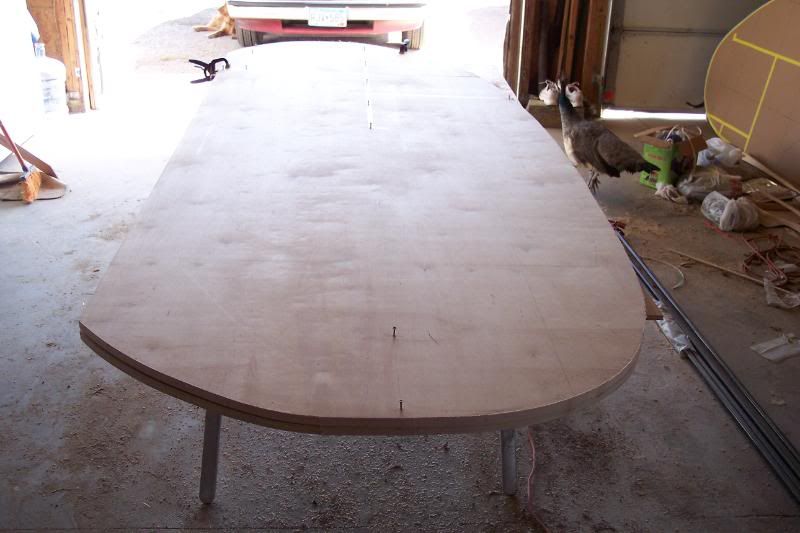
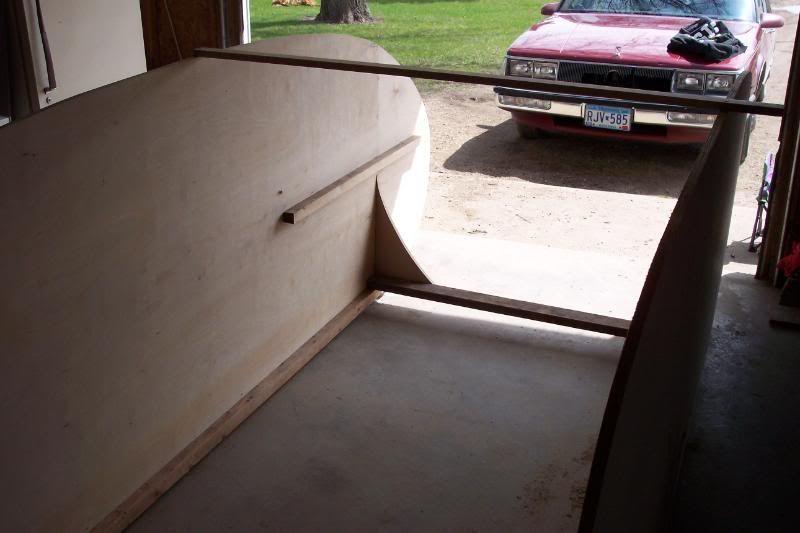
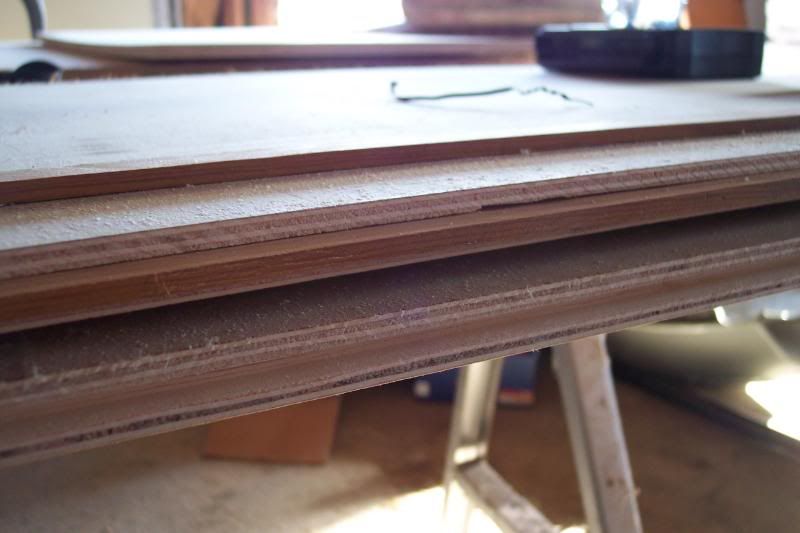
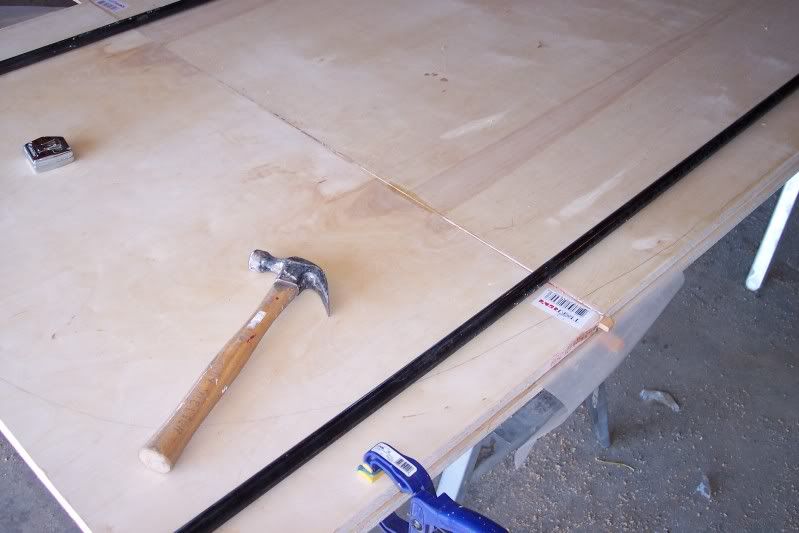
MN finally has 50+ degree days (although nights are still a bit chilly) so we got out the saw, router, and glue and "stretched" our ply. It's 3/4" birch ply. Advertised at Menard as 7 ply but when I look at it I count 11 very thin plys. More is better, right?? (we'll see)

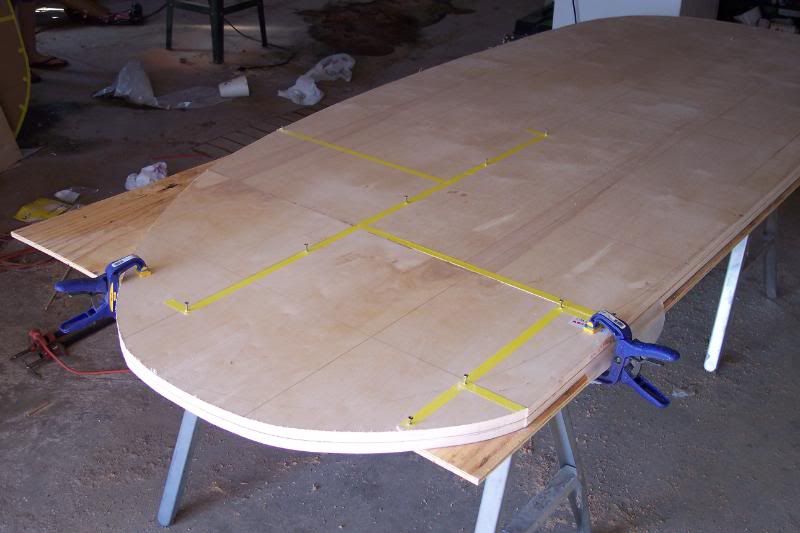
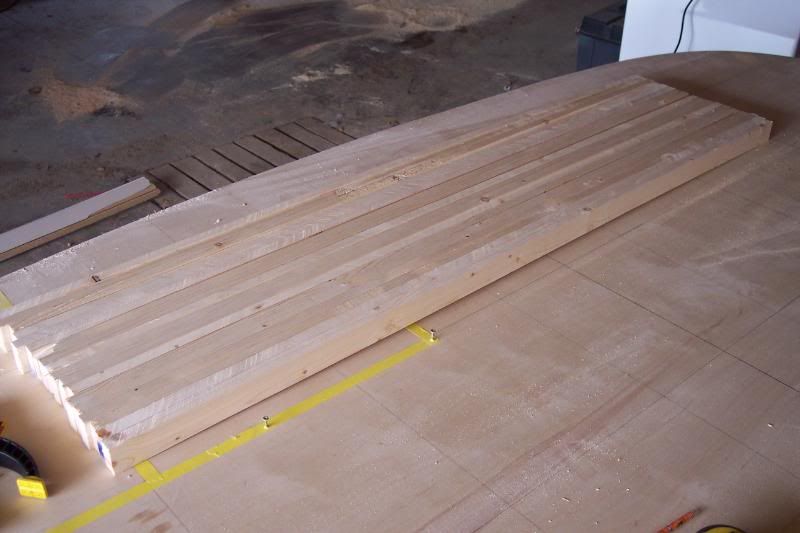
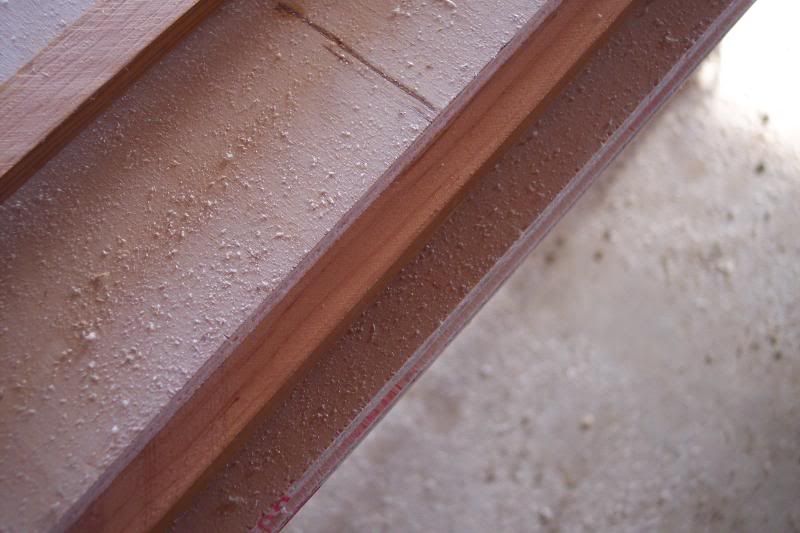
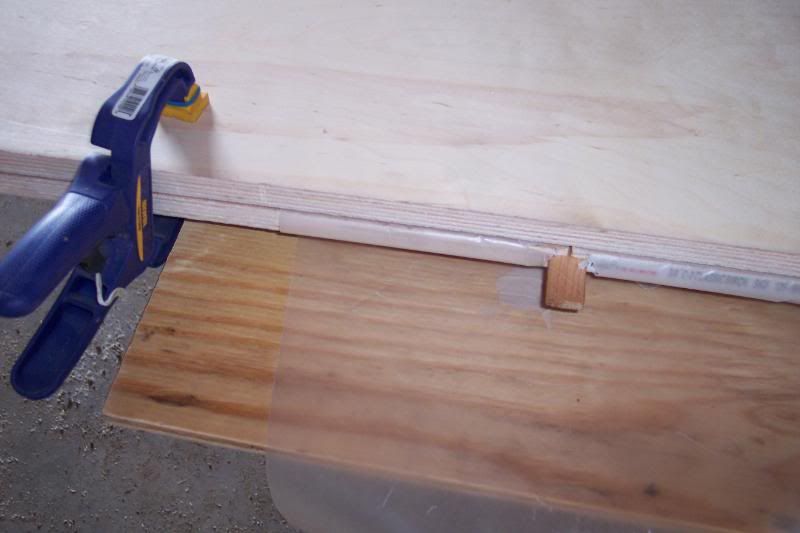
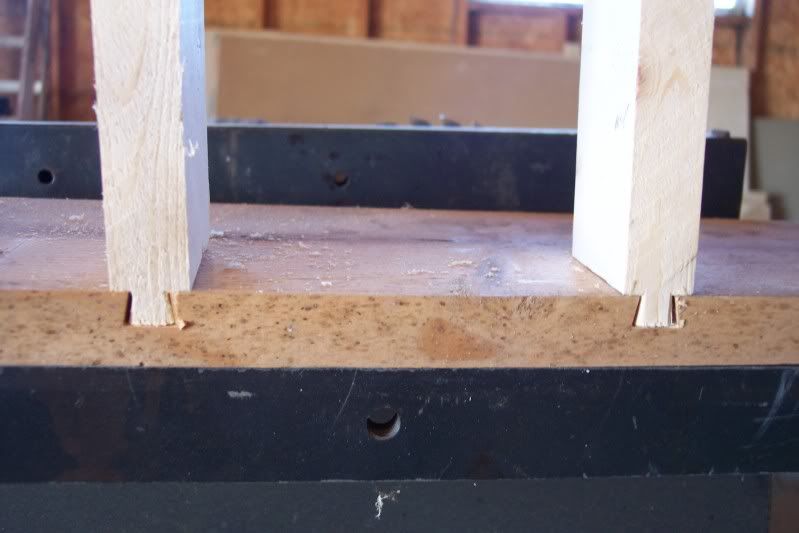
I took my router and cut a 1/4" groove in the ply and cut 1/4" strips (splines) out of a board.

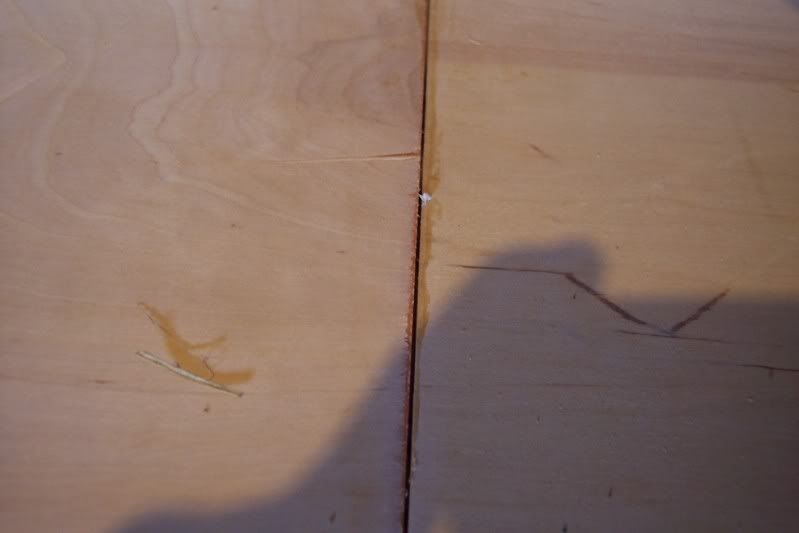
Note: Ply is not straight. When I joined my 4'x8' to my 4'x2', I have a gap. Since I have access to fillers at my body shop, I am not too worried (nor do I know any better at this point).

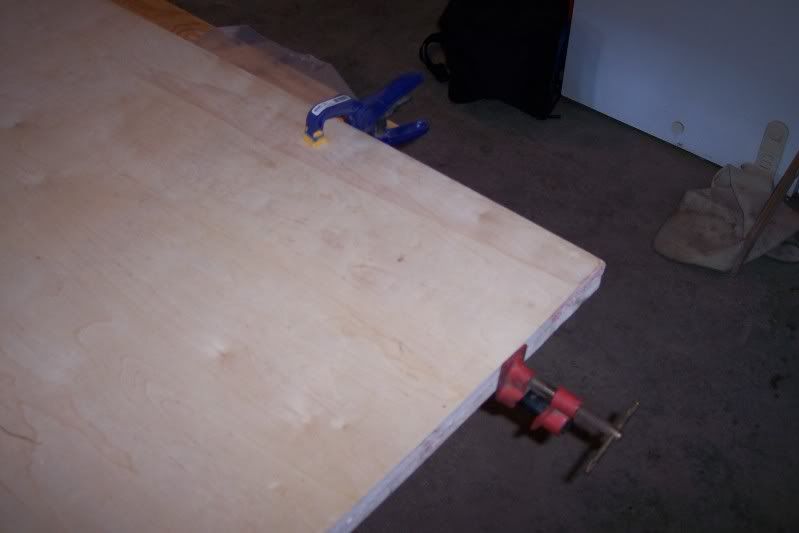
I used T3 to glue it together.

Image

Image

Image

Image

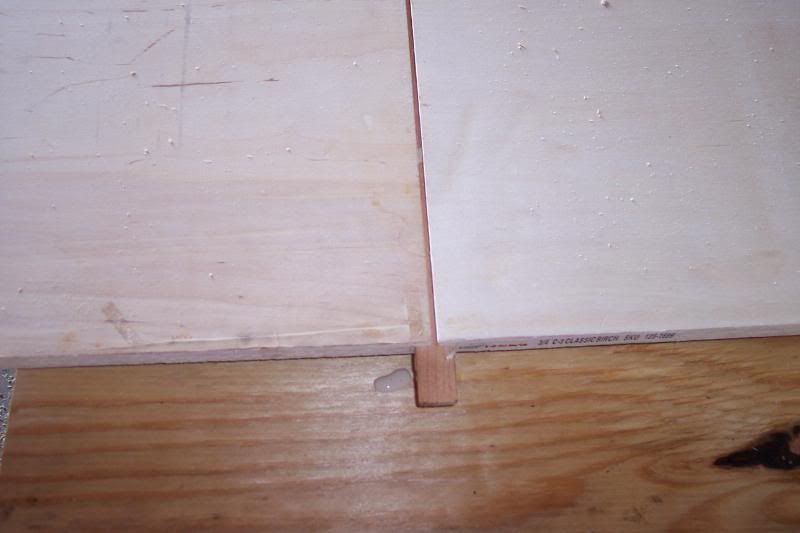
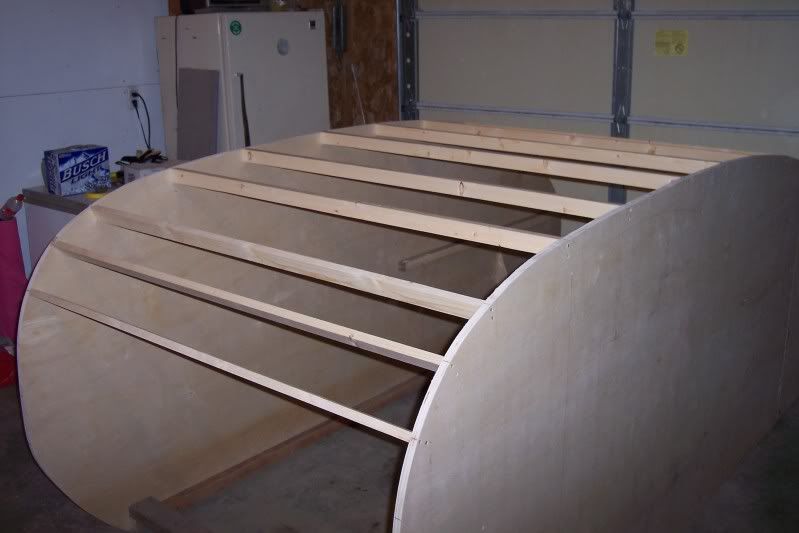
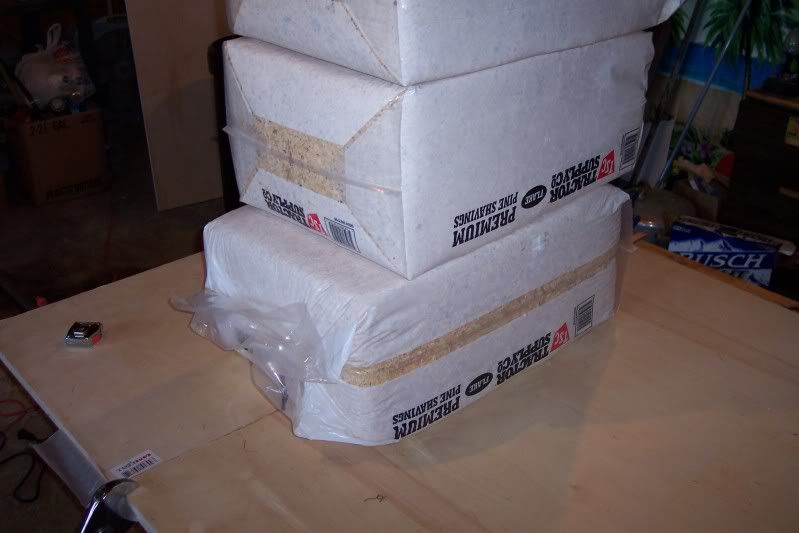
We'll let it dry tonight and pray that things are good and straight.

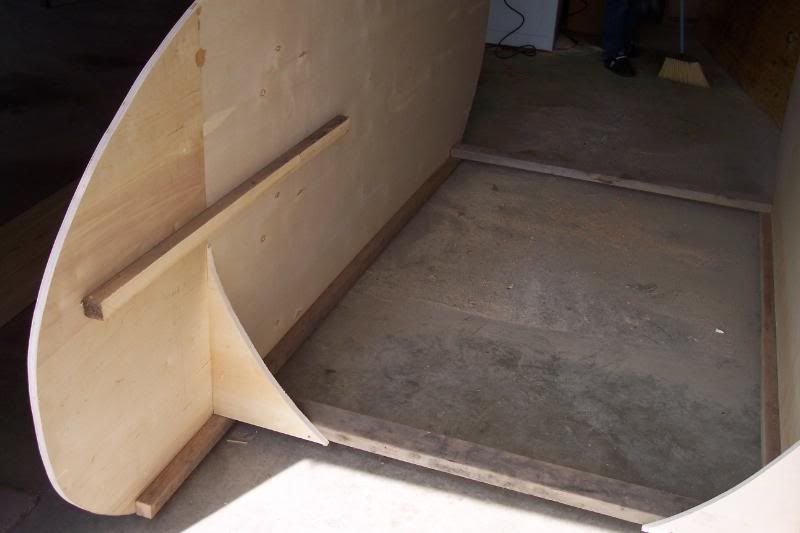
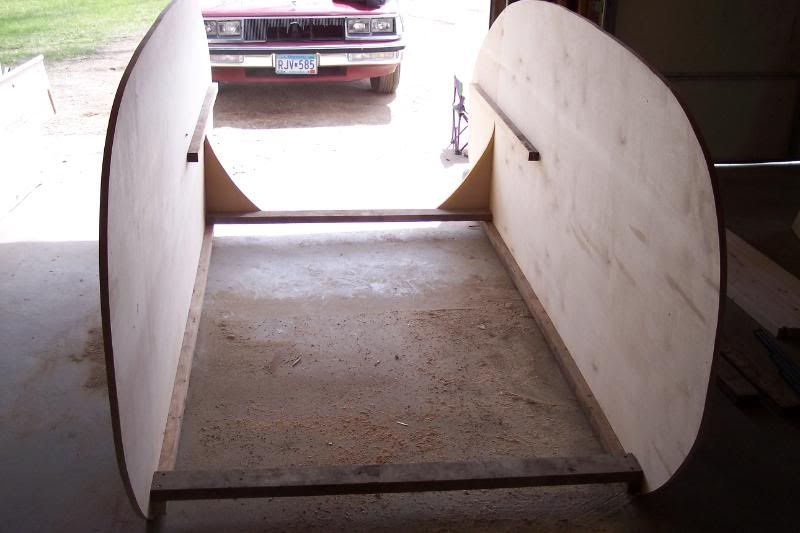
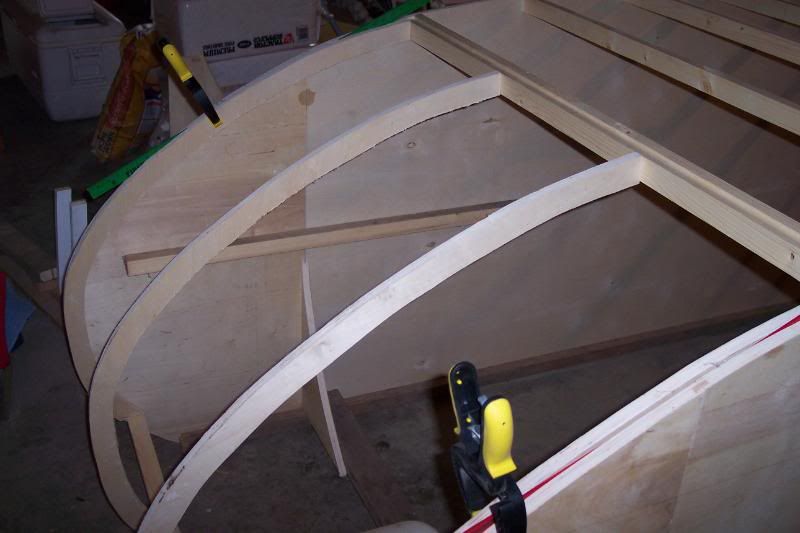
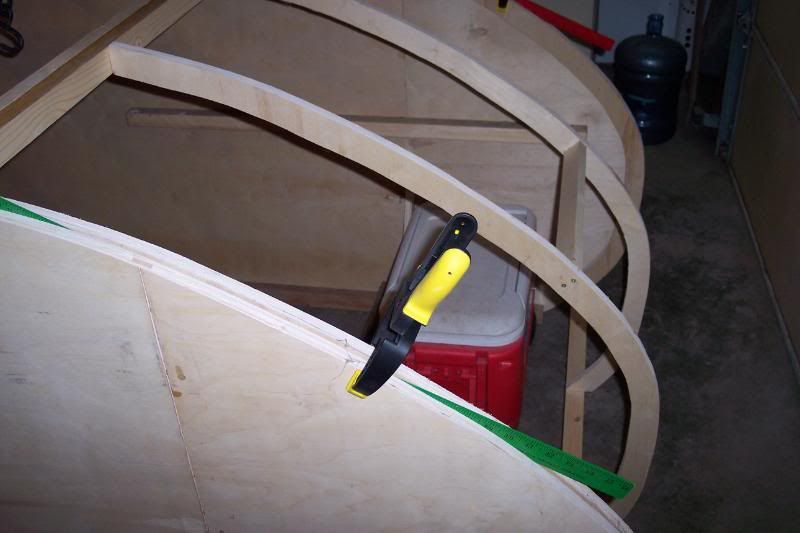
Next up, transferring the profile to the wood and cutting it out.

I also bought a used pop-up camper frame for $125.00 today. I planed on a 4'x8' TSC trailer but this will allow me to go a little wider (since that seems to be where I am heading :lol:
Chris'
Autobody
Restoration
Service

Image
CARS
The 300 Club
 
Posts: 332
Joined: Mon Feb 28, 2011 10:05 pm
Location: Comfrey, MN

Postby kevingb » Tue Apr 12, 2011 9:13 am

Great start... keep the sawdust flowing
User avatar
kevingb
Donating Member
 
Posts: 73
Images: 97
Joined: Tue Mar 10, 2009 7:10 pm
Location: Granbury, Texas

OK, more sawdust it is!

Postby CARS » Tue Apr 12, 2011 1:13 pm

I played hooky today because it is going to hit 70 degrees today :applause:

Unfortunately, they are talking a chance of snow for Friday :thumbdown:

Anyhoo...

TB3 says that it has a 30 minute clamp time, but not to strain the joint for 24 hours. OK, all I have to do is spin the top ply sheet 180 degrees and remove the wax paper that I used to keep the glue from getting on the other sheet. MY SPLINE SPLIT!!! Damn!!! :x

So the router came back out, a new spline was cut, and it was glued back together. I am going to have to be careful till I get some reinforcement built in.

Some more pics:

Image

Image

Image

Image

OK, so I am back where I was last night.... yea....

I have had an idea on how to join my spars to the sidewalls:

Image

I bought a router for this project, I may as well use it :twisted:

Anyone ever use sliding dovetails instead of screws to make this joint? I still have to fine-tune my router adjustments, but for a quick try, I think it worked pretty good. (might be making alot of work for myself?)

Once the clamps come off later this afternoon I am going to screw the 2 sheets of ply together and draw out the profile! (hoping that by screwing them together I can build some strength to avoid what happened this morning from happening again)
Chris'
Autobody
Restoration
Service

Image
CARS
The 300 Club
 
Posts: 332
Joined: Mon Feb 28, 2011 10:05 pm
Location: Comfrey, MN
Top

Postby nevadatear » Tue Apr 12, 2011 1:42 pm

An exciting new build! Love the profile, maybe because it looks so much like ours! 8) Since you are a body man, are you going with an automotive paint finish, like Doug Hodder? Teardrop builds have been a little slow of late, what with all the bad weather, excited to see another on its way!

Debbie
Debbie (with Randy looking over my shoulder)
Our build thread: http://www.tnttt.com/viewtopic.php?t=41295&highlight=monstero
2009 Homebuilt woody, Kenskill inspired 5 wide
ImageImage
User avatar
nevadatear
Silver Donating Member
 
Posts: 2374
Images: 171
Joined: Mon Nov 10, 2008 2:37 pm
Location: No. Nevada
Top

Postby CARS » Tue Apr 12, 2011 2:02 pm

nevadatear wrote:Since you are a body man, are you going with an automotive paint finish, like Doug Hodder?
Debbie


Not sure Debbie. I really can't even narrow down a color yet, but I do know it wont be bare woodgrain or aluminum skinned.

I may take the easy way out and use a colored spray-in bedliner material.
Chris'
Autobody
Restoration
Service

Image
CARS
The 300 Club
 
Posts: 332
Joined: Mon Feb 28, 2011 10:05 pm
Location: Comfrey, MN
Top

Re: OK, more sawdust it is!

Postby RockyMountainTeardrops » Tue Apr 12, 2011 2:06 pm

CARS wrote:I have had an idea on how to join my spars to the sidewalls:

Image


That's awesome!
Love that idea, really "thinking outside the box" on that one.

Keep it up!

Lee
User avatar
RockyMountainTeardrops
Super Teardrop Manufacturer
 
Posts: 99
Images: 233
Joined: Fri Oct 22, 2010 1:28 pm
Location: 4,000 above Denver, CO
Top

Postby CARS » Tue Apr 12, 2011 4:37 pm

Done for the day, but thought I would post what I did.

First, before I forget again. Here is the ply I am using for the sides. It was $18.something per sheet. 11 ply birch:

Image

I am so scared of snapping off another spline that I just opted to screw the two sheets together. I wasn't going to use screws if I went with the dovetail joints. We'll see what happens.

I had a couple visitors today. Sure the dog and cats checked in but I thought you would get a kick out of this "shop dog":

Image

On to the build. I cut the profile out:

Image

Image

I need to beg, borrow, steal a belt sander now. As careful as I tried, I can't cut a nice smooth, straight line with a jig saw.

Probably wont get much more done this week (I need to get to my real job :lol: )
Chris'
Autobody
Restoration
Service

Image
CARS
The 300 Club
 
Posts: 332
Joined: Mon Feb 28, 2011 10:05 pm
Location: Comfrey, MN
Top

Postby CARS » Sun Apr 17, 2011 3:24 pm

Pretty nice outside today so I grabbed a few cold ones, turned the radio on the NASCAR race, and fired up the saws!

I cut my roof spars and set them aside to see which ones are going to warp badly and which ones are going to be stable:

Image

I then split some 2"x4" to add supports to my extended plywood sides. My floor is going to be 3/4" thick, so I screwed the 8' long 2"ishx2"ish board 3/4" from the bottom edge of my sides. And added a 4' long 2x2 for my rear shelf.

Image

Image

Image

I added a couple 2"x4"s cut to 54" across the bottom and an extra roof spar across the top to see what she is going to look like.
Chris'
Autobody
Restoration
Service

Image
CARS
The 300 Club
 
Posts: 332
Joined: Mon Feb 28, 2011 10:05 pm
Location: Comfrey, MN
Top

Postby CARS » Mon Apr 18, 2011 7:50 am

Couldn't stop last night. We decided to stick to the KISS theory. Cut the spars, glued and screwed them in place:

Image

The only thing I am un-sure of is the spacing between the spars for the roof vent (more on that item later). I have read 14" many, many times but last night I was in sdtripper2's Index and saw 14 1/4" spacing. I am hoping the fan is 14"s and smart people are allowing some extra room with 1/8" on each side. I can do some sanding to get a little wiggle room.

Back to the vent. I ordered the fantastic fan from http://www.pplmotorhomes.com/parts/rv-vents/62466.htm It was on sale for $124.00. Looking forward to getting it. While I was ordering, I ordered my 12 volt interior lights too.

While the debit card was warm, I also ordered a 2 gallon kit of CPES from the Rot Doctor. Not cheap, but from what I read here and on their web site it sounds like the best thing to seal end grain and wood in general.

I'll pick up my trailer this week (the ground was too wet/soft this weekend to drive back to where it was stored).

The "plan" is to take the sides off the pop-up and cut the 3/4" ply floor 54" wide. I want to protect the outer edge of the tear so thin 2" angle will be welded to the trailers cross members once they have been cut down. So in a nut shell, the sides will be sitting on the angle and tied to the floor with those 2"x2"s I ran 3/4" up the side walls. (hope this works!)
Chris'
Autobody
Restoration
Service

Image
CARS
The 300 Club
 
Posts: 332
Joined: Mon Feb 28, 2011 10:05 pm
Location: Comfrey, MN
Top

Postby aggie79 » Mon Apr 18, 2011 8:51 am

Chris,

I love the profile! Your teardrop is coming along nicely. :thumbsup: :applause: :thumbsup:

I framed out a 14-1/2" square space for my vent fan. While the fan itself is only 14", the extra 1/2" allows room for the wiring which exits on one side of the frame.

Image

You can see where I pre-wired for the fan in the picture. Another tip I picked up from this forum was to double up the framing around the vent fan. This allows some "meat" for the crews that fasten the vent fan to the teardrop.

Take care,
Tom
Tom (& Linda)
For build info on our former Silver Beatle teardrop:
Build Thread

93503
User avatar
aggie79
Super Duper Lifetime Member
 
Posts: 5405
Images: 686
Joined: Tue Aug 07, 2007 5:42 pm
Location: Watauga, Texas
Top

Postby CARS » Mon Apr 18, 2011 9:38 am

Thanks for the post Tom. That is good to know. I will double up the spars and sand a little more clearance into that 14" opening. The side supports will be installed at 14 1/2" so the wire has room.

They shipped my order this morning (great service!) so I will just wait a few days till it shows up to do anymore work in that area.
Chris'
Autobody
Restoration
Service

Image
CARS
The 300 Club
 
Posts: 332
Joined: Mon Feb 28, 2011 10:05 pm
Location: Comfrey, MN
Top

Postby eaglesdare » Mon Apr 18, 2011 10:07 am

you are doing a great job! isn't it so exciting to get in and build. just wait til you get on your maiden voyage. looking forward to the rest of the build.
Louella
May the foam be with you.
User avatar
eaglesdare
Donating Member
 
Posts: 3168
Images: 13
Joined: Tue Aug 26, 2008 7:06 pm
Top

Postby CARS » Mon Apr 18, 2011 11:28 am

eaglesdare wrote:you are doing a great job! isn't it so exciting to get in and build. just wait til you get on your maiden voyage. looking forward to the rest of the build.


Thanks. It is fun to have a "hobby" again. Since I opened my shop 6+ years ago, I have been focused on cars and family (unfortunately, sometimes in that order). It's good to be dusty from sawdust and not body filler and primer dust!!!

One thing that is really going to hold me back is the luan. 1/4" is all I can find within a couple hours. I don't think it will bend that tight. I wonder if I can do a combination of what you did with "foamy" of the roof and epoxy/paint the sides??? Hmmm......
Chris'
Autobody
Restoration
Service

Image
CARS
The 300 Club
 
Posts: 332
Joined: Mon Feb 28, 2011 10:05 pm
Location: Comfrey, MN
Top

Postby CARS » Wed Apr 20, 2011 3:39 pm

My fan and lights arrived today! It fits the opening just fine and I see what Tom was talking about. I'll allow some extra space on the left side for the wires.

That Fan-tastic vent looks nice sitting there on the spars.

Now, to find that luan..........
Chris'
Autobody
Restoration
Service

Image
CARS
The 300 Club
 
Posts: 332
Joined: Mon Feb 28, 2011 10:05 pm
Location: Comfrey, MN
Top

Postby CARS » Sat Apr 23, 2011 8:28 pm

Got some more done today.

Cut 4 hatch supports

Image

Image

Image

Fit the Fan-Tastic vent:

Image

Added some support for the interior lamps:

Image

And finished the rest of the spars:

Image

I need to go shopping now. Need the insulation, bendy ply, and some thing to cover the interior.

The CPES arrived yesterday so I guess I can start soaking it into the wood :twisted:
Chris'
Autobody
Restoration
Service

Image
CARS
The 300 Club
 
Posts: 332
Joined: Mon Feb 28, 2011 10:05 pm
Location: Comfrey, MN
Top

Next

Return to Build Journals

Who is online

Users browsing this forum: No registered users and 20 guests