Franks First Build [10/13/2012] "FRANK'S DOG HOUSE"

...ask your questions in the appropriate forums BUT document your build here...preferably in a single thread...dates for updates, are appreciated....

Re: Franks First Build [update 5-28-2012] "FRANK'S DOG HOUS

Postby Wobbly Wheels » Tue May 29, 2012 8:25 pm

Just a thought here, Frank - it might be easier for you to make the outer box solid and fixed to the front of the trailer body, then have a door on the forward face that you can open to allow the unit to breathe when it's running. That way you've just got a single plane hinging on a single line, like a cupboard door. That way you can go ahead and match up all your lines with the sanding and not have to worry about where the hinges are backing....and it will match what you're doing below it.

I think just about every build thread I've read has had some setbacks at some point. Fortunately ours are being done in materials that are cheap and easy to form...and re-form....

It's coming along, just keep at 'er & you'll get there.
User avatar
Wobbly Wheels
Donating Member
 
Posts: 1080
Joined: Tue Mar 15, 2011 9:51 am

Re: Franks First Build [update 5-28-2012] "FRANK'S DOG HOUS

Postby KCStudly » Tue May 29, 2012 8:57 pm

Another option would be to hinge the AC hatch at the bottom front, on top of the lower compartment, and have the whole thing flip forward. That way you could fair the top to your liking. Though it would be harder to reach the latch (unless you used a little pull chain or ?) and since you need to seal it up so rain doesn't drive thru to the inside maybe that's not the best solution. But it is a thought.
KC
My Build: The Poet Creek Express Hybrid Foamie

Poet Creek Or Bust
Engineering the TLAR way - "That Looks About Right"
TnTTT ORIGINAL 200A LANTERN CLUB = "The 200A Gang"
Green Lantern Corpsmen
User avatar
KCStudly
Donating Member
 
Posts: 9611
Images: 8169
Joined: Mon Feb 06, 2012 10:18 pm
Location: Southeastern CT, USA

Re: Franks First Build [update 5-28-2012] "FRANK'S DOG HOUS

Postby crumbruiser » Wed May 30, 2012 7:07 pm

Thanks for the comments and sugestions. My only concern with only having a single door for the AC cover was the sides of the AC have vents all the way up each side. I suppose that if I built the box bigger there would more room all around the AC. I could also put a clothes dryer type of vent in each side to help it breath as well as a big front door. Yes, my mind is made up [for now] I'll saw it off and rebuild it attatching it to the front of the trailer with a nice big front door.
Thank you,
Frank
I am not weird, I am a Limited Edition.
Facebook http://www.facebook.com/profile.php?id=100000303236631
User avatar
crumbruiser
Teardrop Master
 
Posts: 266
Images: 255
Joined: Sun Jul 10, 2011 6:11 pm
Location: Central Ohio
Top

Re: Franks First Build [update 5-28-2012] "FRANK'S DOG HOUS

Postby crumbruiser » Wed May 30, 2012 7:08 pm

OOPS Seeing double.
Last edited by crumbruiser on Wed May 30, 2012 7:19 pm, edited 1 time in total.
I am not weird, I am a Limited Edition.
Facebook http://www.facebook.com/profile.php?id=100000303236631
User avatar
crumbruiser
Teardrop Master
 
Posts: 266
Images: 255
Joined: Sun Jul 10, 2011 6:11 pm
Location: Central Ohio
Top

Re: Franks First Build [update 6-5-2012] "FRANK'S DOG HOUSE

Postby crumbruiser » Tue Jun 05, 2012 7:51 pm

Hello Gang,
I am feeling better about my workmanship now. I am learning to take more time with the foam especially. I decided that the AC cover had to be replaced. So off with the old. I'm going to try to salvage at least part of it. Maybe make a step?
Image
So I built it like this. I will put a door on the front at some point.
Image
Also installed a couple of vents on the side to help it breath. As you can tell in the pics. I used the vent for a "cookie cutter" to make installation easier.
Image
Image
Image
Image
Image
I also stared on the bed/couch futon[?] thing. This is still in design and planning. My wife came out and sat on it with me. She said she wouldn't put a back on it. She would just make it slide out to make a longer platform and just lean against some pillows. Any way, I bought these doors off of Craigslist for a good price for the purpose of making this platform. They are light and strong. they held my 190+ pounds and her[???].I was going to maybe put a hinge and make it fold, now I'm not sure.
Image
Image
And finally, I got the ac wireing finished. The AC unit works very well. [another Craigslist bargain] I'd like to say thank you to Zach for the idea on the outlet frame buildup. [I think it was Zachs idea anyway]
Image
Image
Now, I have a confession to make :oops: . My foam on the drivers side of the body did not bond well with the interior luan. I was able to grab the foam at the bottom of the side and pull if away from the body with ease. I decided to drill 4 holes and install 1/4 inch carriage bolts and secure the foam in this manner. I cut a trim piece for each side to run the bolts through. I think it will be fine. I will put some added adhesive through the bolt holes for added security. I put a strip on both sides.
Image
Image
I like the black stripe. Thank you for checking in on me.
Frank
I am not weird, I am a Limited Edition.
Facebook http://www.facebook.com/profile.php?id=100000303236631
User avatar
crumbruiser
Teardrop Master
 
Posts: 266
Images: 255
Joined: Sun Jul 10, 2011 6:11 pm
Location: Central Ohio
Top

Re: Franks First Build [update 5-28-2012] "FRANK'S DOG HOUS

Postby StandUpGuy » Tue Jun 05, 2012 8:39 pm

Looking good. Keep going it is coming together.
User avatar
StandUpGuy
1000 Club
1000 Club
 
Posts: 1090
Images: 52
Joined: Sun Mar 27, 2011 6:15 pm
Top

Re: Franks First Build [update 5-28-2012] "FRANK'S DOG HOUS

Postby bonnie » Tue Jun 05, 2012 9:08 pm

it's great when fixing a problem ends up looking like it was part of the plan all along. Great work!
Remember, the turtle won. :)
User avatar
bonnie
Donating Member
 
Posts: 1389
Images: 107
Joined: Sun Jul 24, 2011 4:14 pm
Location: Roxana, IL
Top

Re: Franks First Build [update 6-10-2012] "FRANK'S DOG HOUSE

Postby crumbruiser » Sun Jun 10, 2012 4:24 pm

Howdy Folks,
Here is the updates for the week.
I got the AC/battery box primed and skinned. I used newspapers for the skin, I thought it would be easier. That is not correct. The newspaper will not slide and ends up tearing. I will not do a build involving skinning again. I like doing woodworking but I do not like doing skins. Anyway. Here it is. It looks good from a distance.
Image
Here is what the skin looks like on the side. It will have to do. Maybe after about 20 coats of paint it will be nice and smooth. ;) :crazy: 
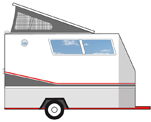
Probably not but thats OK.
Image
Here it is from a distance. A camo paint job would cover up some of the mistakes. :thinking:
Image
So, While I was working on the inside, the AC was blowing nice and cool, I hear a "pop"! 1 of the spars popped loose from the foam. These are brad nailed through the wall from the outside and GG glued or foamed to the foam but this one popped off???? Maybe it was already curved, maybe the cool air on the 1 side and the other side against the hot foam caused it warp. I don't know but I will more than likely be drilling holes in the walls and screwing them on from the outside. I don't think they really support anything, but I like the idea of having them there.
Image
Image
Anyway, my wife suprised me with a camp cot she found at a thrift store, so the bed/couch design may end up changing.
Image
Here is 1 option. This will need some more designing.
Image
I moved to the back and built the porch lights. The light units are LED's bought off of Ebay. They are clearence lights but I thought they would do the job.
Image
Image
Image
I covered the wireing up with heavy duty aluminum tape.
Image
Thanks for your attention. I hope you all have a great week.
Frank
I am not weird, I am a Limited Edition.
Facebook http://www.facebook.com/profile.php?id=100000303236631
User avatar
crumbruiser
Teardrop Master
 
Posts: 266
Images: 255
Joined: Sun Jul 10, 2011 6:11 pm
Location: Central Ohio
Top

Re: Franks First Build [update 7-17-2012] "FRANK'S DOG HOUS

Postby crumbruiser » Sun Jun 17, 2012 6:02 pm

Hi Ya'all,
You know, some weeks it seems like you don't get anything done, at least not much. Nothing in particular happened to hamper progress. I think I will blame it on the paint. Do you know how long it takes oil based paint to dry? It takes a long time. I paint something and 24 hours later I'm getting paint on my hands\while handling these things. Oh well, the blame games over. This week I got the front end painted up. Would you believe I ran out of the custom grey color that I became fond of? Thats right, I did. I looked around, and haveing already blown my budget, plus 20% or more, I wasn't going to buy any. I had 2 quarts of black and 1/2 quart of yellow. Together they became what the kids think looks like "Batman Black". This is the first coat. When changing colors, I do not clean or change my roller or clean out my paint tray. I figure by the time the second coat goes on, it all blends together.
Image
I also made the doors for the AC and battery boxes as well as the trim for the windows as seen in the background.
Image
Together they look like this. This is also with the second coat of paint. The doors are'nt attached yet, I was going to do that today but we are getting some much needed rain. Maybe I'll get to them tomorrow.
Image
Image
My wife says she likes it like this. I do not mind the look, I figure it's waterproof and maybe next year I'll buy enough paint to redo it in a silver color to match the PT Cruiser [TV].
While reading in the Foamy section, they started a "What to do with left over foam" thread. For several years, I have been wanting a cup cozie or cup holder that would keep my soda pop cold. This is my addition to the thread. It is'nt finished yet, but it does work good!
Image
Thank you for the comments, and thank you other people for looking.
Frank
Last edited by crumbruiser on Tue Jul 17, 2012 7:16 pm, edited 1 time in total.
I am not weird, I am a Limited Edition.
Facebook http://www.facebook.com/profile.php?id=100000303236631
User avatar
crumbruiser
Teardrop Master
 
Posts: 266
Images: 255
Joined: Sun Jul 10, 2011 6:11 pm
Location: Central Ohio
Top

Re: Franks First Build [update 6-17-2012] "FRANK'S DOG HOUS

Postby StandUpGuy » Sun Jun 17, 2012 6:46 pm

These little trailer are all a series of choices and compromises. You may have some issues with strength because of the nature of the build. You are certainly going to have a nice little trailer that holds its internal temerature very well and will be comfortable.
User avatar
StandUpGuy
1000 Club
1000 Club
 
Posts: 1090
Images: 52
Joined: Sun Mar 27, 2011 6:15 pm
Top

Re: Franks First Build [update 7-17-2012] "FRANK'S DOG HOUS

Postby crumbruiser » Tue Jul 17, 2012 7:14 pm

Howdy Y'All,
I haven't exactly taken a break although it's been a while since I last posted. We had a really bad storm roll through the area on June 29th. The company I work for [power company] gave an "ALL HANDS ON DECK" call. Meaning, we have a bunch of outages and need everybody that can come to work to come in. So starting on June 30th, I had to work 16 hr days, 8 in a row. The first 2 days I did damage accessing. That's where we go out and report back the damage we found. Here is an example. This was a very common sight for that week. If you see this in your backyard, STAY IN THE HOUSE!
Image
Any way, I made some good progress in the build. Here are the doors mounted. The top door that protects the AC hinges from the top. I use a rod to prop it open so it can breath. The AC works very well with this setup. The battery compartment door has a lock hasp on top, to prevent theft, the door has no hinges instead, you pull the top out a ways and lift it off. I figure it's easier to work inside that way.
Image
Image
I trimmed out the windows.
Image
Built the back porch.
Image
I put the little side on it in case I end up hauling firewood on it. I figure it will stay put better that way. I plan to install some tie down rings at some point.
Image
This is a mock up of the radio cabinet. It is on the drivers side as the camper is being towed. There is a 4ft long shelf, triangular shaped above it.
Image
The other side got a 4 ft long triangular shelf as well.
Image
The back porch lights are wired up and working and I've been toying around with the interior lights but haven't commited to any thing as of yet.
I think before I get too much much more done on the interior, I need to do the headliner.
I do hope you enjoy looking at my build and welcome any comments or helpful hints.
Frank
I am not weird, I am a Limited Edition.
Facebook http://www.facebook.com/profile.php?id=100000303236631
User avatar
crumbruiser
Teardrop Master
 
Posts: 266
Images: 255
Joined: Sun Jul 10, 2011 6:11 pm
Location: Central Ohio
Top

Re: Franks First Build [update 7-17-2012] "FRANK'S DOG HOUS

Postby KCStudly » Tue Jul 17, 2012 7:37 pm

Keep on keeping on. Before you know it you will have reached your goal. :thumbsup:
KC
My Build: The Poet Creek Express Hybrid Foamie

Poet Creek Or Bust
Engineering the TLAR way - "That Looks About Right"
TnTTT ORIGINAL 200A LANTERN CLUB = "The 200A Gang"
Green Lantern Corpsmen
User avatar
KCStudly
Donating Member
 
Posts: 9611
Images: 8169
Joined: Mon Feb 06, 2012 10:18 pm
Location: Southeastern CT, USA
Top

Re: Franks First Build [update 7-28-2012] "FRANK'S DOG HOUS

Postby crumbruiser » Sat Jul 28, 2012 1:55 pm

Hi everybody! :)
Maybe I will feel more like typing later, right now I'm gonna post pics.
Porch lights.
Image
Futon mattress on top of a cot.
Image
Radio cabinet is done.
Image
Home made antenna for the radio, [the zig zag wire] along with some 12v wiring.
Image
A shot of the headliner along with a shelf.
Image
The restroom.
Image
And the future kitchen.
Image
There is still a lot of work to be done. Finish the lighting, trim, roof spars and insulate the rest of the floor and add wire supports underneath..... If I drank beer or wine I would add a few beer and wine smilies here.
:pictures:
Frank
I am not weird, I am a Limited Edition.
Facebook http://www.facebook.com/profile.php?id=100000303236631
User avatar
crumbruiser
Teardrop Master
 
Posts: 266
Images: 255
Joined: Sun Jul 10, 2011 6:11 pm
Location: Central Ohio
Top

Re: Franks First Build [update 10/13/2012] "FRANK'S DOG HOUS

Postby crumbruiser » Sat Oct 13, 2012 7:49 am

I've been off the build for a while but, I'm back. August 11th I totaled my PT Cruiser. Thank you GOD for keeping every one involved safe.
Image
Image
After the accident I kind of layed around depressed a little but I came out of it. I thought I could save some money and use the insurance settlement and buy an old truck for cash.
Image
That ended up being the biggest waste of money for me in my life. I knew it neededd work but I didn'r know that it would cost so mich and take so much of my time. Live and learn.
I am not weird, I am a Limited Edition.
Facebook http://www.facebook.com/profile.php?id=100000303236631
User avatar
crumbruiser
Teardrop Master
 
Posts: 266
Images: 255
Joined: Sun Jul 10, 2011 6:11 pm
Location: Central Ohio
Top

Re: Franks First Build [update 10/13/2012] "FRANK'S DOG HOU

Postby crumbruiser » Sat Oct 13, 2012 8:06 am

Hi Everyone! The build continues a bit. I got the interior window trim painted and installed.
Image
Image
I bought and installed some new lights off of E Bay. The map lights I bought just weren't bright enough for the space they needed to light. These RV type of lights do a very nice job.
Image
Image
I can't remember if I posted the foamy step I built so here it is.
Image
I actually have pics of more work that I've done, but instead of the Blackberry phone I was using for all of the pics, I now have an I phone and haven't had the time or ambition to learn how to post pictures with it. The Blackberry I could just size and email the pictures to myself in pdf form, load them on my PC and put them in my gallery. The I phone emails pictures as pictures and not as pdf's and so far, I don't know how to make files out of them. If you have any information on that, let me know.
You all keep up the good work.
Until next time,
Frank
I am not weird, I am a Limited Edition.
Facebook http://www.facebook.com/profile.php?id=100000303236631
User avatar
crumbruiser
Teardrop Master
 
Posts: 266
Images: 255
Joined: Sun Jul 10, 2011 6:11 pm
Location: Central Ohio
Top

PreviousNext

Return to Build Journals

Who is online

Users browsing this forum: No registered users and 10 guests