Rockhopper - Solutions!

...ask your questions in the appropriate forums BUT document your build here...preferably in a single thread...dates for updates, are appreciated....

Re: Rockhopper - btm covered with resin!

Postby mikeschn » Sat Jun 09, 2012 9:14 am

pohukai wrote:I only applied 1 coat to the face and edges of the 3/4" plywood before mounting it to the wood frame. I thought it would be a little easier not having to work around the nooks and crannies. I will be sealing the edges of all the walls with resin since that is the area. I use http://www.harborfreight.com/20-piece-4-inch-putty-spreaders-96088.html these types of spreaders exclusively. After the epoxy dries on these spreaders, a quick twist pops the brittle coating off and are ready for the next time.

Jim


Hey Jim,

So you are saying that just by putting two coat of resin on the edges of the plywood is enough to keep the plywood from delaminating? Is that true for any kind of plywood?

Mike...
The quality is remembered long after the price is forgotten, so build your teardrop with the best materials...
User avatar
mikeschn
Site Admin
 
Posts: 19202
Images: 479
Joined: Tue Apr 13, 2004 11:01 am
Location: MI

Re: Rockhopper - btm covered with resin!

Postby pohukai » Sat Jun 09, 2012 11:34 am

Hi Mike,
I haven't done any testing of the sealing on my TD, but kayak builders that I know personally have had incredible success when using cheap luan from HomeDepot as long as the plywood is completely encapsulated in resin; both the faces and edges. One guy has used that boat for YEARS without any issues. He built that boat as a prototype saving the more expensive Okoume marine plywood for the real thing. Since he had so much success, he used the Okoume for a different project.

1 coat of resin on the face and two coats on the edges sounds like a good idea. The edges are the most sensitive area to prevent delamination; it acts like a wick.

Since I'm using 3/4 ply, adding fiberglass to increase the strength would be overkill.

My thought is as long as the resin doesn't have any cracks to allow moisture to penetrate the (any) plywood, I should be ok. Rocks hitting it and causing damage is a bit of a concern... but I think I'm being a little to anal about that. :)

Have a great weekend.

Jim
pohukai
Teardrop Master
 
Posts: 182
Images: 9
Joined: Mon Aug 22, 2011 10:39 am
Location: Fontana CA

Re: Rockhopper - btm covered with resin!

Postby mikeschn » Sat Jun 09, 2012 2:57 pm

Thanks Jim,

The Rockhopper is going to be the guinea pig for the resin sans fiberglass test!

Today's Rockhopper pictures don't look much different than last weekend. But there is a big difference.

First of all, we put the second coat of resin on the bottom!

Image

Then we flipped the floor over, and used tightbond III to glue the walls to the floor.

And finally we screwed the floor down to the chassis. We had to use clamps to straighten out the metal chassis, but everything is nice and straight and flat now!

Image

And yes, it was only a 1/2 day... :D

Tomorrow I think I'll cut some spars! Gotta figured out how I am going to put the angles on them!

Mike...
The quality is remembered long after the price is forgotten, so build your teardrop with the best materials...
User avatar
mikeschn
Site Admin
 
Posts: 19202
Images: 479
Joined: Tue Apr 13, 2004 11:01 am
Location: MI
Top

Re: Rockhopper - btm covered with resin!

Postby starleen2 » Sat Jun 09, 2012 4:04 pm

Looks good so far -That resin will do a good job of waterproofing especially with two coats :thumbsup:
User avatar
starleen2
5th Teardrop Club
 
Posts: 16272
Images: 224
Joined: Sat May 12, 2007 8:26 pm
Location: Pea Ridge ,AR
Top

Re: Rockhopper - btm covered with resin!

Postby pohukai » Sat Jun 09, 2012 7:47 pm

Mike,

It looks great with the resin on it. You should be fine with two coats. I like it because it doesn't seem to be as bad as the 'black gu' everyone speaks of and it won't clump off. There are several of us doing this so maybe we're more like lemmings instead of guinea pigs. LOL

I honestly believe we're going to be fine. After all, my experience has been with plywood submerged in water. At least, I hope I don't have an incident in life where that test is being done on my TD.

Jim
pohukai
Teardrop Master
 
Posts: 182
Images: 9
Joined: Mon Aug 22, 2011 10:39 am
Location: Fontana CA
Top

Re: Rockhopper - btm covered with resin!

Postby High Desert » Sat Jun 09, 2012 8:32 pm

This is getting exciting :twisted: (OK, I'm easily entertained lol)

Another minor question Mike; what size lumber is the floor framing? Ripped 2x?
Shaun

"it's not the years honey, it's the mileage"
High Desert
Platinum Donating Member
 
Posts: 8780
Images: 27
Joined: Wed Apr 08, 2009 1:46 pm
Location: SW Washington state
Top

Re: Rockhopper - btm covered with resin!

Postby RAYVILLIAN » Sun Jun 10, 2012 7:57 am

Mike I've always used the marine epoxy on the edges of the exterior ply wood surfaces and on the bottom edge of the built up wall on the new WW I used one coat of epoxy straight than squeegeed a coat with glass beads with epoxy putty into the edge. On the bottom I sealed with epoxy than used black gue too. I know old school dies hard.

GAry
Where ever we raise the hatch is home.
Darn blank states keep getting further away and we keep traveling slower ain't never gona get this map full.
111961Image
User avatar
RAYVILLIAN
Lifetime member
 
Posts: 1434
Images: 109
Joined: Thu Aug 05, 2004 9:33 pm
Location: Rayville MO
Top

Re: Rockhopper - btm covered with resin!

Postby mikeschn » Sun Jun 10, 2012 7:05 pm

Today I figured I'd make a few spars. Since I didn't know how I was going to make them, I didn't set any goals.

But I found a really easy way to make the spars, and as a result, I made all 12 spars today. The method I used was to make 2 equal sized spars, with equal angles. The angles were calculated in CAD.
Then I just flipped one piece on top of the other, and glued them together. That made perfect corner spars, with exactly 1 1/2" spacing for 1 1/2" foam insulation.

Image

After I got the front spars in, I looked at the hatch profile, and I didn't like how it was sticking up so high in the air, like in this picture.

Image

So I extended the line from the front edge, and chopped off 5.6" off the top. That looks better!

Image

And here's a view of the spars I did today...

Image

Here's the new hatch profile in the up position...

Image

And finally, here is a perspective to show you how much standing room is available... the lowest point is at the very back where I have that huge 1x5.

Image

Mike...
The quality is remembered long after the price is forgotten, so build your teardrop with the best materials...
User avatar
mikeschn
Site Admin
 
Posts: 19202
Images: 479
Joined: Tue Apr 13, 2004 11:01 am
Location: MI
Top

Re: Rockhopper - btm covered with resin!

Postby starleen2 » Sun Jun 10, 2012 9:53 pm

mikeschn wrote:Image
Mike...

Much better - and cleaner lines too! :thumbsup: - So mike how ya gonna finish off the back end?? . . .and how about the interior layout. . .curious minds want to know?? :roll:
User avatar
starleen2
5th Teardrop Club
 
Posts: 16272
Images: 224
Joined: Sat May 12, 2007 8:26 pm
Location: Pea Ridge ,AR
Top

Re: Rockhopper - spars in!!!

Postby mikeschn » Mon Jun 11, 2012 4:08 am

The back end is going to get finished off like the Escape Hatch Winter Warrior...

Image

For the inside, I am thinking something like Andrew's Compact design...


Image


Image

Mike...
The quality is remembered long after the price is forgotten, so build your teardrop with the best materials...
User avatar
mikeschn
Site Admin
 
Posts: 19202
Images: 479
Joined: Tue Apr 13, 2004 11:01 am
Location: MI
Top

Re: Rockhopper - spars in!!!

Postby bgordon » Fri Jun 15, 2012 3:09 pm

Hi Mike,

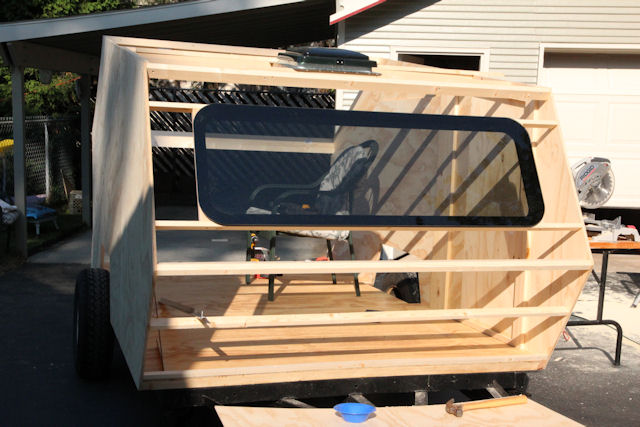
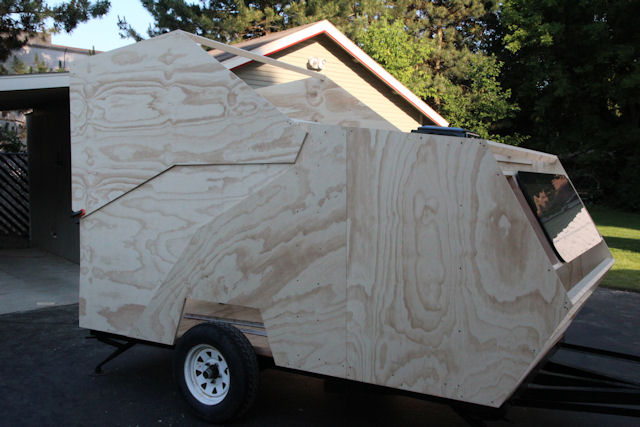
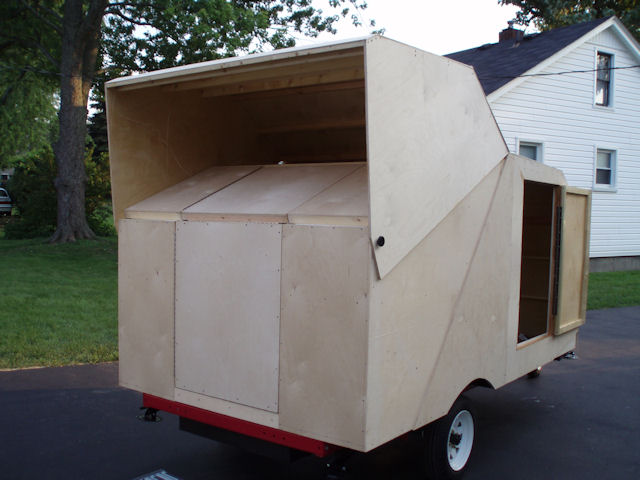
I've been away for a while and I see that you are building two trailers at once now! Wow!

Just a thought on the fiberglass. First of all, let me say that my fiberglass trailer is still holding very well. In the last two years I have not had any form of delamination or water damage. I believe the fiberglass and resin combination is almost unbeatable.

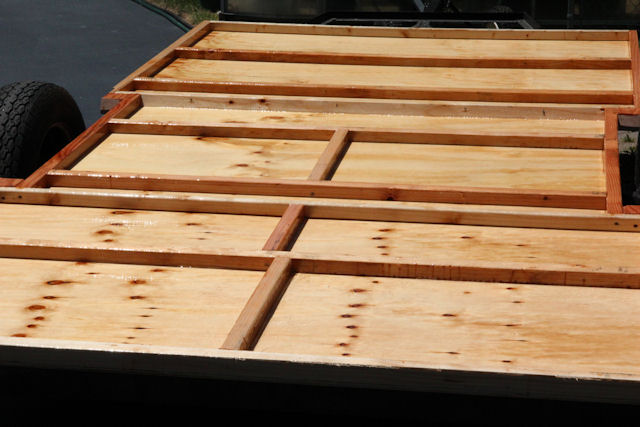
Having said that, I think that if you only use resin on your trailer (without fiberglass) you are going to have EXACTLY the same problems that you had with your escape hatch. I remember it delaminating. The reason for my slight scepticism about a resin only approach is that the expanding and contracting factors of resin and plywood is not the same. In warm weather the plywood will expand more than the (then) dry resin, and you are going to get hairline cracks. That will introduce moisture in the wood, and you will have wood rot and delamination.

Learning to work with fiberglass is quite a learning curve, but when you get the hang of it. it is quite easy.

First of all, you need to round off all your right angles. Fiberglass does NOT like square angles.

One of the most-used methods is that of the garbage bag. Take a garbage bag, and cut in long strips, about 6 inches x 24 inches. Then cut a piece of fiberglass mat to fit the strip, but leave about an inch or so 'border'. Then wet out the fiberglass mat with resin, and take a second piece of fiberglass, place it on the first, and roll with a roller like this:
Image

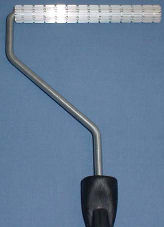
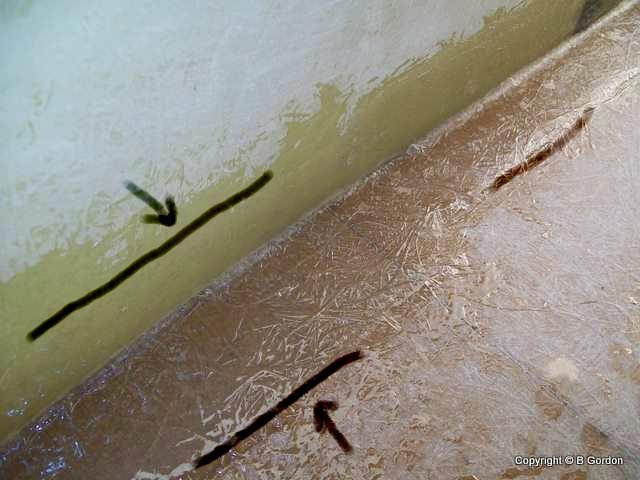
Now take the strip of garbage bag plastic with the wet fiberglass and place it across the curve that you want to cover. Use another roller like the one above, and roll out the bubbles (the second brush is dry, and you are rolling the back of the plastic). When all bubbles are removed, you peel off the plastic, and the fiberglass will stay in place. Look carefully at the picture below and you will see the patched 'strip' of fiberglass.

Image

I have used this method extensively in my build, and it works lovely!

By the way, I used a translucent plastic. It is then easy to spot the bubbles through the plastic. Look at the photo below. On the table you will see a used green strip of plastic.

Image

Kind regards,
Barrie

Keep moving forward.
Psalm 1:1-3.

Build Journal: bgordon's 5 week cardboard & fiberglass build
http://www.tnttt.com/viewtopic.php?f=50&t=38781
User avatar
bgordon
Teardrop Master
 
Posts: 299
Images: 122
Joined: Tue Apr 24, 2007 6:45 am
Location: Johannesburg, South-Africa
Top

Re: Rockhopper - spars in!!!

Postby mikeschn » Fri Jun 22, 2012 7:18 pm

Had a little bit of help on the teardrop today. We built the fender wells, and cut out doors.... then rain threatened, so we put all the tools away! We'll continue again tomorrow!

Anyone recognize the guests?

Image

Mike...

P.S. I think we'll cut those fenders down tomorrow!!!
The quality is remembered long after the price is forgotten, so build your teardrop with the best materials...
User avatar
mikeschn
Site Admin
 
Posts: 19202
Images: 479
Joined: Tue Apr 13, 2004 11:01 am
Location: MI
Top

Re: Rockhopper - spars in!!!

Postby starleen2 » Fri Jun 22, 2012 7:42 pm

mikeschn wrote:Had a little bit of help on the teardrop today. We built the fender wells, and cut out doors.... then rain threatened, so we put all the tools away! We'll continue again tomorrow!

Anyone recognize the guests?

Image

Mike...

P.S. I think we'll cut those fenders down tomorrow!!!


Where's Wendell?? :thinking:
I also believe that the person in the picture can be further enticed to help with a fresh bottle of Steens syrup!
Image
User avatar
starleen2
5th Teardrop Club
 
Posts: 16272
Images: 224
Joined: Sat May 12, 2007 8:26 pm
Location: Pea Ridge ,AR
Top

Re: Rockhopper - doors cut out!!!

Postby cuyeda » Fri Jun 22, 2012 8:27 pm

I have seen an advertisement for a camper shell that goes onto the back of a pickup truck. The shape, and action of the rear roof section reminds me of this Rockhopper build. When I saw the ad I wondered if the designer got his inspiration from this forum. I should have bookmarked it, because I can't find it now.
Why just dance, when you can Salsa!
Cliff & Vanessa
User avatar
cuyeda
Platinum Donating Member
 
Posts: 1924
Images: 17
Joined: Fri Sep 22, 2006 12:09 am
Location: California, Long Beach
Top

Re: Rockhopper - doors cut out!!!

Postby mikeschn » Sat Jun 23, 2012 5:13 am

Scott,

This guy?!

Image

Mike...
The quality is remembered long after the price is forgotten, so build your teardrop with the best materials...
User avatar
mikeschn
Site Admin
 
Posts: 19202
Images: 479
Joined: Tue Apr 13, 2004 11:01 am
Location: MI
Top

PreviousNext

Return to Build Journals

Who is online

Users browsing this forum: Bing [Bot] and 31 guests