Simple Foamie - 5x8 with galley.

...ask your questions in the appropriate forums BUT document your build here...preferably in a single thread...dates for updates, are appreciated....

Re: Simple Foamie - 5x8 with galley.

Postby katrinad » Sat Jun 29, 2013 10:52 am

Okay so I'm not doing a very good job updating...

Took yesterday off from work. Starting to feel the time crunch of the build. I really hope I can finish but I'm getting a little worried now.

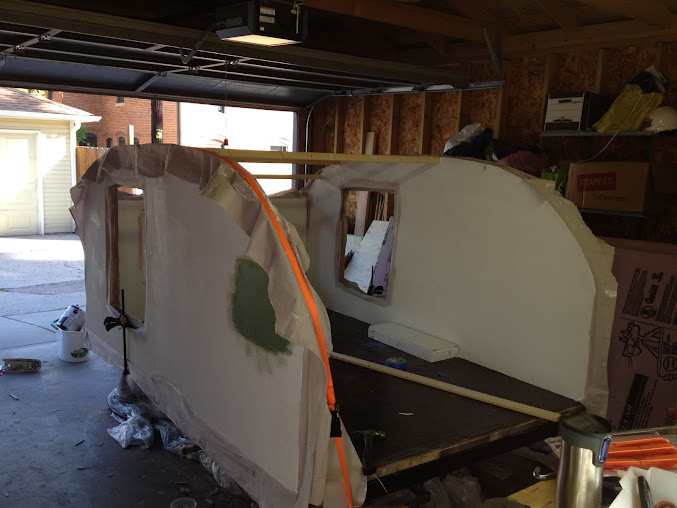
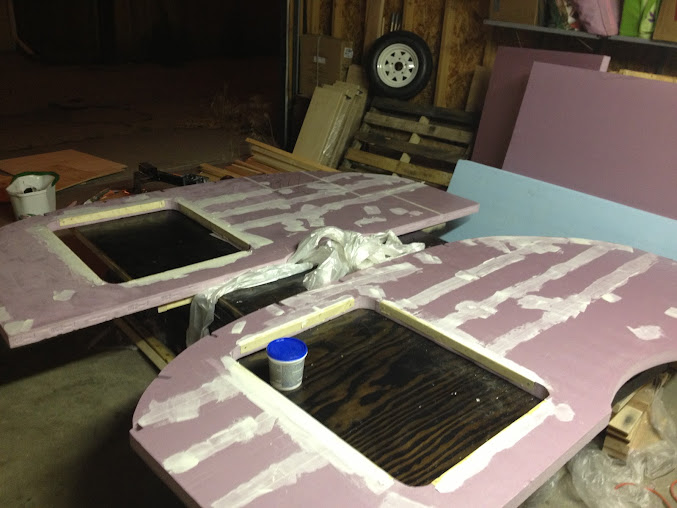
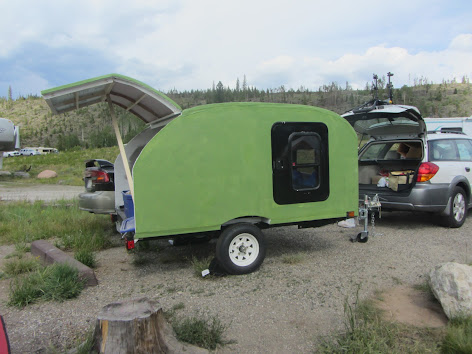
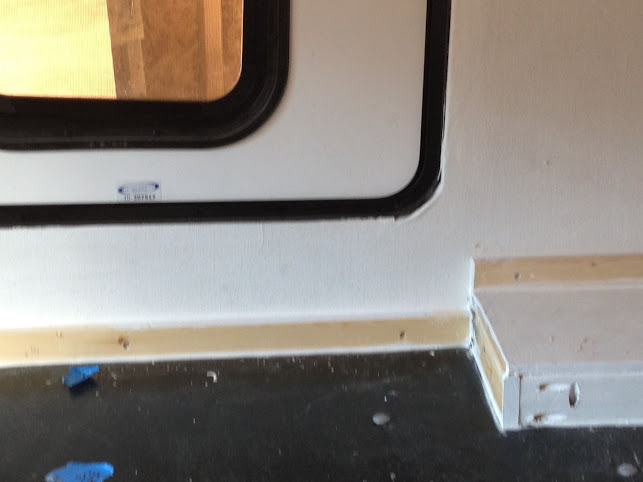
Precanvassed the side walls inside and out. Went to HD for the 10000th time. Finally glued down the walls and spars. Installed the wheel wells.

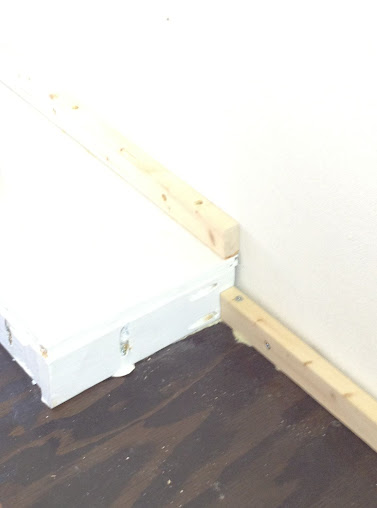
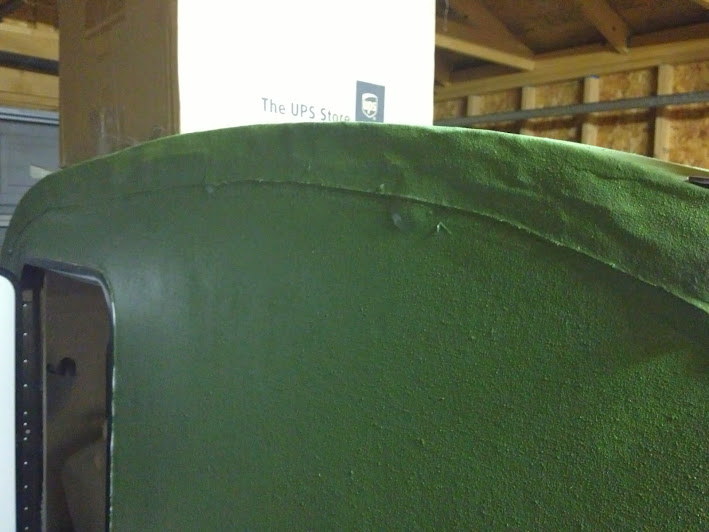
Putting the roof on today! A lot more difficult than I thought. Layering (2) layers of 1/2" foam for the top using Glidden Gripper. So far the walls are a little wobbly, but I'm hoping that all goes away with the roof and the overlap of the canvas. I did line the inside of the cabin with 1x2's attached to both the wall and floor for some added stability.

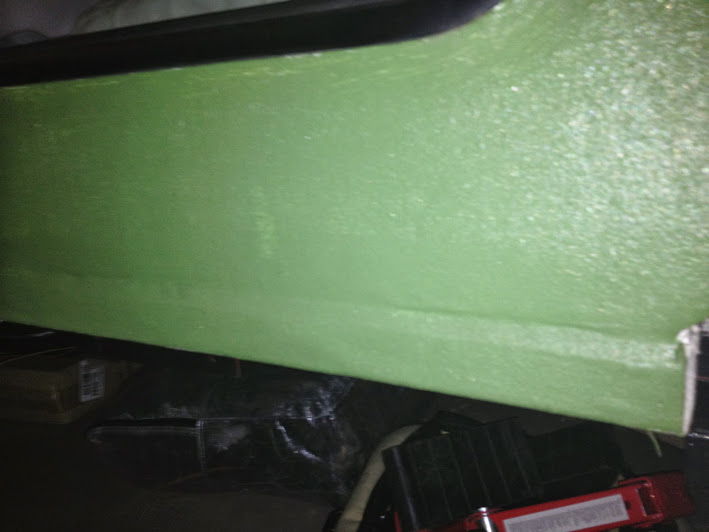
In canvassing I found a few things:
- I remembered my intense hate for ironing.
- Theres gonna be some wrinkles no matter what.
- Make sure you line up the whole piece before sticking it on and keep checking for it going on crooked.
- Sanding and filling in tiny gaps is not all that important.
- Glidden Gripper is some serious stuff. Best to clean up right away and not the day after.

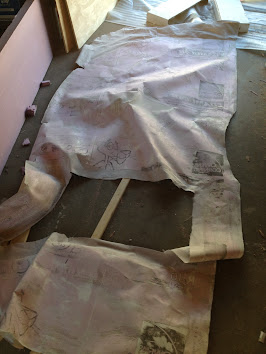
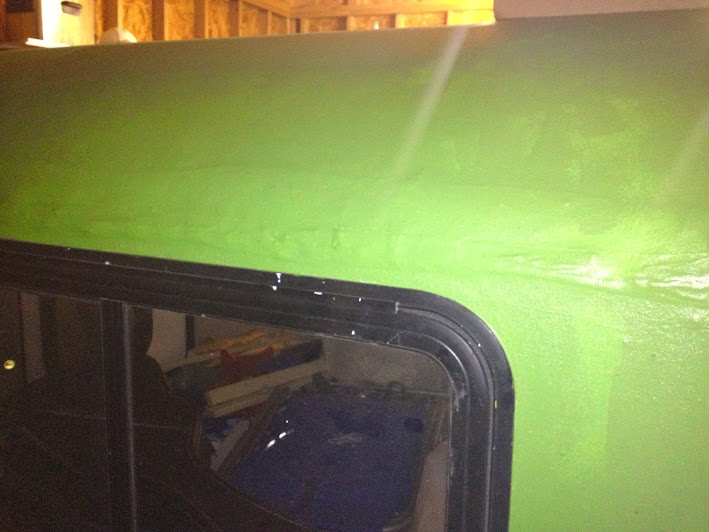
Also, even checking and double checking does me no good sometimes. I guess I installed the door spars wrong (i.e. on the same side instead of mirror opposite). So when I trimmed the canvas it ended up being on both sides. The worst part of knowing I had to redo one side was realizing I had to iron again. This is the canvas after ripping it off the side, took a nice little layer off the foam.

Image

Image

Image

Image

Image
katrinad
Teardrop Builder
 
Posts: 39
Joined: Tue Oct 23, 2012 8:01 pm

Re: Simple Foamie - 5x8 with galley.

Postby Kharn » Sun Jun 30, 2013 8:49 am

Put in the wall between the cabin and galley to stop the wall wobble.
User avatar
Kharn
500 Club
 
Posts: 655
Images: 1
Joined: Sun Jul 17, 2011 1:54 pm

Re: Simple Foamie - 5x8 with galley.

Postby bonnie » Sun Jun 30, 2013 9:36 am

Very nice
Remember, the turtle won. :)
User avatar
bonnie
Donating Member
 
Posts: 1389
Images: 107
Joined: Sun Jul 24, 2011 4:14 pm
Location: Roxana, IL
Top

Re: Simple Foamie - 5x8 with galley.

Postby katrinad » Wed Jul 03, 2013 9:37 pm

I got the trailer inspected today so it is now roadworthy! No galley yet and lots of work to do though.

First trip will be tomorrow. The one thing I want to fix is the driver's side door. Now that its installed it seems its all crooked and difficult to close. It also has a big gap on the opposite corner of the hinge. Wondering how I can fix this. Shim it? If so which side would I shim to straighten it out?

Tear is definitely not even close to waterproof. Hope for no rain!!!
katrinad
Teardrop Builder
 
Posts: 39
Joined: Tue Oct 23, 2012 8:01 pm
Top

Re: Simple Foamie - 5x8 with galley.

Postby katrinad » Sun Jul 07, 2013 10:14 pm

Maiden voyage was this past weekend. Ended up raining every single night and the tarp over the hatch still let in some water. Should fix that by next trip and be able to have it waterproof. I can't wait to get the galley finished up and everything organized inside. Camping just went to a whole different level!

I was very worried about towing but had no issues from Denver to the mountains. Averaged 23mpg the trip so I couldn't really ask for more. However, the trailer bounces a TON when towing under 30mph. Any insight onto why? Is it just inevitable due to the folding HF trailer?

Lots of details left
-finishing the interior with caulk, sanding, and paint.
-second coat of paint on outside, possibly darker.
- build galley and paint.
- waterproof the hatch hinge.
- cut the mattress to fit over the wheel wells.
- finish the outside of the wheel wells (caulk and repaint).
- figure out what to do for hatch supports.
- attach lights in various spots - probably just with velcro.

Last but not least, stock up on supplies, organize, and plan the rest of the summer trips! Hoping to go to a few national parks and camp into October.

Image

Image

Hopefully I'll write up a few more lessons learned when I have the time.
katrinad
Teardrop Builder
 
Posts: 39
Joined: Tue Oct 23, 2012 8:01 pm
Top

Re: Simple Foamie - 5x8 with galley.

Postby wagondude » Tue Jul 09, 2013 7:18 pm

Nice job! Your bouncing is probably due to the light weight. You either need more ballast (some will come with the galley and stuff it gets stocked with), or you could adjust tire pressures. Another option is to remove a leaf from each of the springs to soften the ride. Your foamie should give you many years of service. :thumbsup:
Bill

TnTTT ORIGIONAL 200A LANTERN CLUB
101137
User avatar
wagondude
1000 Club
1000 Club
 
Posts: 1535
Images: 35
Joined: Sun Jan 16, 2011 7:41 pm
Location: Land of the Jayhawks
Top

Re: Simple Foamie - 5x8 with galley.

Postby kudzu » Tue Jul 09, 2013 8:30 pm

Yea! Maiden voyage complete. Sure there's still work but you've built yourself a camper. Congrats!!
kudzu
Donating Member
 
Posts: 439
Images: 16
Joined: Wed Mar 27, 2013 3:20 pm
Top

Re: Simple Foamie - 5x8 with galley.

Postby katrinad » Tue Oct 22, 2013 7:41 pm

I took a few months off of working on the trailer so I could actually enjoy it. Its hard to justify working in the garage all weekend when you could be camping in the mountains! Loads left to do on the trailer over the winter. I'm glad we took it out a few times so we could see what else needs to be done. Also, taking it out made me realize my car barely notices it when towing even at high grades. So I don't need to be as focused on weight as I figure out how to do the galley.

First things first, we hit some hard rain on the last few trips. Trailer is definitely not waterproof. Mattress got soaked a few times. Once driving 2+ hours through pouring rain and another just from rain overnight. I think i know the issue but I'm not sure.

Here's what I finished since the initial journey.
- Sanded, caulked, and painted the interior.
- Cut mattress to lay flat over wheel wells
- Hung hook and some places to stash small items by the bed.
- Cheap quick hatch waterproof.
- Bought way more gear that I now have to find space for! (ez-up, inflatable kayak, second cooler, etc.)
- 2nd coat of paint on the bulk of it.

Here's my list of things remaining:

Exterior -
- Waterproof the wall to floor joint. I'm 90% sure this is where the water is coming in. As the bottom of the mattress kept getting soaked and I couldn't see any water coming in from the doors, window, or hatch.
- Figure out a new waterproof method for the hatch. Right now I can't leave it up when its raining. kicking myself for not splurging for the hurricane hinge.
- Smooth out the canvas edges? Not sure if that's possible at this point in the game. But the edges are butt ugly.

Cabin
- Clean up all the messy caulking on the windows.
- Velcro on LED puck lights
- Gorilla glue the hooks and screws currently in the foam. They loosened a lot after a few uses.
- Put up curtains
- Shim the passenger side door so you don't have to slam it.

Galley - Need to make and dimension some plans. I have a rough idea but its a lot more complicated than I anticipated.
- Build the cabinet framing. Been ignoring this forever!
- Determine best way for countertop
- Attach wall between cabin and galley.
- Make shelf off the wall for interior storage
- Fix the canvas that is rubbing against the hatch to close.

Maybe someday...
- Build or attach tongue box for trailer gear.
- Figure out some tarp or sunshade attachment
- Get this thing weighed
- Return all the extra supplies I've collected along the way!

Additional lessons learned:
1. Silicone caulk isn't paintable! But if you sand it down a little it will take some paint.
2. Don't attach the foam sitting on top of the floor unless you do some waterproofing at that edge. It will leak.
3. It may be easier to pre-canvas the sides, but its near impossible to smooth down the gorilla glue after you attach. This makes all the joints under the canvas bumpy, hard, and look like crap.
katrinad
Teardrop Builder
 
Posts: 39
Joined: Tue Oct 23, 2012 8:01 pm
Top

Re: Simple Foamie - 5x8 with galley.

Postby wagondude » Tue Oct 29, 2013 9:27 am

To water proof your floor to wall seams, Just jay on some strips of canvas and wrap it around the corner under the floor and paint it.
Bill

TnTTT ORIGIONAL 200A LANTERN CLUB
101137
User avatar
wagondude
1000 Club
1000 Club
 
Posts: 1535
Images: 35
Joined: Sun Jan 16, 2011 7:41 pm
Location: Land of the Jayhawks
Top

Re: Simple Foamie - 5x8 with galley.

Postby eaglesdare » Wed Oct 30, 2013 9:11 am

Yeah I don't recall that being an issue. Did you use the canvas as "sock" ? Once canvas is water proofed, there should be no leaking. The canvas will be wrapped under the floor boards.
Glad you are using it and getting out.
Louella
May the foam be with you.
User avatar
eaglesdare
Donating Member
 
Posts: 3168
Images: 13
Joined: Tue Aug 26, 2008 7:06 pm
Top

Re: Simple Foamie - 5x8 with galley.

Postby katrinad » Tue Nov 05, 2013 2:41 pm

I think this is the only way water can enter since the mattress was wet on the bottom not the top. Also, there was no evidence of leaking from any of the doors or ceiling seam when we sat inside during a rainstorm. Doors and top edges were all caulked. In retrospect I should have caulked the foam to floor edge on the outside. I was unable to do so since I precanvased the side walls. After it was assembled the canvas edges were wrapped around the corner and stapled to the bottom while wet with Glidden Gripper. It was then painted another time with gripper and (2) coats of exterior paint. There appears to be a gap in some areas which you can push on and move a little with your finger. I'm guessing this is where the water is coming in. That water is somehow soaking through the layers of paint and gathering in this area, then seeping into the cabin. I did caulk the interior but admit I likely did an awful job. It also may have only been interior latex caulk which I'm guessing doesn't block the ingress of water.

Inside edge.
Image

Problem area #1. Note gap.
Image

Closer look.
Image


Not a leaking point but a very ugly seam I wish I could make look nicer...
Image

Closeup of ugly bumpy side seam....
Image
katrinad
Teardrop Builder
 
Posts: 39
Joined: Tue Oct 23, 2012 8:01 pm
Top

Re: Simple Foamie - 5x8 with galley.

Postby wagondude » Tue Nov 05, 2013 9:26 pm

Ok, I think I may see the biggest part of your problem. In the second pick of the open door, there is staining/dust residue that indicates o location where water could be (most likely is) pooling. The problem is that the door frame is perforated with mounting screws. The screws allow water to come through the frame and into the cabin through that gap (as well as the entire bottom of the door frame) shown in the interior shot. The caulking along the wall to floor joint looks fine and where the canvas wraps around the floor looks good too. I'm pretty sure the screws through the lower door flange are the problem.
Bill

TnTTT ORIGIONAL 200A LANTERN CLUB
101137
User avatar
wagondude
1000 Club
1000 Club
 
Posts: 1535
Images: 35
Joined: Sun Jan 16, 2011 7:41 pm
Location: Land of the Jayhawks
Top

Re: Simple Foamie - 5x8 with galley.

Postby katrinad » Thu May 22, 2014 6:02 pm

After neglecting my teardrop for pretty much the entire fall and winter I need to get back to it so I can go camping!

As I listed before there are a slew of pending issues to fix on my teardrop for it to be done. Actually I don't think it will every actually be completely done but that's besides the point.

The more I think about the galley configuration the more undecided I get on what I want out of the galley. I'm kind of glad I did not build it last year as camping with it gave me more ideas on how I would use it. But now I'm bogged down with all the needs, wants, and possibilities.

1. My main challenge is I'm not really sure we would use the counter of the galley to cook and prepare food on. All the places we would go have picnic tables. Its a shot in the dark as to whether the picnic table is going to be anywhere near where we can park the teardrop anyway. This has got to be a common problem right? Does everyone find they will just use galley for storage rather than cooking? If I don't set up the back in the standard counter and cooking configuration is it going to be harder to sell down the road?
2. Bears. We have to put our food and dirty cooking stuff in the car every night because of bears. This is something I completely ignored when dreaming about teardrops. I don't think my foam and canvas will deter a hungry bear, will it? If we have to move all that stuff at the end of the day anyway I'm wondering why I'm thinking so much about having the back organized.
3. I'm also not sure how I feel about having the hatch open for extended time because of the random strong winds that can come by in Colorado. I'm afraid one gust could rip apart my foamie! Also, haven't decided on how to actually hold up the hatch. Do you think it will be better to go with hydraulic thingys or just some cheap wood props? The door itself isn't heavy, more worried about having it be stable.

Additionally, I need to fix the hinge on the hatch. I just ordered the plastic hinge but don't really understand how to install it so it will be waterproof. Currently I have a stainless piano hinge and I was thinking it would be stronger to leave that on and use the plastic one simply for waterproofing. Is that the best way to handle it or should I remove the stainless one and rely on solely on the plastic hinge?

There's going to be a ton of other questions coming. I'll be sure to upload pictures as I get farther.
katrinad
Teardrop Builder
 
Posts: 39
Joined: Tue Oct 23, 2012 8:01 pm
Top

Re: Simple Foamie - 5x8 with galley.

Postby katrinad » Thu May 22, 2014 6:10 pm

Another thing I need to tackle is making the outside pretty. I hate that I rushed the exterior because all the seams look like crap. They're unfinished, bumpy, unsightly ana all. Its going to be so much harder fixing everything after the fact. The only good thing is it's been unpainted (well halfway painted half primed mixed) and the previous paint I used froze in the garage over the winter.

Regarding the uneven bumps and divets. Can I sand down the areas and fill in the gaps with spackle on top of the canvas and first layer of paint? I was thinking of filling in and sanding down those areas. Then paint then entire think with concrete block filler to even out the canvas and make the smooth areas less noticeable. This would of course be followed the finished exterior paint. If I did this should I cut out the overlap seams and redo them?
katrinad
Teardrop Builder
 
Posts: 39
Joined: Tue Oct 23, 2012 8:01 pm
Top

Re: Simple Foamie - 5x8 with galley.

Postby KCStudly » Thu May 22, 2014 7:12 pm

I'm not so sure that the spackle should be used outside of the canvas. I'm pretty sure that it is not waterproof at all, and would not do well if your paint were to break down. It is an interior product after all. Maybe a test is in order. I am only comfortable using it under the canvas since it will be well sealed by the glue, canvas, primer and paint to follow.

For the hinge, using both will absolutely not work because they will bind each other. It is my understanding that, although the plastic living hinge is flexible about its middle trough area, it is essentially a rigid hinge with a distinct center of rotation, just like any other hard hinge. If you stack two hard hinges they will both bind due to the conflicting centers of rotation.

Builders who use the piano style hinge usually cover it with a strip of soft flexible rubber, such as pond liner material or other EPDM rubber (which is UV resistant). This is the method that I am planning to use. In order to be sure that the hinge is solidly attached and is not allowed to squirm around due to the flexibility of the rubber and interplay between the screws, I plan to screw the hinge down first using countersunk flat head screws, then using an additional staggered set of screw holes, use flat aluminum trim to secure flexible rubber laid over the hinge. My wall to roof transition will have a radius that I do not want to interrupt with a drip edge, so I will be doing that area a little differently, I hope. :worship:
KC
My Build: The Poet Creek Express Hybrid Foamie

Poet Creek Or Bust
Engineering the TLAR way - "That Looks About Right"
TnTTT ORIGINAL 200A LANTERN CLUB = "The 200A Gang"
Green Lantern Corpsmen
User avatar
KCStudly
Donating Member
 
Posts: 9611
Images: 8169
Joined: Mon Feb 06, 2012 10:18 pm
Location: Southeastern CT, USA
Top

PreviousNext

Return to Build Journals

Who is online

Users browsing this forum: Google [Bot] and 42 guests