Colorado Teardrop Build Journal (Build Complete) (kayakdlk)

...ask your questions in the appropriate forums BUT document your build here...preferably in a single thread...dates for updates, are appreciated....

Re: Colorado Teardrop Build Journal (Build Complete) (kayakd

Postby jimun » Tue Mar 25, 2014 10:59 pm

Really nice job. It looks great.Image
Every build I look at gives me more ideas for mine.
Have a great time on your 1st camping trip in it.
Benroy Style 5x10 Build - http://www.tnttt.com/viewtopic.php?f=50&t=57462

Now to Him who is able to do far more
abundantly beyond all that we ask or think,
according to the power that works within us,
Eph 3:20 (NASB)
User avatar
jimun
Teardrop Advisor
 
Posts: 57
Images: 10
Joined: Sun Sep 08, 2013 11:49 am
Location: Banning, CA

Re: Colorado Teardrop Build Journal (Build Complete) (kayakd

Postby kayakdlk » Fri Apr 25, 2014 5:51 pm

My battery and mattress is installed. My original goal was for a queen size mattress. My teardrop measures just about 1/8" under 60" wide from outside wall to outside wall. I made it this size so I could use 5'x5' Baltic birch plywood for the roof and it usually measure a little over 60". A queen size mattress is 60" wide x 80" long. When I measured the inside area for the mattress it was 78" x 57". I had reduced the length by two inches to allow for more up front storage and the width was really close to 58" with the walls being about 1" wide but then the door seals set in another 1/2" so I decide I should stick with 57"

From http://www.foambymail.com/ a custom 5' HD36-HQ mattress that was 57" X 78" was going to run $285 plus another $70 for the customer cover.

On several other builds I had read that you should leave some room for getting sheets, blankets etc on. I priced a standard 5' HD36-HQ foam full size mattress and it came in at $133, plus another $45 for the cover.

I decided that the extra 3 " in width wasn't worth $177. When the mattress arrived and I installed the mattress is just seemed small (partly as it hadnt complete expanded). It was easy to move around but had 1 1/2" gap on each side and 3-4" short. It slid around when I went to sit on it to get in and left a pocket to lose things and fall into. I didn't like that and wasn't sure the wife would either. I looked for some foam spacers and then remembered we had several of those swim noodles from previous summers. I found two and they are about 3 1/2" in diameter. I placed one on my side of the mattress and it fills the void perfectly. It pushed the mattress up flush with the door on my wife's side, so she can get in easy. It is not 5" high but it is OK. I also placed one at the foot of the bed and it locks the mattress in place and it doesn't move around to create gap at the top . When lying down and rolling around I didn't notice it as much with the noodle as I did without it. The noodles are easy to pull out when changing sheets etc. I plan to use sleeping bags until my wife gets the quilt she wants to make done. The $3 noodle fills the void so you really don't notice the gaps any more. I get the 58" width and saved $171.

Here is a picture, you can see the green noodle
Image

I go get trailer inspected and VIN number assigned tomorrow morning.

Dan
User avatar
kayakdlk
Platinum Donating Member
 
Posts: 310
Images: 392
Joined: Wed Jun 27, 2012 9:02 pm
Location: Foothills of Colorado

Re: Colorado Teardrop Build Journal (Build Complete) (kayakd

Postby kayakdlk » Fri Apr 25, 2014 6:00 pm

As I said have an appointment to get my home made trailer inspected and a VIN number assigned on Saturday morning. I went to the DMV and got a temporary 3 day license plate so I could legally drive down to get it inspected. The temporary plate cost $6.00 . I decided to get my $6 worth so I emptied the trailer except for battery and mattress and hooked it up to the Jeep and took it for a drive. I first went down the mountain canyon road to I70. I had already set the brakes and controller earlier by driving around the block. They worked pretty good. I even reduced the setting a little bit as they occasionally locked up on loose gravel. The trailer pulled fine down the canyon. I got onto I470 and got it up to 65-70 MPH on the flat road and it pulled fine. I drove it another 20 or more miles stopped and checked everything again and then drove to do an errand. I then decided to get it weighed.

I stopped at the T/A truck stop on I70 and talked to them about weighing my trailer. They said just drive around onto the scale and press the button and tell them it is a personal vehicle. They will weight it and then come in and pay $10.00 Then repeat (re-weigh) with just the Jeep for $2.00 more. Kind of funny but when I pulled up and looked for the button it was way up in the air at a truck drivers window height (which makes sense). I had to stand on the Jeep door sill to reach the button. Not sure you could reach the button if you had a lower vehicle or car and wanted to weigh it.

Together Jeep and trailer weighed 6060 lbs with 1300 lbs on trailer axle (Truck scale has had separate axle pads). Then I remove trailer and weighed just Jeep weighed 4580 lbs

So the Trailer weight = 6060-4580 = 1480 lbs and the Tongue weight = 1480 - 1300 = 180 lbs

I originally had a goal of 1300 lbs when I made my parts list out. I was closer to 1350 in my spreadsheet. I went and checked again and I didn't have wheels and tires and a few other smaller items. I added them in and my spreadsheet sheet says 1430 lbs. So not bad getting to within 50 lbs of estimated.

I also checked my trailer balance sheet that I used off the forum and plugged in the real weight and it says the tongue weight should be 182 lbs (12.3%) for an empty trailer. Sound like the trailer balance spreadsheet works great. When I add all of my gear (max amount I would ever carry for the four of us) I should be up to less than 1900 lbs and less than 250 lbs on the tongue (depending on how I place items in galley and tongue box). The Jeep is rated at 3500 lbs with 350 tongue weight so I should be good.

I was originally concerned about the weight with the Jeep as it has larger tires, and geared (4.11) for off roading more than highway. When on the flats I was able to pass a few slower going trucks. After weighing it I decide to drive it home up I70. Merging onto I 70 took a while and I was able to go 55-65 with over drive kicked off and even passed a couple slower semi trucks. Wasn't much different than driving the Jeep by its self up I70. I have to give it gas , kick off the over drive and keep the RPM up which is what I normally do so it worked fine. I am happy so far. We will see what happens when there are four people in the Jeep and all of our gear in the teardrop. Worst case I stay in the far right lane like all of the other motor homes and trailer and chug my way up the hill. In the canyon road where the speed limit is 35-45 I don't even really notice it behind me.

All in all I am glad I didn't use heavier metal for the frame, or thick than 1/8" plywood. A foamy might of been lighter but I like the looks of my wood insides.

Here are couple pictures along the road
Image

Image

Happy Camping
Dan
Last edited by kayakdlk on Sun Apr 27, 2014 12:31 pm, edited 1 time in total.
User avatar
kayakdlk
Platinum Donating Member
 
Posts: 310
Images: 392
Joined: Wed Jun 27, 2012 9:02 pm
Location: Foothills of Colorado
Top

Re: Colorado Teardrop Build Journal (Build Complete) (kayakd

Postby Junkboy999 » Fri Apr 25, 2014 6:33 pm

Such A great looking TD.. love all the extras..
User avatar
Junkboy999
1000 Club
1000 Club
 
Posts: 1259
Images: 52
Joined: Fri Jul 06, 2012 9:18 pm
Location: Wichita, KS
Top

Re: Colorado Teardrop Build Journal (Build Complete) (kayakd

Postby S. Heisley » Fri Apr 25, 2014 9:30 pm

Your Jeep and teardrop are the perfect pair! Good job! Enjoy camping! :thumbsup: :applause:
User avatar
S. Heisley
Super Lifetime Member
 
Posts: 8772
Images: 495
Joined: Mon Sep 17, 2007 10:02 am
Location: No. California
Top

Re: Colorado Teardrop Build Journal (Build Complete) (kayakd

Postby pchast » Fri Apr 25, 2014 9:50 pm

Nice Job!
:thumbsup:
pchast
Platinum Donating Member
 
Posts: 2026
Images: 97
Joined: Mon Jan 28, 2013 5:47 pm
Location: Athens, NY
Top

Re: Colorado Teardrop Build Journal (Build Complete) (kayakd

Postby KCStudly » Fri Apr 25, 2014 10:06 pm

S. Heisley wrote:Your Jeep and teardrop are the perfect pair! Good job! Enjoy camping! :thumbsup: :applause:

+1 !!! :thumbsup:
KC
My Build: The Poet Creek Express Hybrid Foamie

Poet Creek Or Bust
Engineering the TLAR way - "That Looks About Right"
TnTTT ORIGINAL 200A LANTERN CLUB = "The 200A Gang"
Green Lantern Corpsmen
User avatar
KCStudly
Donating Member
 
Posts: 9611
Images: 8169
Joined: Mon Feb 06, 2012 10:18 pm
Location: Southeastern CT, USA
Top

Re: Colorado Teardrop Build Journal (Build Complete) (kayakd

Postby Ned B » Thu May 01, 2014 12:02 pm

Very cool rig! Well done, especially hitting so close to your weight goal!
User avatar
Ned B
1000 Club
1000 Club
 
Posts: 1036
Joined: Sat Apr 16, 2011 10:25 am
Location: Syracuse NY (ish)
Top

Re: Colorado Teardrop Build Journal (Build Complete) (kayakd

Postby Starseeker » Fri May 02, 2014 8:40 am

Great build! Looks like you have plenty of fun camping experiences in your future!
Aaron
KF5VBV
User avatar
Starseeker
Teardrop Builder
 
Posts: 37
Images: 10
Joined: Wed Nov 07, 2012 2:53 pm
Location: Midwest City, Oklahoma
Top

Re: Colorado Teardrop Build Journal (Build Complete) (kayakd

Postby kayakdlk » Wed Jun 04, 2014 9:59 pm

Several weeks ago I went to the DMV on a Saturday open 8:00m - 12:00pm first come first served to get my home made trailer inspected and a VIN number assigned. I arrived before 7:30am and was way back in line. I ended up waiting for 4.5 hours and never made it to the front of the line. I left at 11:30 after I realized there were still 15 cars in front of me and they were inspecting about 3 an hour. I went home made an appointment for 8:20am the following Monday. I had to get another temp plate. I arrive around 7:50am and was suppose to be the second person, when 8:02 came no one else was in line they said come on up. It took less than 10 minutes. They checked the lights then went inside and came back out with my paper work. I took the paper work back to the DMV and they gave me my VIN ID plate and licenses plate. Never again will I wait in line on an open Saturday!

I decide to just pop rivet the aluminum VIN plate to my tongue and then put my License plate on. We were now legal.

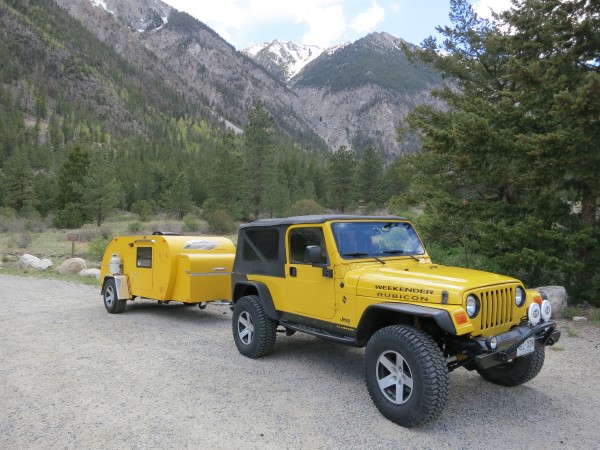
We went camping on its maiden voyage over Memorial day weekend to Buena Vista. I drove up by myself Friday morning in the Jeep pulling the teardrop for its maiden voyage. I went to a favorite lake and fished. Caught my limit of fish, ate lunch, gave a few tours of the teardrop and then went to the KOA and setup camp. It was easy to level, setup in just a few minutes and kept us dry as it rained most every day. The wife our 2 kids and 2 of their friends showed up Friday evening just in time for dinner. The 4 kids stayed in a tent. The wife, the Dog and I slept good in the teardrop. Everyone had a good time.

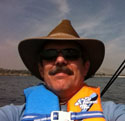
Here I am at the lake while I was fishing
Image

I fished for a while and then started to eating my lunch. I was sitting in the Jeep and then thought why don't I use the galley counter, so I opened it up and then before you know I was giving several tours of the teardrop in the parking lot.

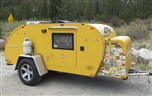
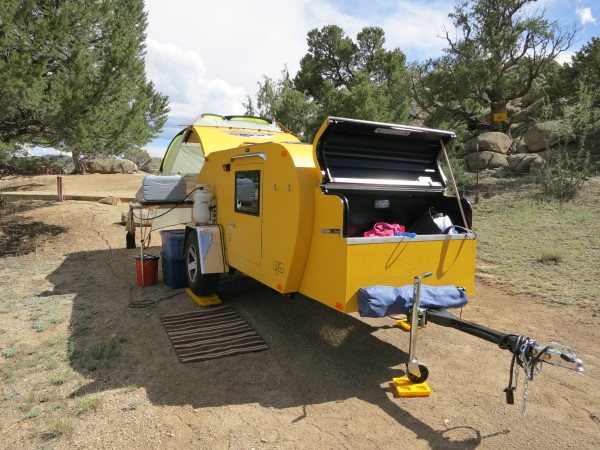
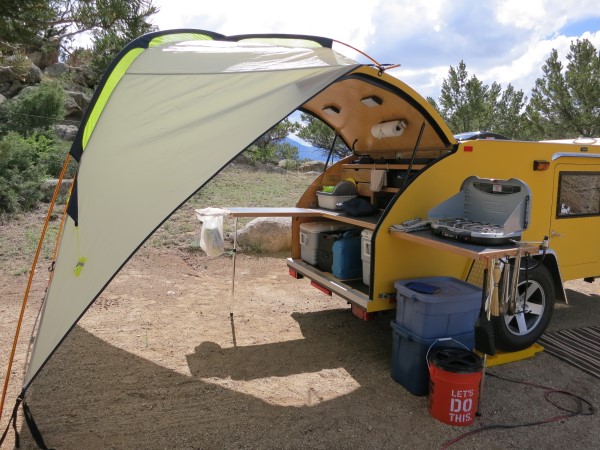
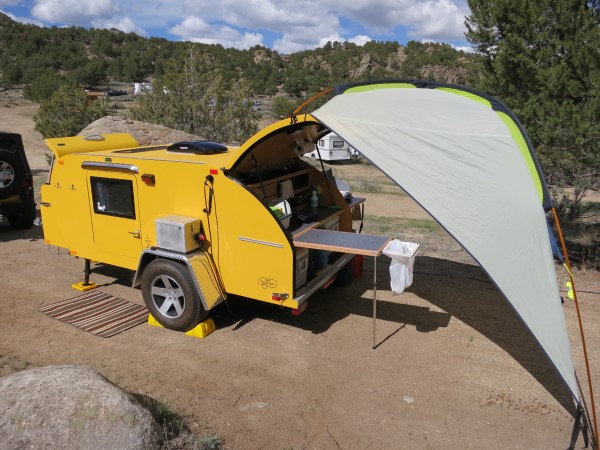
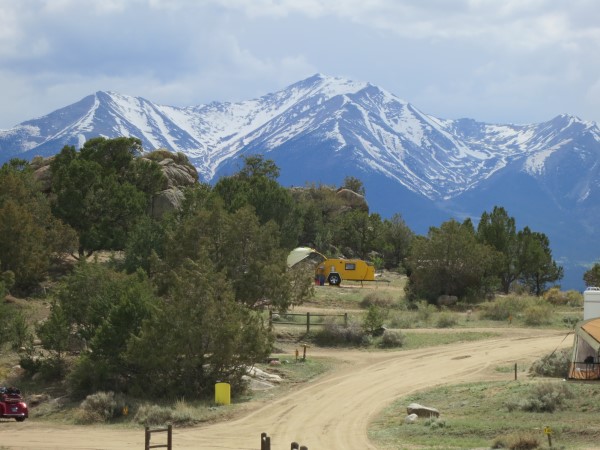
Here are a few pictures of our camp setup at the KOA
Image

Image


Image


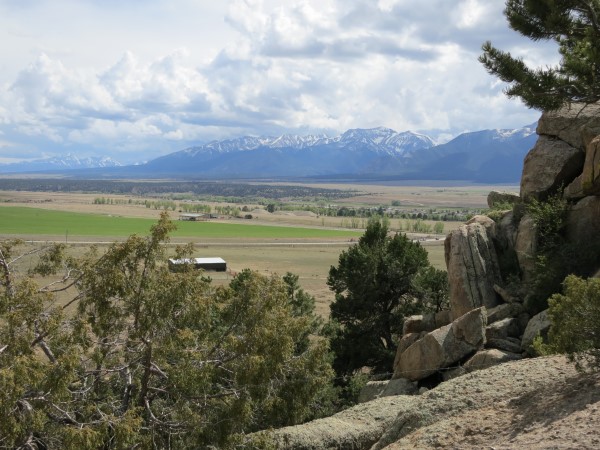
Here is the view from the campfire pit
Image

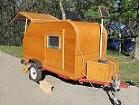
Here is a view of our teardrop from the main office
Image

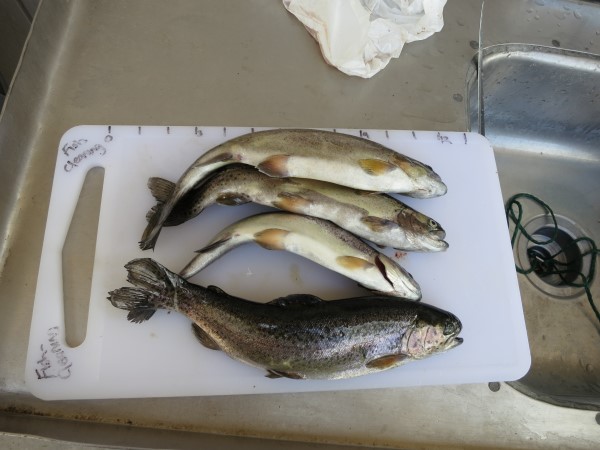
and here are some fish that I caught

Image

All in all a great first trip with the teardrop trailer

As we camped I made a list of little things to fix, change or pack that I forgot. The main issue was I found out was that the hurricane hinge leaks when the hatch is up and it is raining. My awning setup doesn't cover the hinge. I remembered something about the hurricane hinge working in once direction and when I got home I found the pictures from some previous searching that showed adding a small D weather strip along the hinge so when it swings up it compresses and keeps the water out.
Twice we had pretty good winds and my awning over the doors blew off. They caught in the wind and slid right out of the awning rail. I added a small piece of Velcro on each end to attach the pull tabs to hold in place.

One afternoon it stormed and we went inside to take a nap. It was a little cool, and both my wife and I can to the same conclusion that we needed to store some small blankets in the headboard storage area just in case. My wife also said she wanted a towel for the foot of the bed so she didn't have to take her shoes off for a short nap. I picked up a few towels from Walmart to add the headboard storage.

The galley worked out great and the setup with side tables, trash and stove on the side made a nice L shaped work area. When we left for the day, during storms and at night I removed the table on the back of the galley and closed the hatch. The hatch closed without taking off the awning so it made it easy to close up at night.
Cleanup was easy when we got back home and packing for the next trip which is coming up this weekend for 5 days at the Cotopaxi KOA campground was pretty easy.

Happy Camping
Dan
User avatar
kayakdlk
Platinum Donating Member
 
Posts: 310
Images: 392
Joined: Wed Jun 27, 2012 9:02 pm
Location: Foothills of Colorado
Top

Re: Colorado Teardrop Build Journal (Build Complete) (kayakd

Postby KCStudly » Thu Jun 05, 2014 8:14 am

Nice outing. Thanks for sharing the pics. :thumbsup:

Your galley awning interests me. I went back in your thread and see that it is a discontinued Kelty. Can you show a little more detail on how you are attaching it and with it in the closed position; perhaps the next time you have it out and about?
KC
My Build: The Poet Creek Express Hybrid Foamie

Poet Creek Or Bust
Engineering the TLAR way - "That Looks About Right"
TnTTT ORIGINAL 200A LANTERN CLUB = "The 200A Gang"
Green Lantern Corpsmen
User avatar
KCStudly
Donating Member
 
Posts: 9611
Images: 8169
Joined: Mon Feb 06, 2012 10:18 pm
Location: Southeastern CT, USA
Top

Re: Colorado Teardrop Build Journal (Build Complete) (kayakd

Postby kayakdlk » Fri Jun 13, 2014 10:02 pm

KC,
I took 4 pieces of 1" webbing and sewed a D ring on it and then put a grommet through it. I then attached these to the hatch into a spar using a 1" stainless steel screw and washer. Two were put on each end and two space evenly in the middle

I modified the Kelty SUV Awning by cutting off the Velcro they provided (Could never seem to make it work) and adding some Velcro to attach to these D rings. I used the Home Depot 1" Vecro straps and cut them down to fit. I put the rod through the end D rings and Velcro to the other two.
Hope the picture help

Middle two D rings
Image

The end D rings
Image

Here you can see one end of the pole through the end D ring and the other velcroed to the middle D rings.

Image

Here is the other end

Image


Here is a picture with the hatch down
Image

Other pictures

Image

Image

Hope that explains it

Dan
User avatar
kayakdlk
Platinum Donating Member
 
Posts: 310
Images: 392
Joined: Wed Jun 27, 2012 9:02 pm
Location: Foothills of Colorado
Top

Re: Colorado Teardrop Build Journal (Build Complete) (kayakd

Postby kayakdlk » Fri Jun 13, 2014 10:10 pm

We went camping again to Cotopaxi for 5 days. This time it was just the four of us, no extra kids. We took the Jeep and teardrop to Cotopaxi KOA. This was a maximum load test to see if we all fit and if the Jeep could pull it all. With the Jeep loaded with 4 people, dog, gear for 4, and the teardrop it was a full load (extra 800+ lbs from last trip). The Jeep was able to pull it all but didn't have much reserve for a few of the steeper hills. When we all go I will probably use my truck and keep the Jeep for when I go by myself or just the two of us.

Here are some pictures of our setup with all awnings, tent for the kids etc for a muti day trip in the same place.

Image

The door awning worked to keep us dry while getting in and out of the teardrop, the orange tent is for the kids, and the other awning over picnic table provides sun or rain shelter for meals, card etc. We can set them all up, or none of them. It all depends on how long we are staying in one place

Image

Image

The Kelty awning over the hatch works great, keeps the sun and rain off while cooking and doing dishes, but is still open enough for a breeeze

Image

Image

On my last trip my door awning kept blowing off. I had added Velcro to my door awing end tabs and they stayed on even in high winds.

Image

I only had a list of one or two items are this trip, so it looks like the kinks are worked out and she is ready for whatever type trip (by myself, short overnight, longer trip with the four of us) we decide to go on

Happy Camping
Dan
User avatar
kayakdlk
Platinum Donating Member
 
Posts: 310
Images: 392
Joined: Wed Jun 27, 2012 9:02 pm
Location: Foothills of Colorado
Top

Re: Colorado Teardrop Build Journal (Build Complete) (kayakd

Postby kayakdlk » Fri Jun 13, 2014 10:14 pm

As you see I am catching up on my posts

I also decided I wanted a book of my teardrop trailer build to share with some family members, so I took my build journal and reformatted it with additional pictures and used the blurb.com free software and made a 54 page hard cover book. I had previous experience with blurb.com and their software as I made two genealogy books and a 50+ years book of my parents from birth to their 50th anniversary. Their free software is easy to use and the books are high quality. Here is a cover shot and open page shot.
Image

Image

If you are interested you can preview the entire book at http://blur.by/1mUEfLw

Happy Camping
Dan
User avatar
kayakdlk
Platinum Donating Member
 
Posts: 310
Images: 392
Joined: Wed Jun 27, 2012 9:02 pm
Location: Foothills of Colorado
Top

Re: Colorado Teardrop Build Journal (Build Complete) (kayakd

Postby KCStudly » Sat Jun 14, 2014 9:29 am

Thank you for the extra details on the shade fly! Nice install. :thumbsup:

The book is a great idea, too. Looks nice. :applause:
KC
My Build: The Poet Creek Express Hybrid Foamie

Poet Creek Or Bust
Engineering the TLAR way - "That Looks About Right"
TnTTT ORIGINAL 200A LANTERN CLUB = "The 200A Gang"
Green Lantern Corpsmen
User avatar
KCStudly
Donating Member
 
Posts: 9611
Images: 8169
Joined: Mon Feb 06, 2012 10:18 pm
Location: Southeastern CT, USA
Top

PreviousNext

Return to Build Journals

Who is online

Users browsing this forum: No registered users and 23 guests