Perhaps rip some thin slats to use as fillers (many people do this), or even a row of paint stir sticks.
I would be concerned that felt would collect and hold moisture.
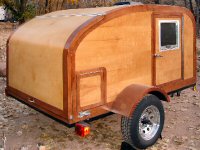
Austin Texas Woody TD Build
74 posts
• Page 2 of 5 • 1, 2, 3, 4, 5
Re: Austin Texas Woody TD Build
![]() by KCStudly » Thu Oct 10, 2013 2:38 pm
by KCStudly » Thu Oct 10, 2013 2:38 pm
KC
My Build: The Poet Creek Express Hybrid Foamie
Poet Creek Or Bust
Engineering the TLAR way - "That Looks About Right"
TnTTT ORIGINAL 200A LANTERN CLUB = "The 200A Gang"
Green Lantern Corpsmen
My Build: The Poet Creek Express Hybrid Foamie
Poet Creek Or Bust
Engineering the TLAR way - "That Looks About Right"
TnTTT ORIGINAL 200A LANTERN CLUB = "The 200A Gang"
Green Lantern Corpsmen
-

KCStudly - Donating Member
- Posts: 9611
- Images: 8169
- Joined: Mon Feb 06, 2012 10:18 pm
- Location: Southeastern CT, USA
Re: Austin Texas Woody TD Build
![]() by WitsRUs » Fri Oct 11, 2013 9:48 pm
by WitsRUs » Fri Oct 11, 2013 9:48 pm
Thank you KC and Ryan for the tip on filling the gap!
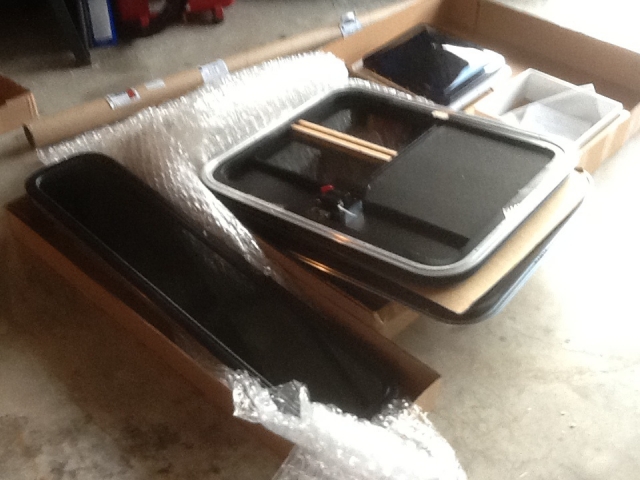
Today I got the shipment of two doors, roof vent, 9"x44" window, and hurricane hinge! The only issue was that the delivery person dropped it on the porch of 3102 instead of mine at 3201! Thank you kind neighbor for coming over to tell me!
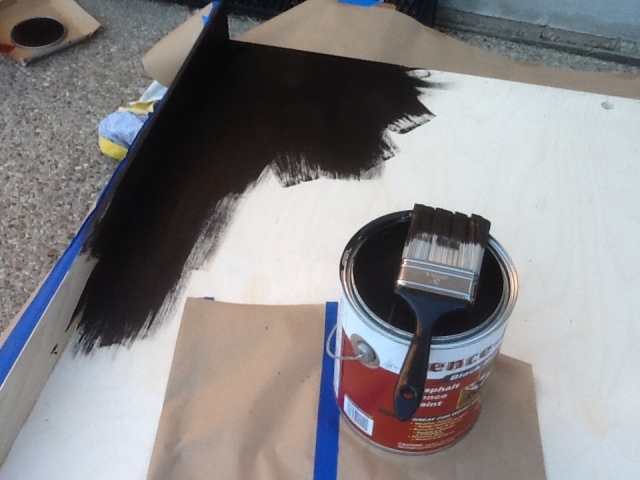
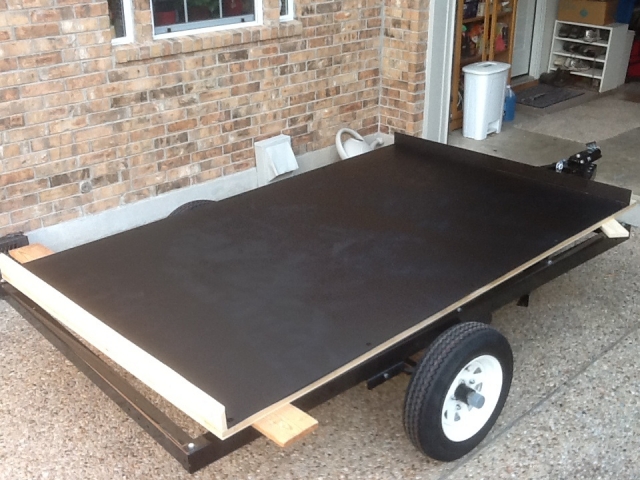
I also put on a a second coat of the Fence Post Asphalt Paint today and removed the taping. It was a very easy application with a brush for the first coat then a roller for the second coat. Like Ryan found, it was not nearly as messy as I thought it was going to be.
Starting the first coat with a brush.
After the fist coat is complete.
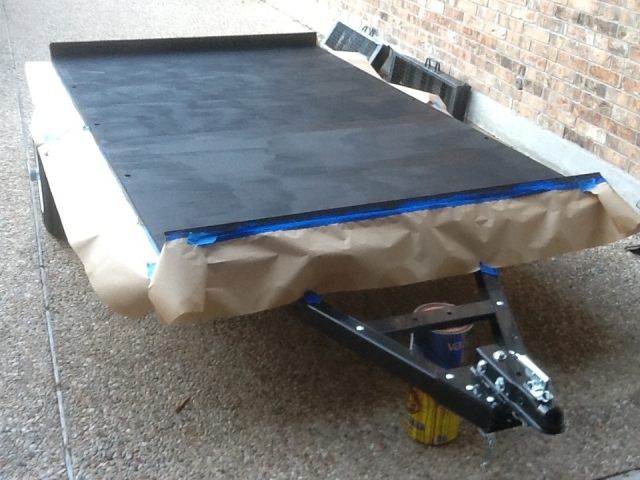
After the second coat with a roller and after the masking is removed.
Today I got the shipment of two doors, roof vent, 9"x44" window, and hurricane hinge! The only issue was that the delivery person dropped it on the porch of 3102 instead of mine at 3201! Thank you kind neighbor for coming over to tell me!
I also put on a a second coat of the Fence Post Asphalt Paint today and removed the taping. It was a very easy application with a brush for the first coat then a roller for the second coat. Like Ryan found, it was not nearly as messy as I thought it was going to be.
Starting the first coat with a brush.
After the fist coat is complete.
After the second coat with a roller and after the masking is removed.
-

WitsRUs - Teardrop Builder
- Posts: 29
- Images: 164
- Joined: Wed Aug 07, 2013 5:31 pm
- Location: Austin, TX

 to sand off the green imprints on the plywood and sand the butt joint between the two sheets one the deck.
 were playing it cut into my work time so I managed to get only one of the mortises routed. I have only used a router on one other small project so getting that done was a big deal for me! Hopefully some evening work will get those done this week!